Share on
What do I do with my oil leak?
Oil leaks are one of the usual headaches for classic car owners because the reasons that I mentioned in the previous post. previous post.
If you haven’t read it yet, you can have a look:
Initial Consideration: Important
I specified it in the first part of this article, but I consider it essential to insist here as well: I am talking about external and slight losses, which in many cases of old cars, are inherent to the design of the vehicle itself. Only those types of losses and no others. Large leaks, or internal leaks due to lack of sealing of rings, cylinders, pistons, problems in valve seals, cylinder head gasket and any leak that compromises the proper functioning of the engine, this is ANOTHER THING and if they happen, it requires intervention in the engine by a qualified professional.
Many oil “leakage” problems can come from engine breather problems. Especially prone to happen in engines that are several tens of years old. I invite you to additionally see this article where I talk about the problem and share with you our own experience. .
If I’m at the point where I can’t avoid oil loss, but it’s clear to me that oil loss is not a problem, or even more, it’s part of the native design of my car, why not simply go for a permanent built-in-car device to pick it up for me instead of having to resort to trays, mats and other external resources placed on the floor?
In fact, this idea is not a “sudden” invention of mine: One day, while changing the oil in a last generation BMW (actually, now it’s a pre-last generation -it’s an F30-) I realized that the fairing that completely covers the underbody of the car is -among other things- a perfect barrier for any -small- liquid leakage. It is true that this fairing is there to cover some other functionalities, both mechanical protection of the elements and aerodynamic – to avoid swirls and air turbulence in the underbody of the vehicle. But e fact is that if that vehicle had a small oil leak, the fairing would totally prevent that oil from rushing to the outside.
Standard solutions
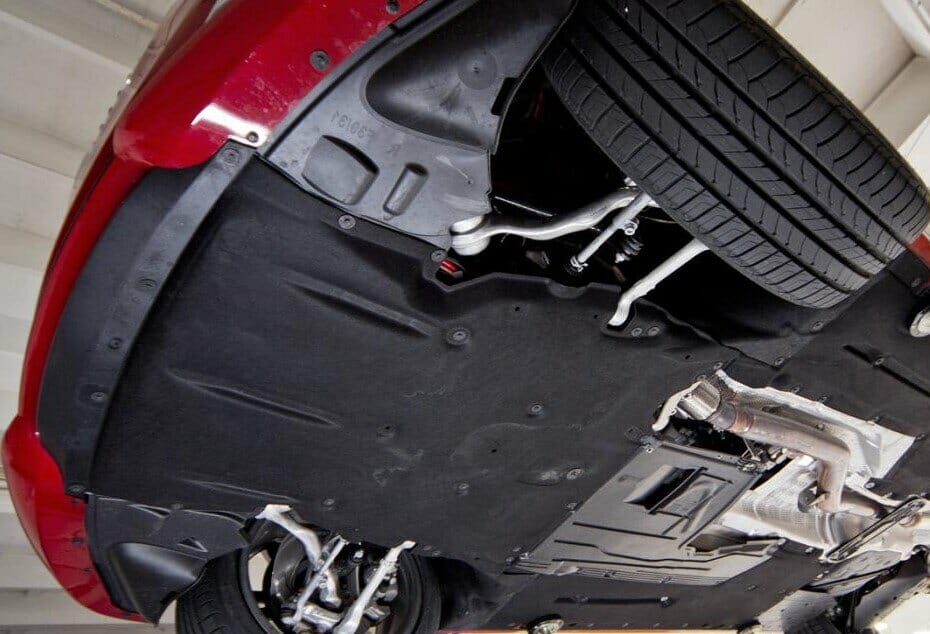
On new cars: Here you can see the underbody fairing on a new generation BMW.
Regardless of its function, it is clear that it will act as a barrier against any small leakage, preventing it from generating a source of contamination outside the vehicle.
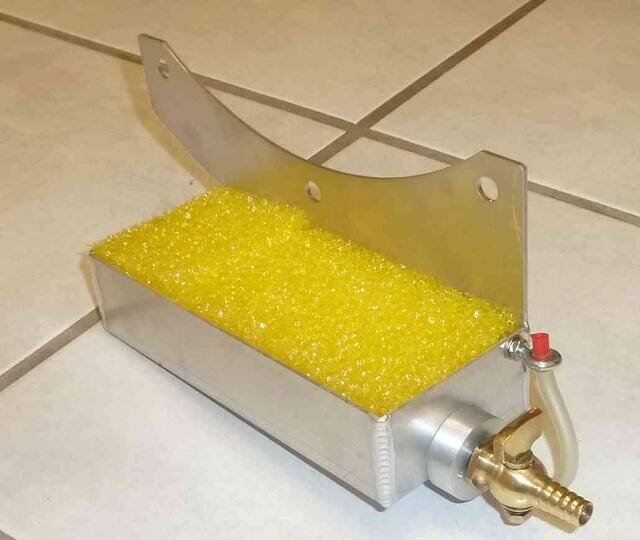
For antique cars: This stainless steel part is a current market standard sold in the United States. Versions for MG and Ford engines are available.
It’s -obviously- not an underbody fairing, but it does what it’s designed to do: collect the oil that goes out from the rear of the crankshaft and drains through the gearbox bellhousing.
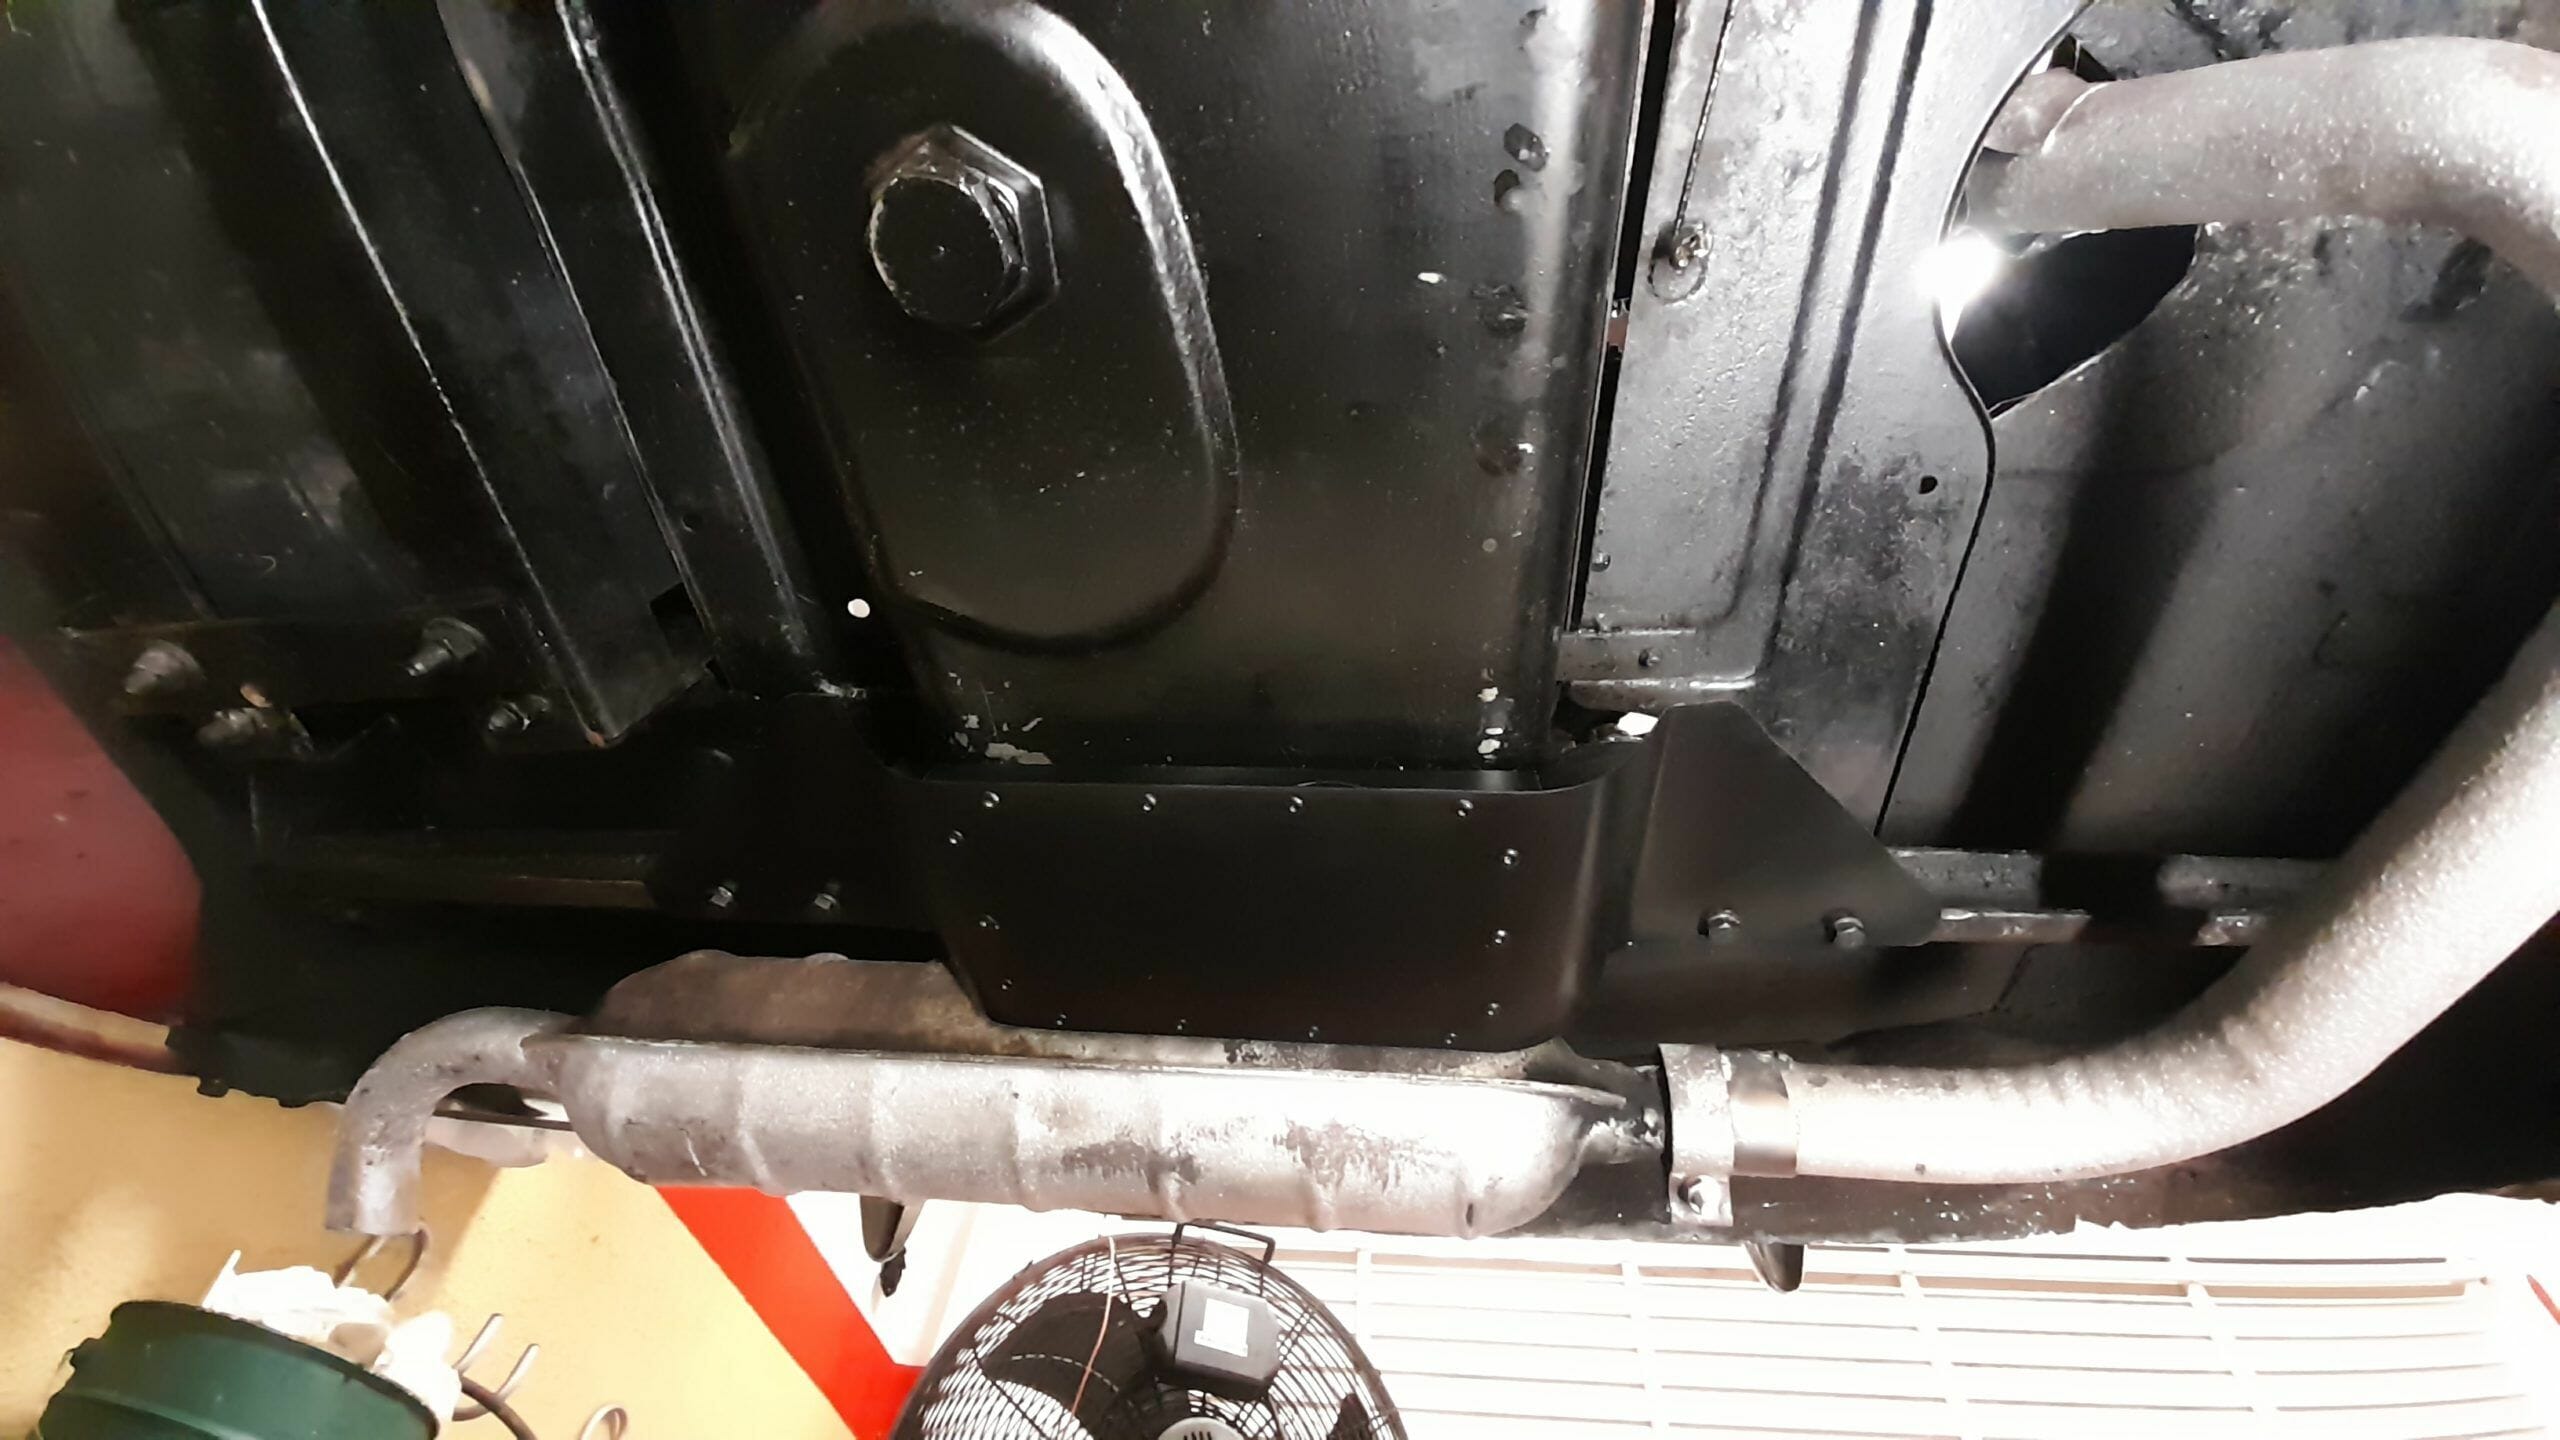
Creation/installation of an oil pan
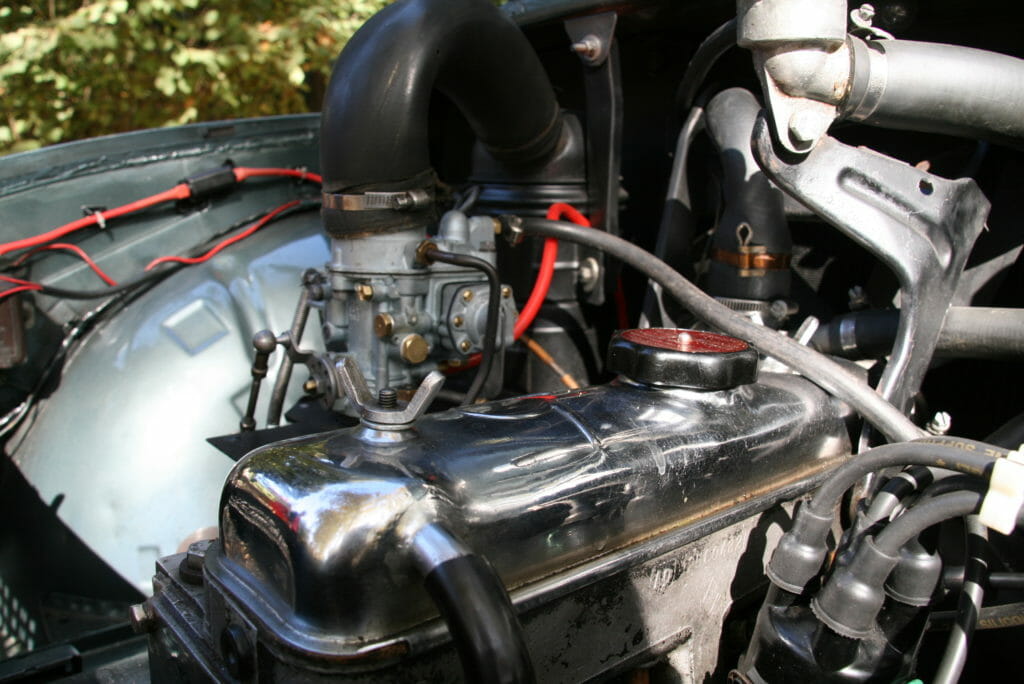
This is precisely what we have done with two of our cars. Both the MGA and the Renault 4CV suffer from this circumstance. They both drip/ooze/sweat (use whatever euphemism you prefer) oil.
In the case of the MGA I am 100% sure that there is no ring seal at the rear output of the crankshaft. On the Renault 4CV, I’m honestly not sure because there were several production series of that engine in those years. In the case of ours, it is the second version of the 1950 Renault Ventoux engine, and it is possible that it does not have a seal at the crankshaft pulley outlet. In any case, even if I carries it, and I can replace it later, at this time I prefer to ensure the total absence of oil drips.
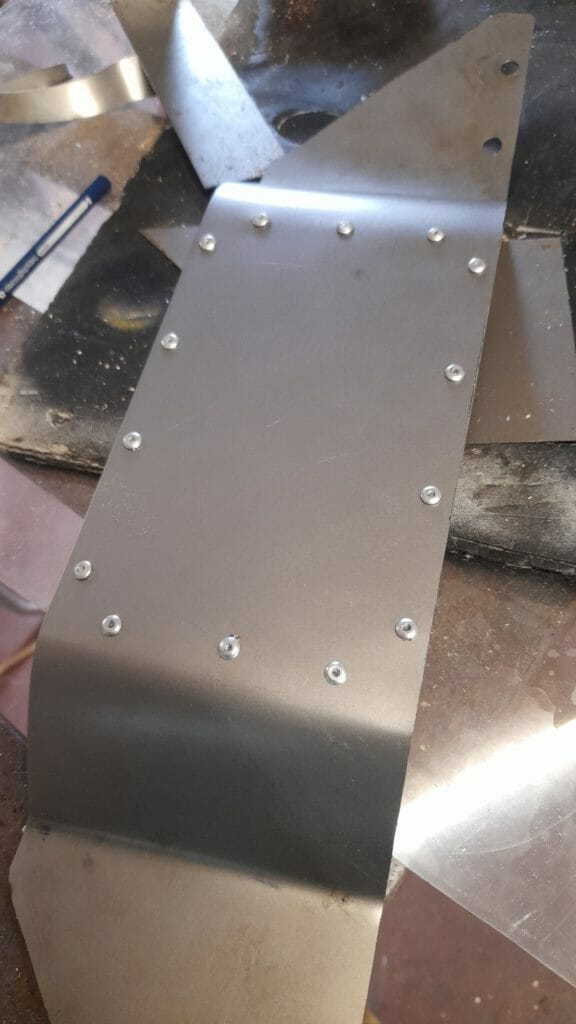
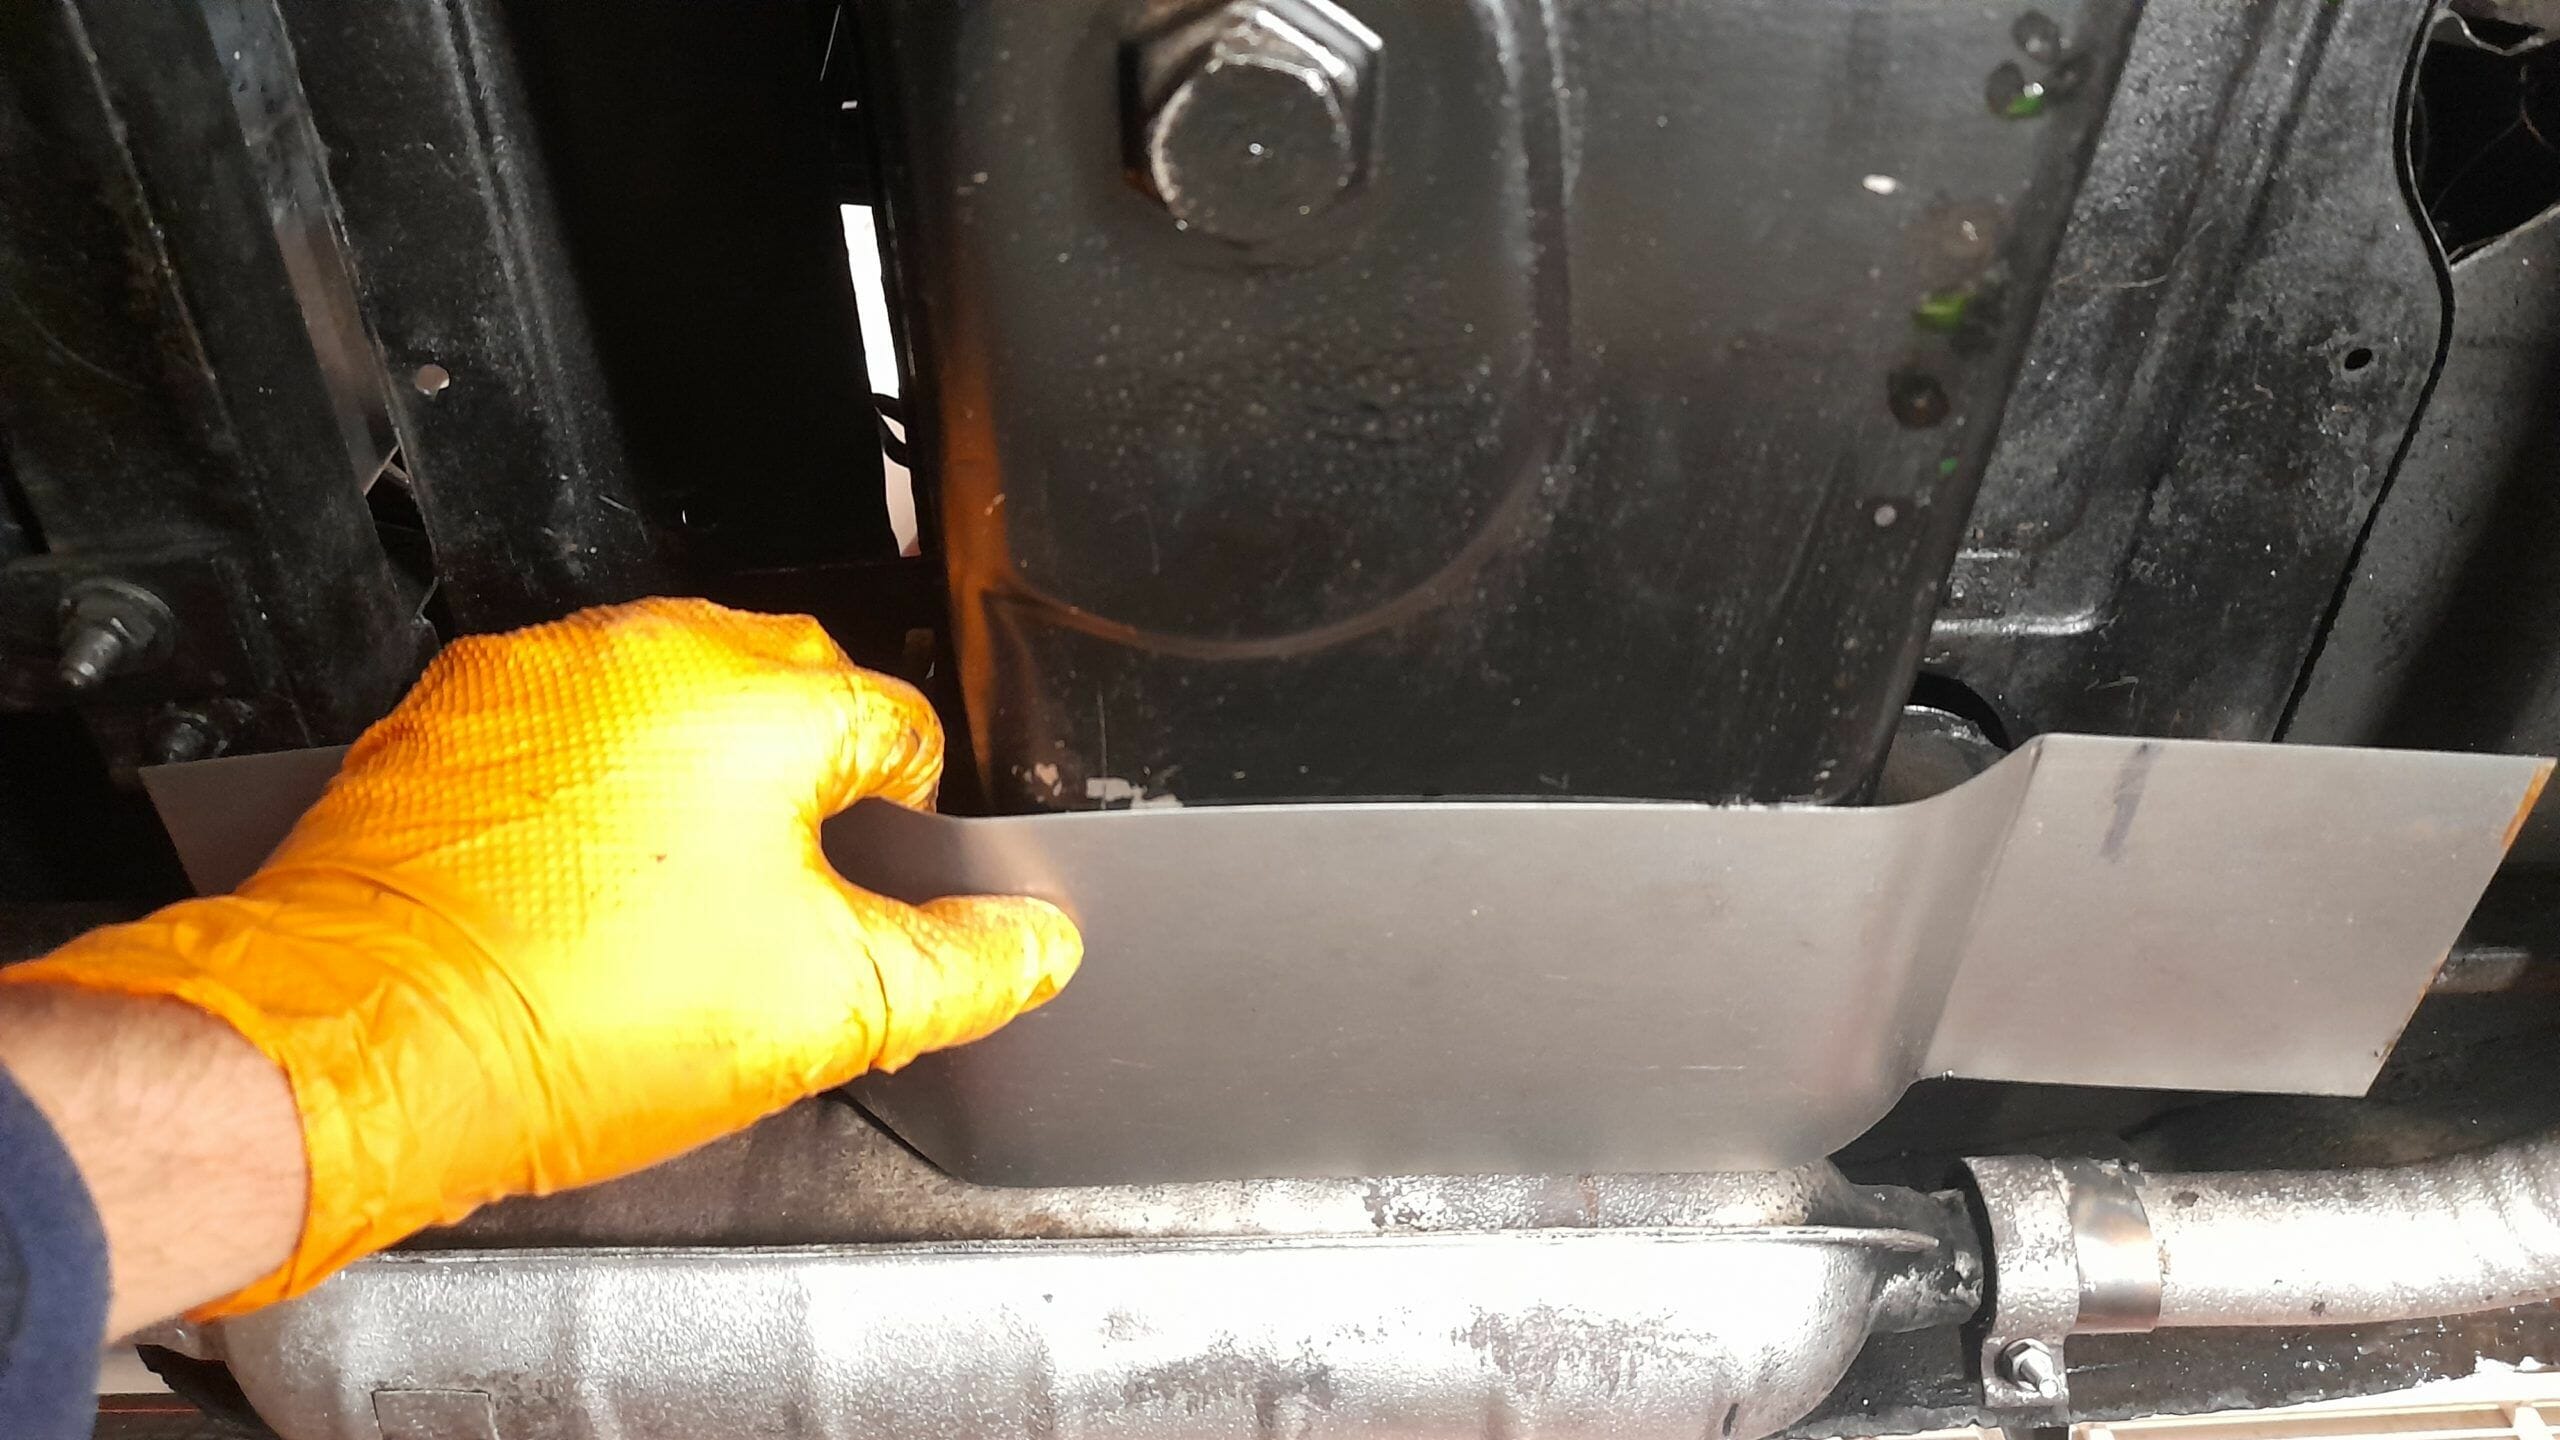
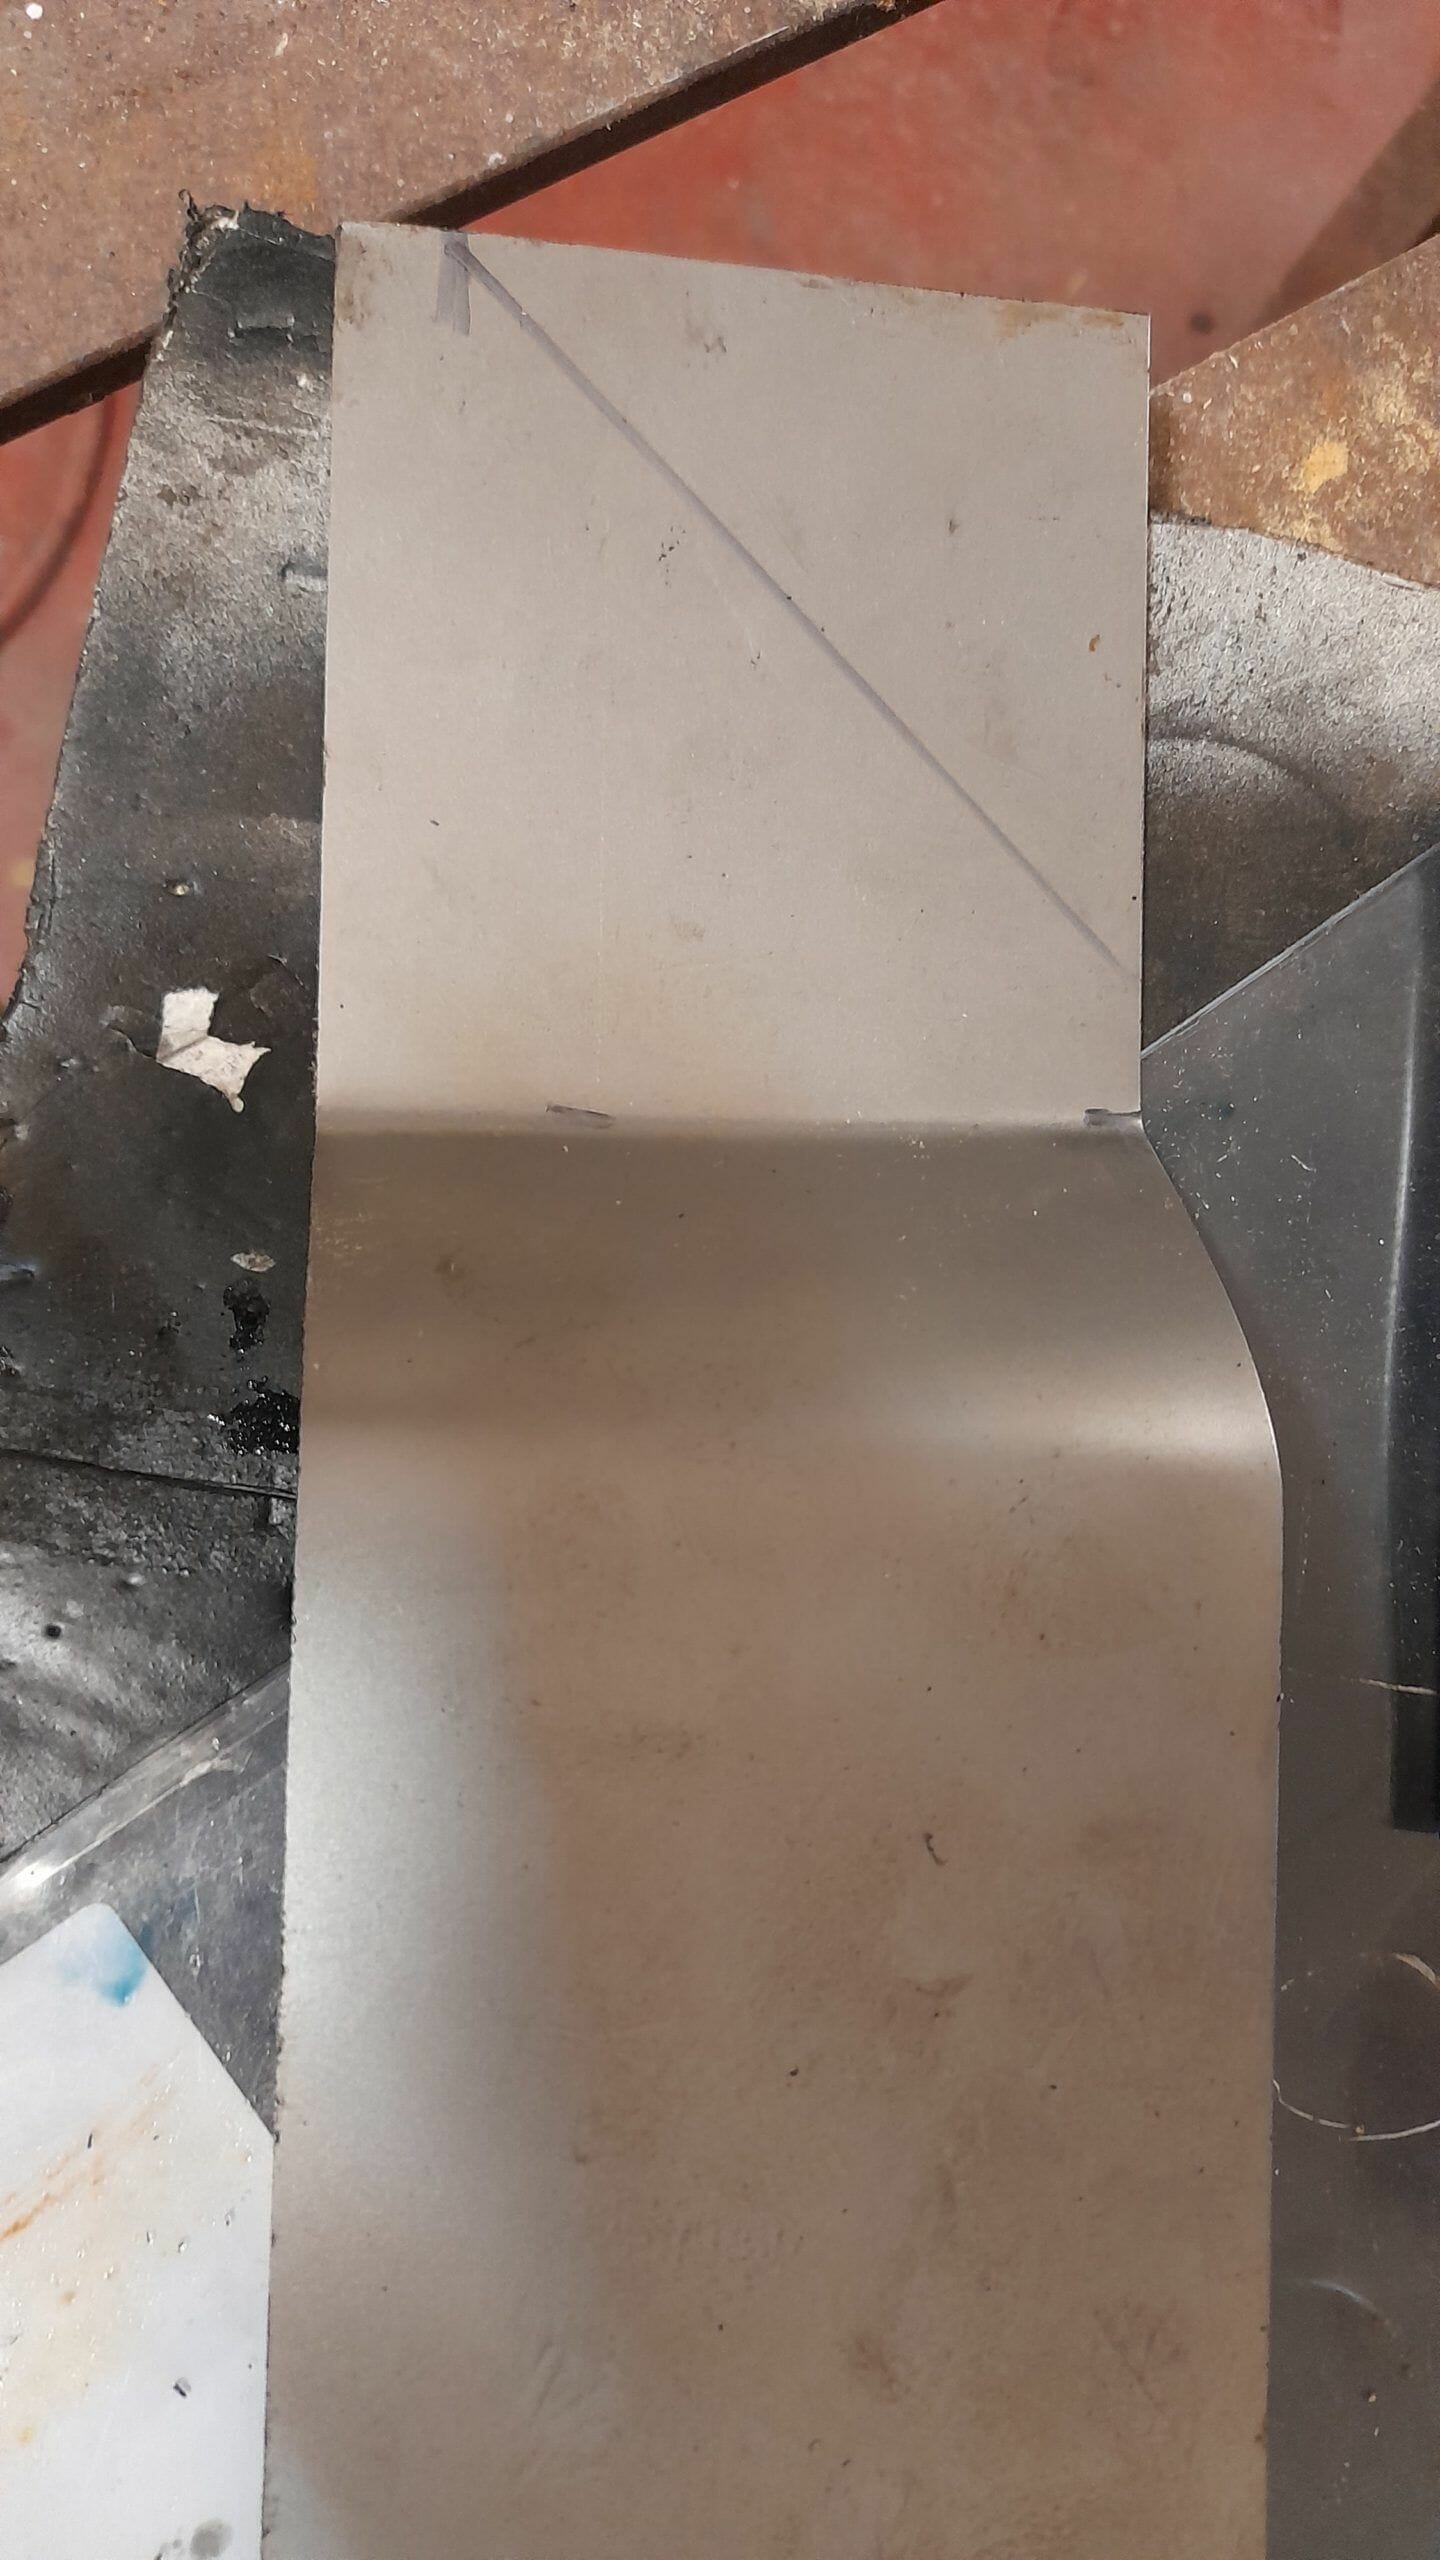
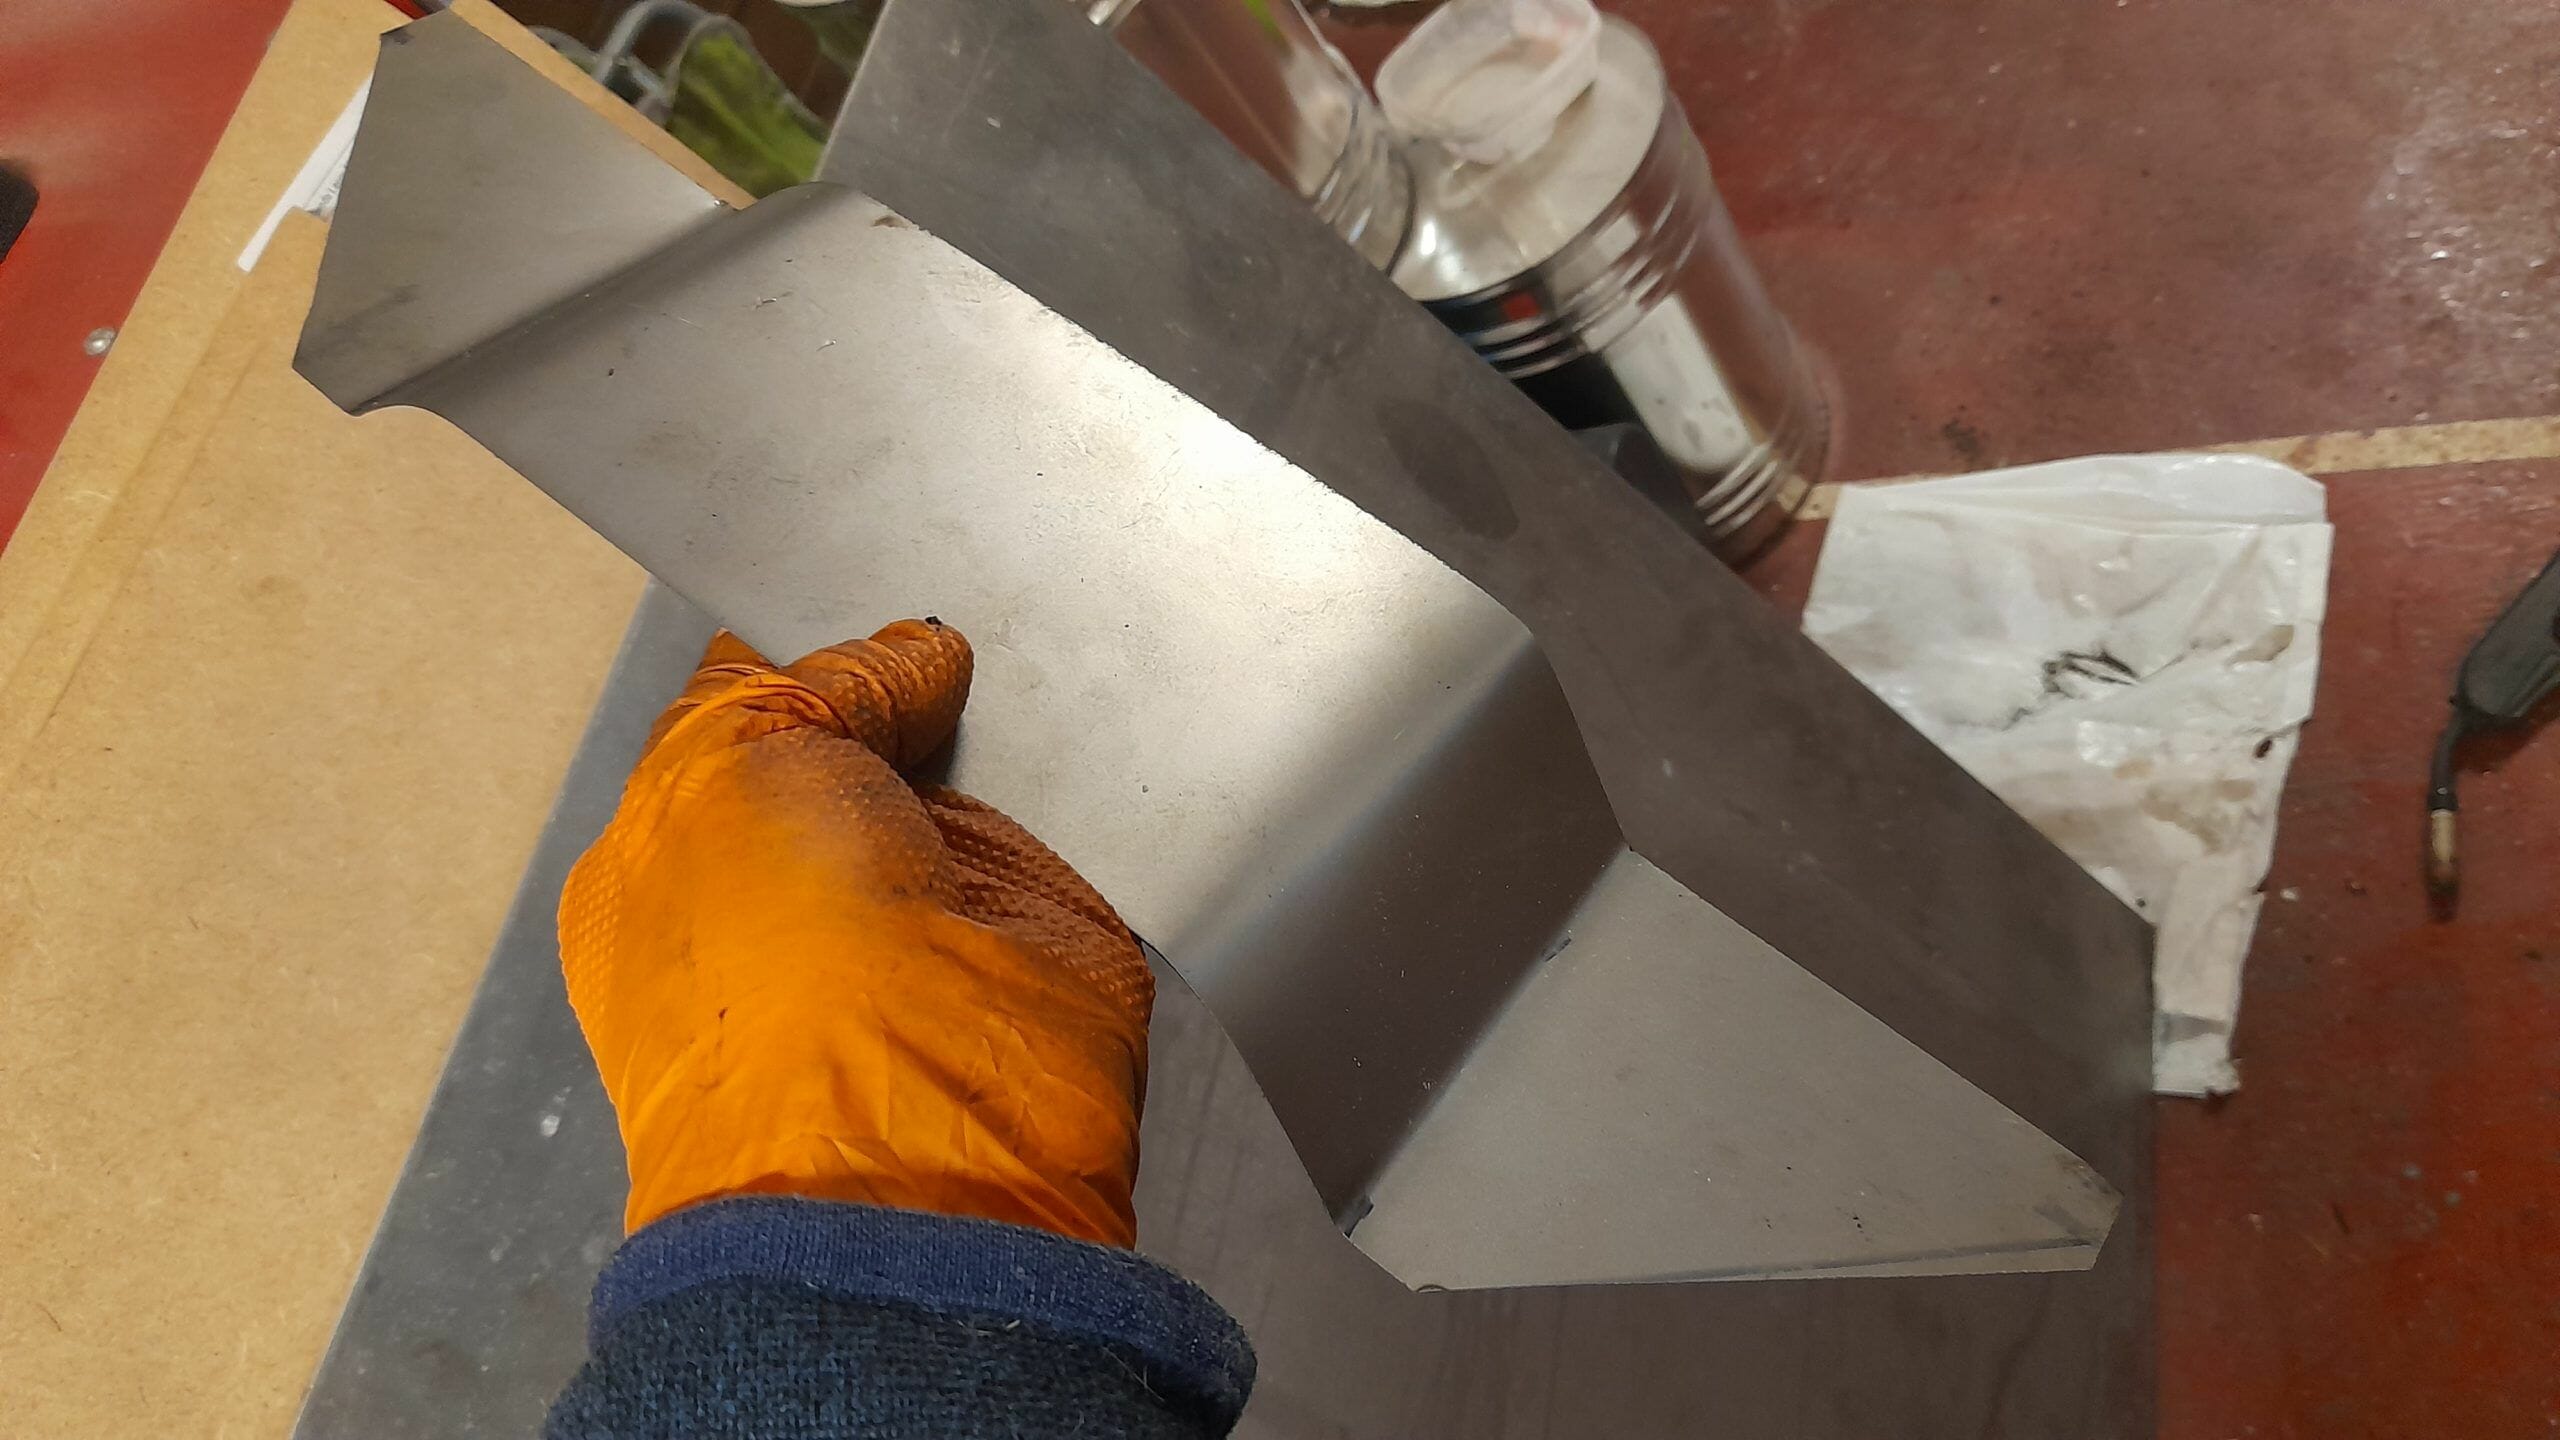
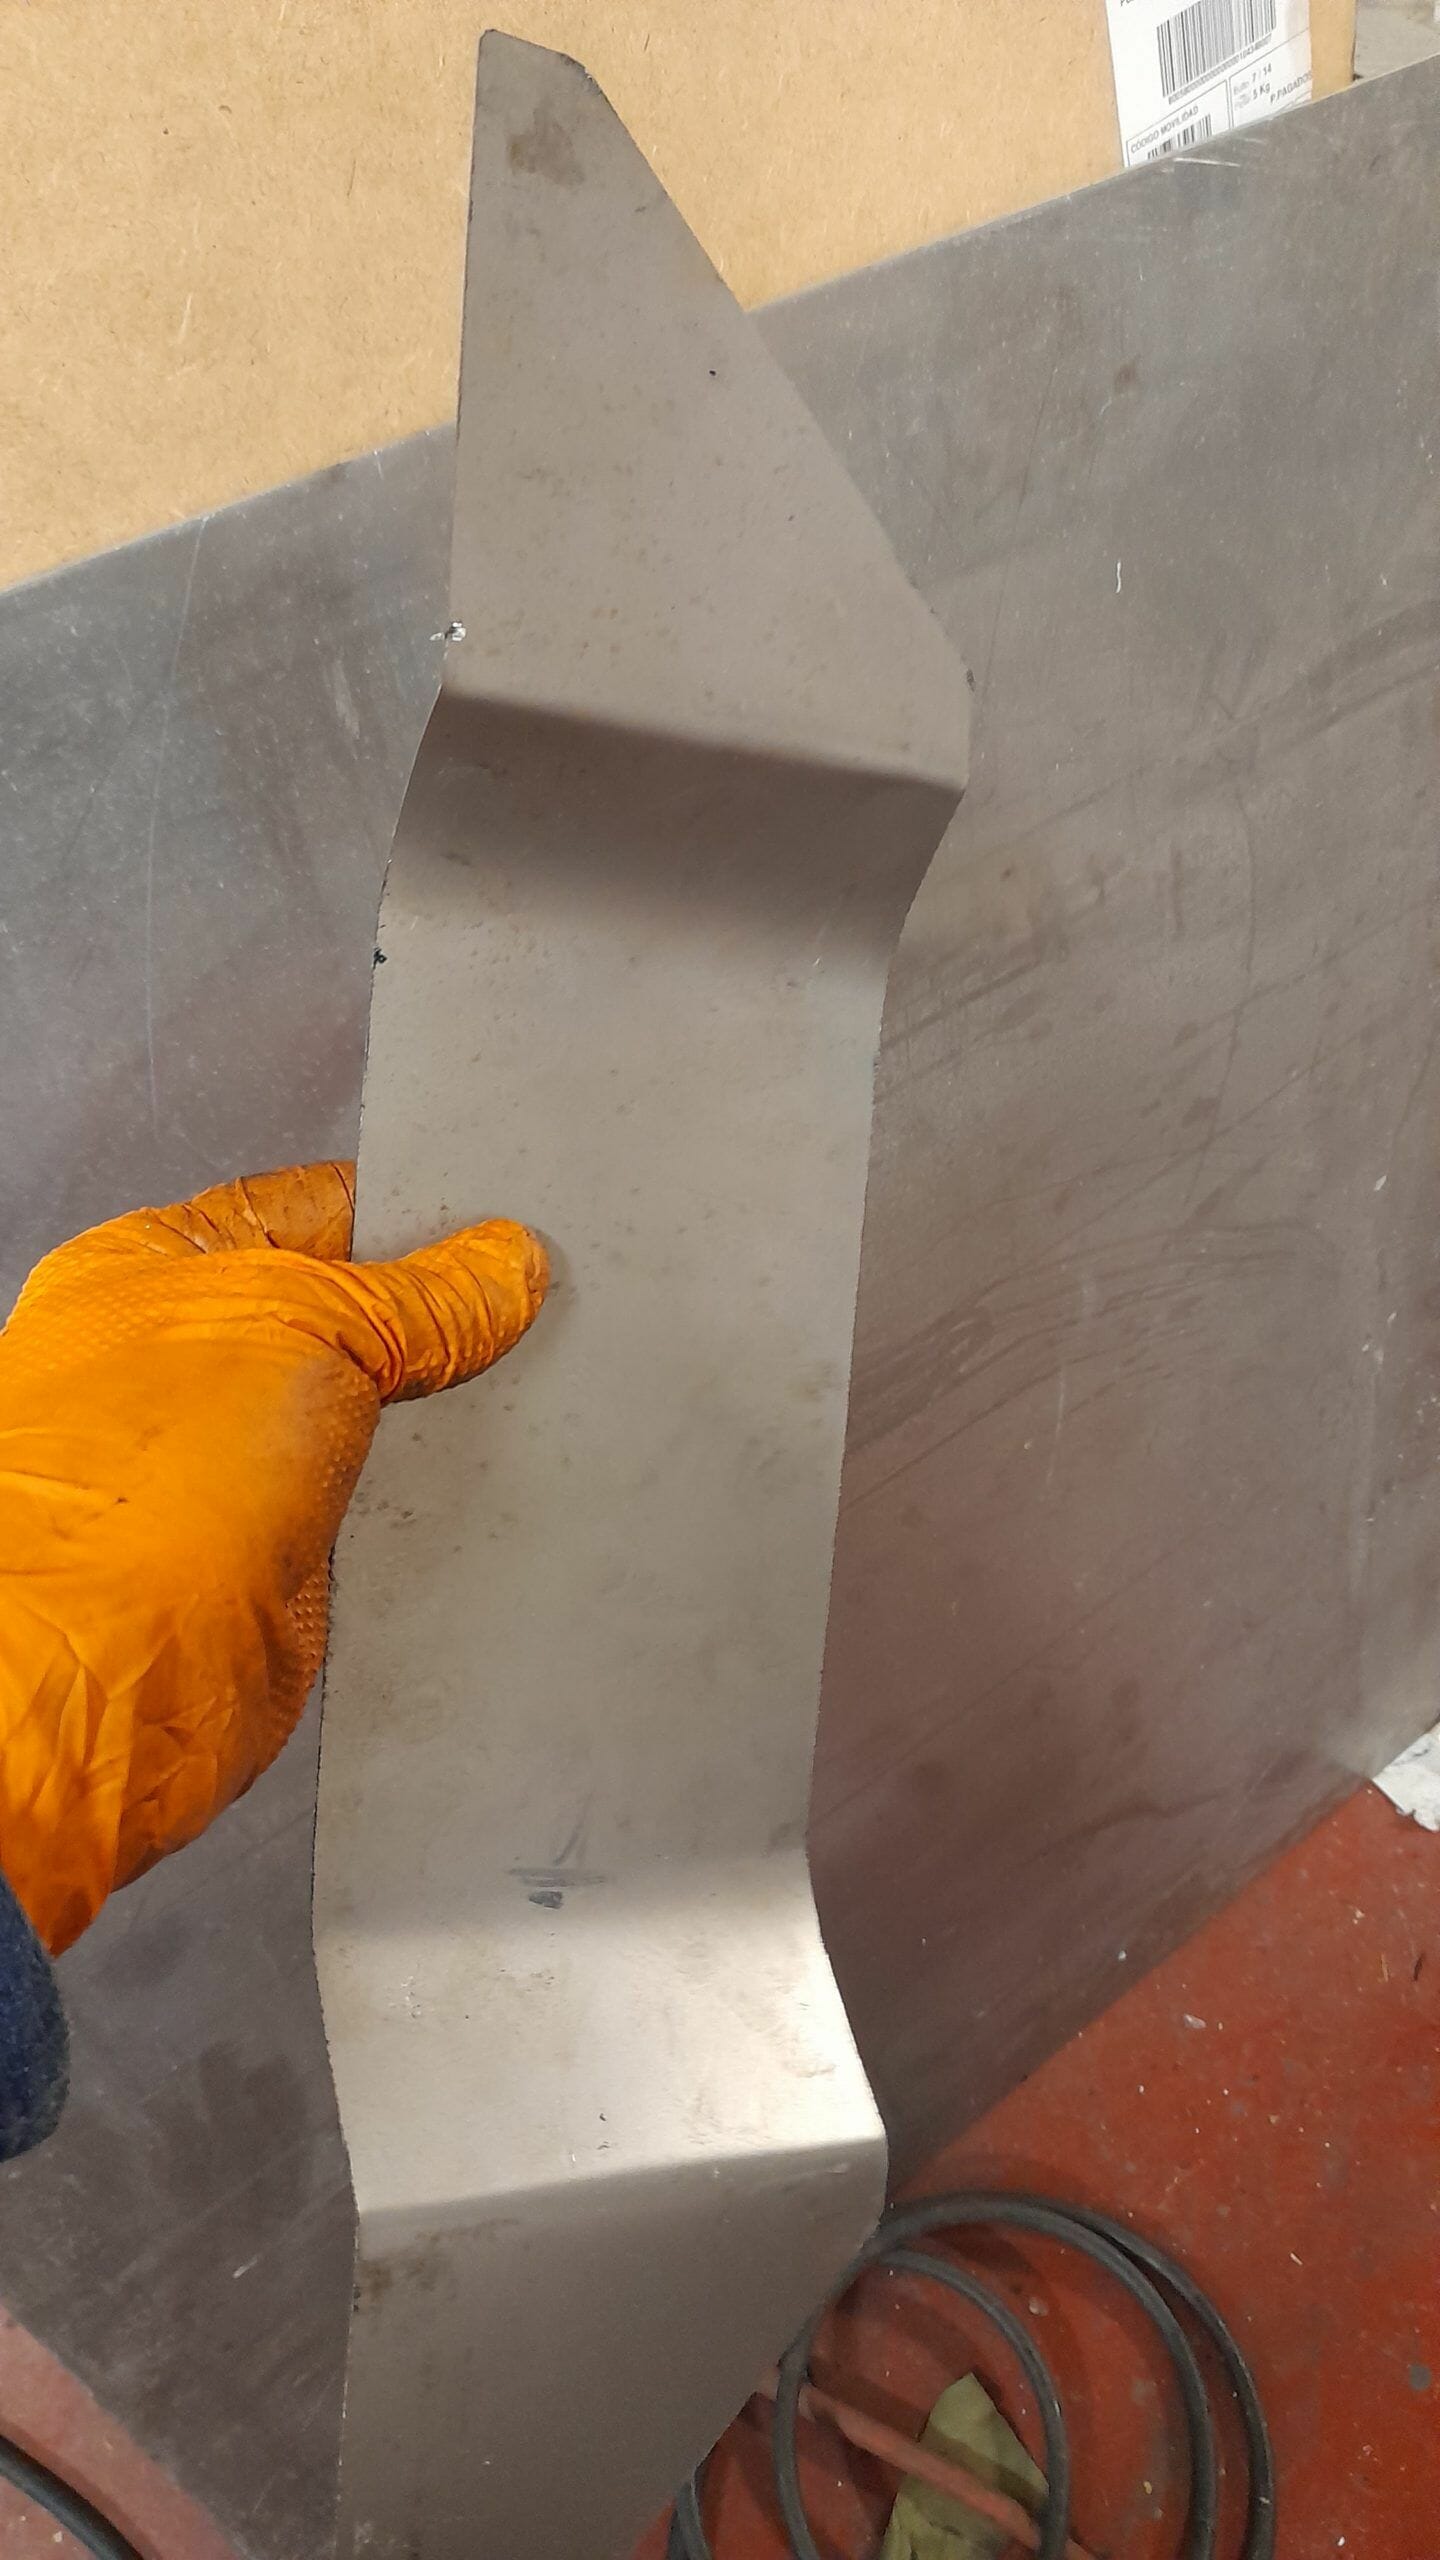
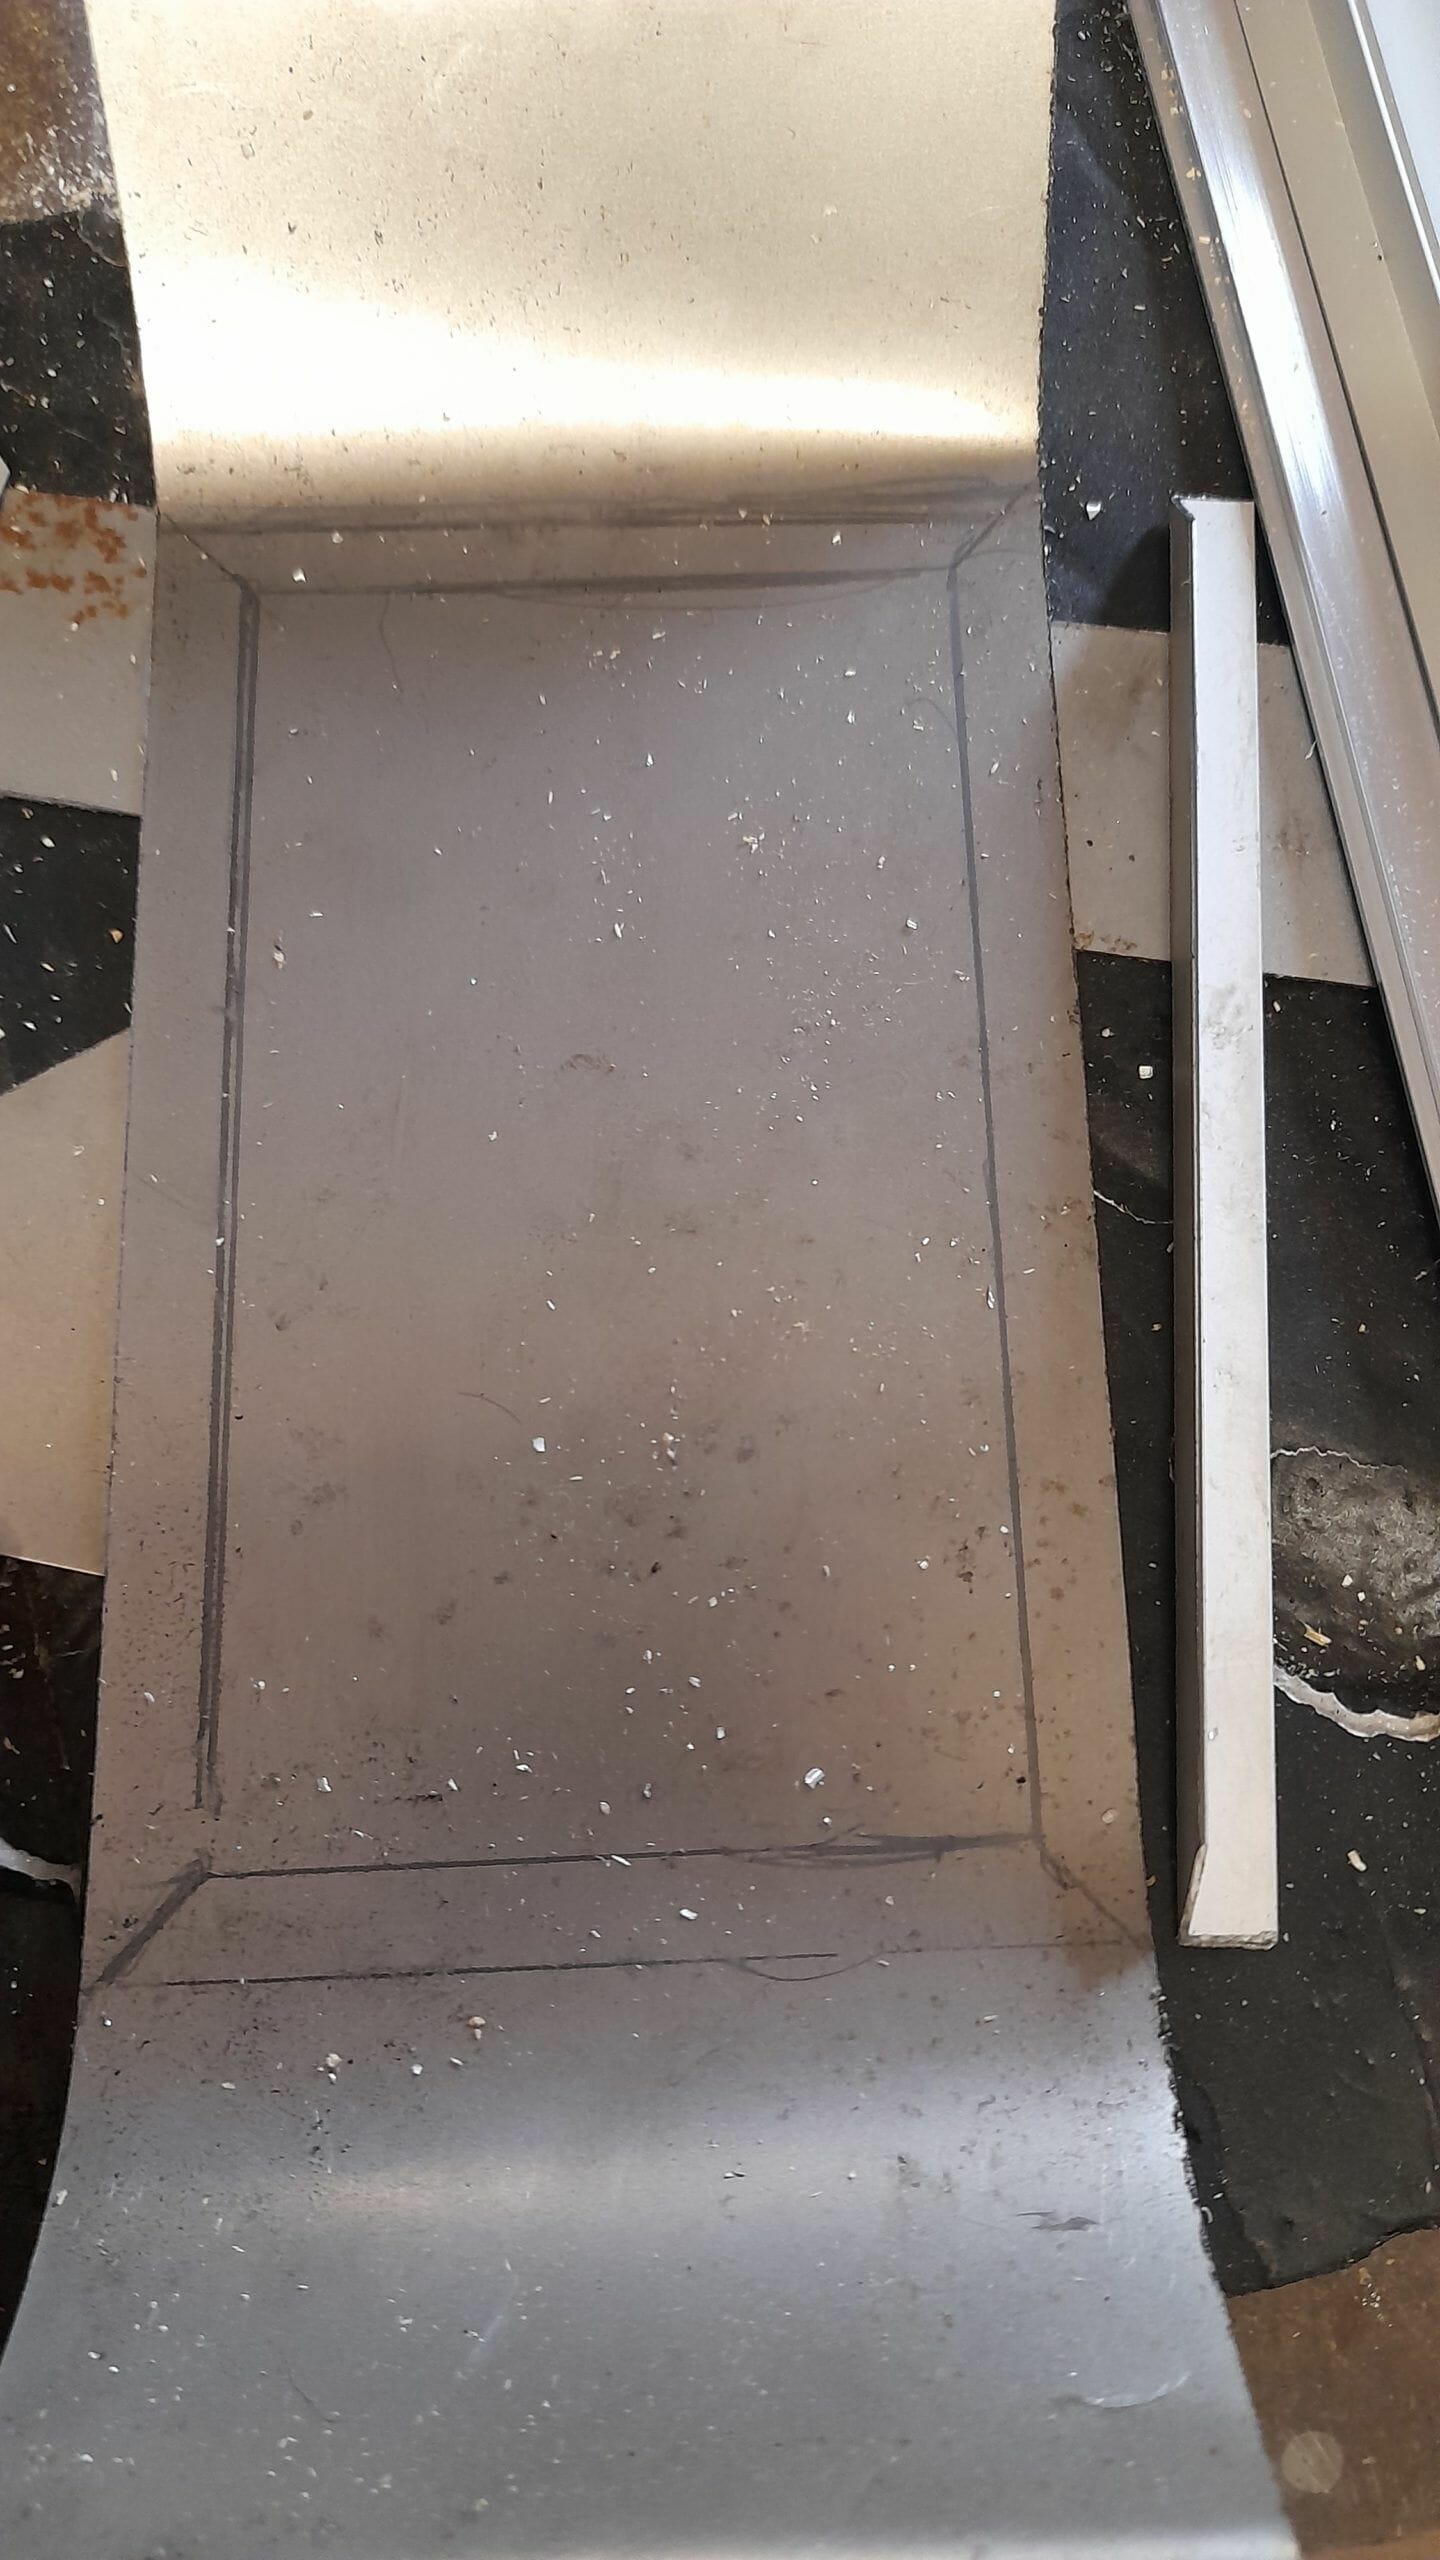
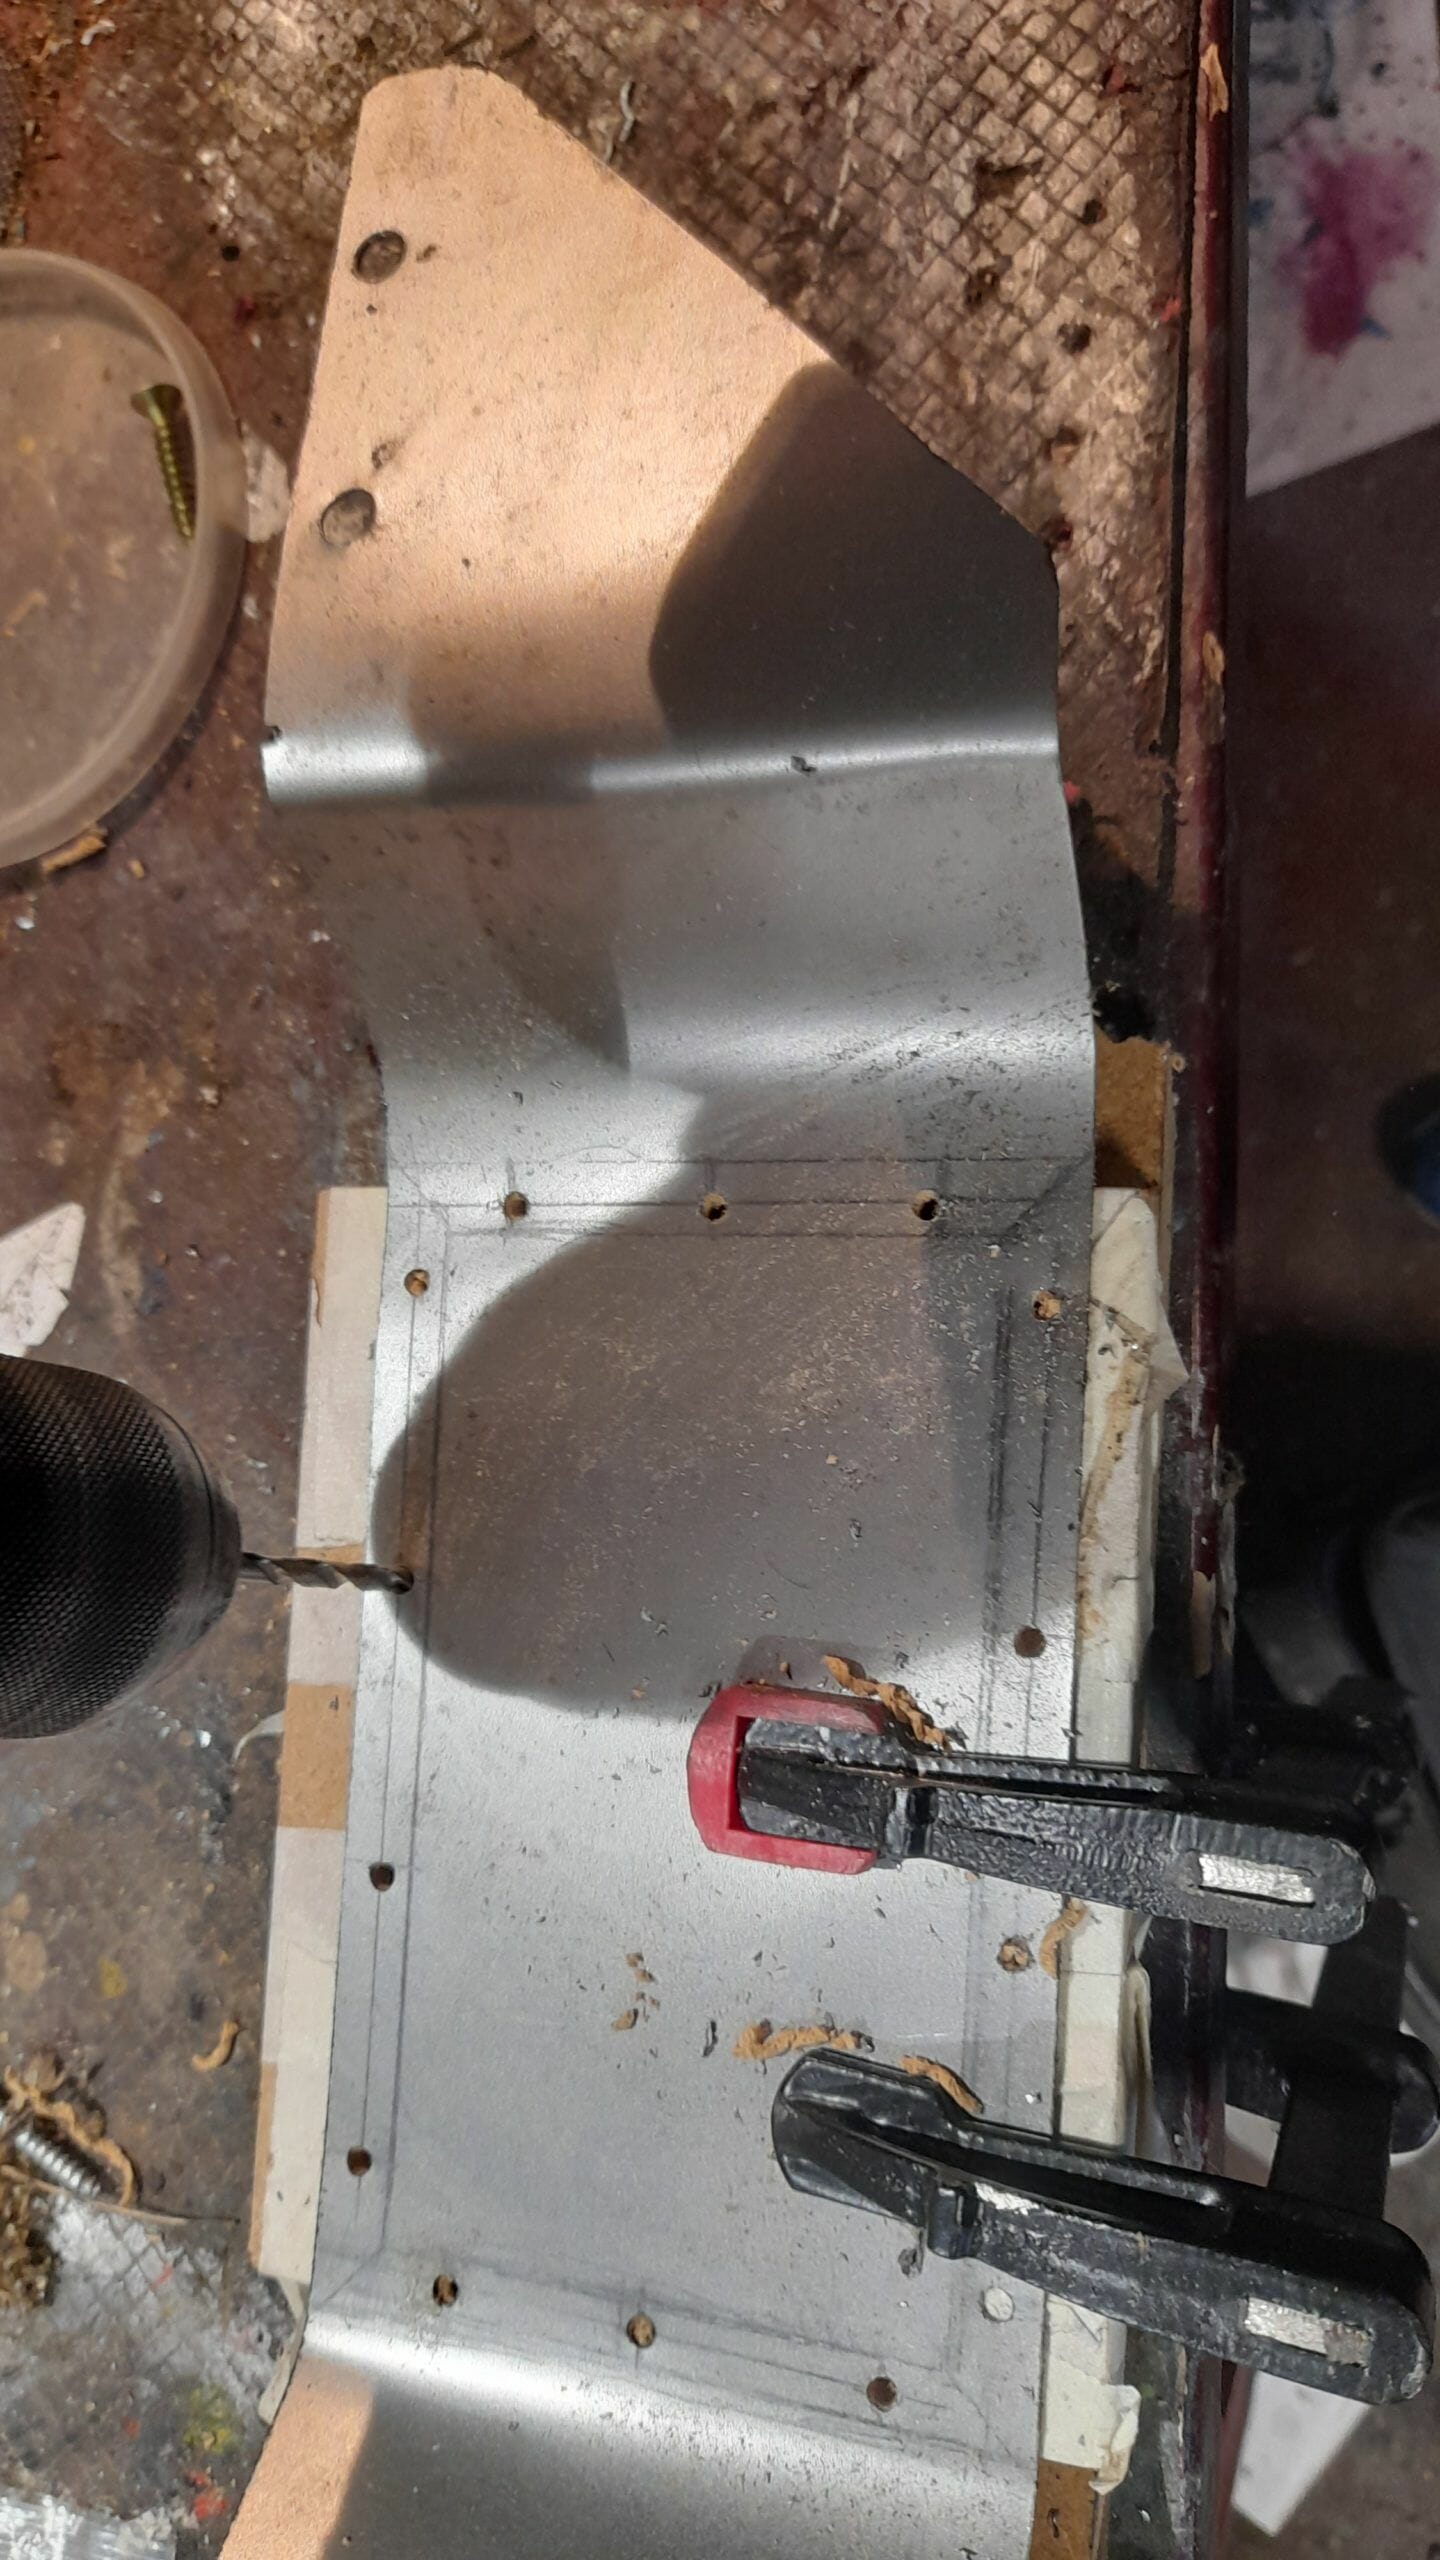
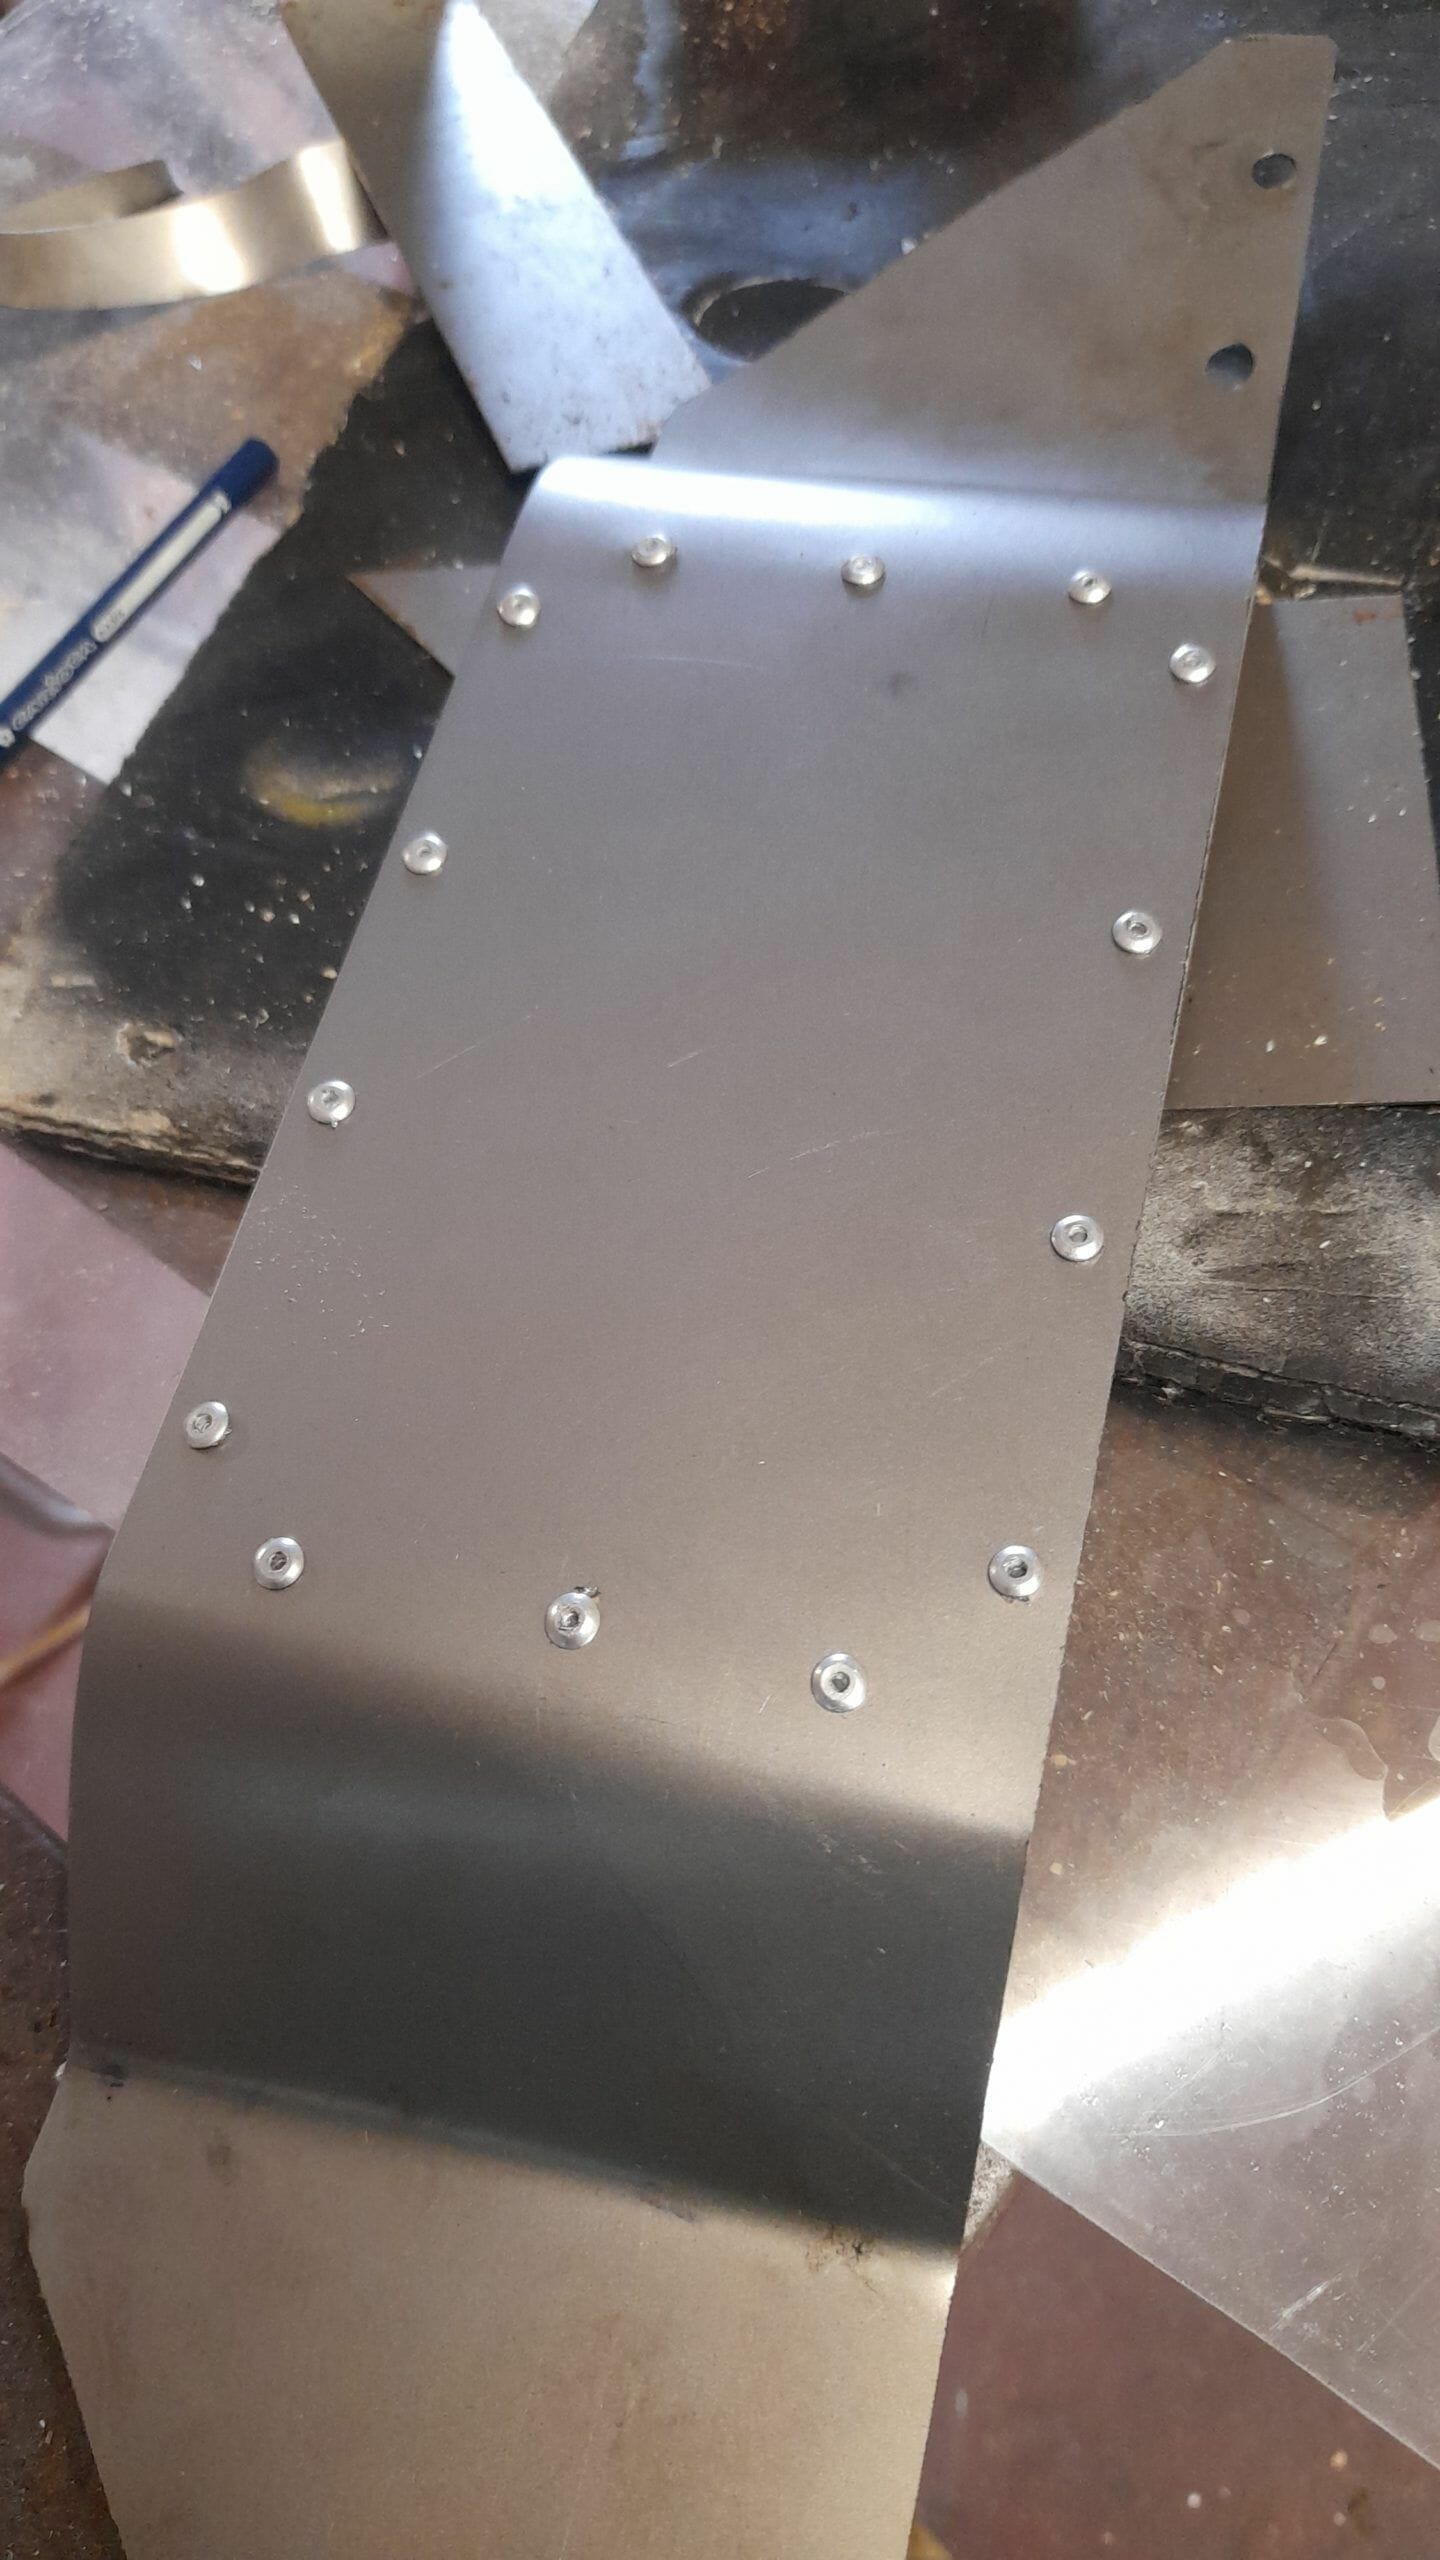
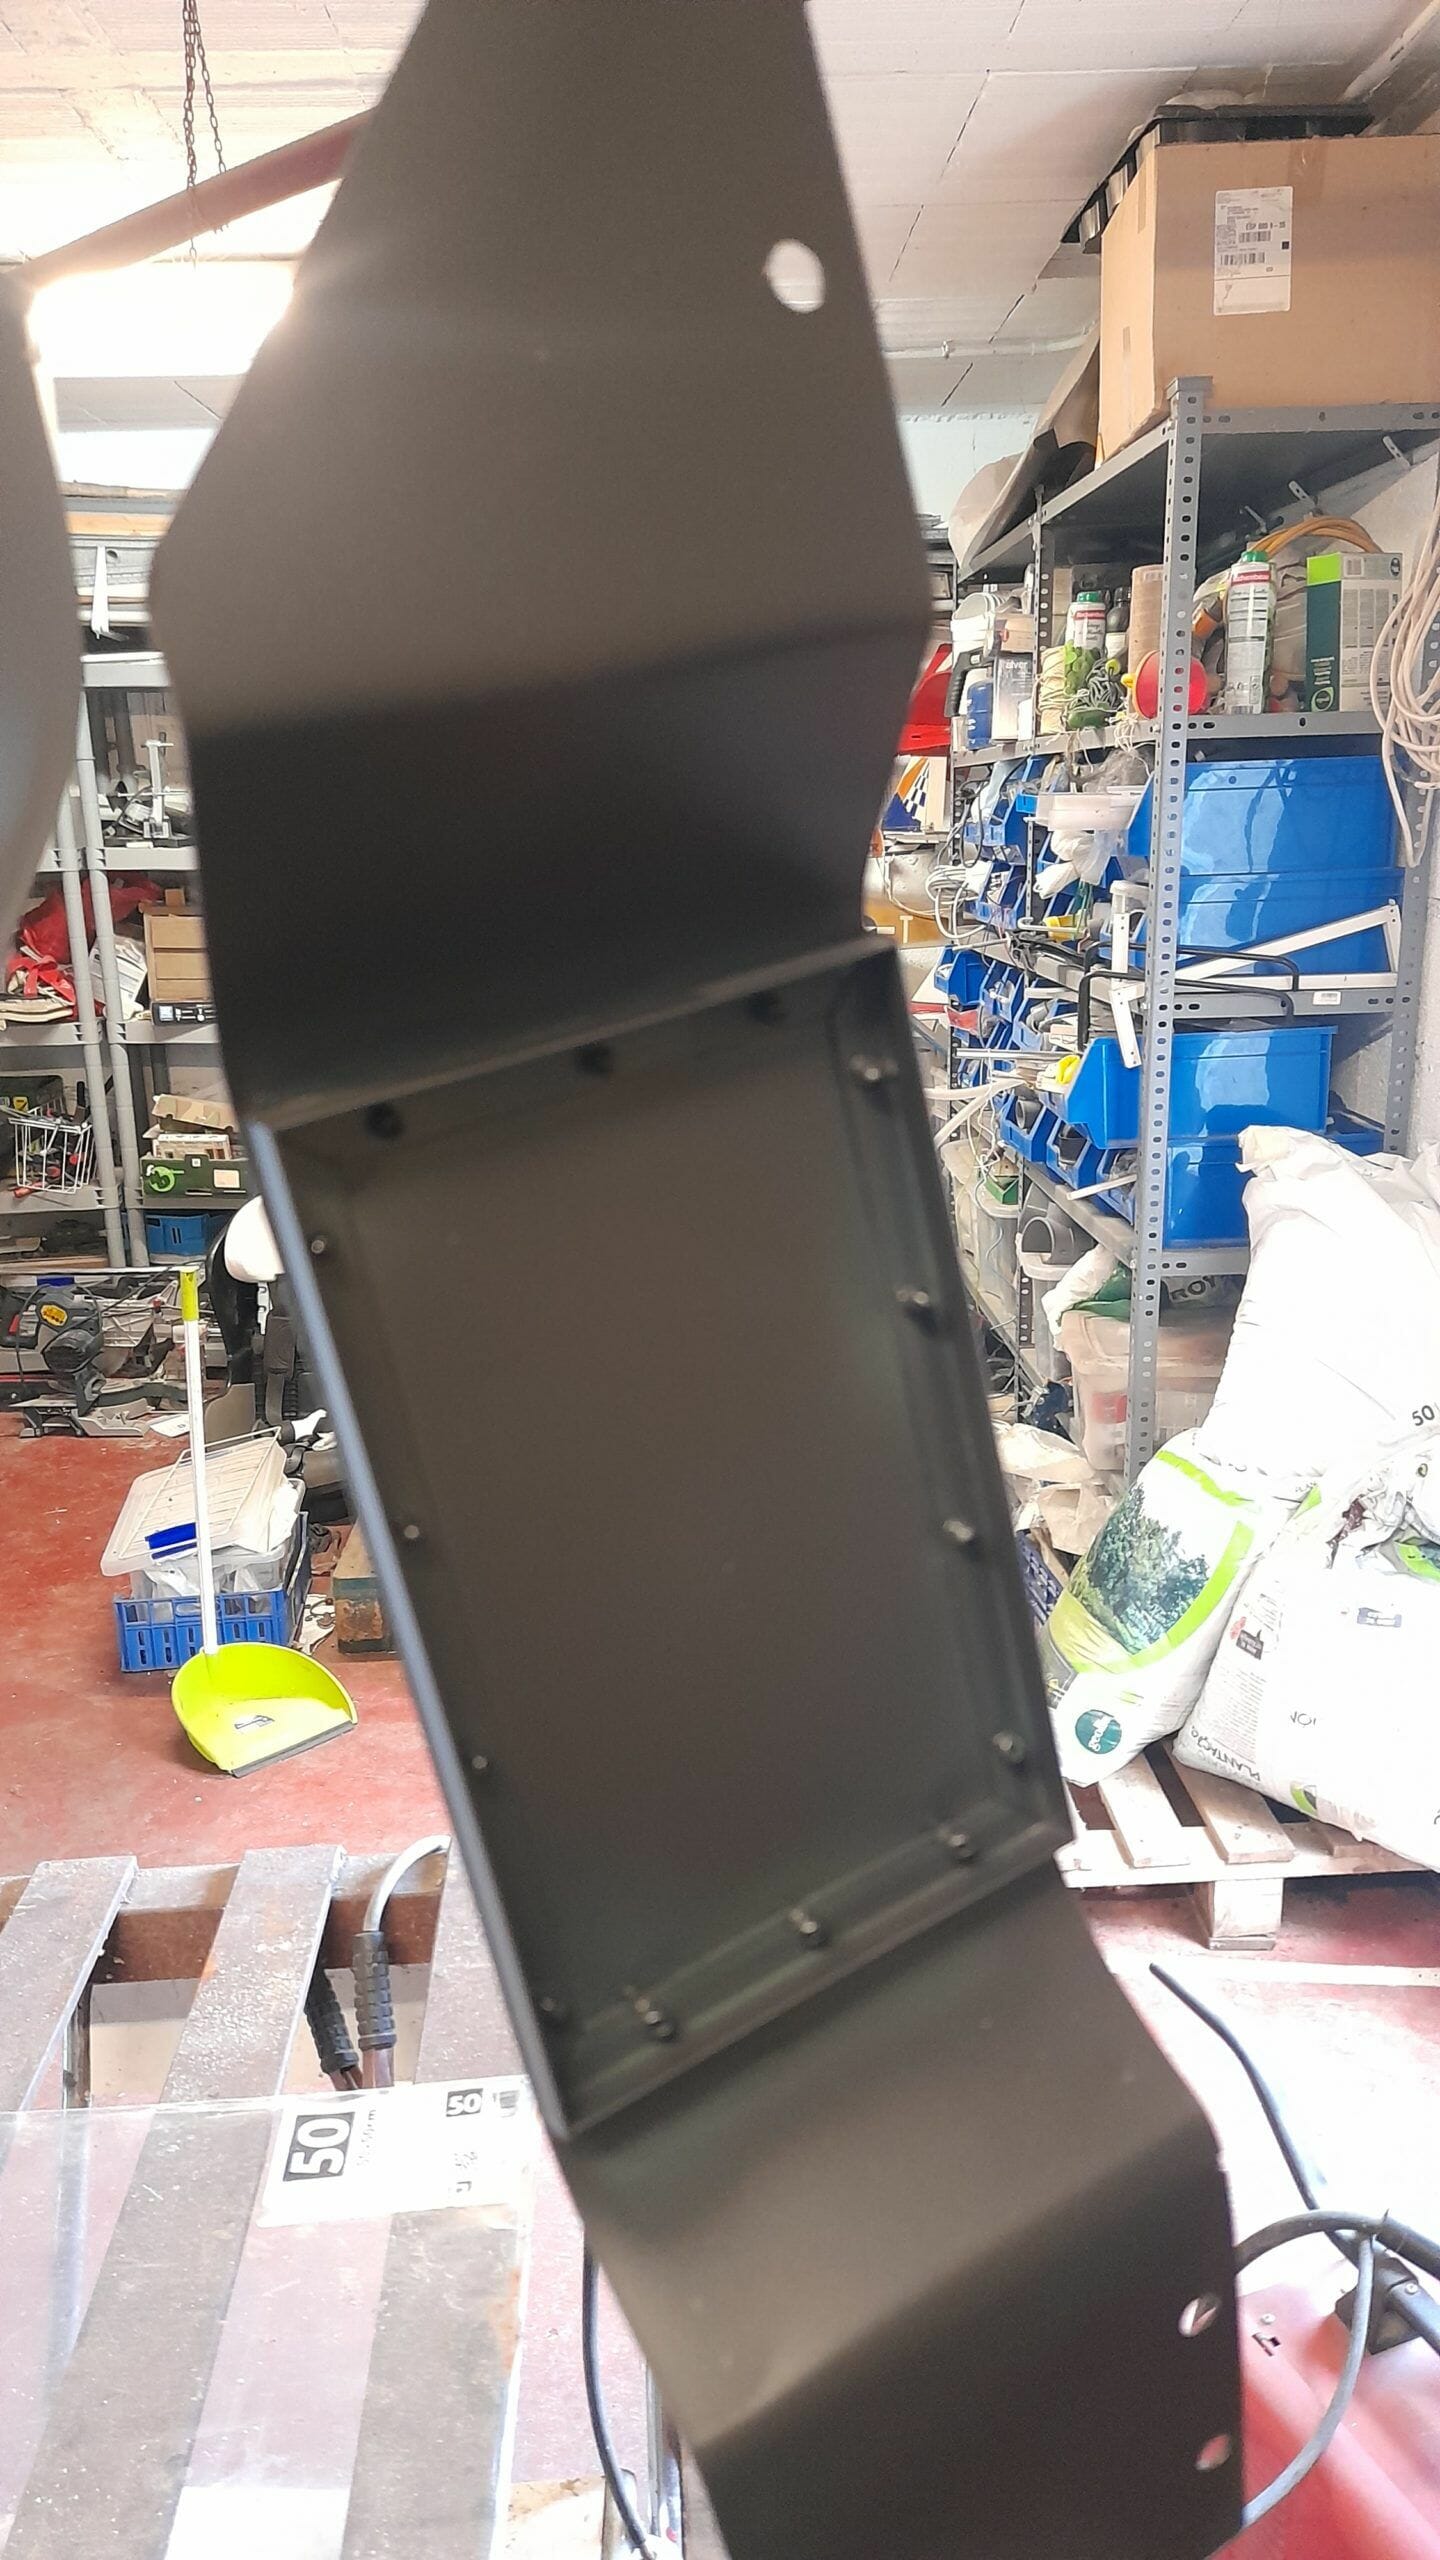
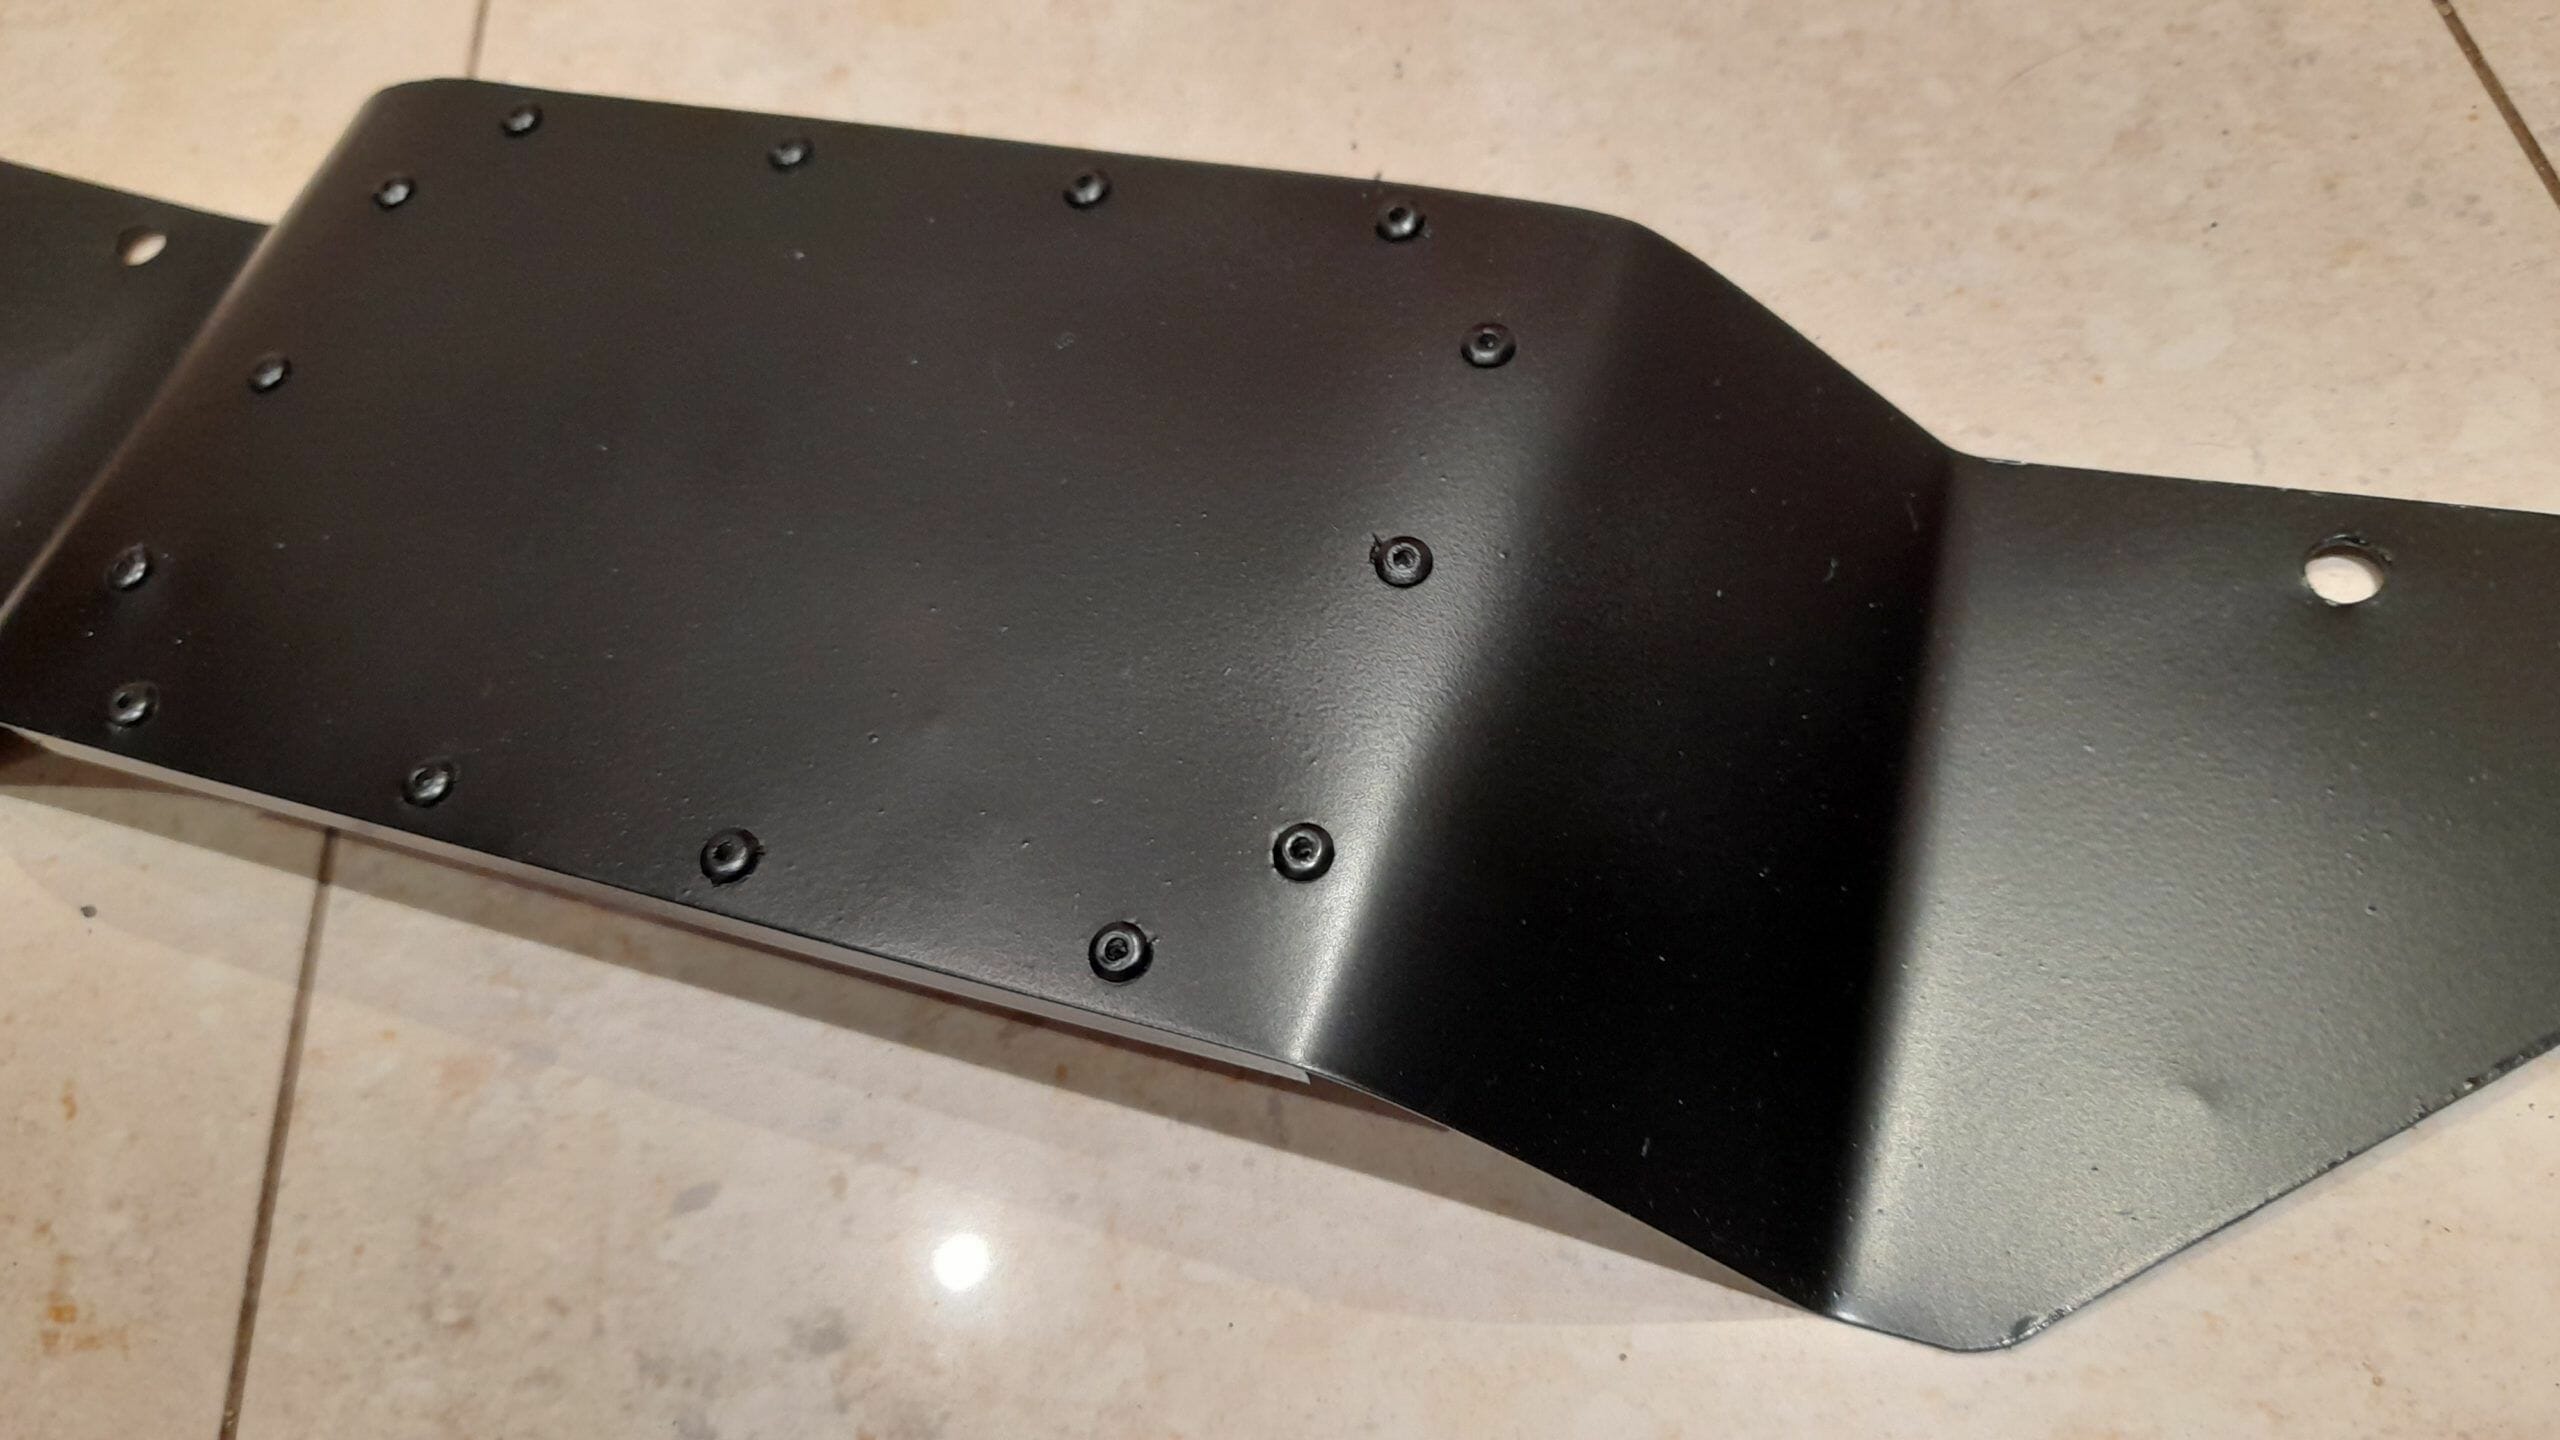
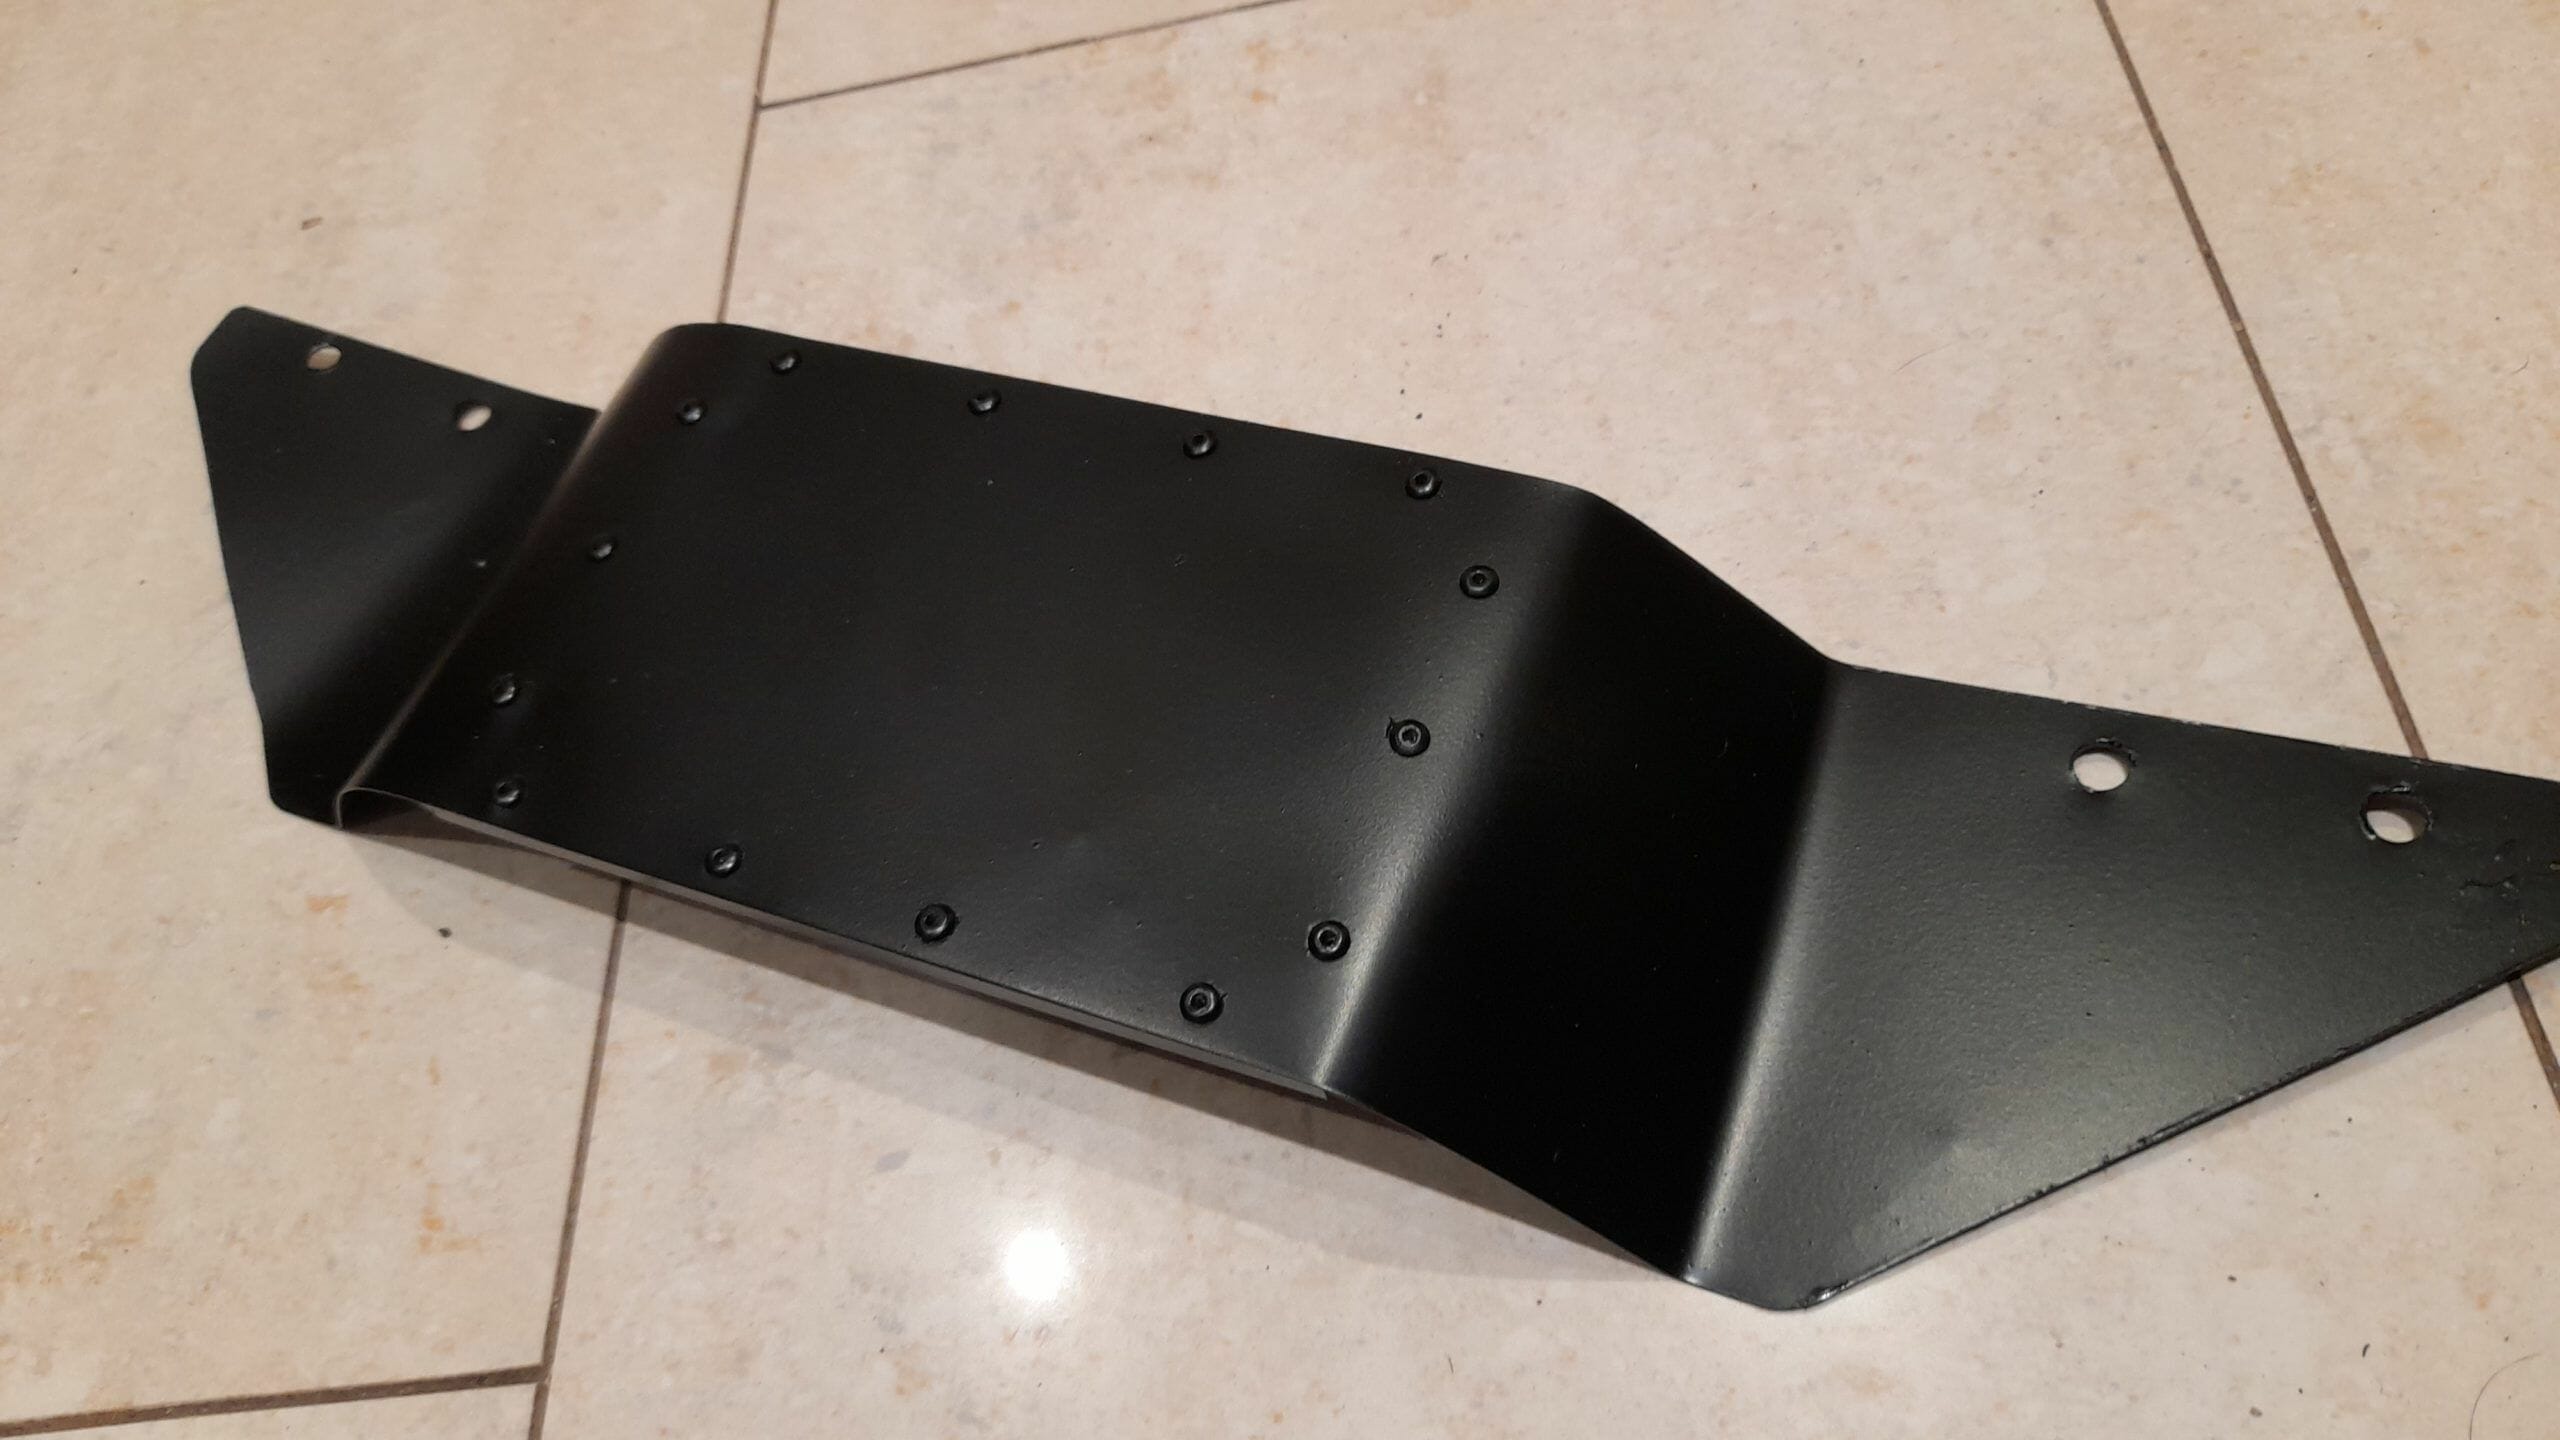
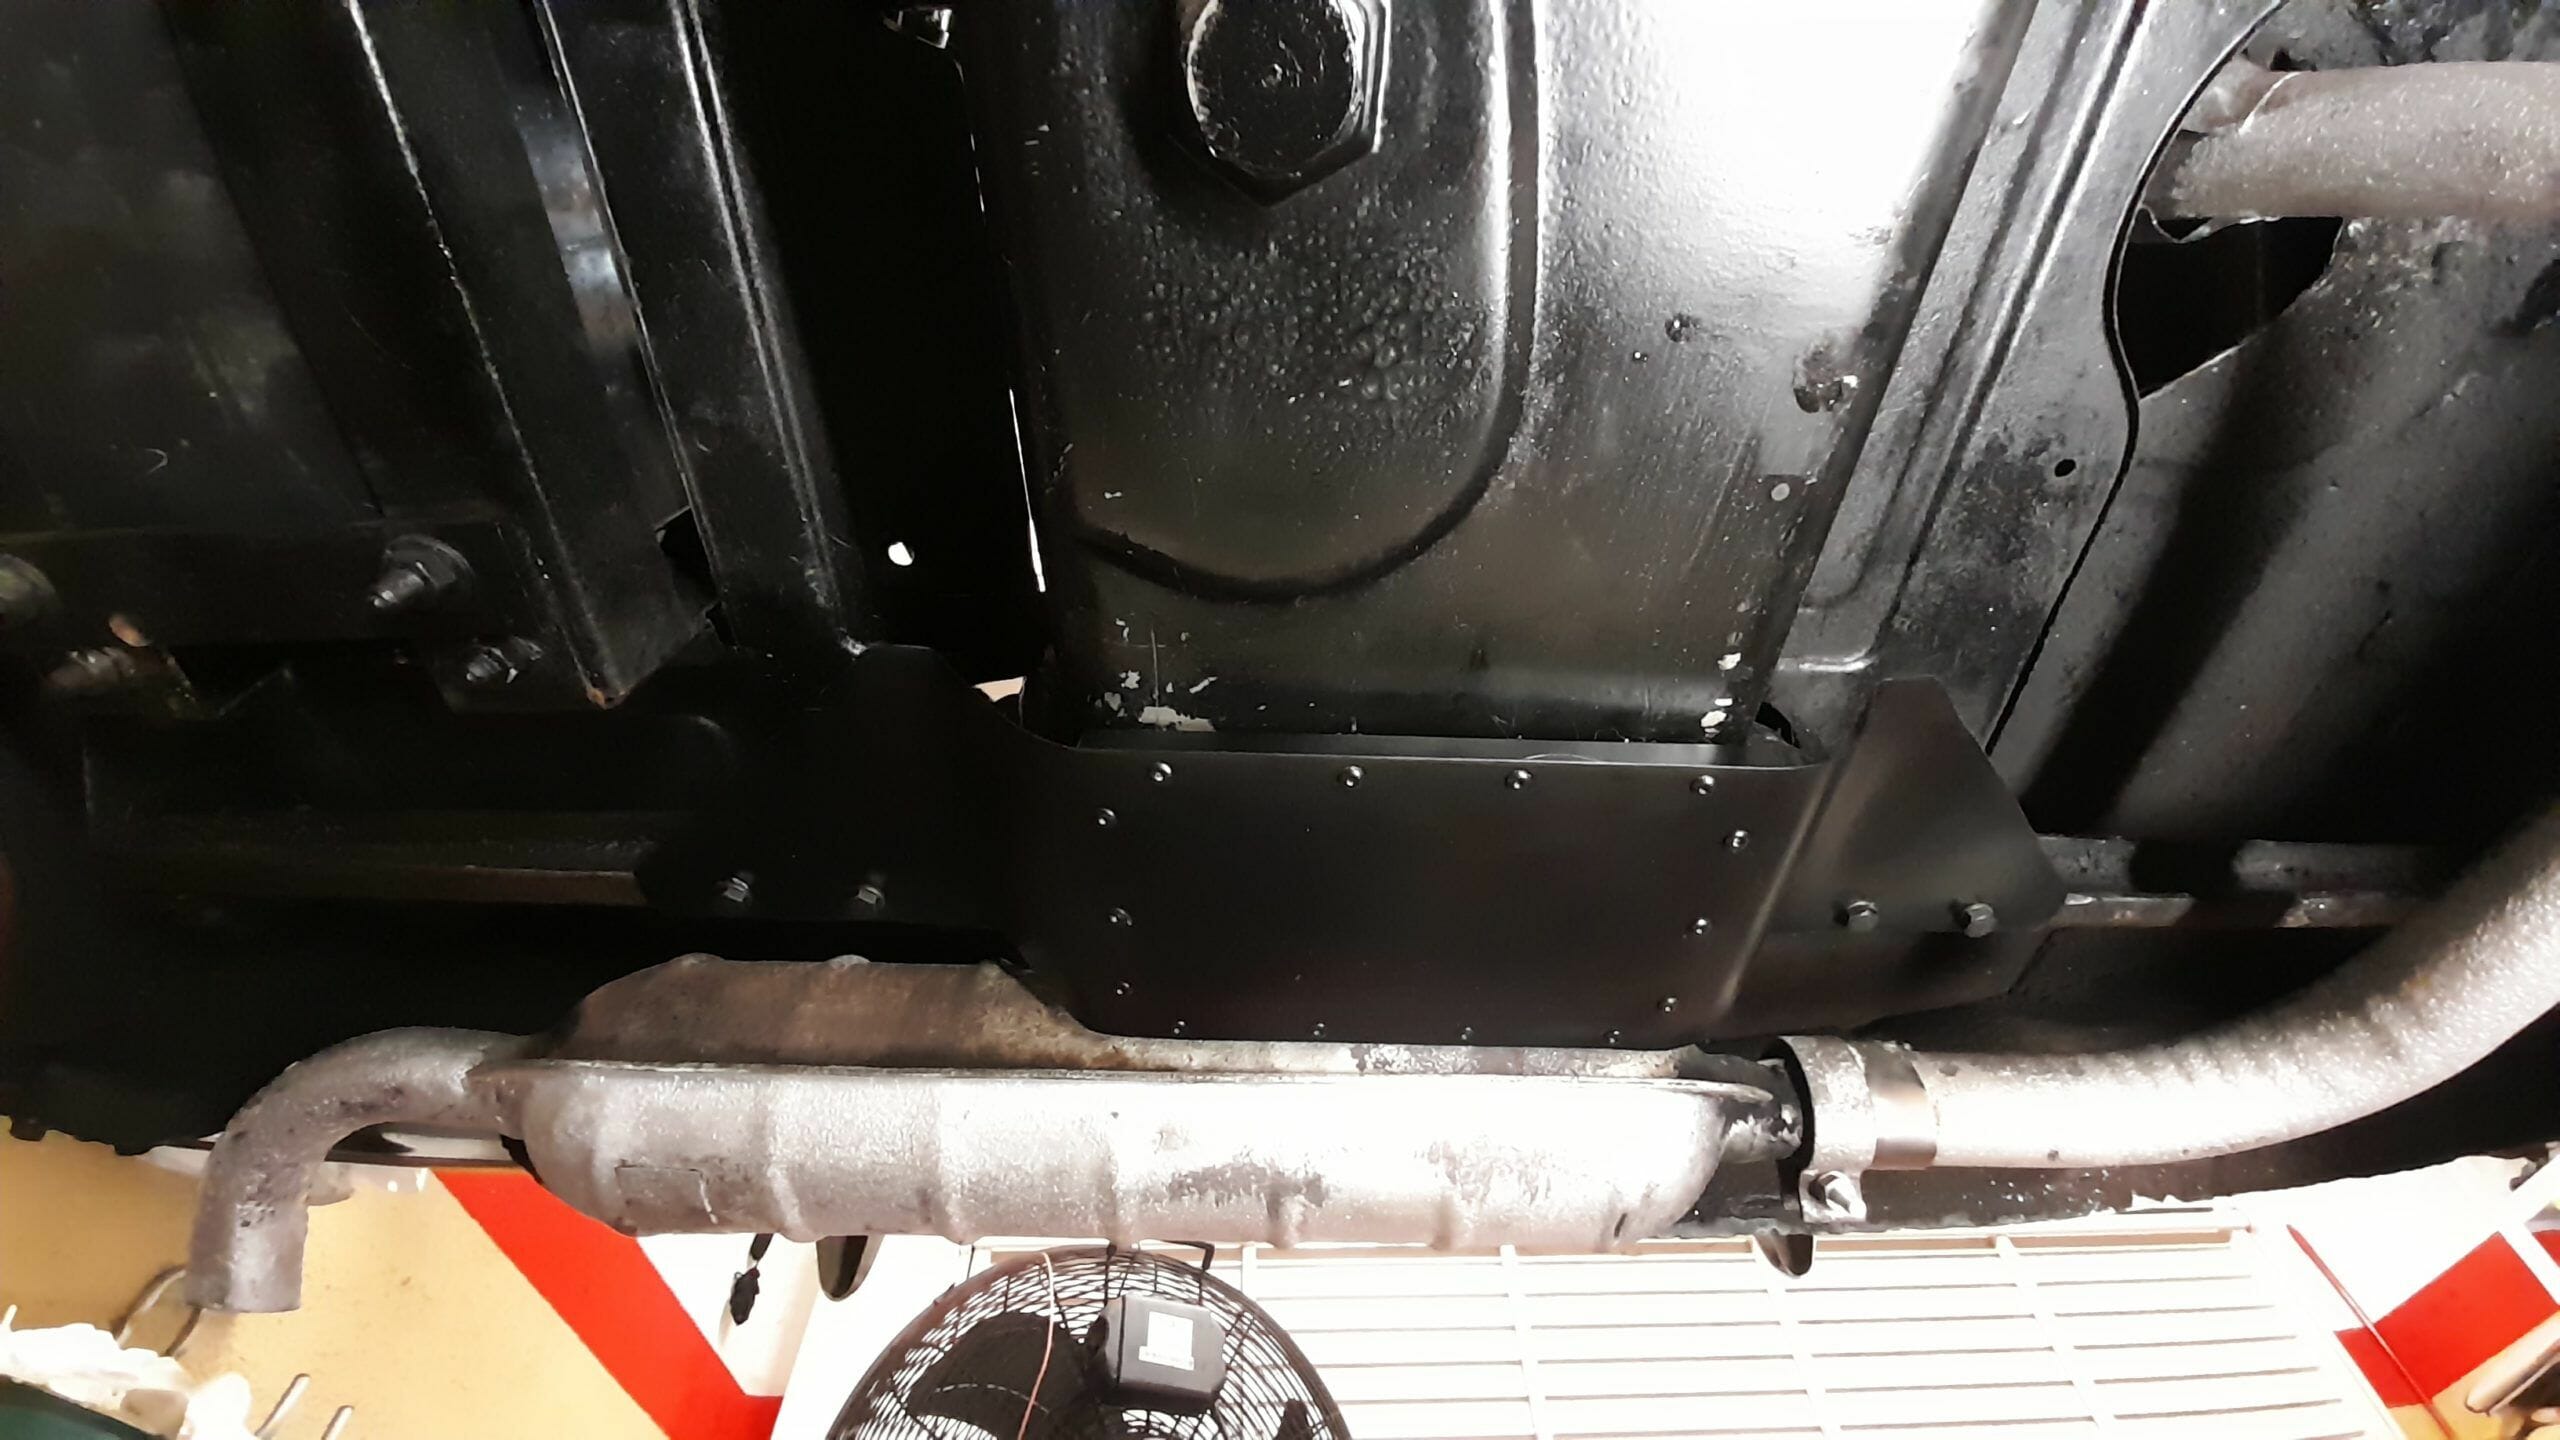
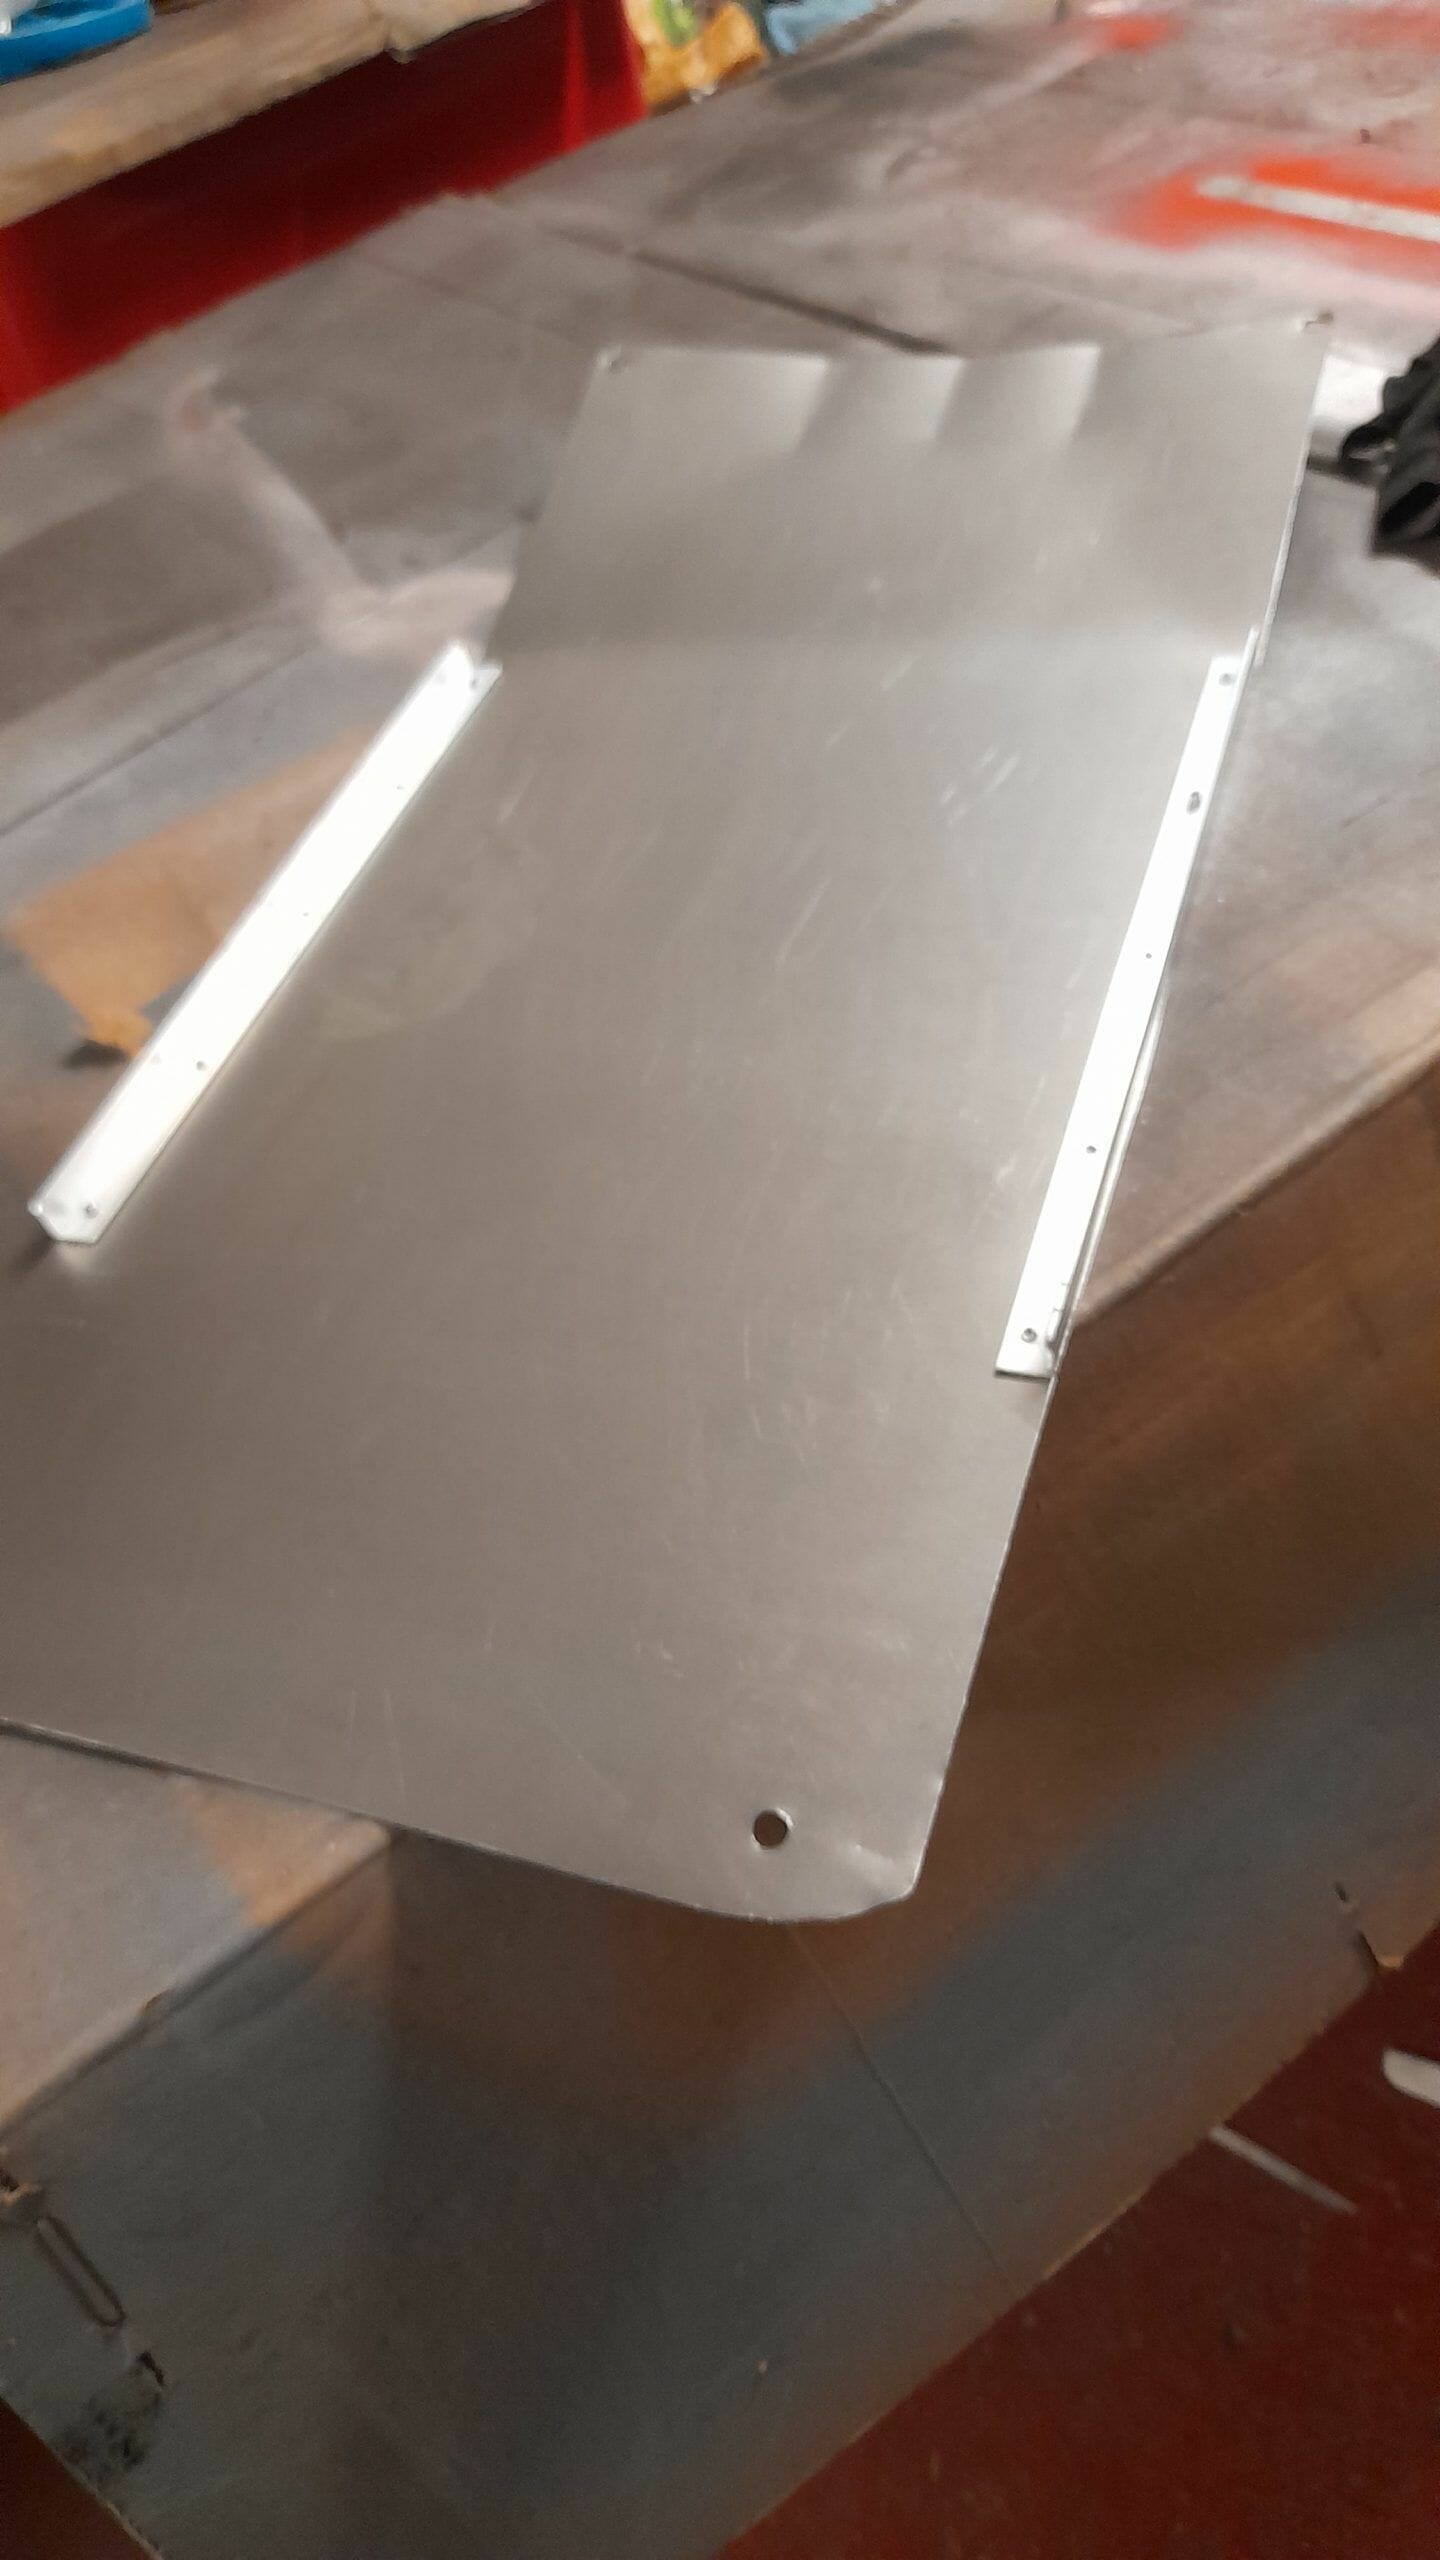
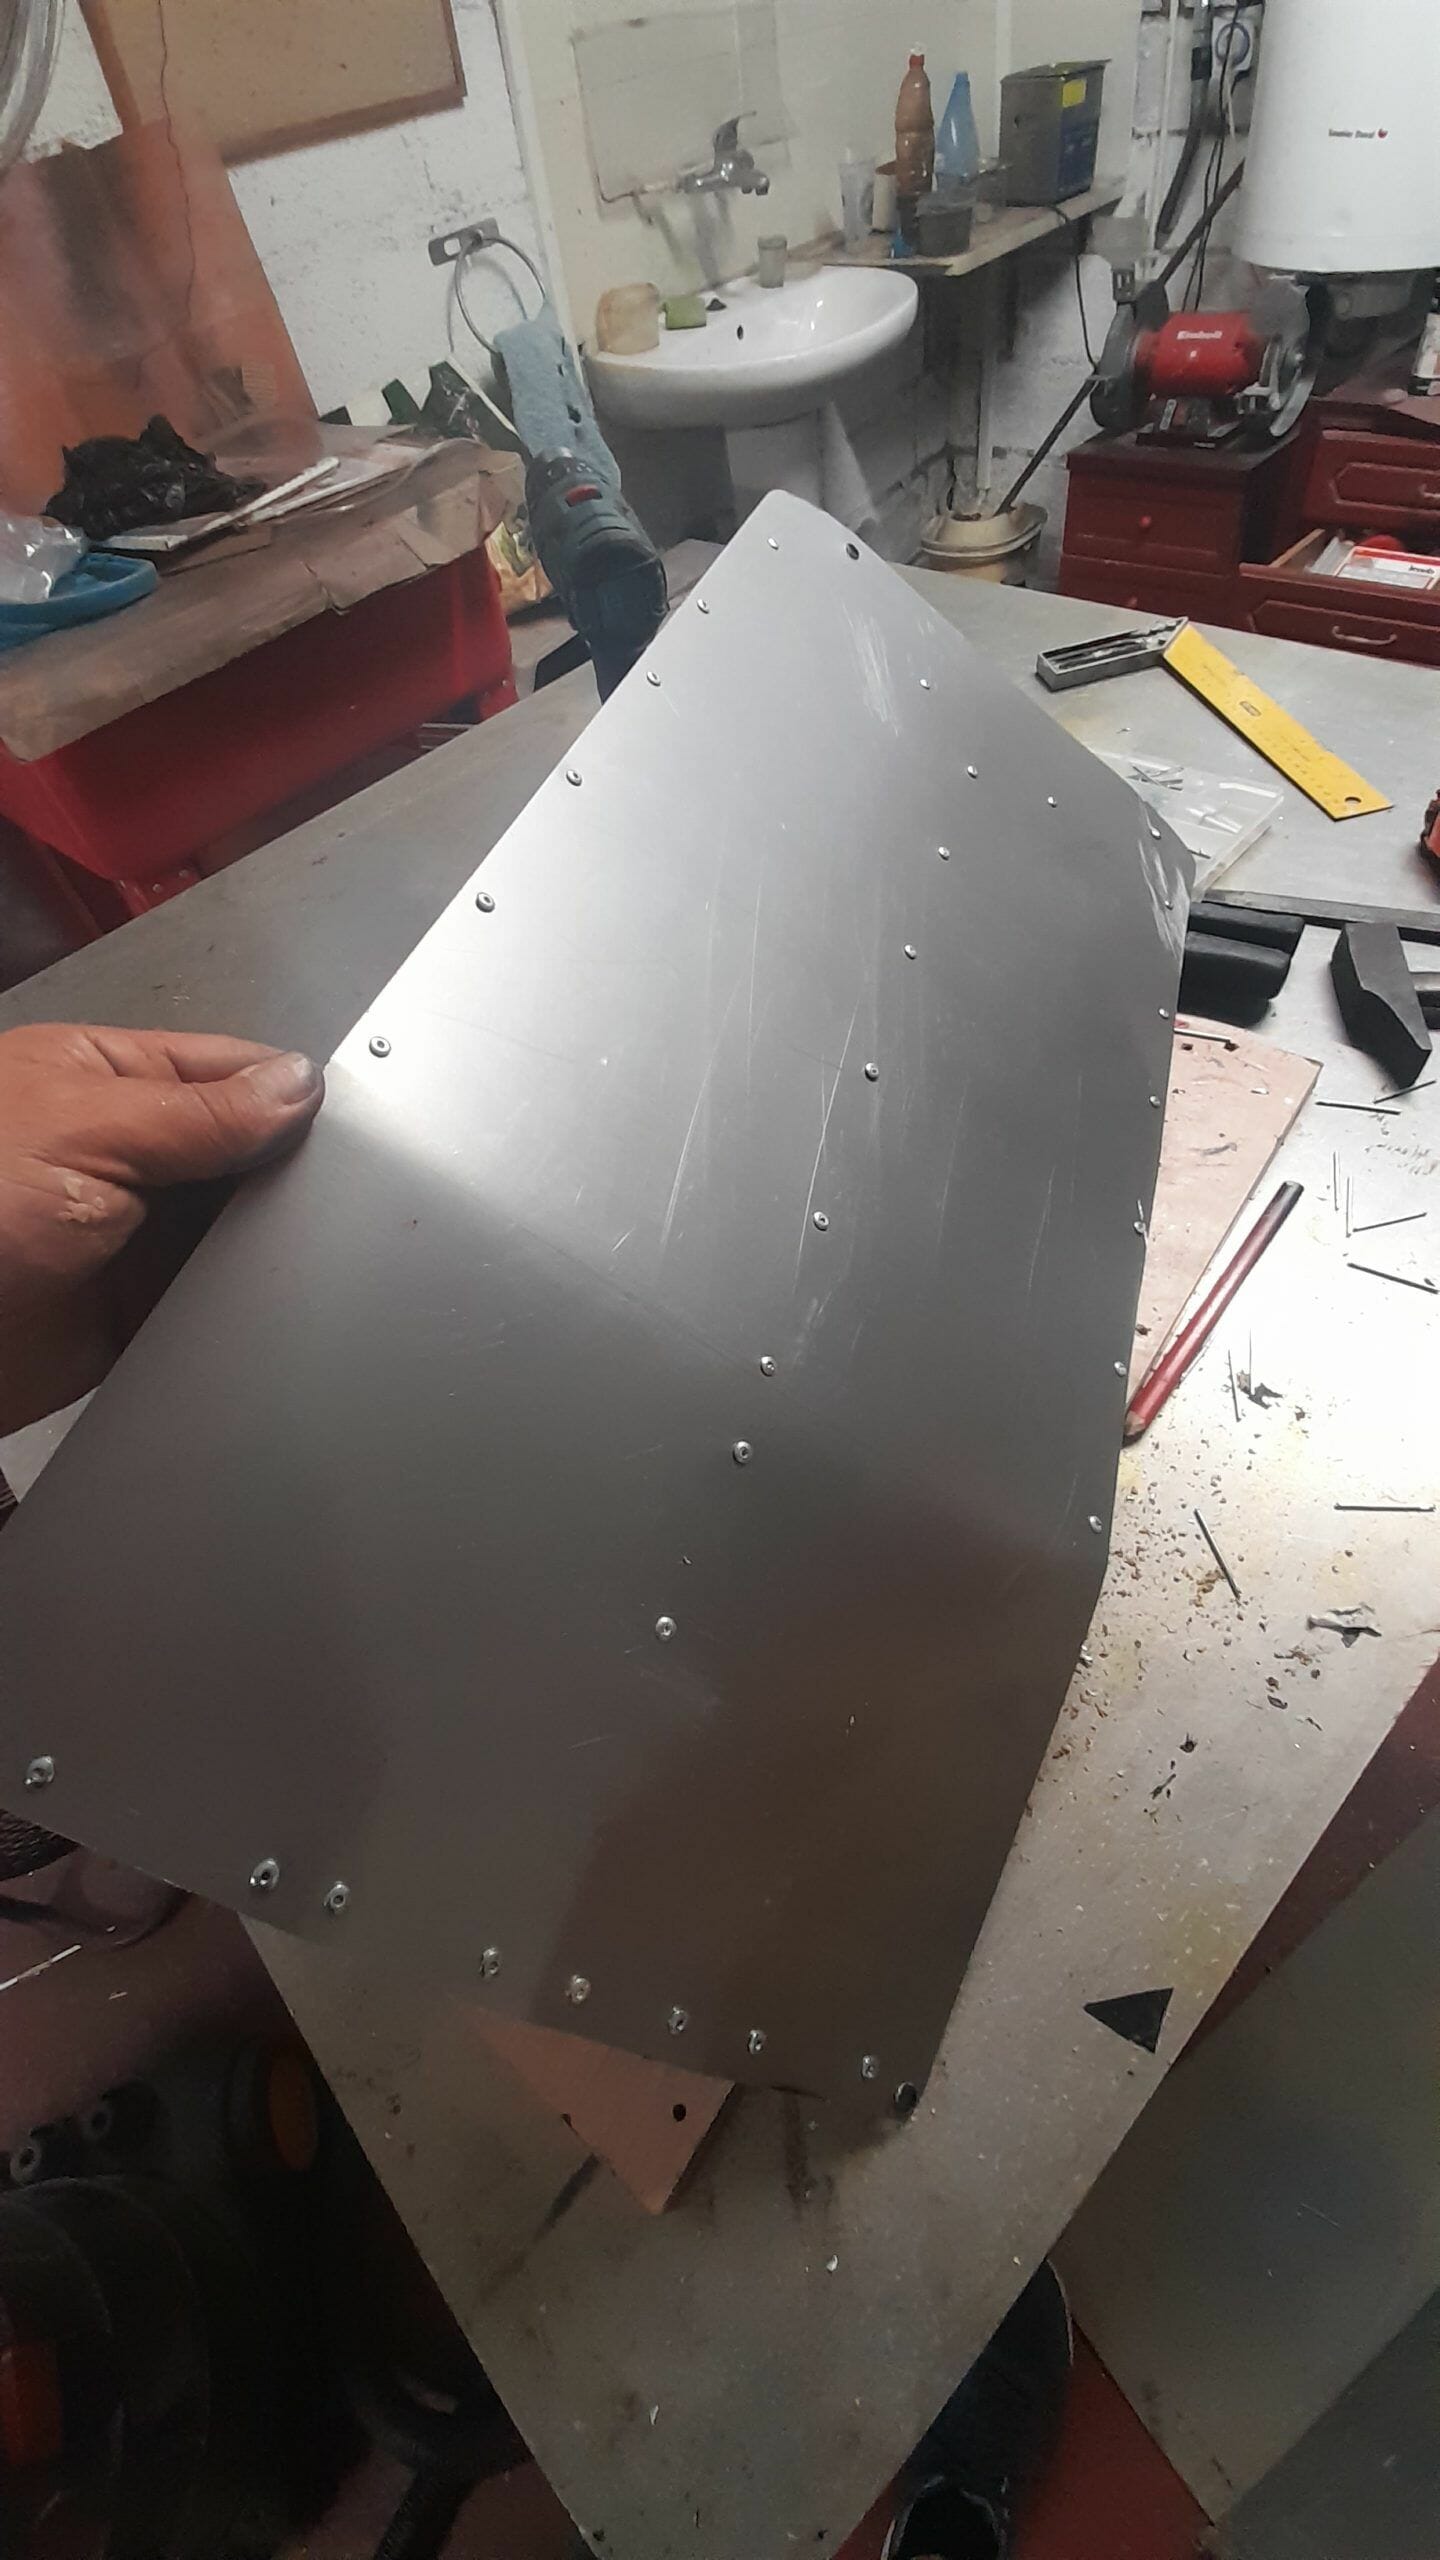
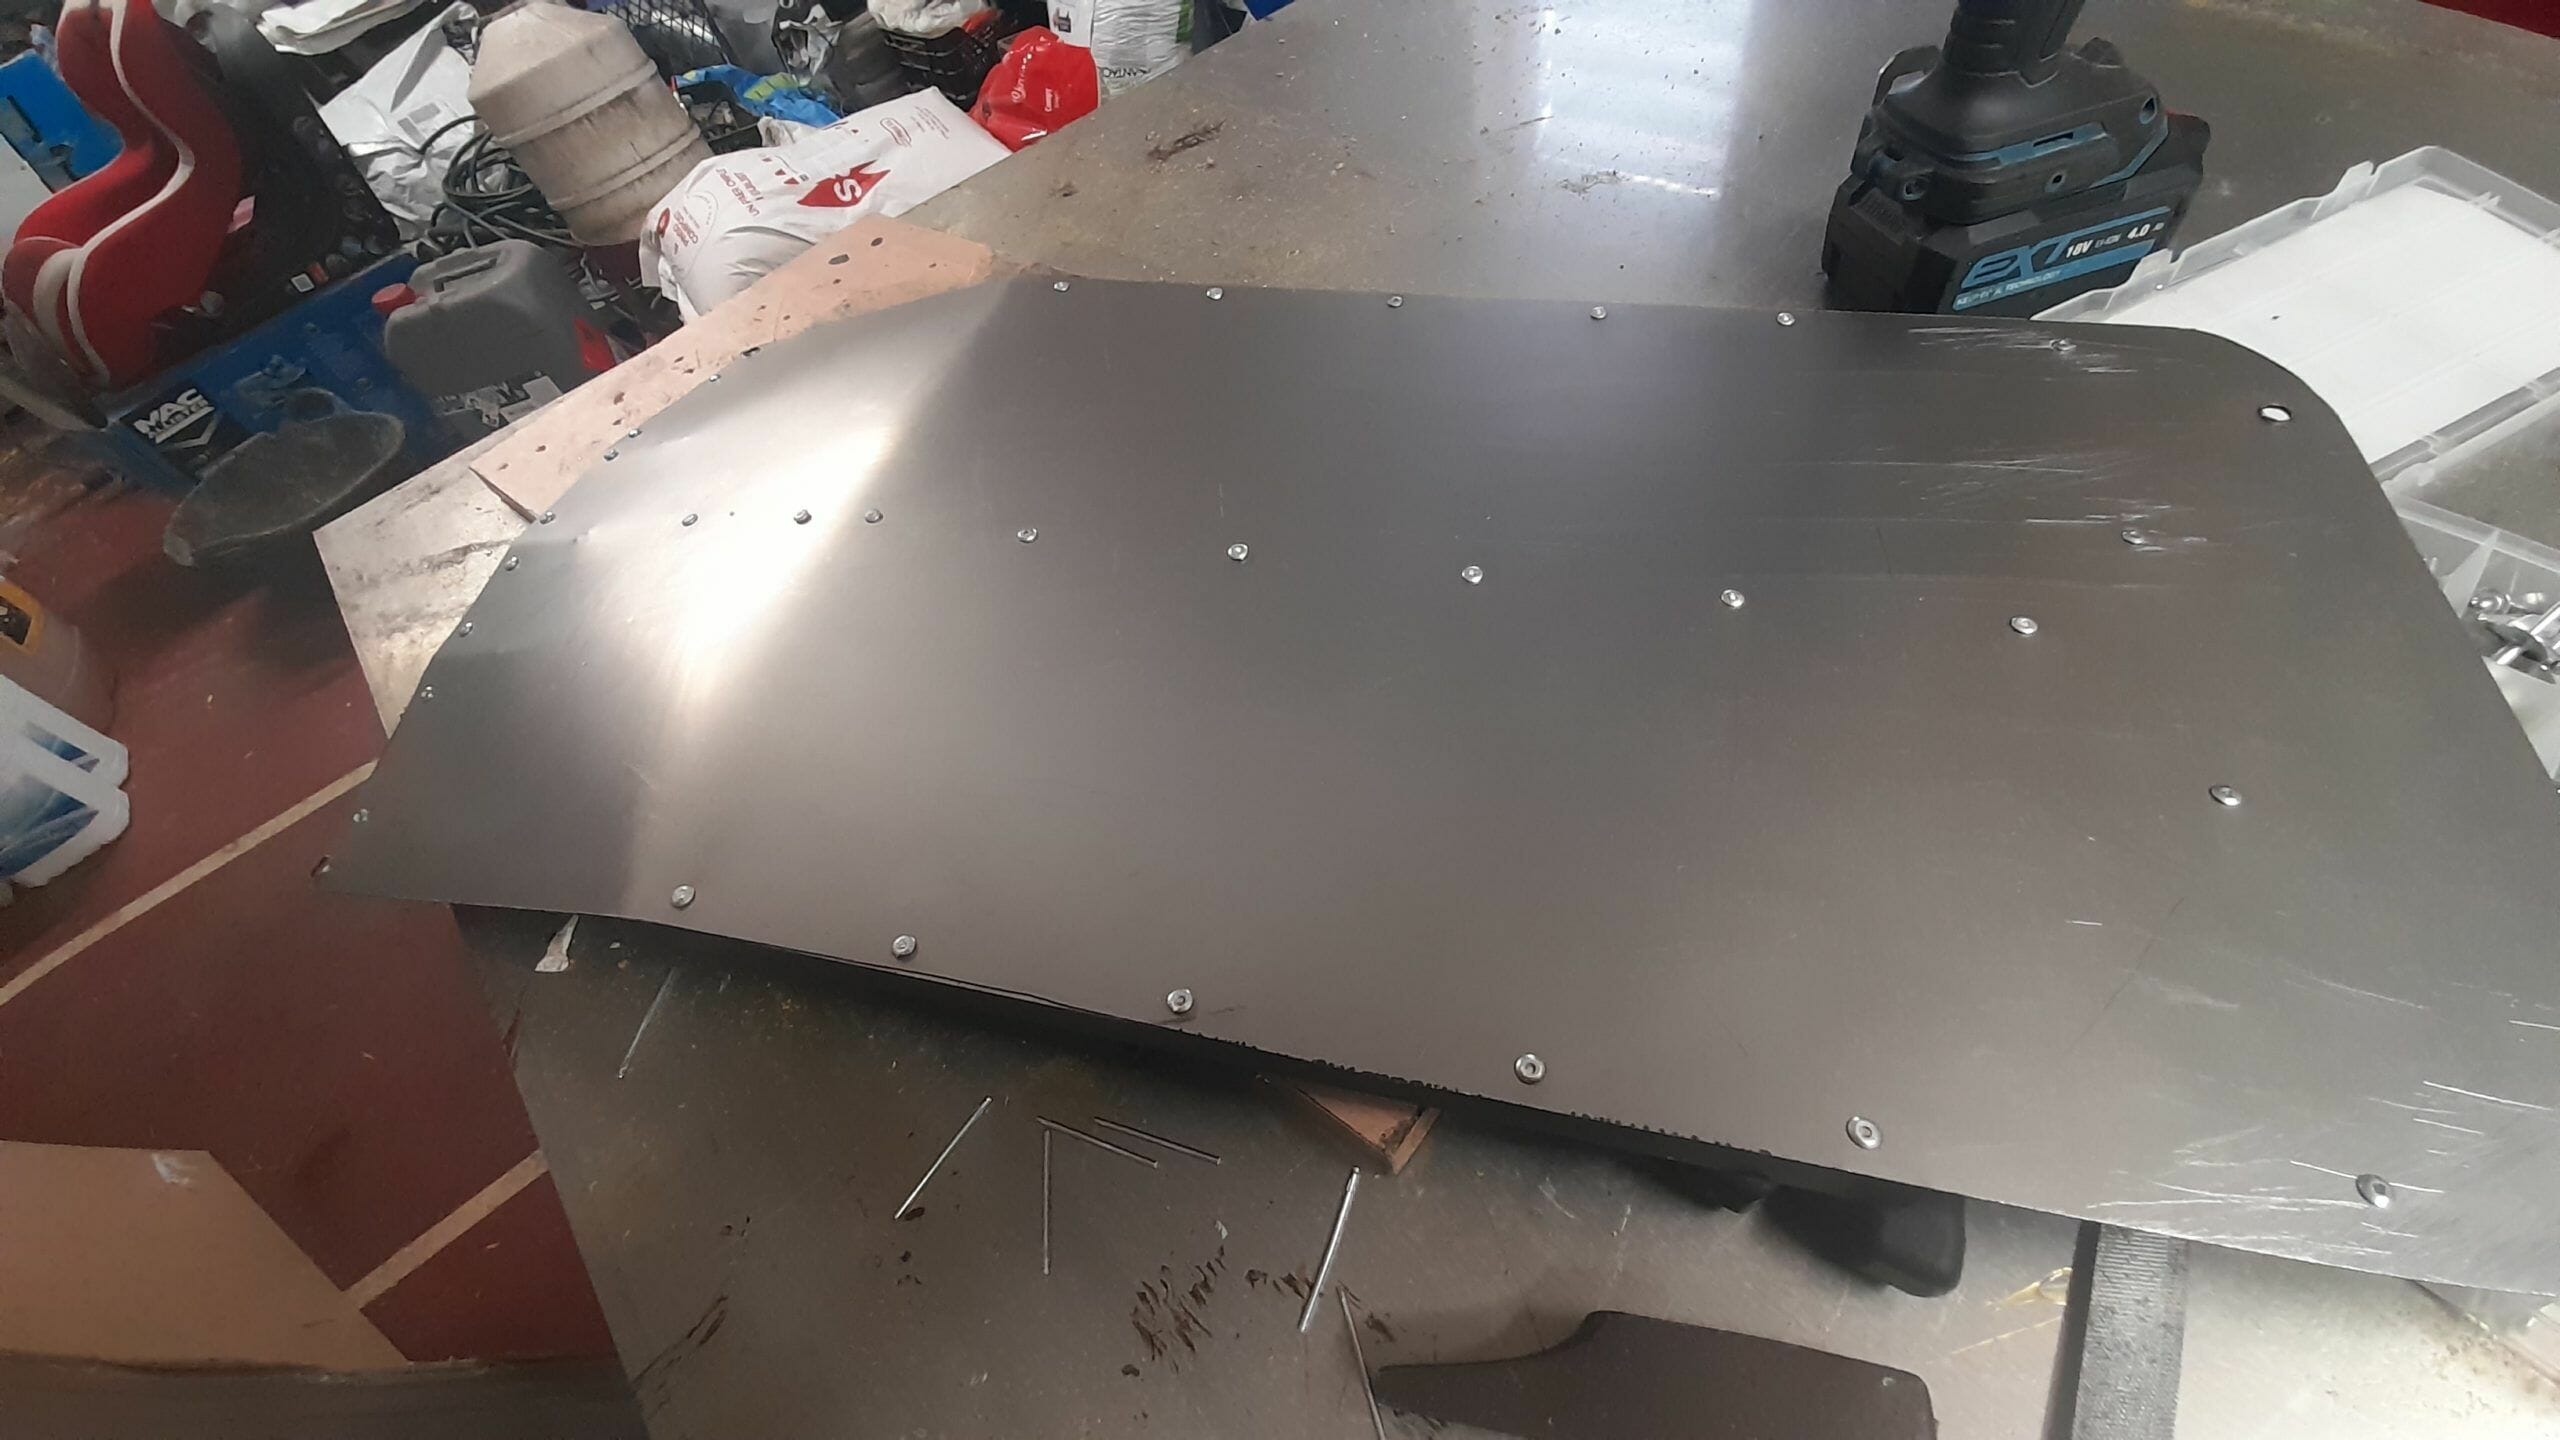
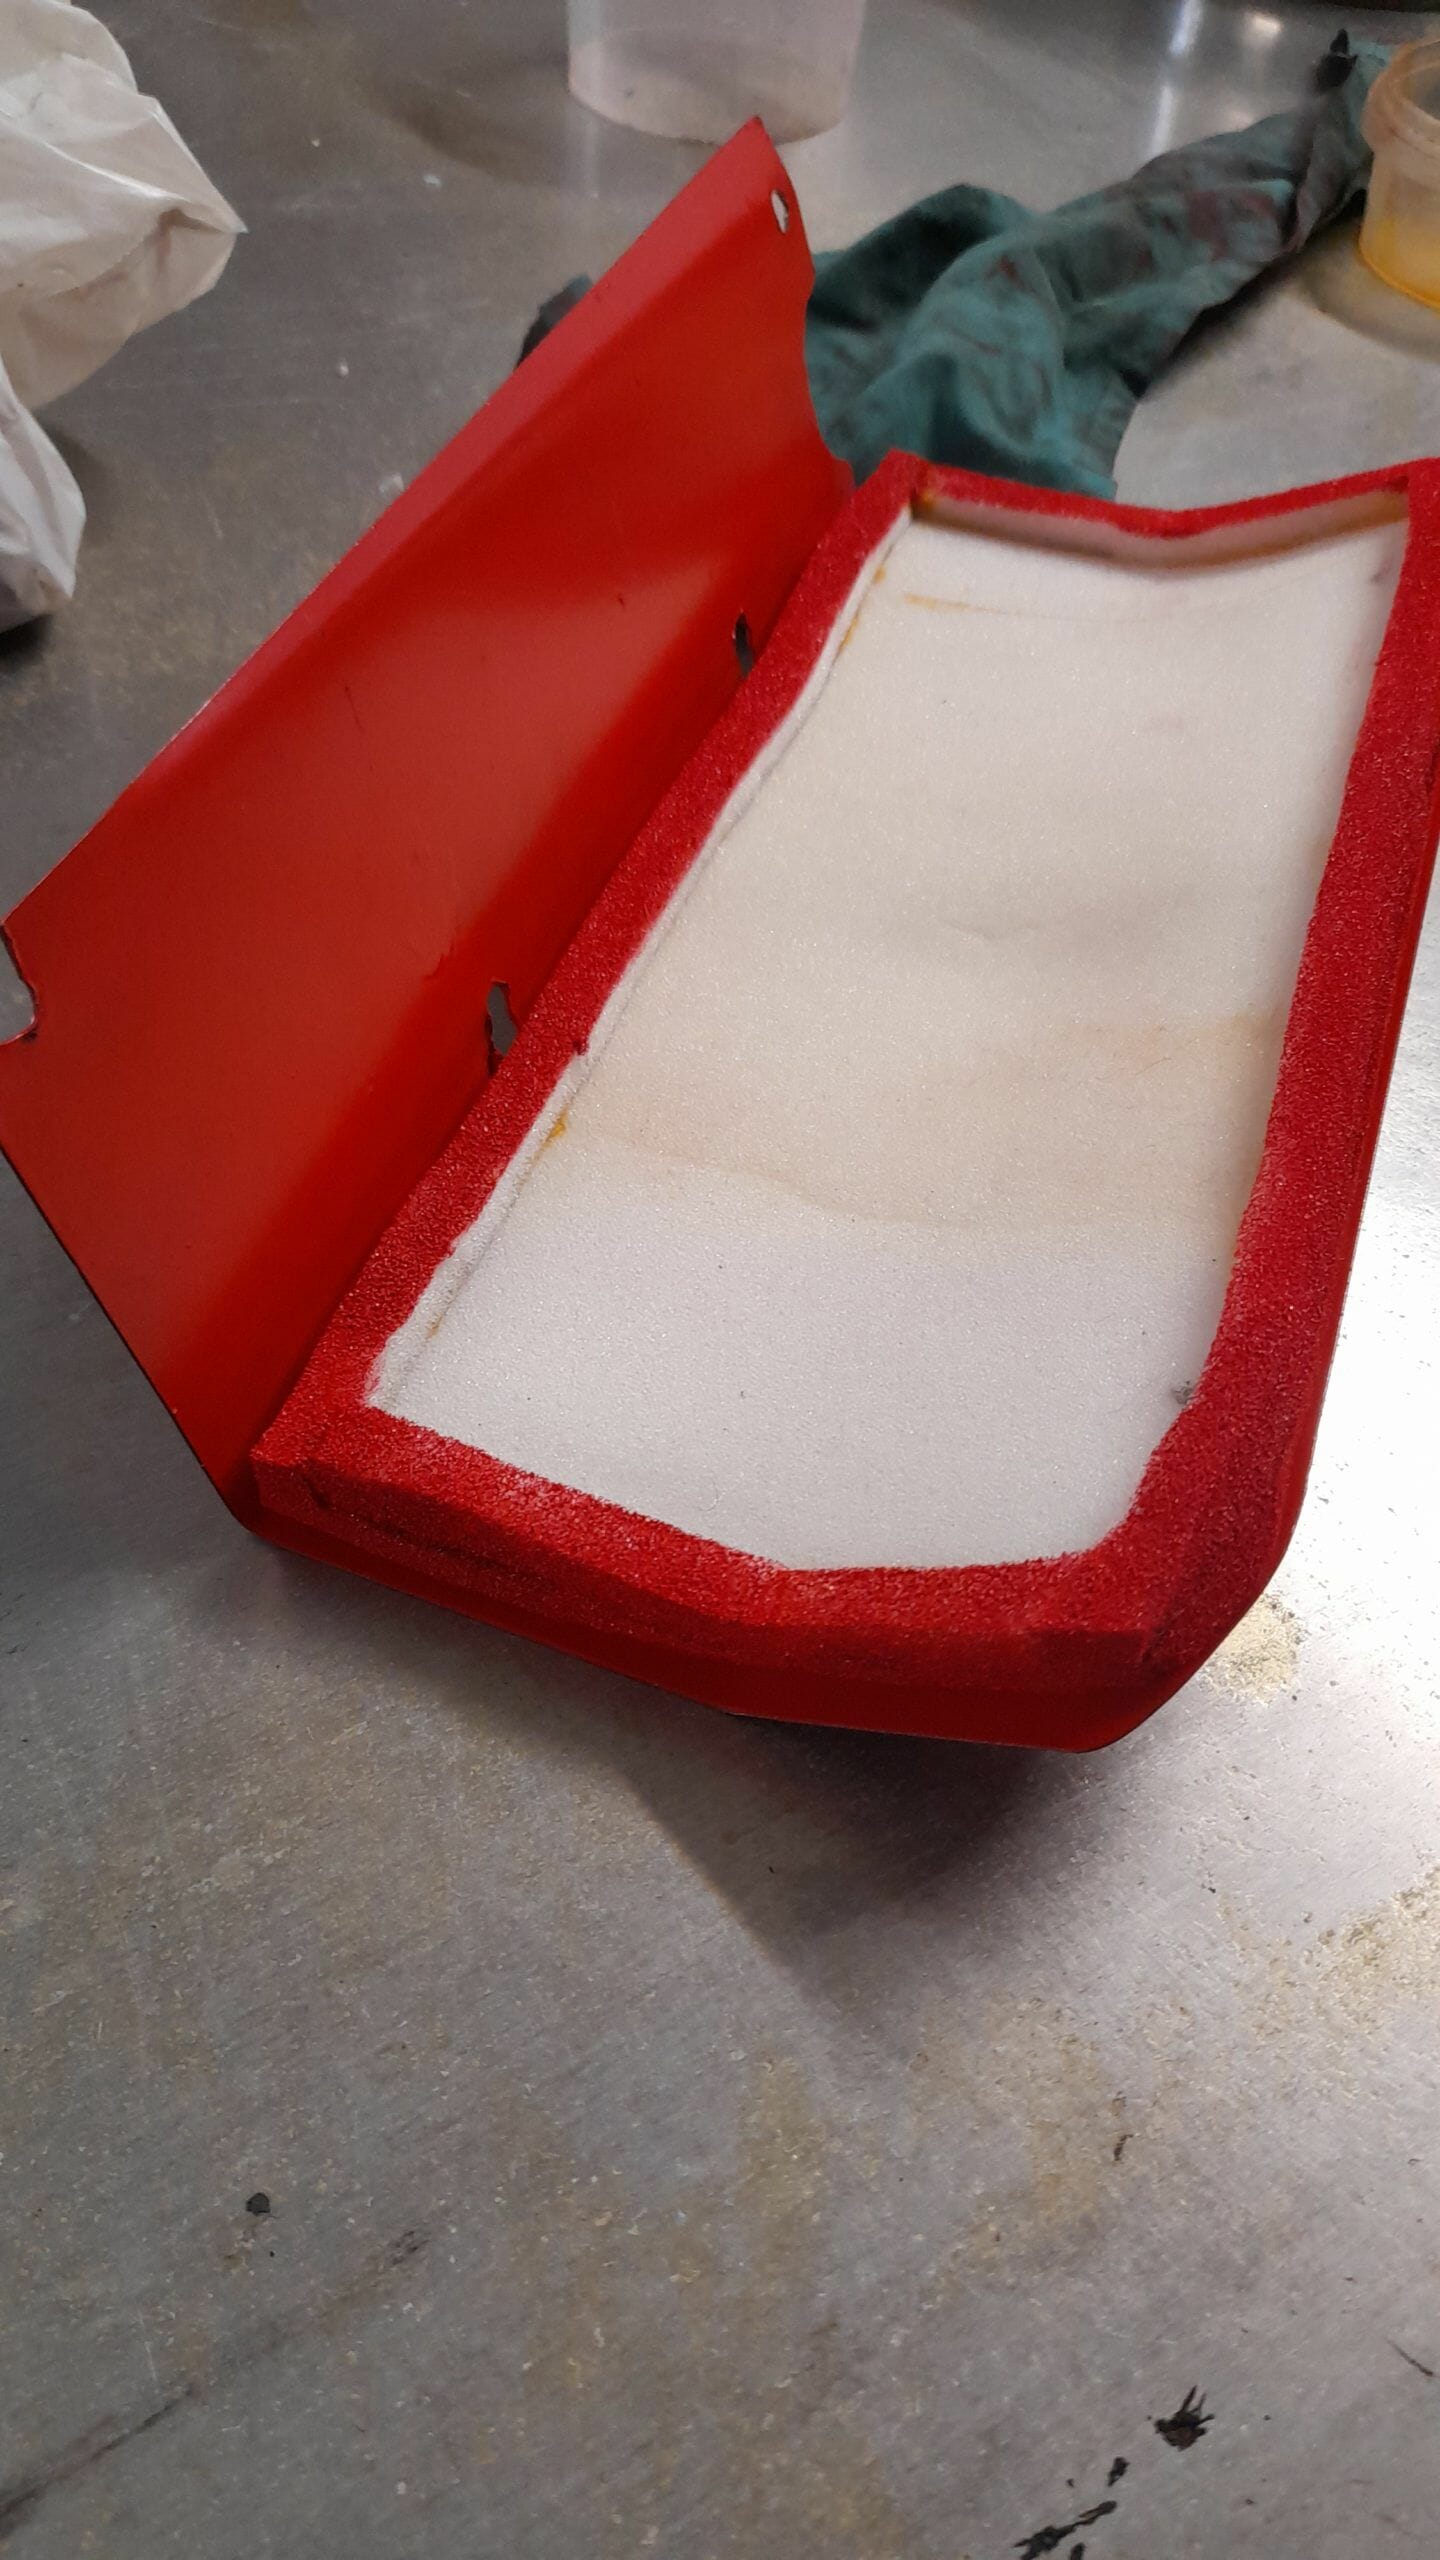
In our case, we have created the tray from ordinary 0.6 mm steel sheet. It is not a very thick one, but it has the advantage of being very workable. It can be easily bent, cut, drilled and shaped.


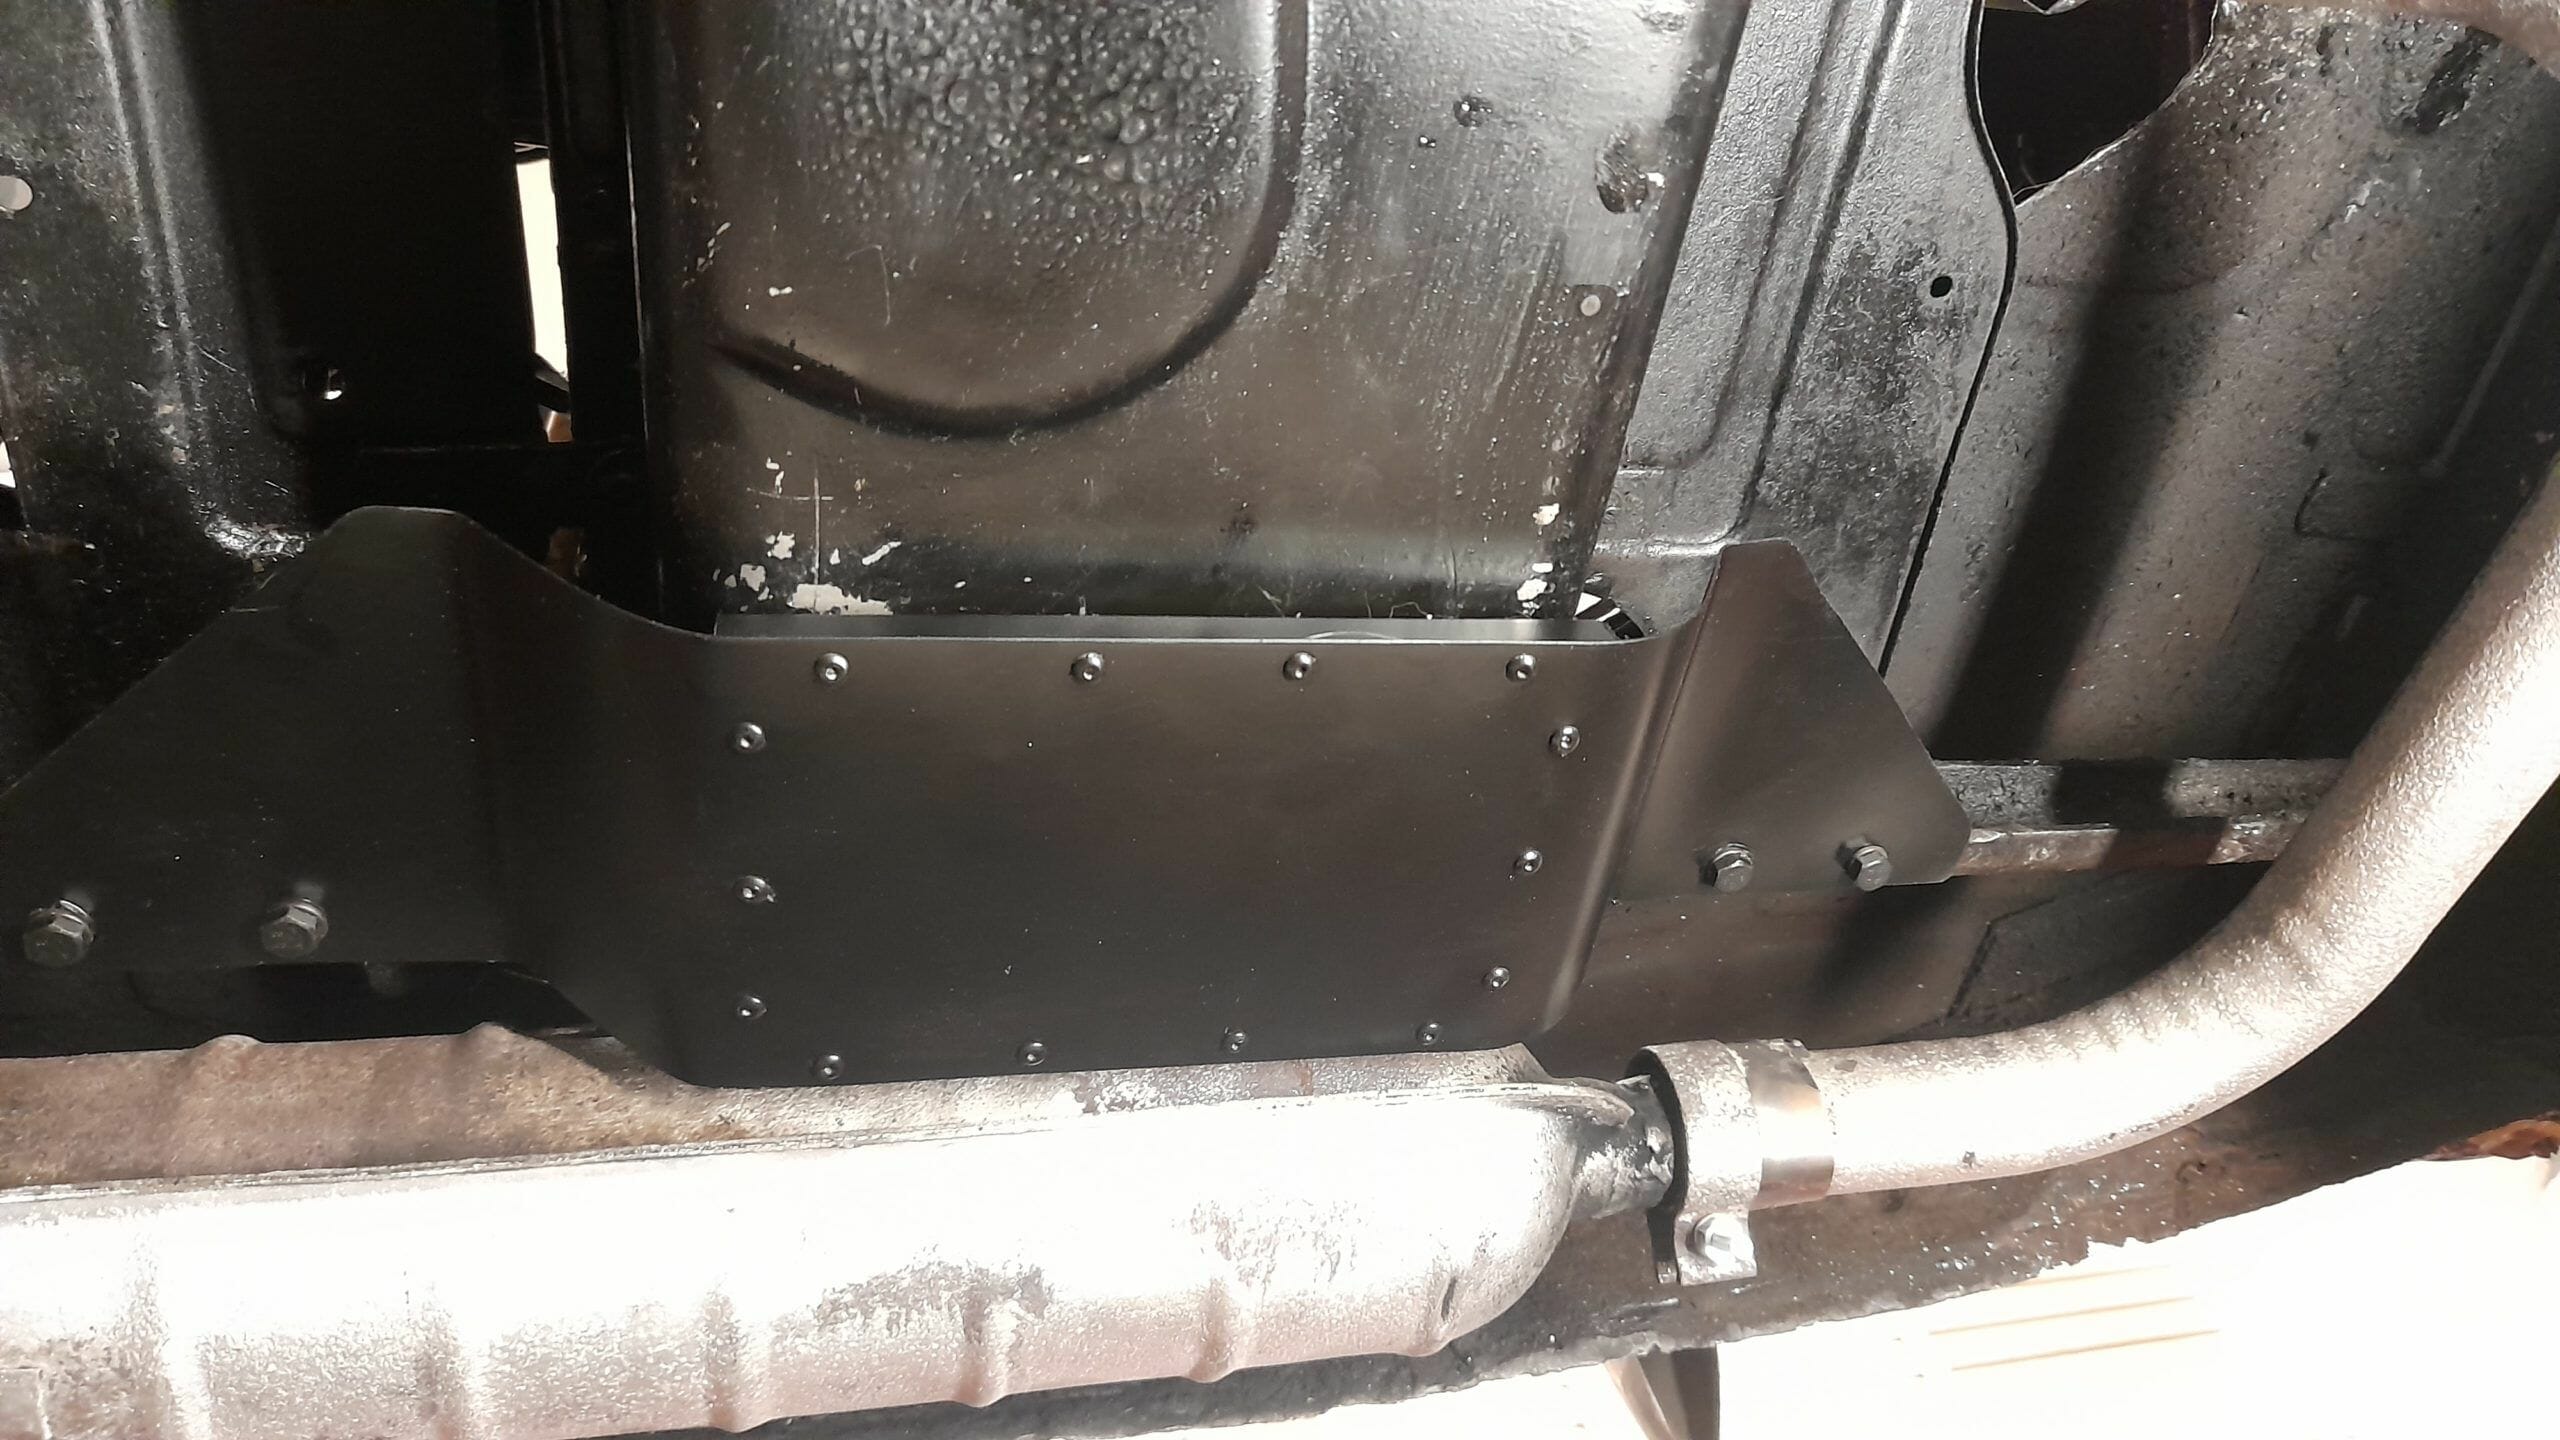
Structure of the oil pan
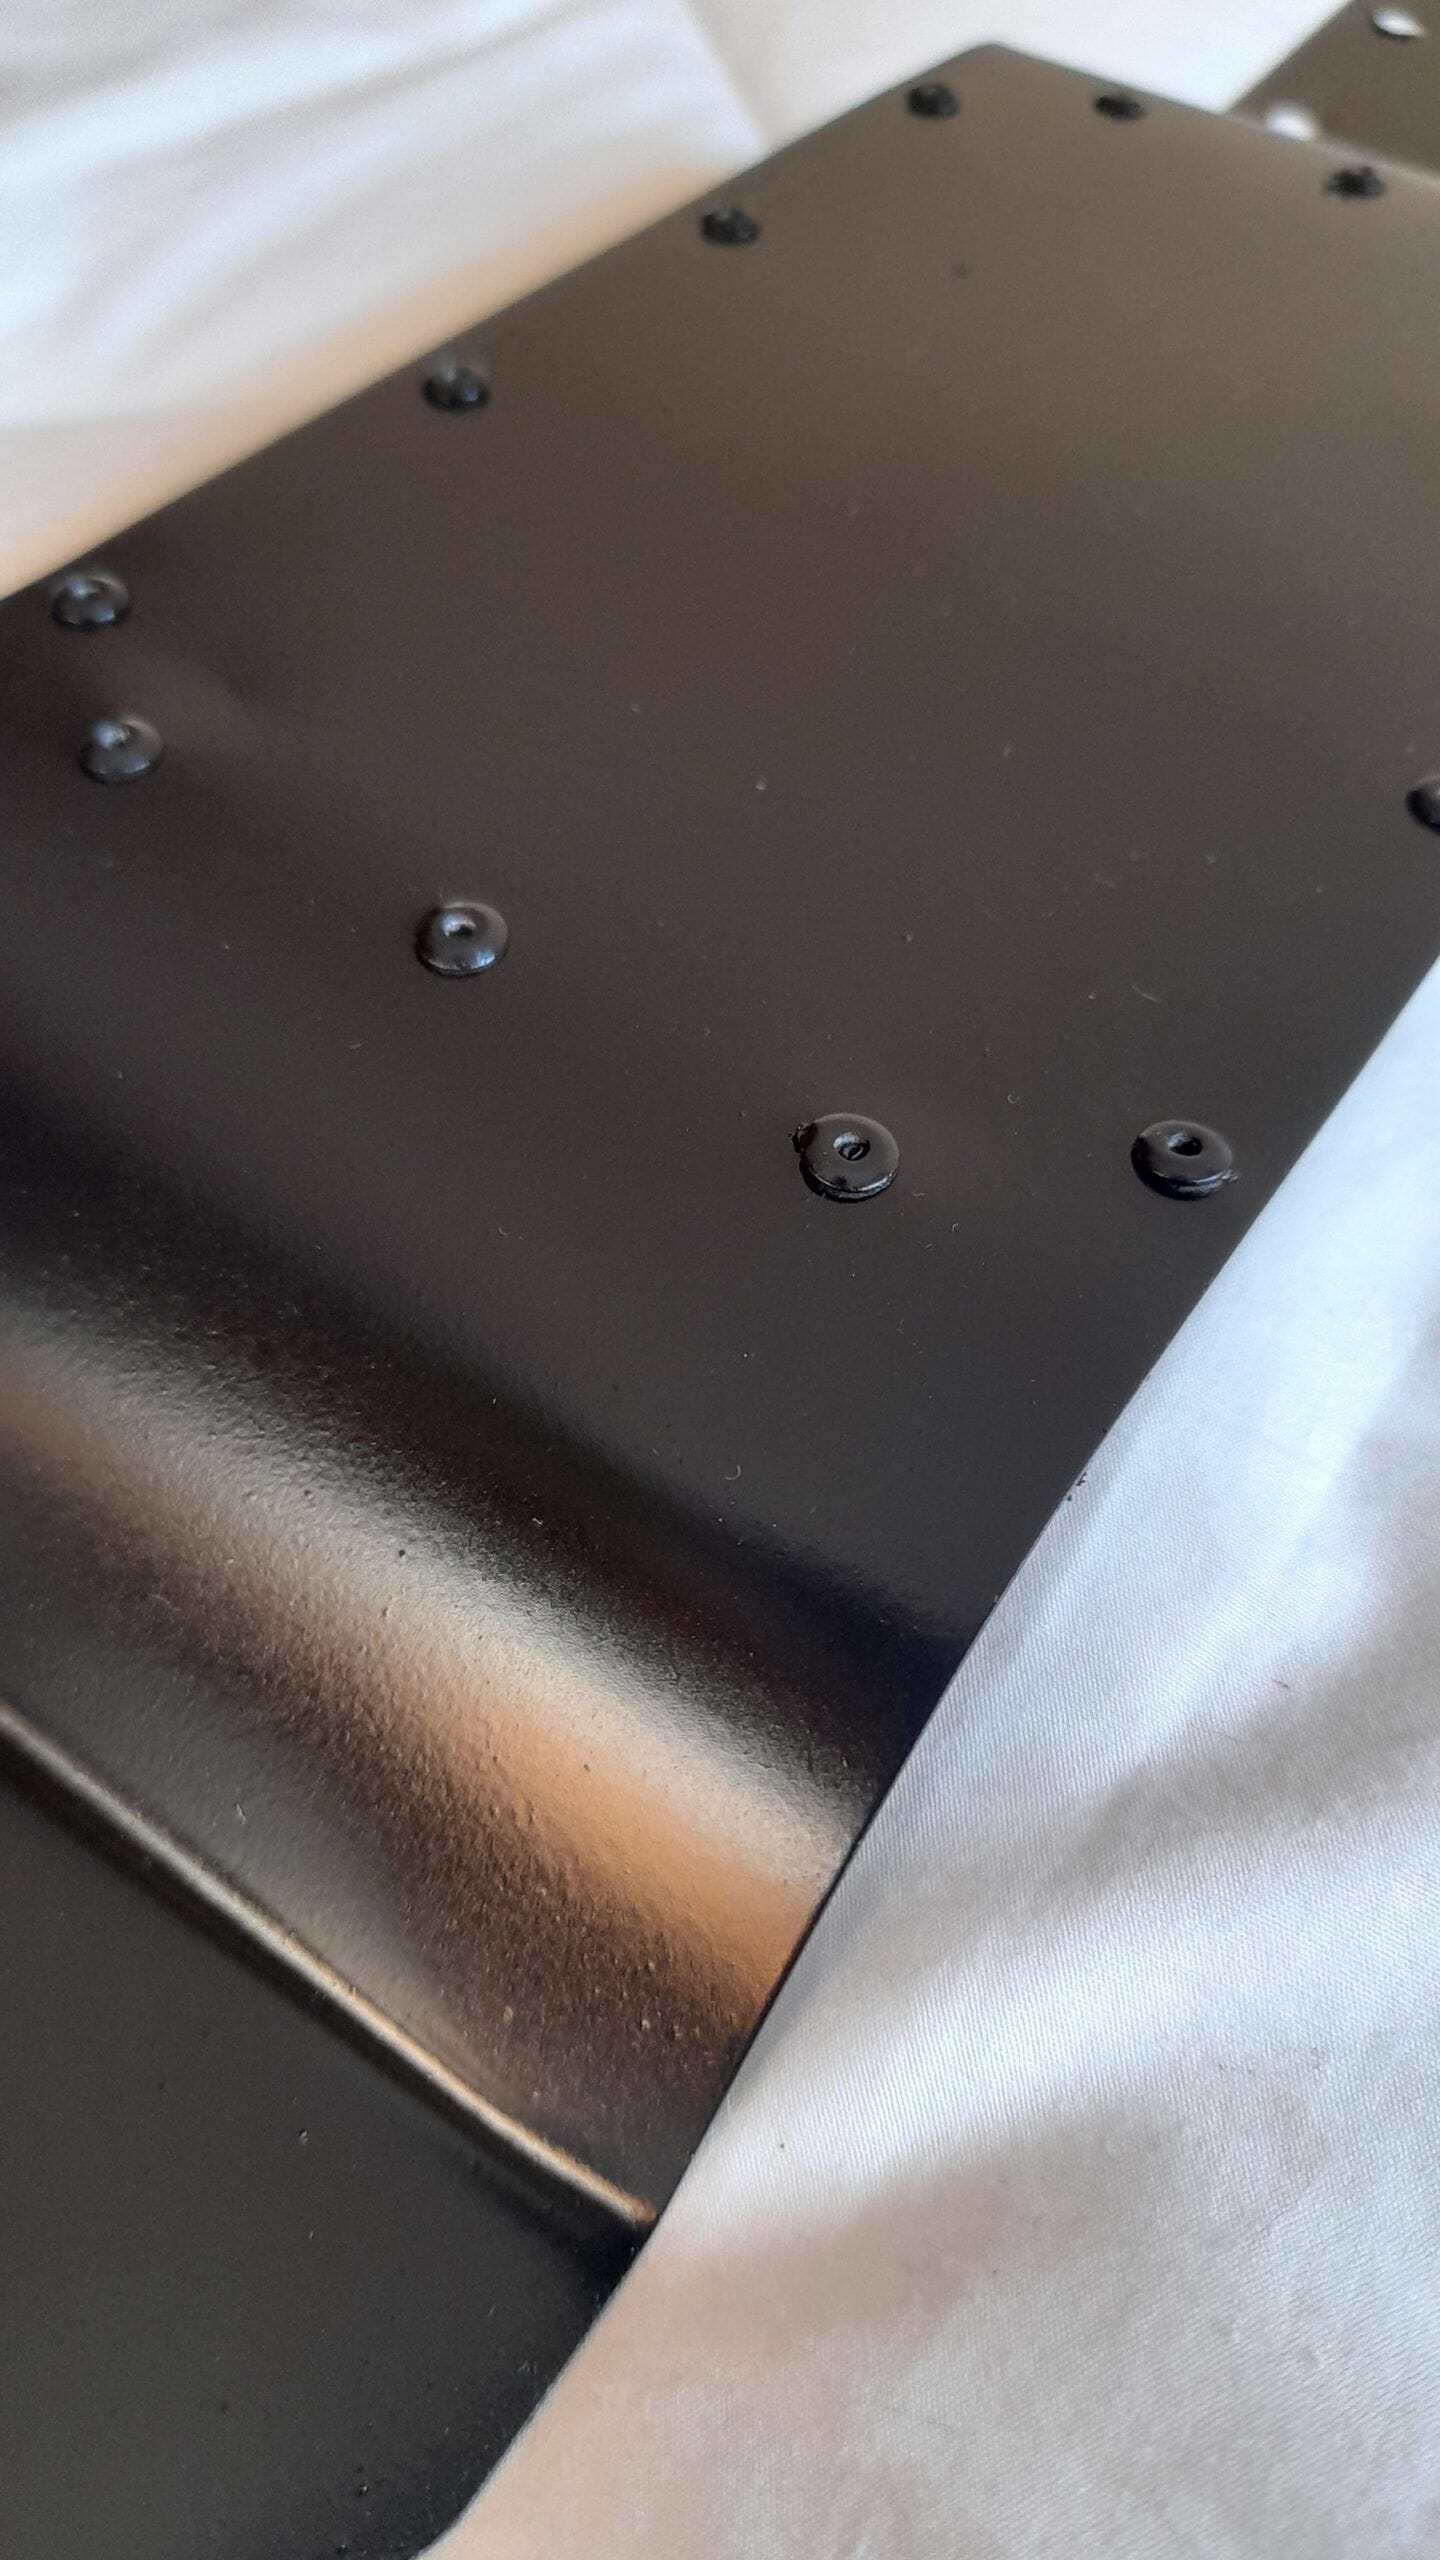
To give it rigidity, we have reinforced it with ribs made of aluminum profile and fastened with rivets. This will void you to have to weld in case you don’t have welding equipment or simply don’t know how to weld (welding in a “clean” way over a steel sheet without piercing it requires some experience):

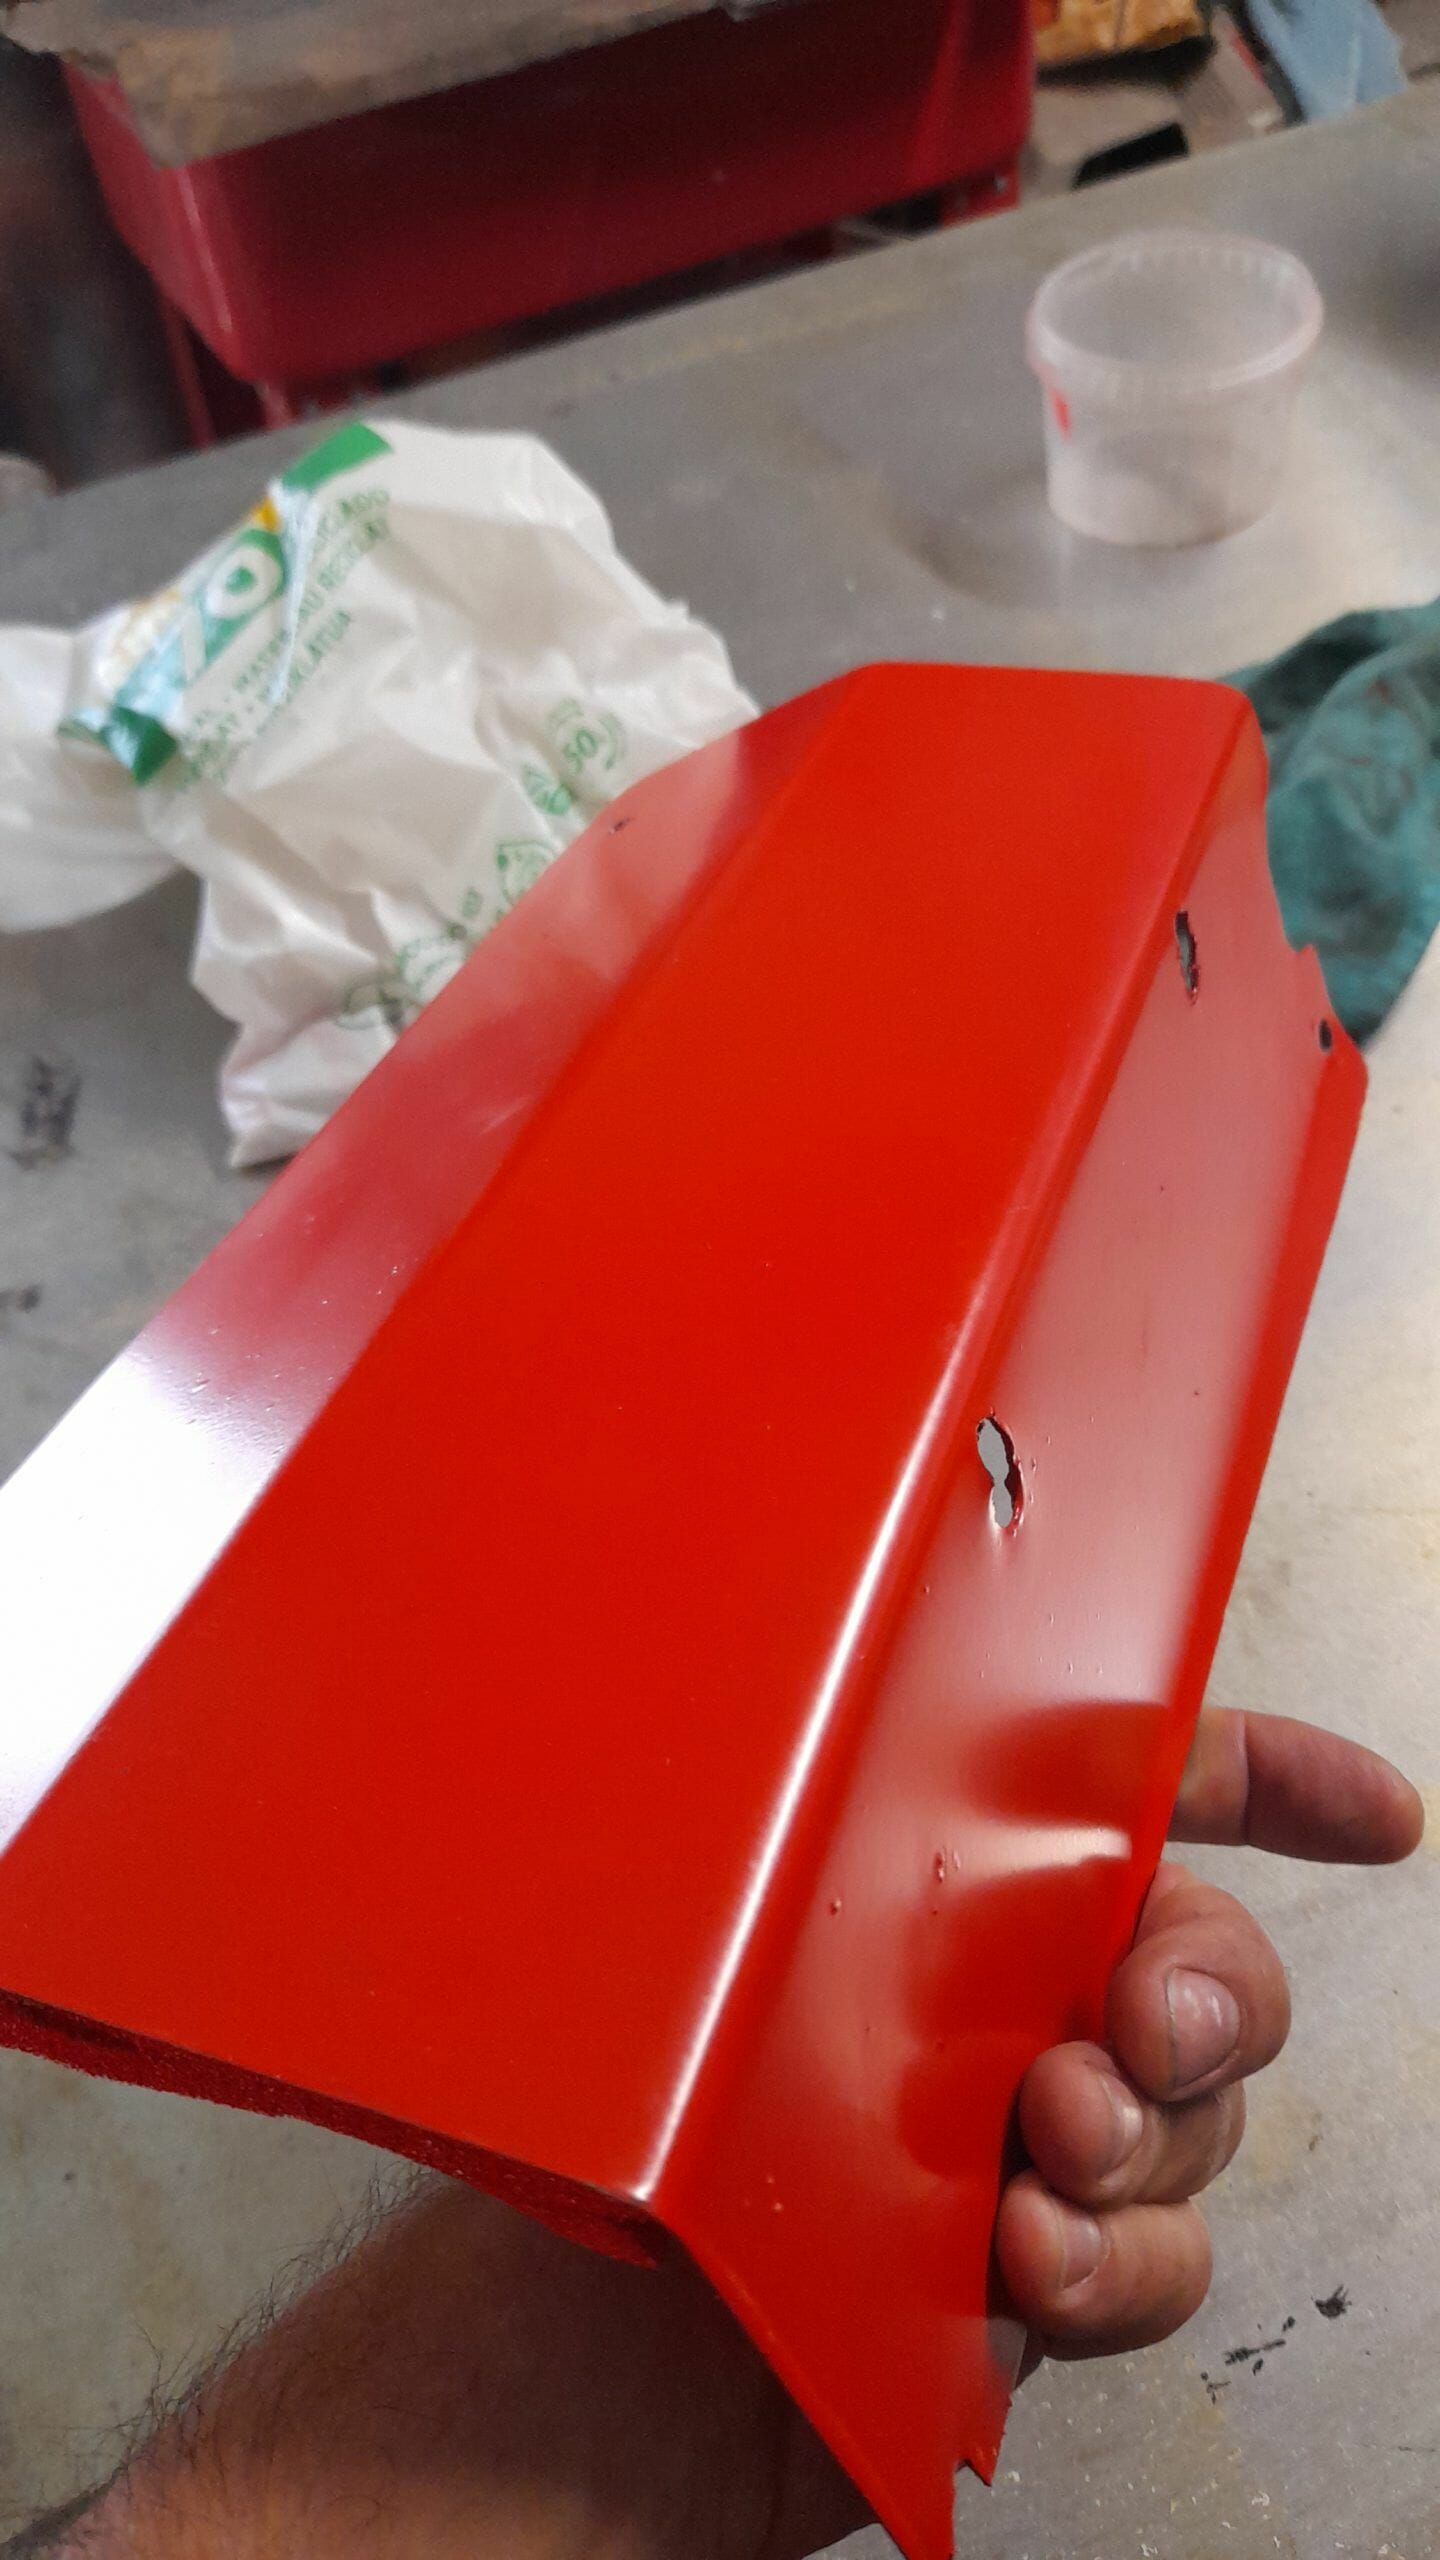
We have chosen ordinary steel and not stainless steel for ease of painting. In our case, we wanted to install a tray that would be aesthetically integrated as much as possible with the underbody of the car and would not be an element too “visible”.
Painting
For the painting, we have given a coat of primer “Beissier todo terreno” black color (it is water-based, and has a very high adhesion power on any material, in another article I will talk about usable paints). This is from Spain, but fr sure you will find something similar in your country/area. I strongly recommend that you apply a coat of primer because if you use aluminum profiles in the assembly, the direct paint does not adhere very well on this material.
Then we applied satin black polyurethane lacquer. Titanlak from Titan, although it is a “domestic” range paint, has an excellent quality, and if left to dry for the right time (it takes at least 4 days to reach maximum hardness) it is extremely resistant.(again, your local dealers in your country will be able to provide you similar paint type if you want to use it)
Applying the paint with an airbrush, will provide you an excellent result, which is completely integrated in the underbody of the vehicle.

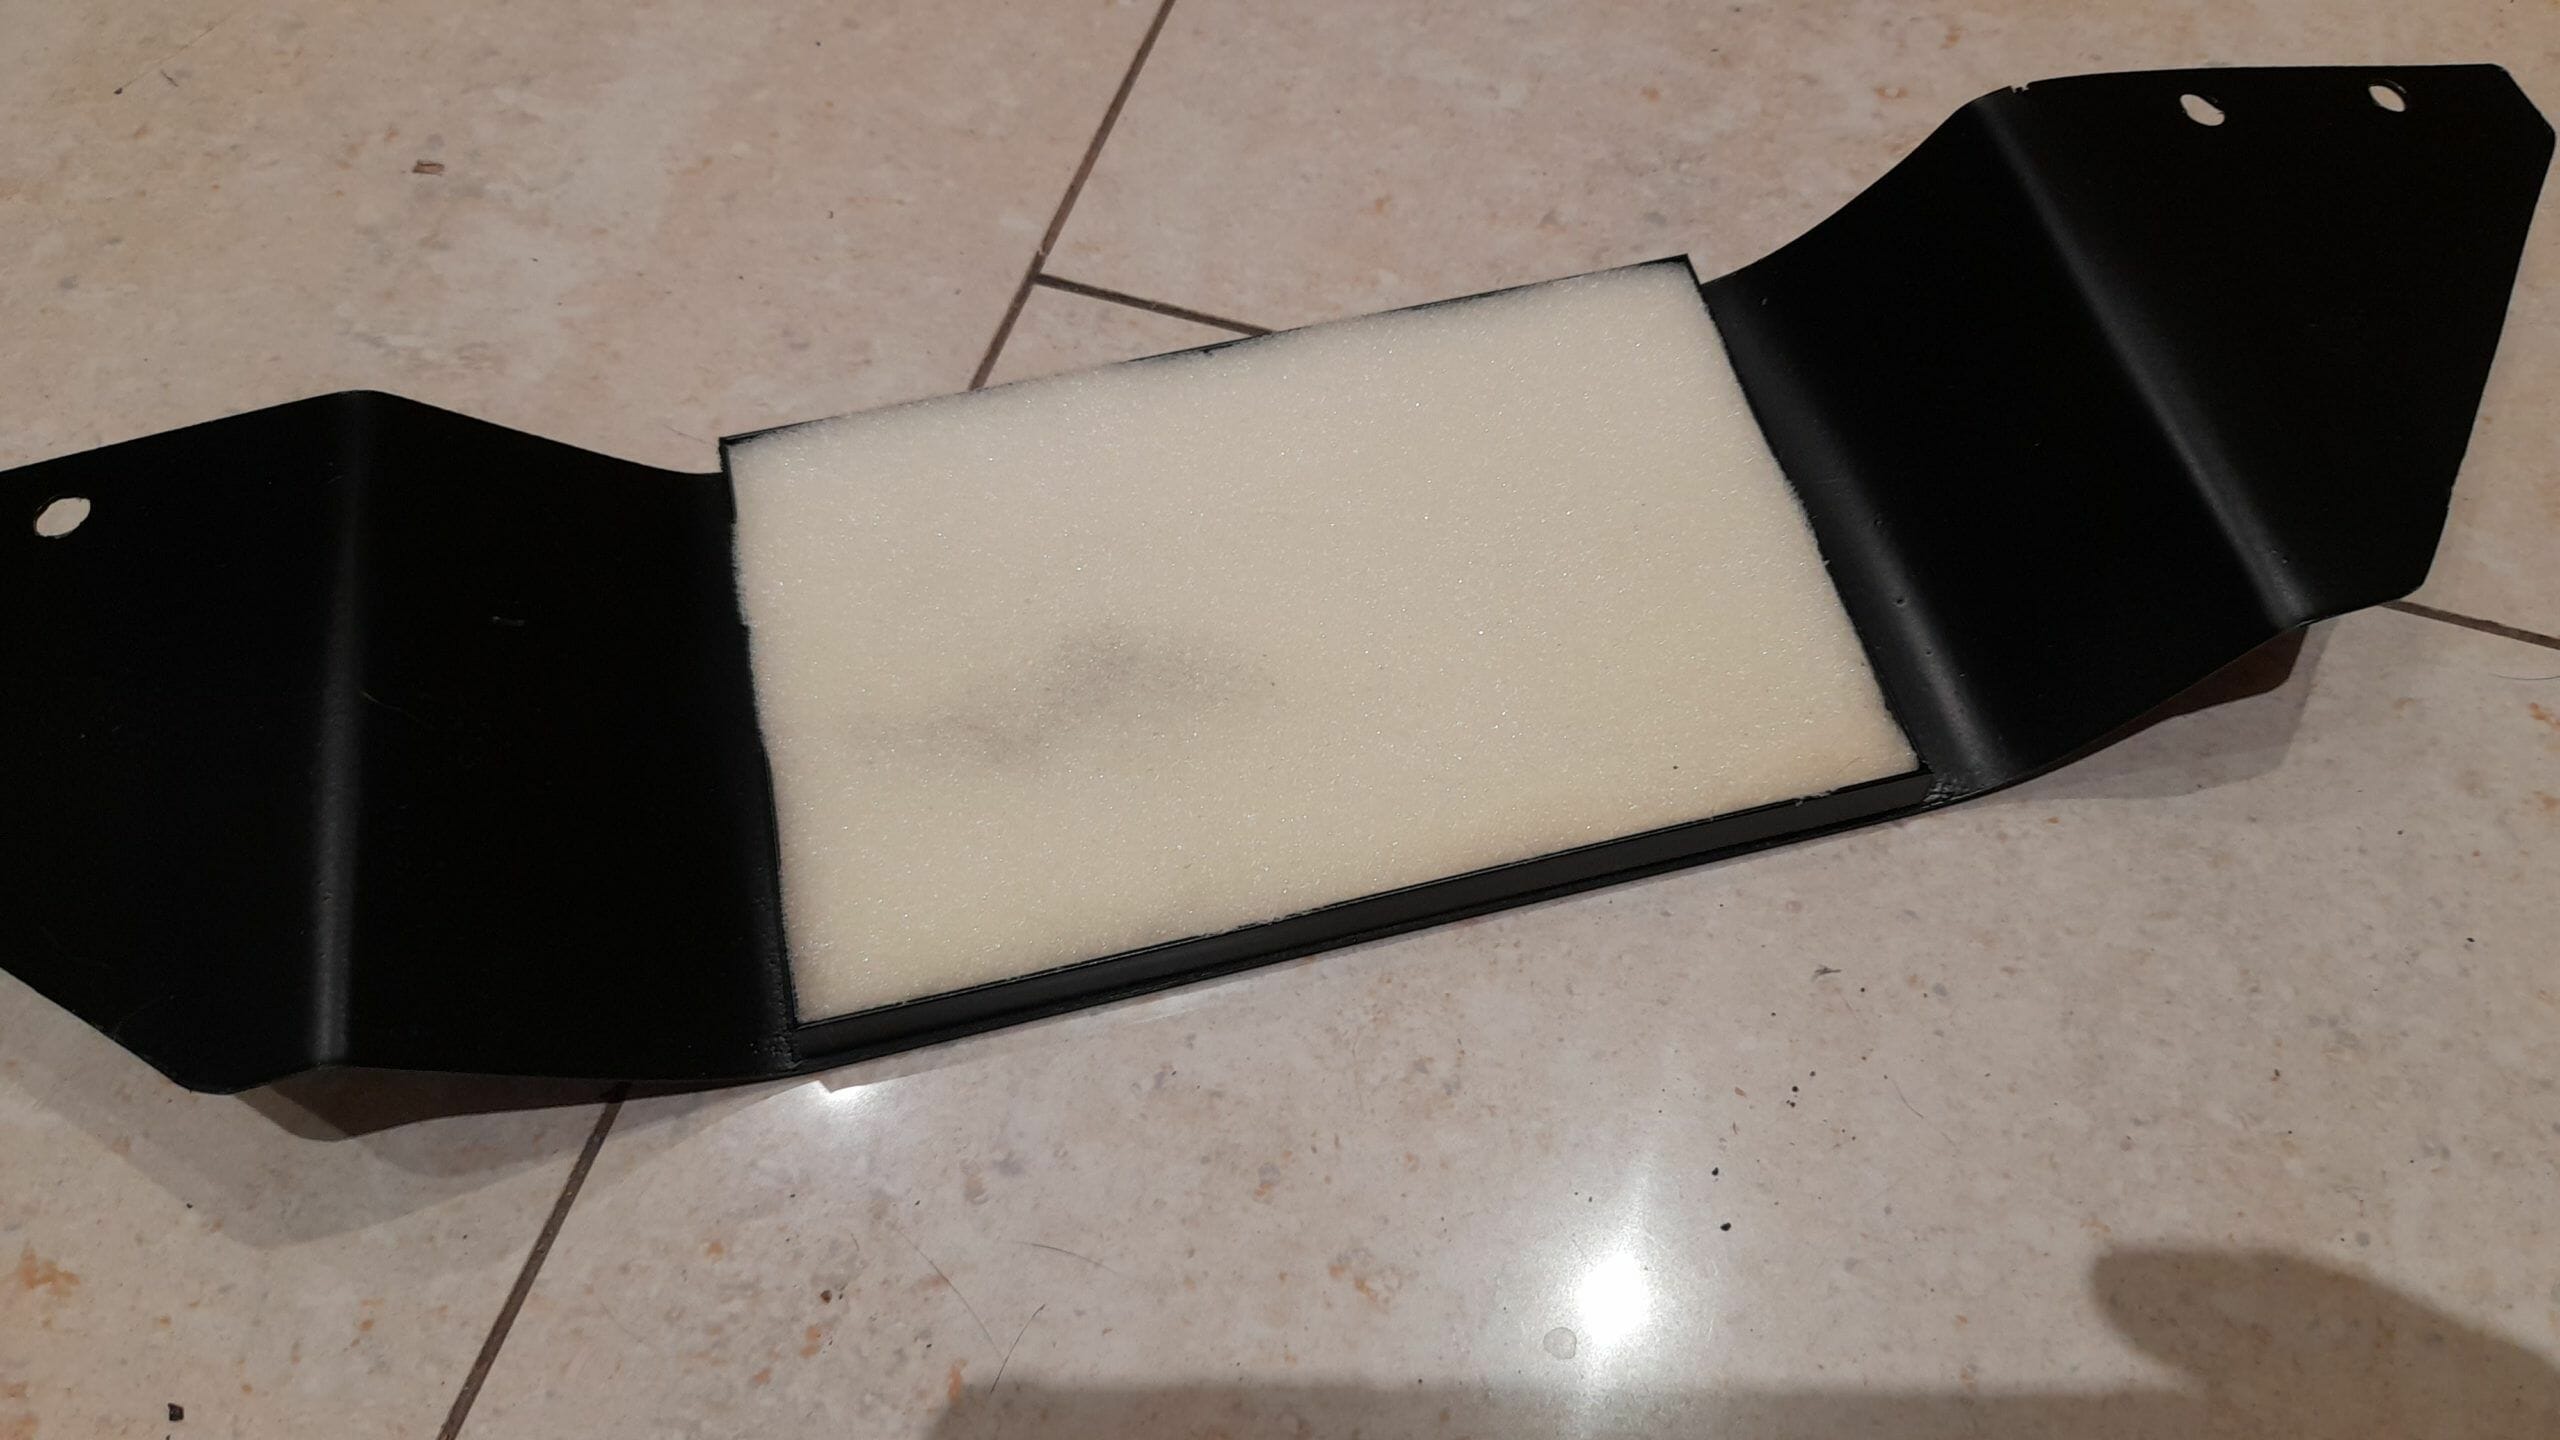
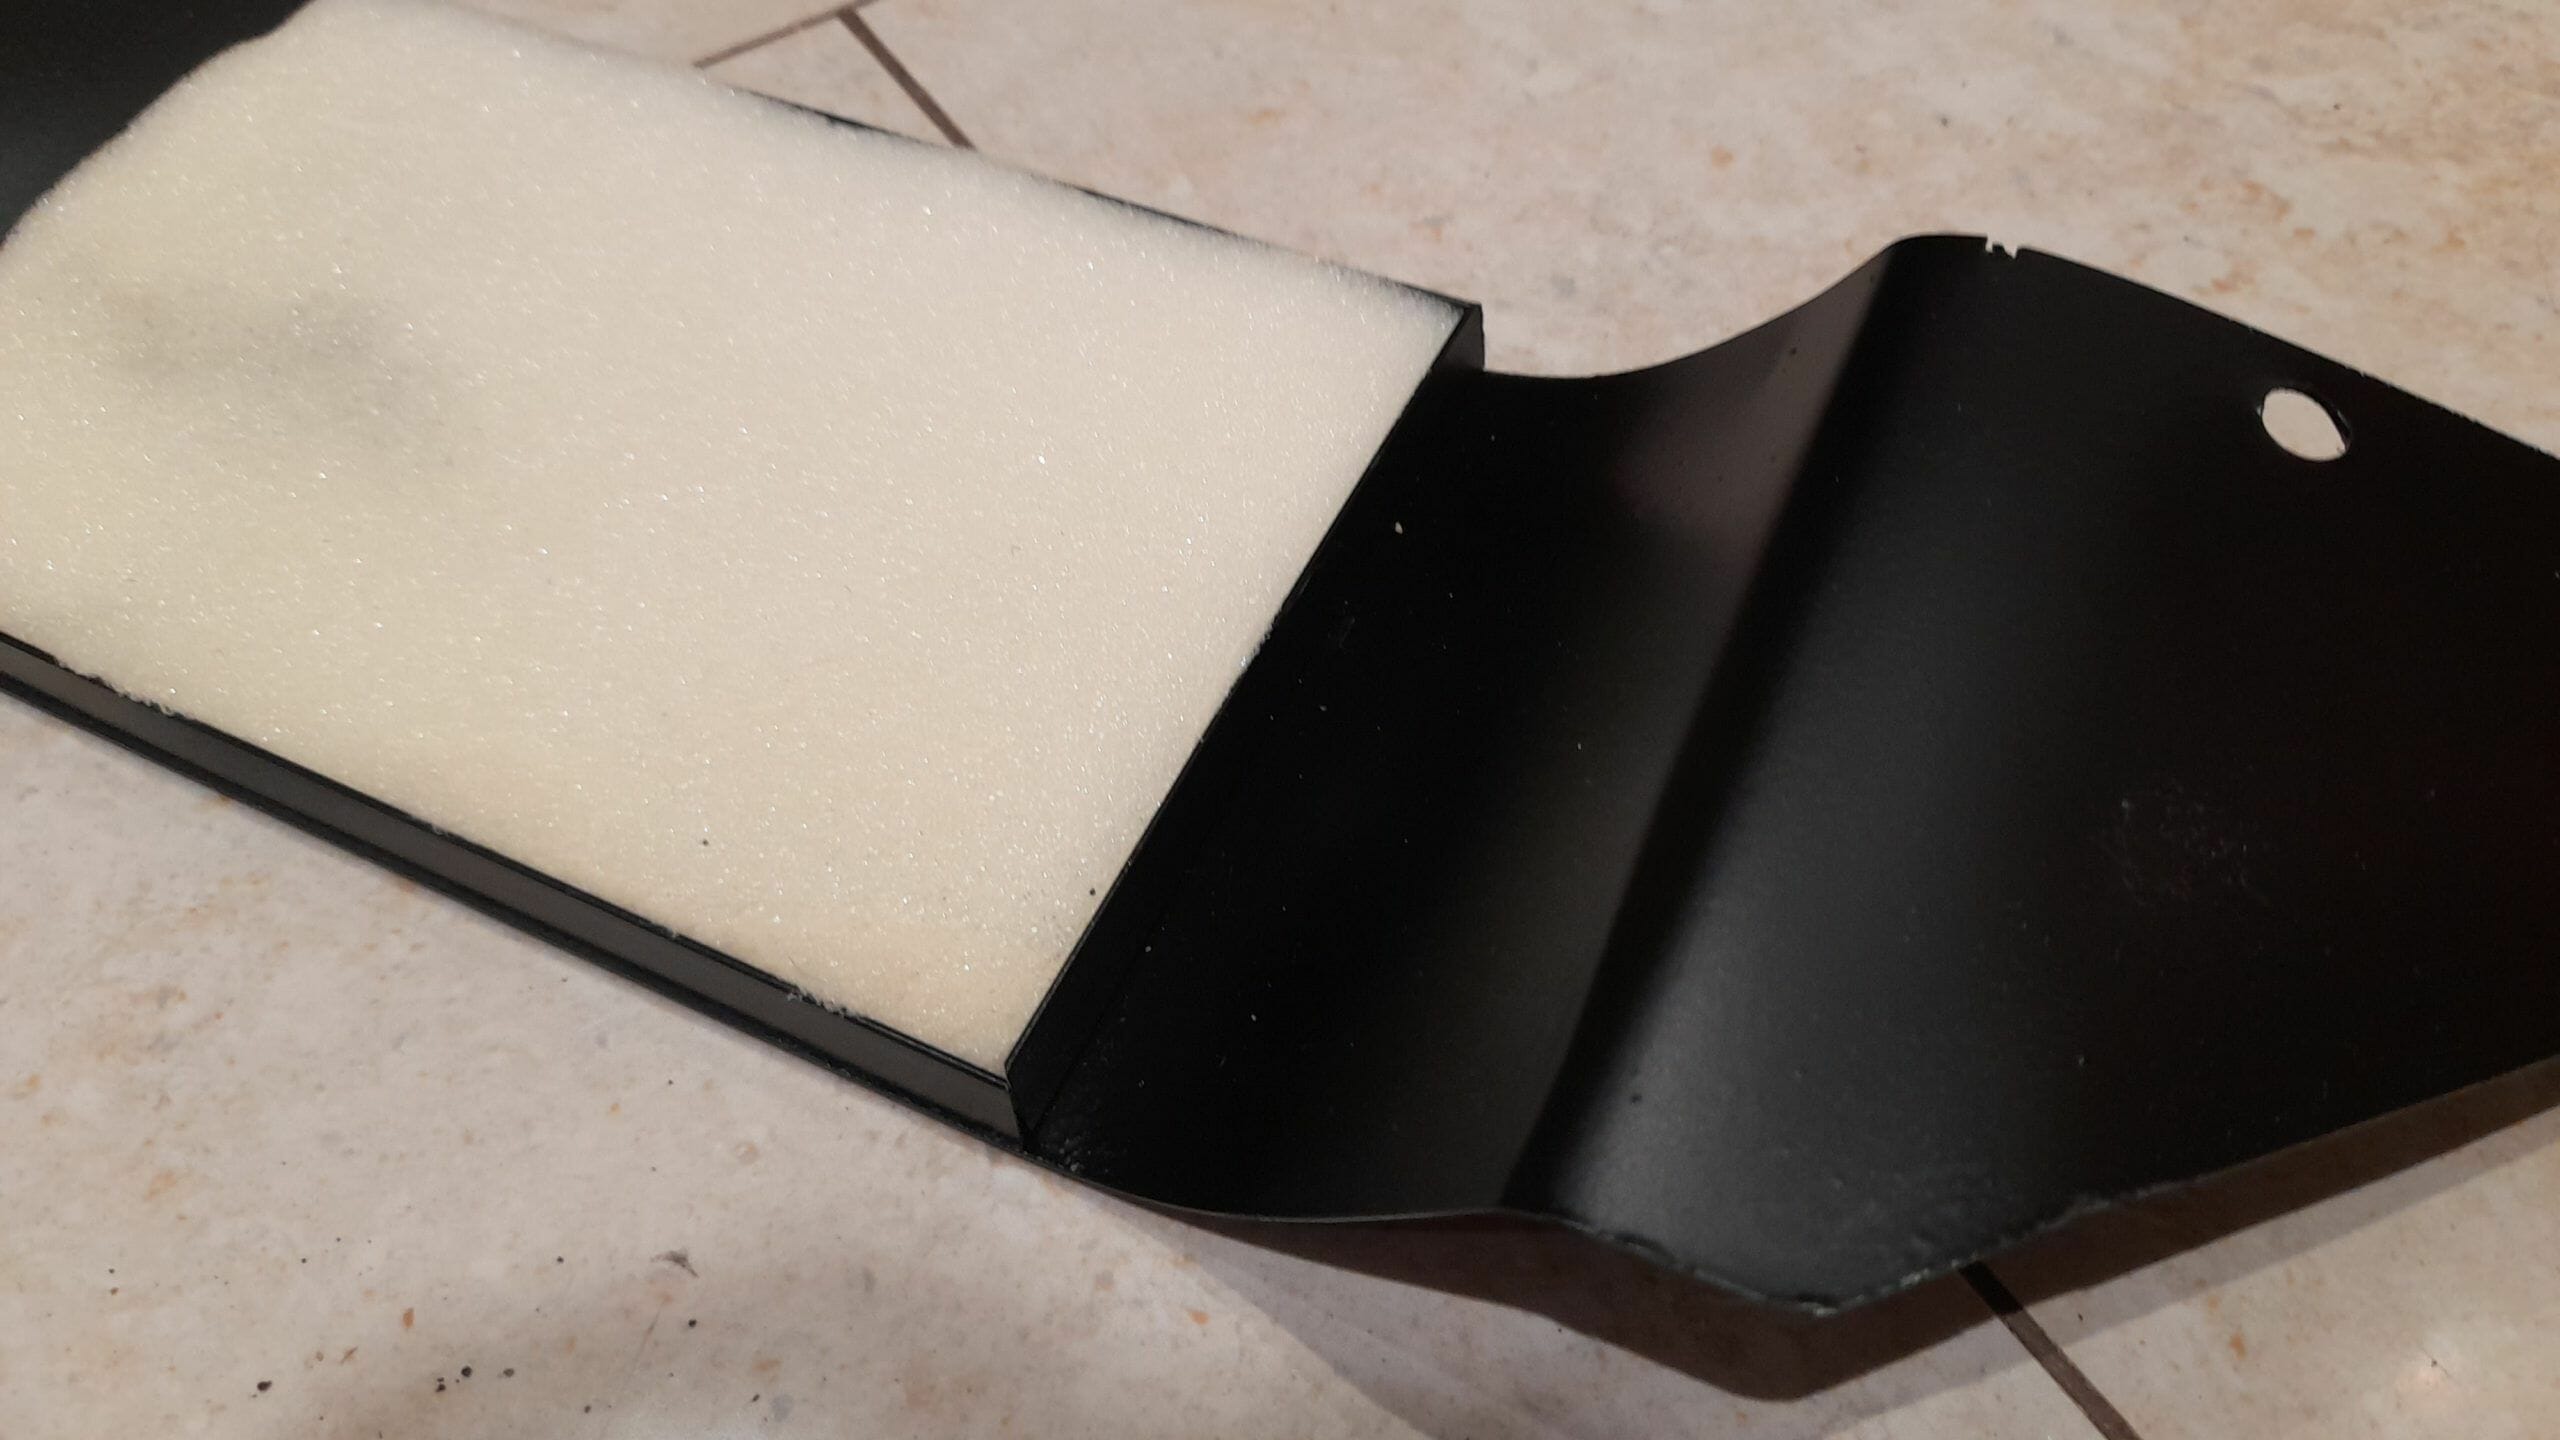
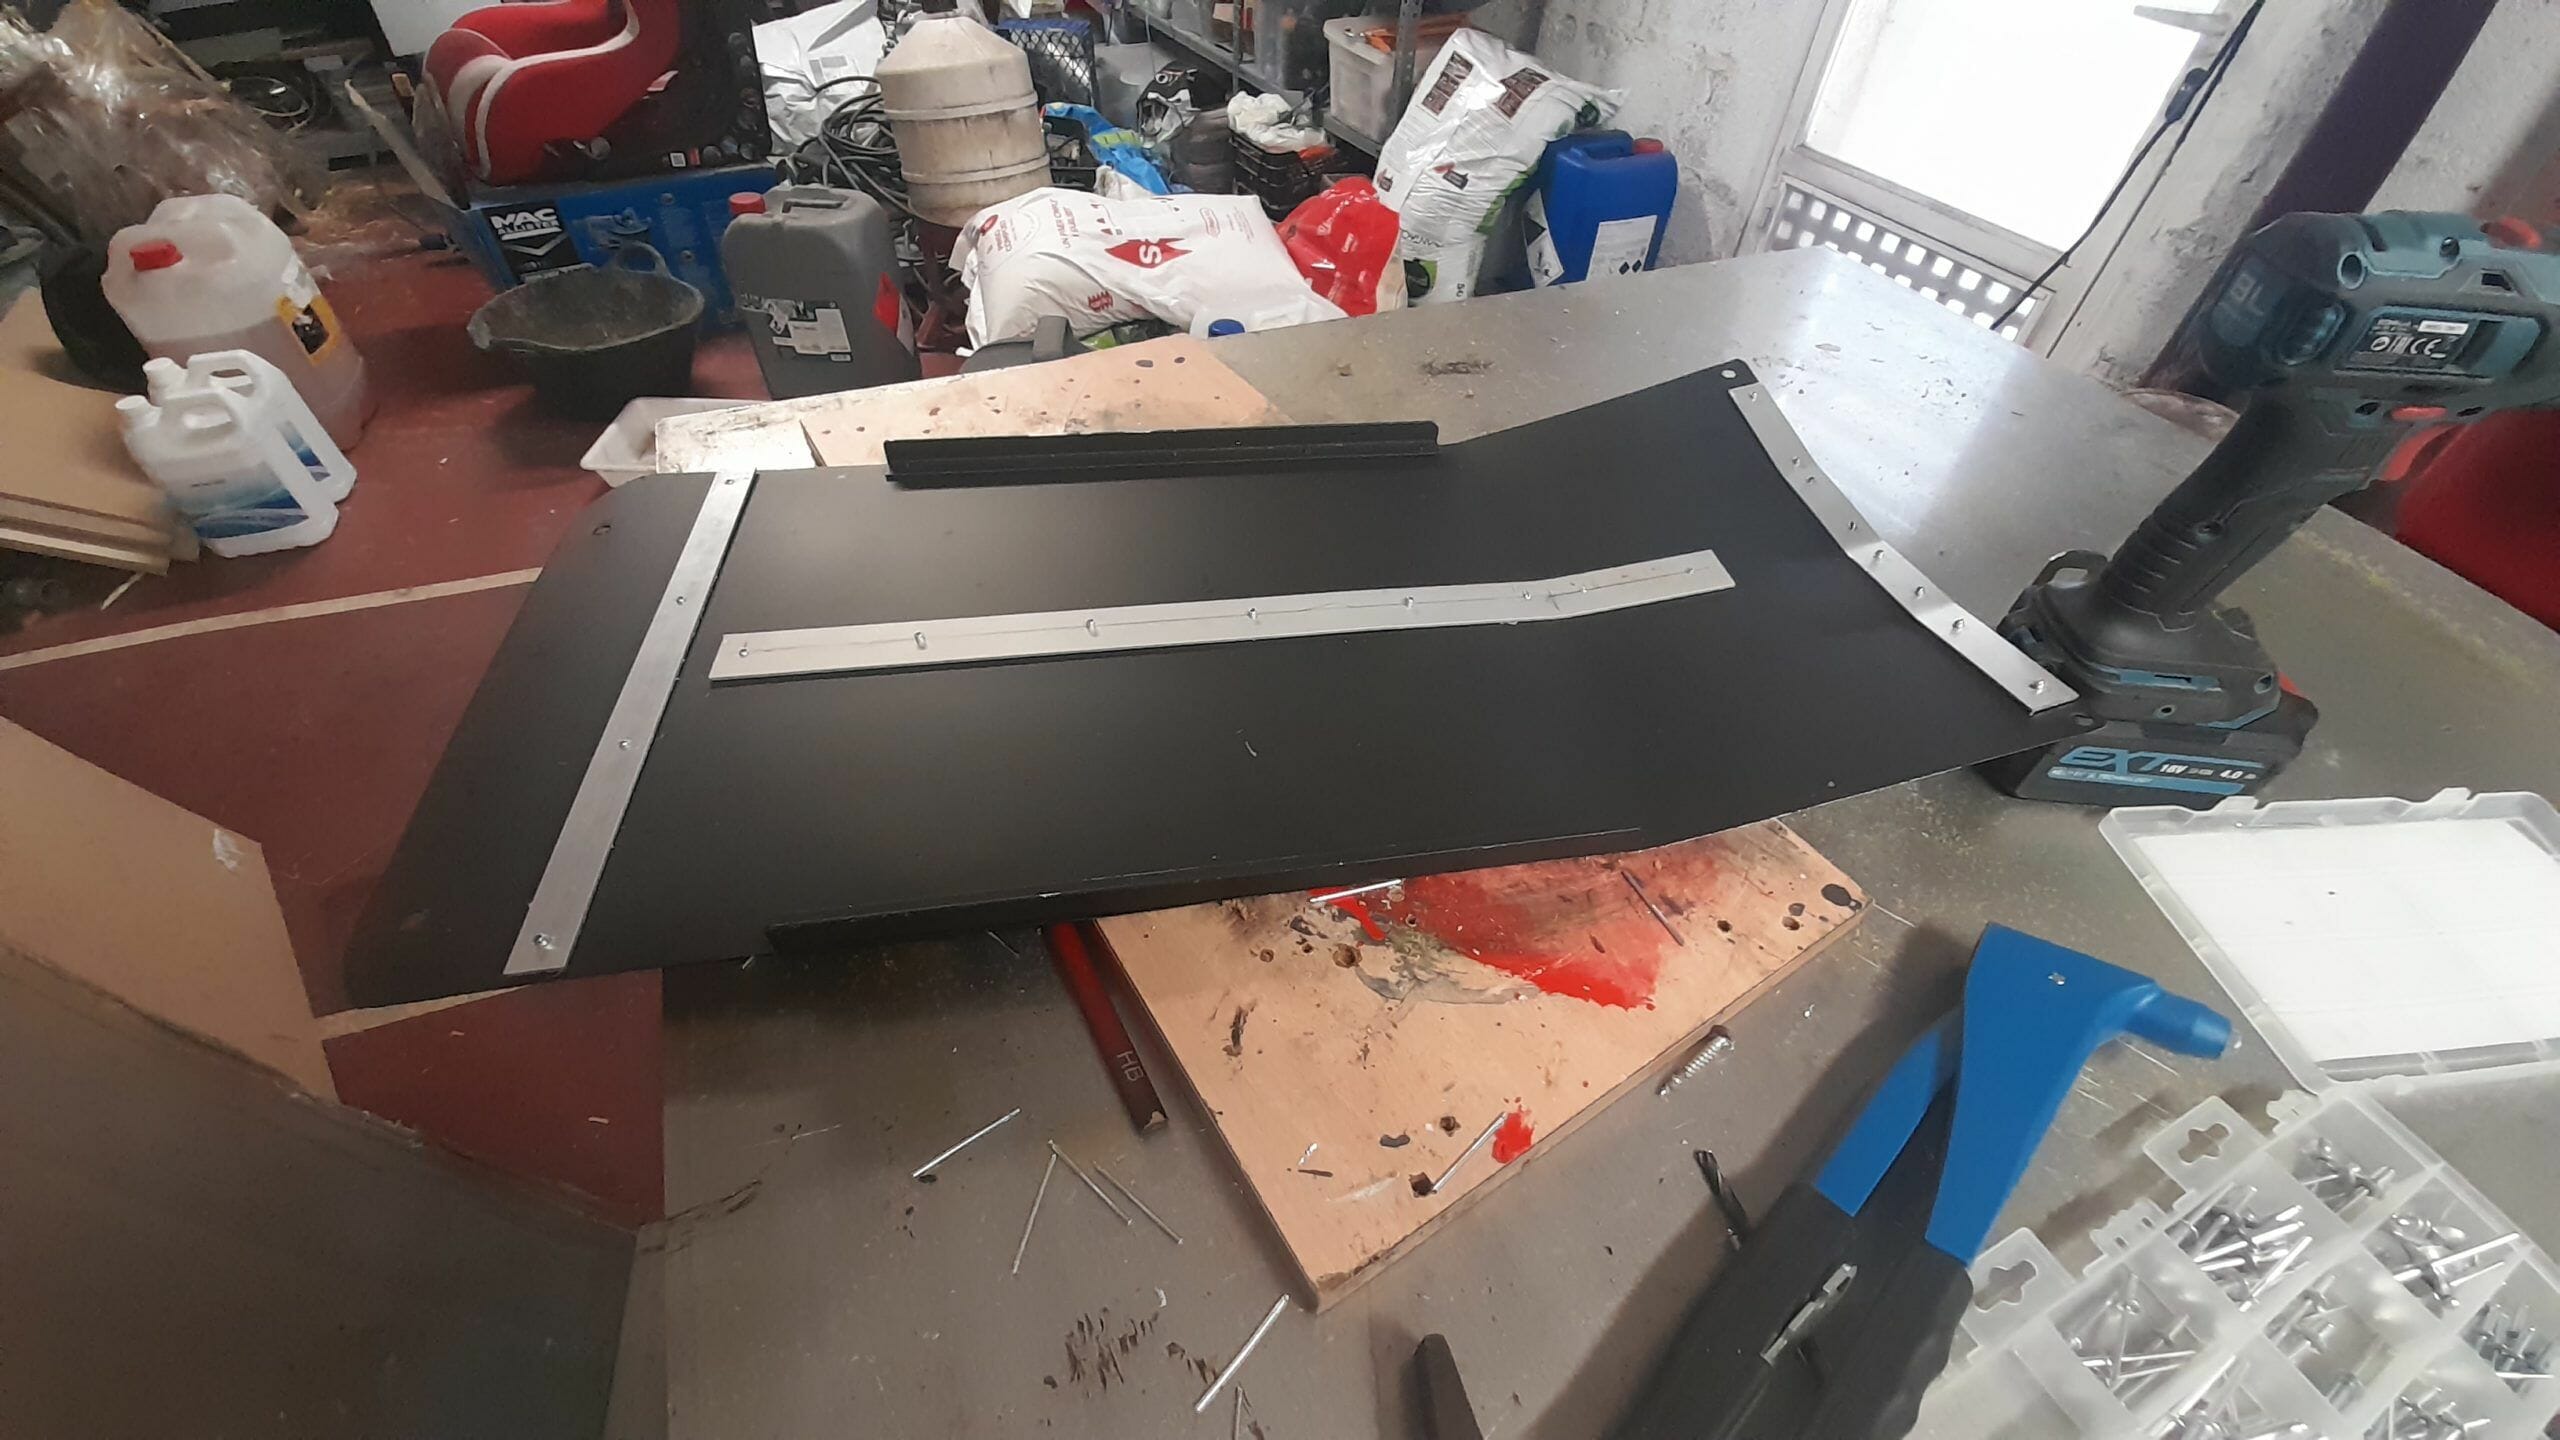
Final structure and foam to retain drained oil
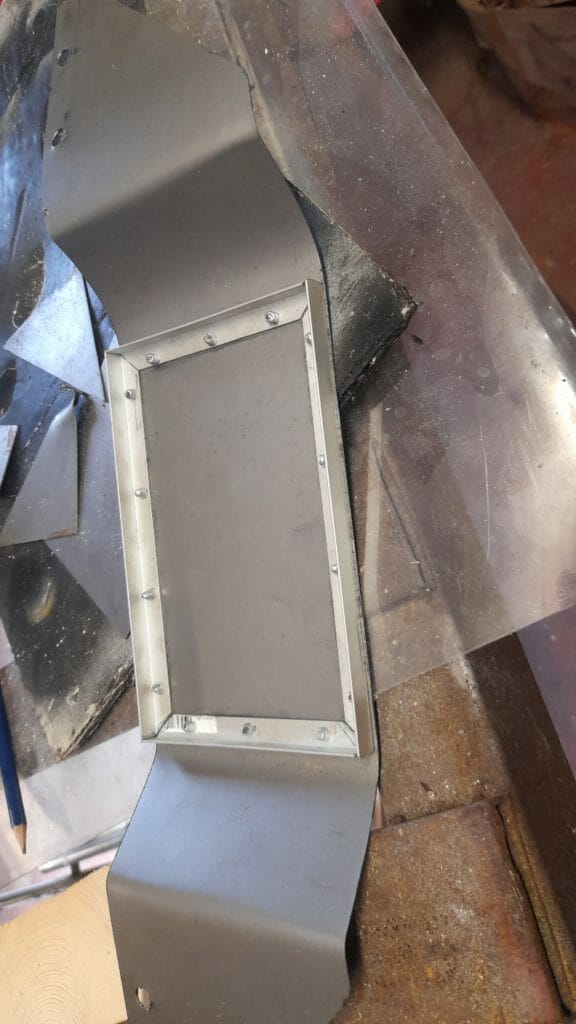
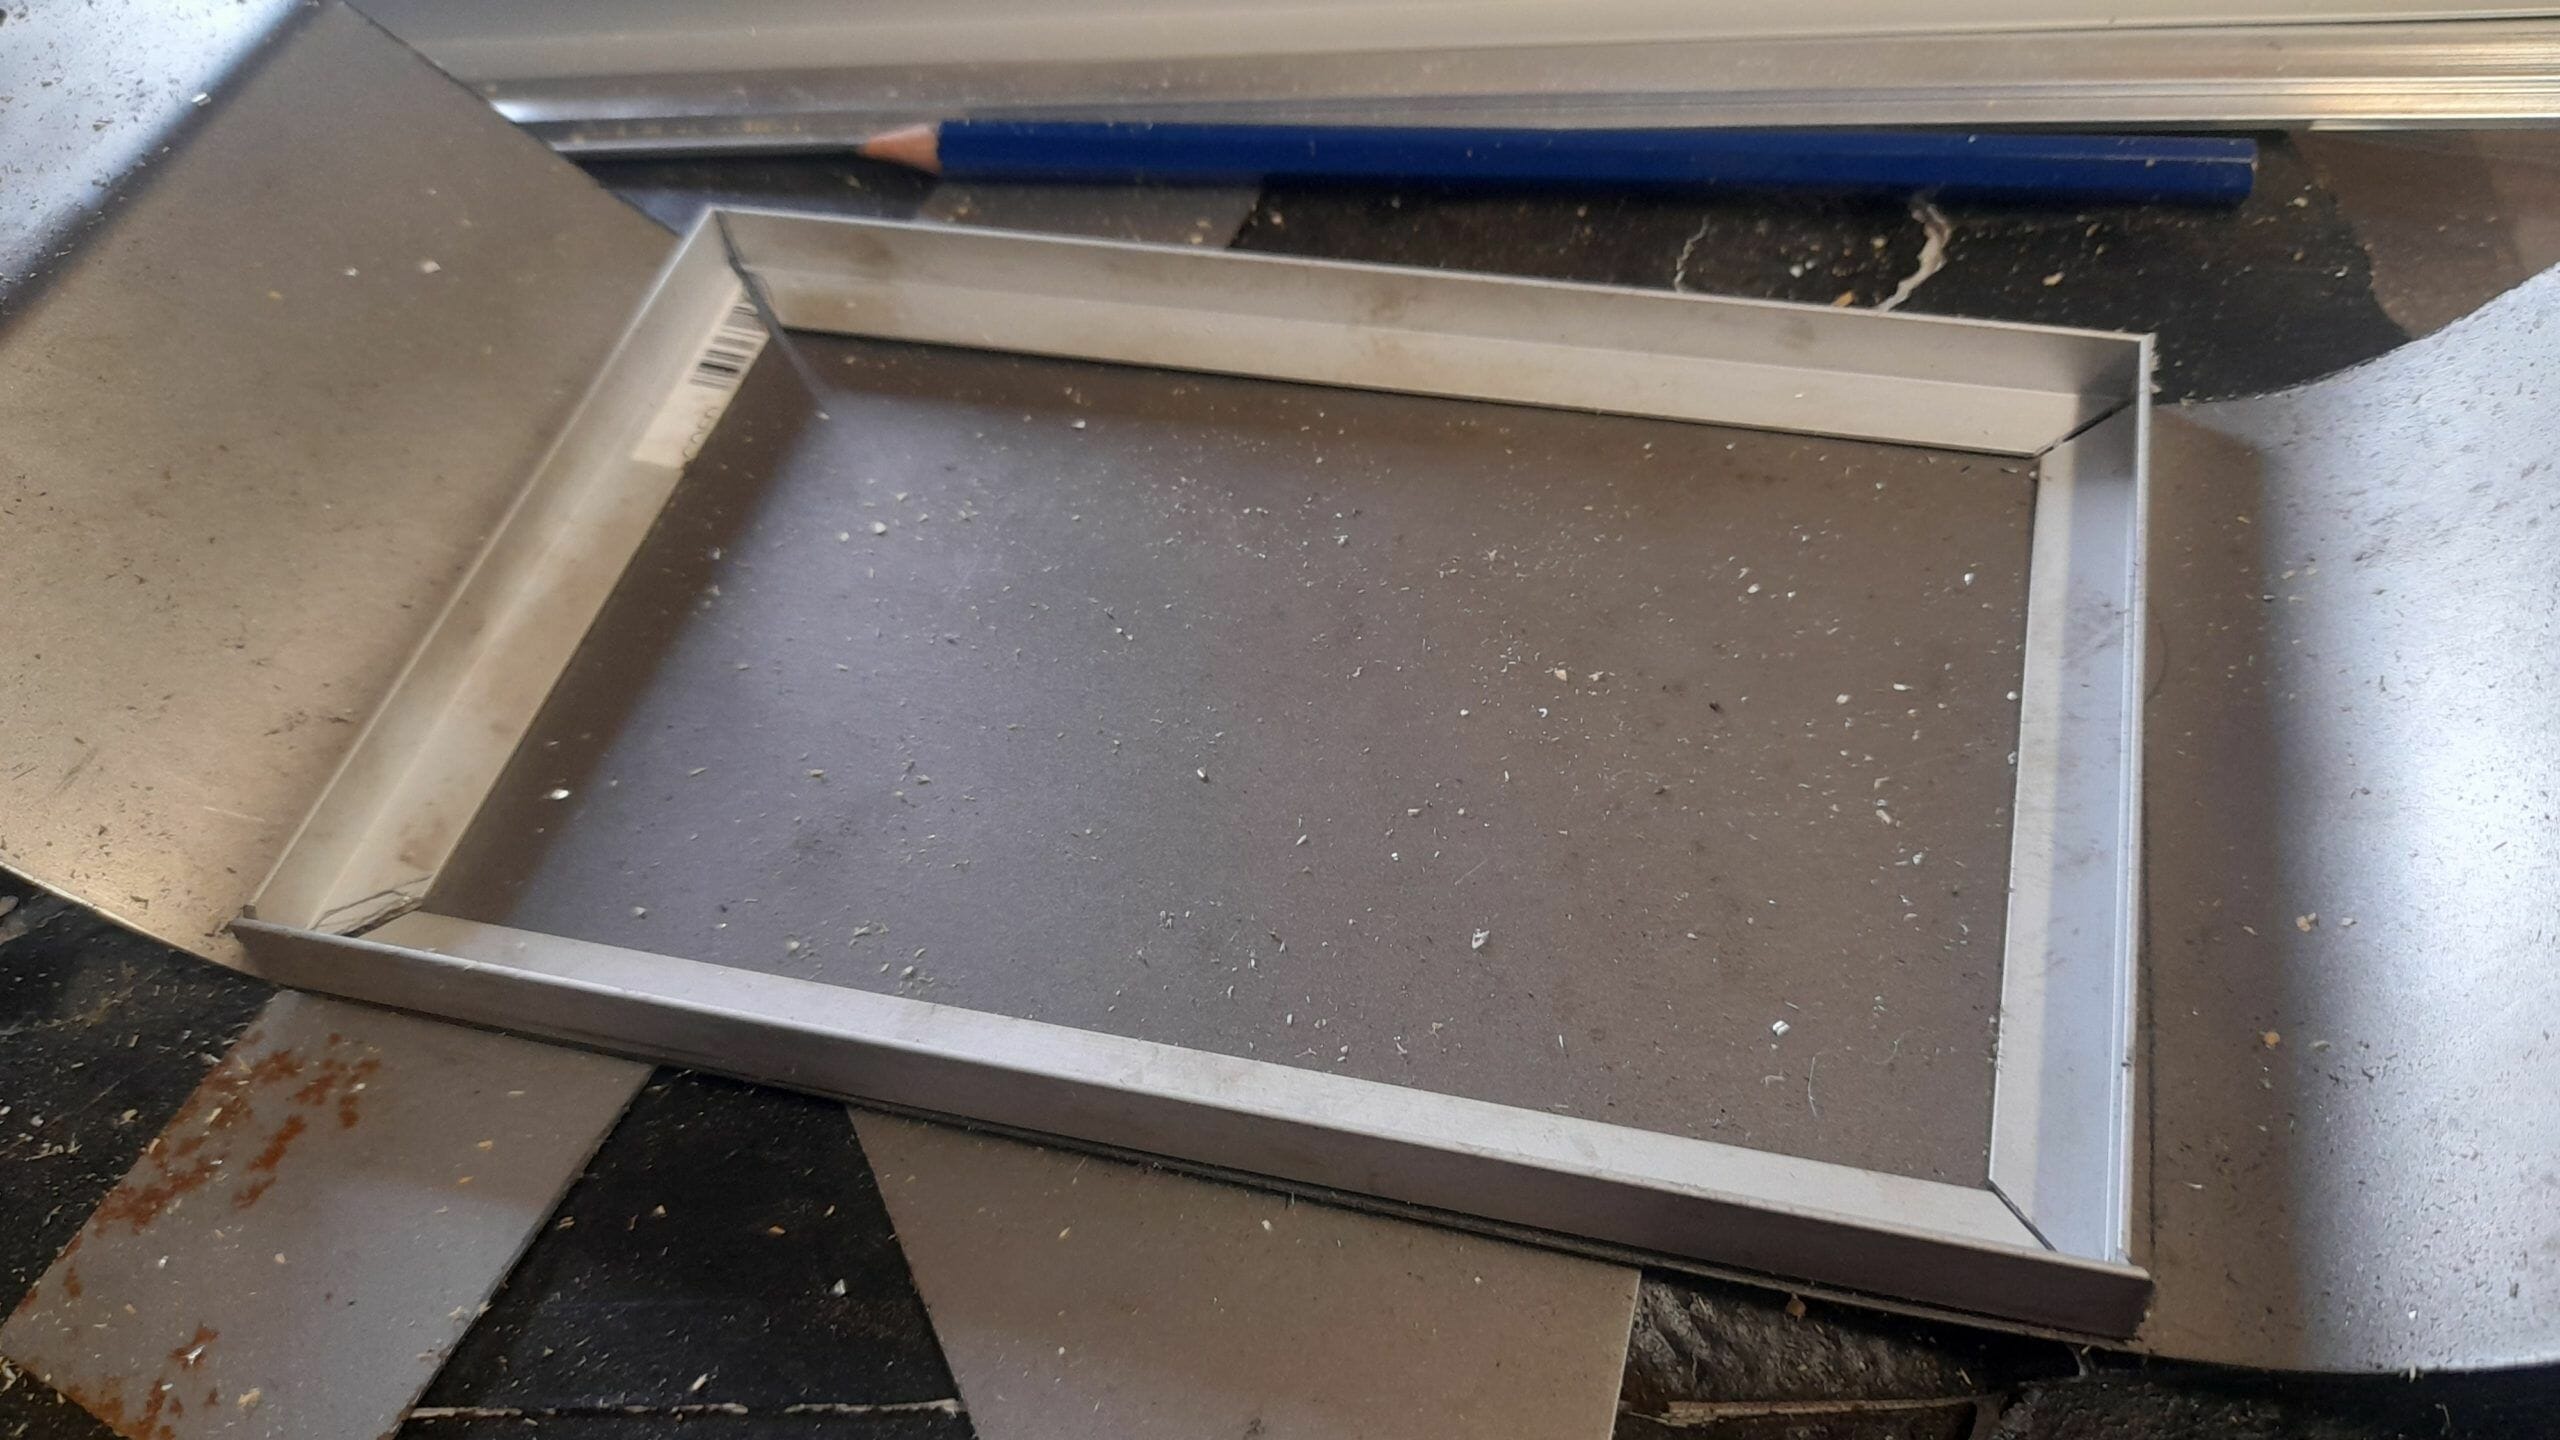
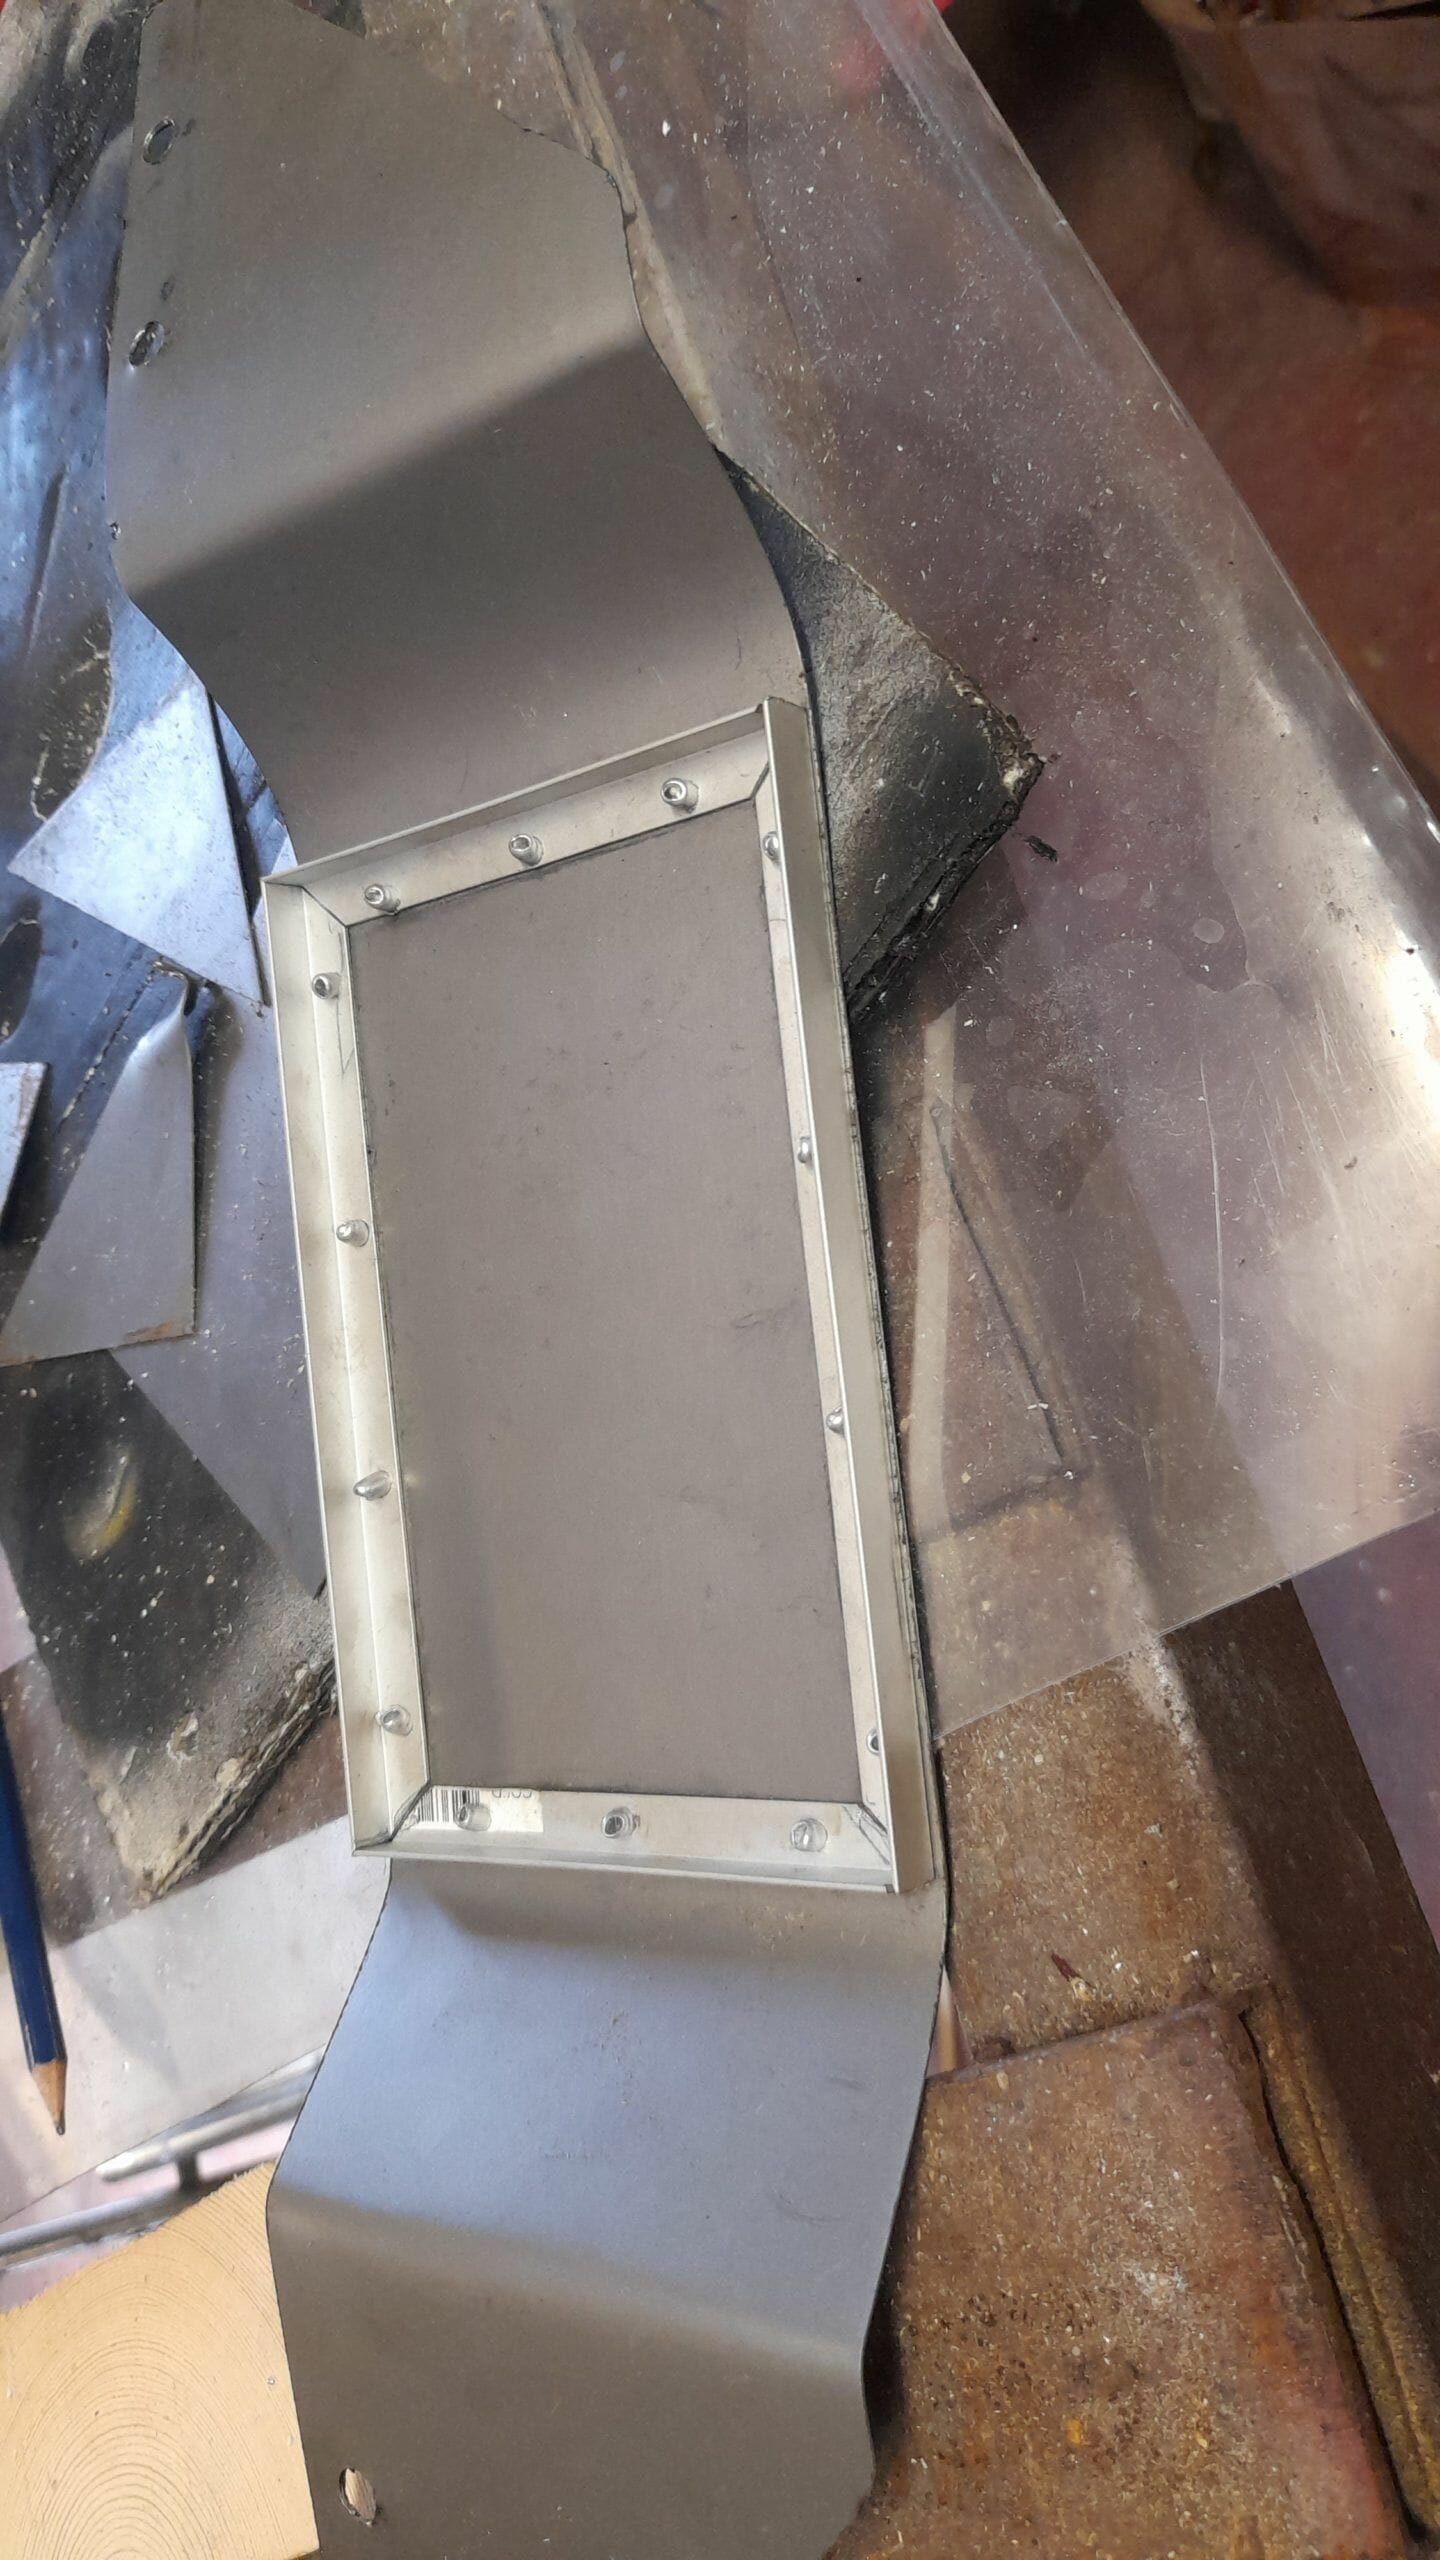
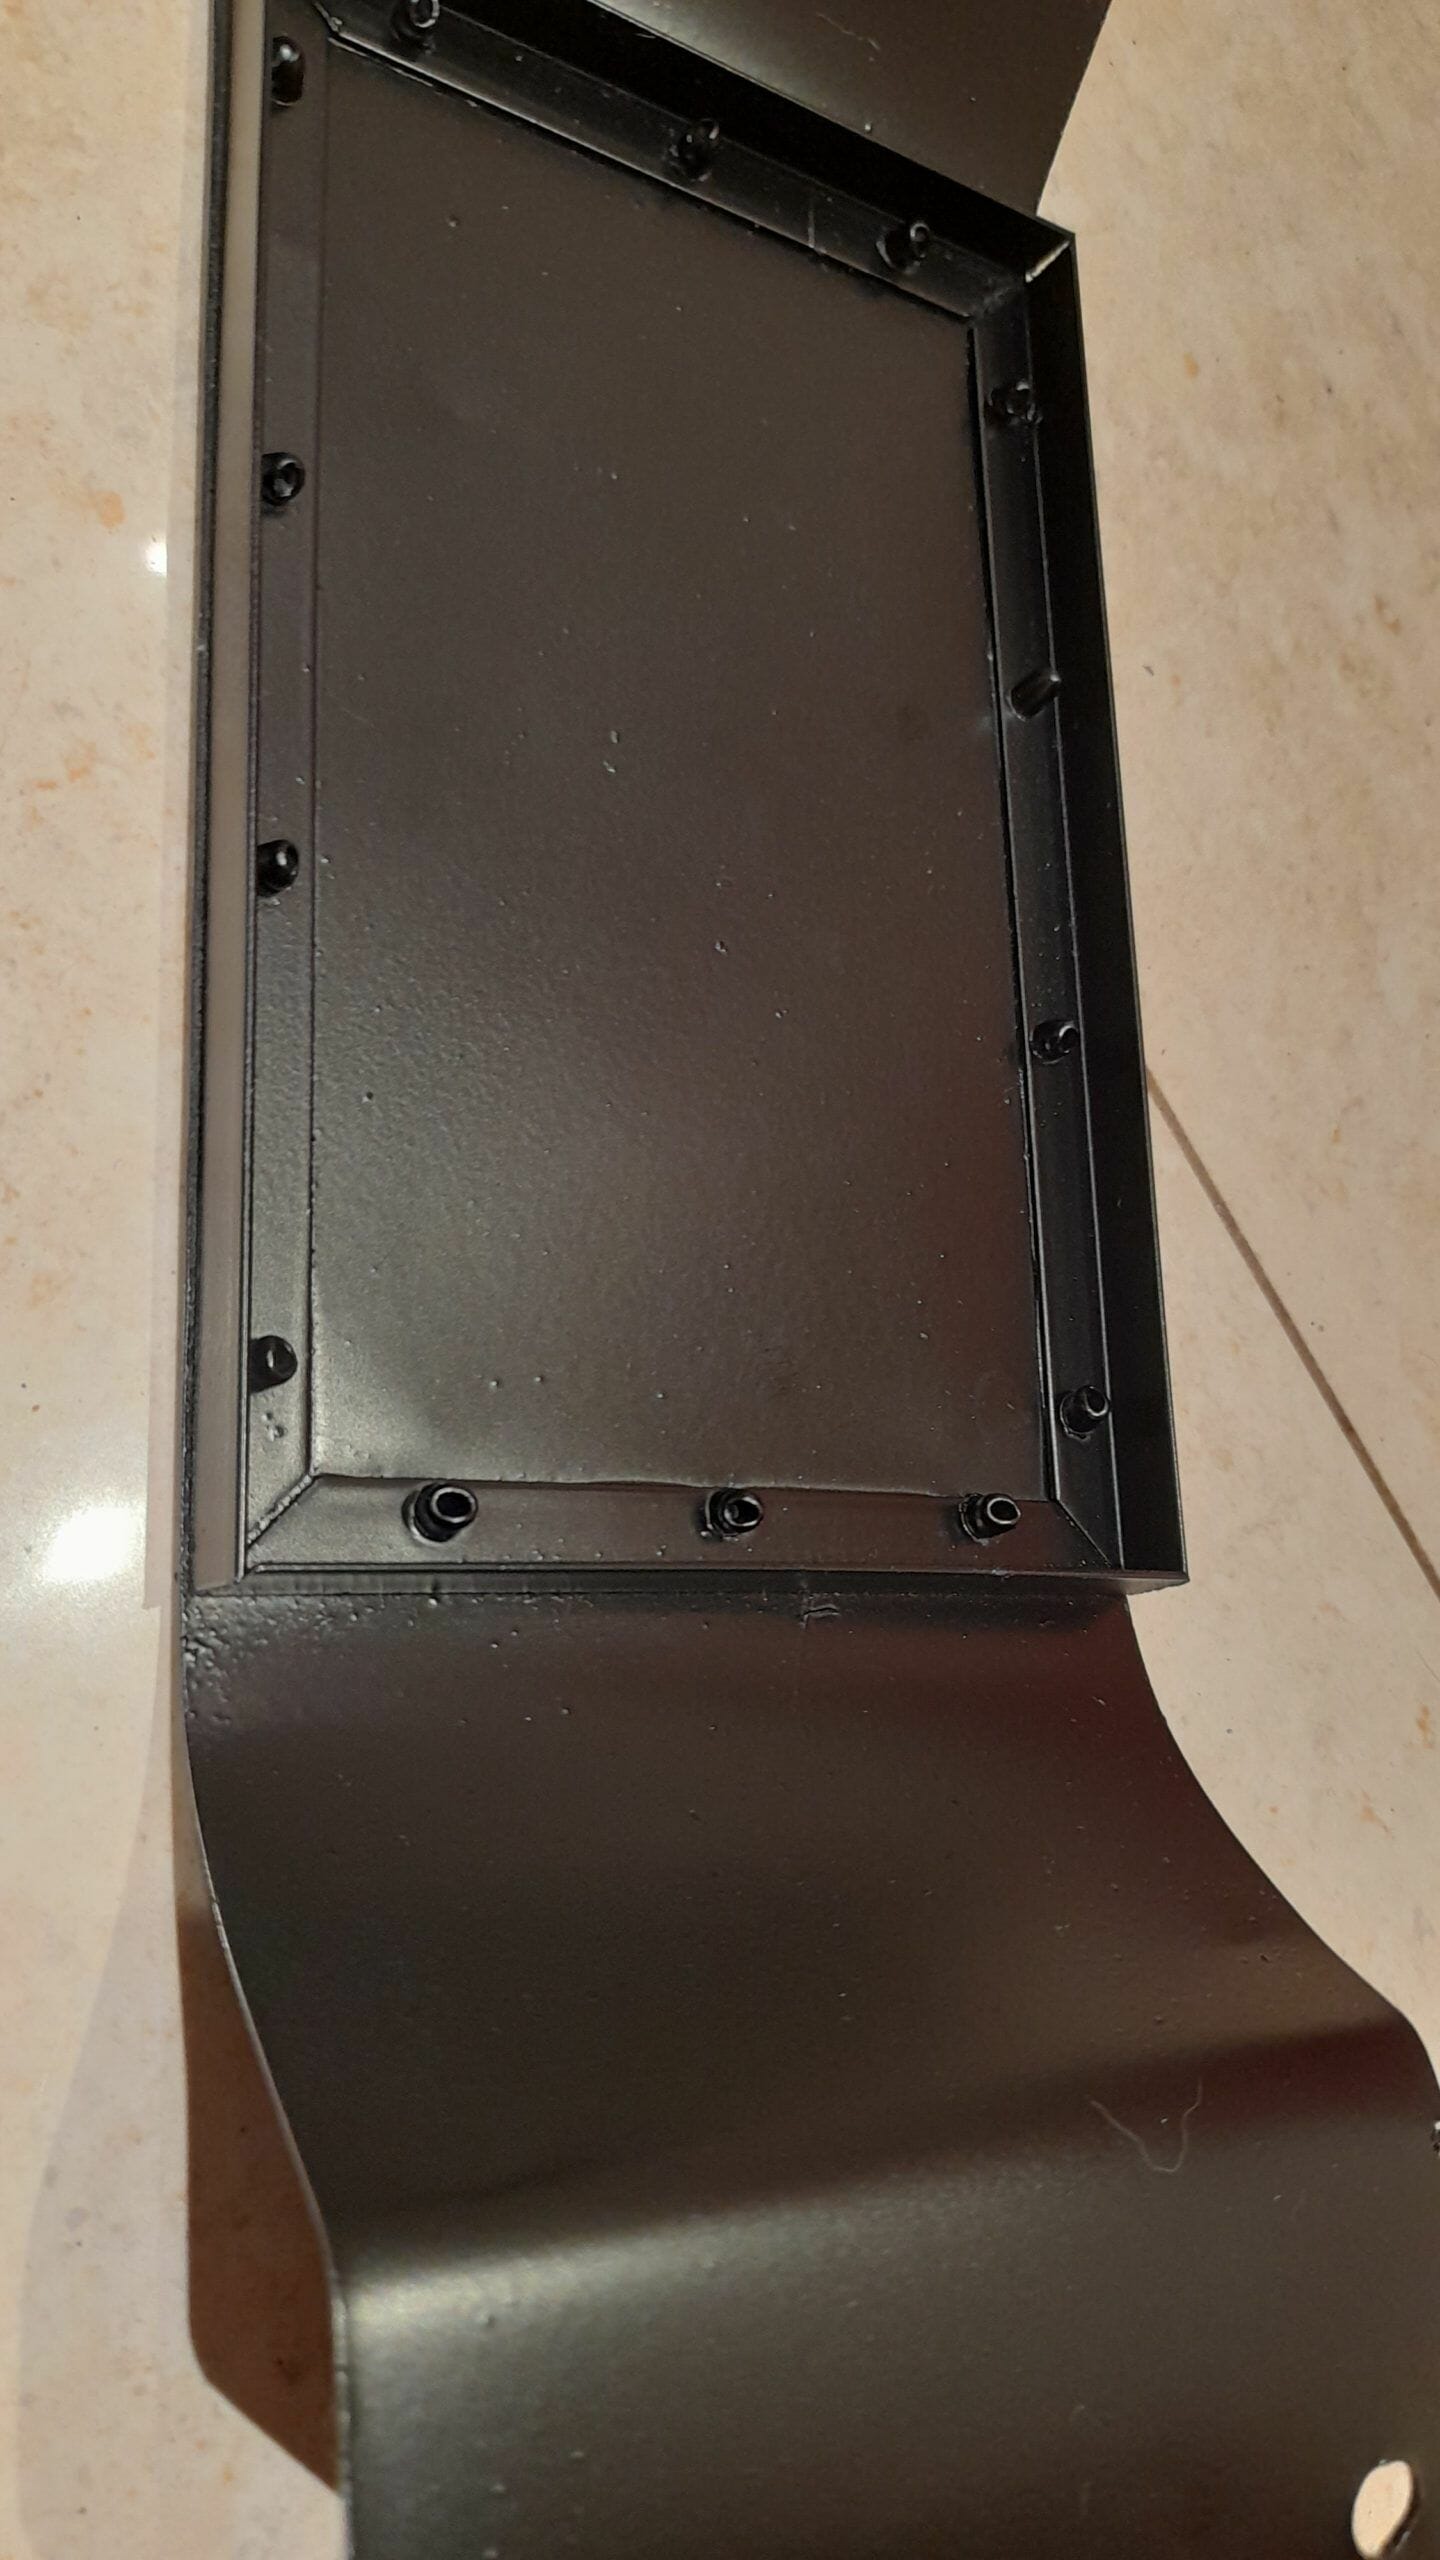
Around the area where the oil “falls” into the tray, you can see that we have built an angled aluminum profile frame (1 cm x 1 cm): With this we achieve two things:
- The tray acquires rigidity (as already mentioned).
- We have created a frame in which we will house a foam sheet or any absorbent material.
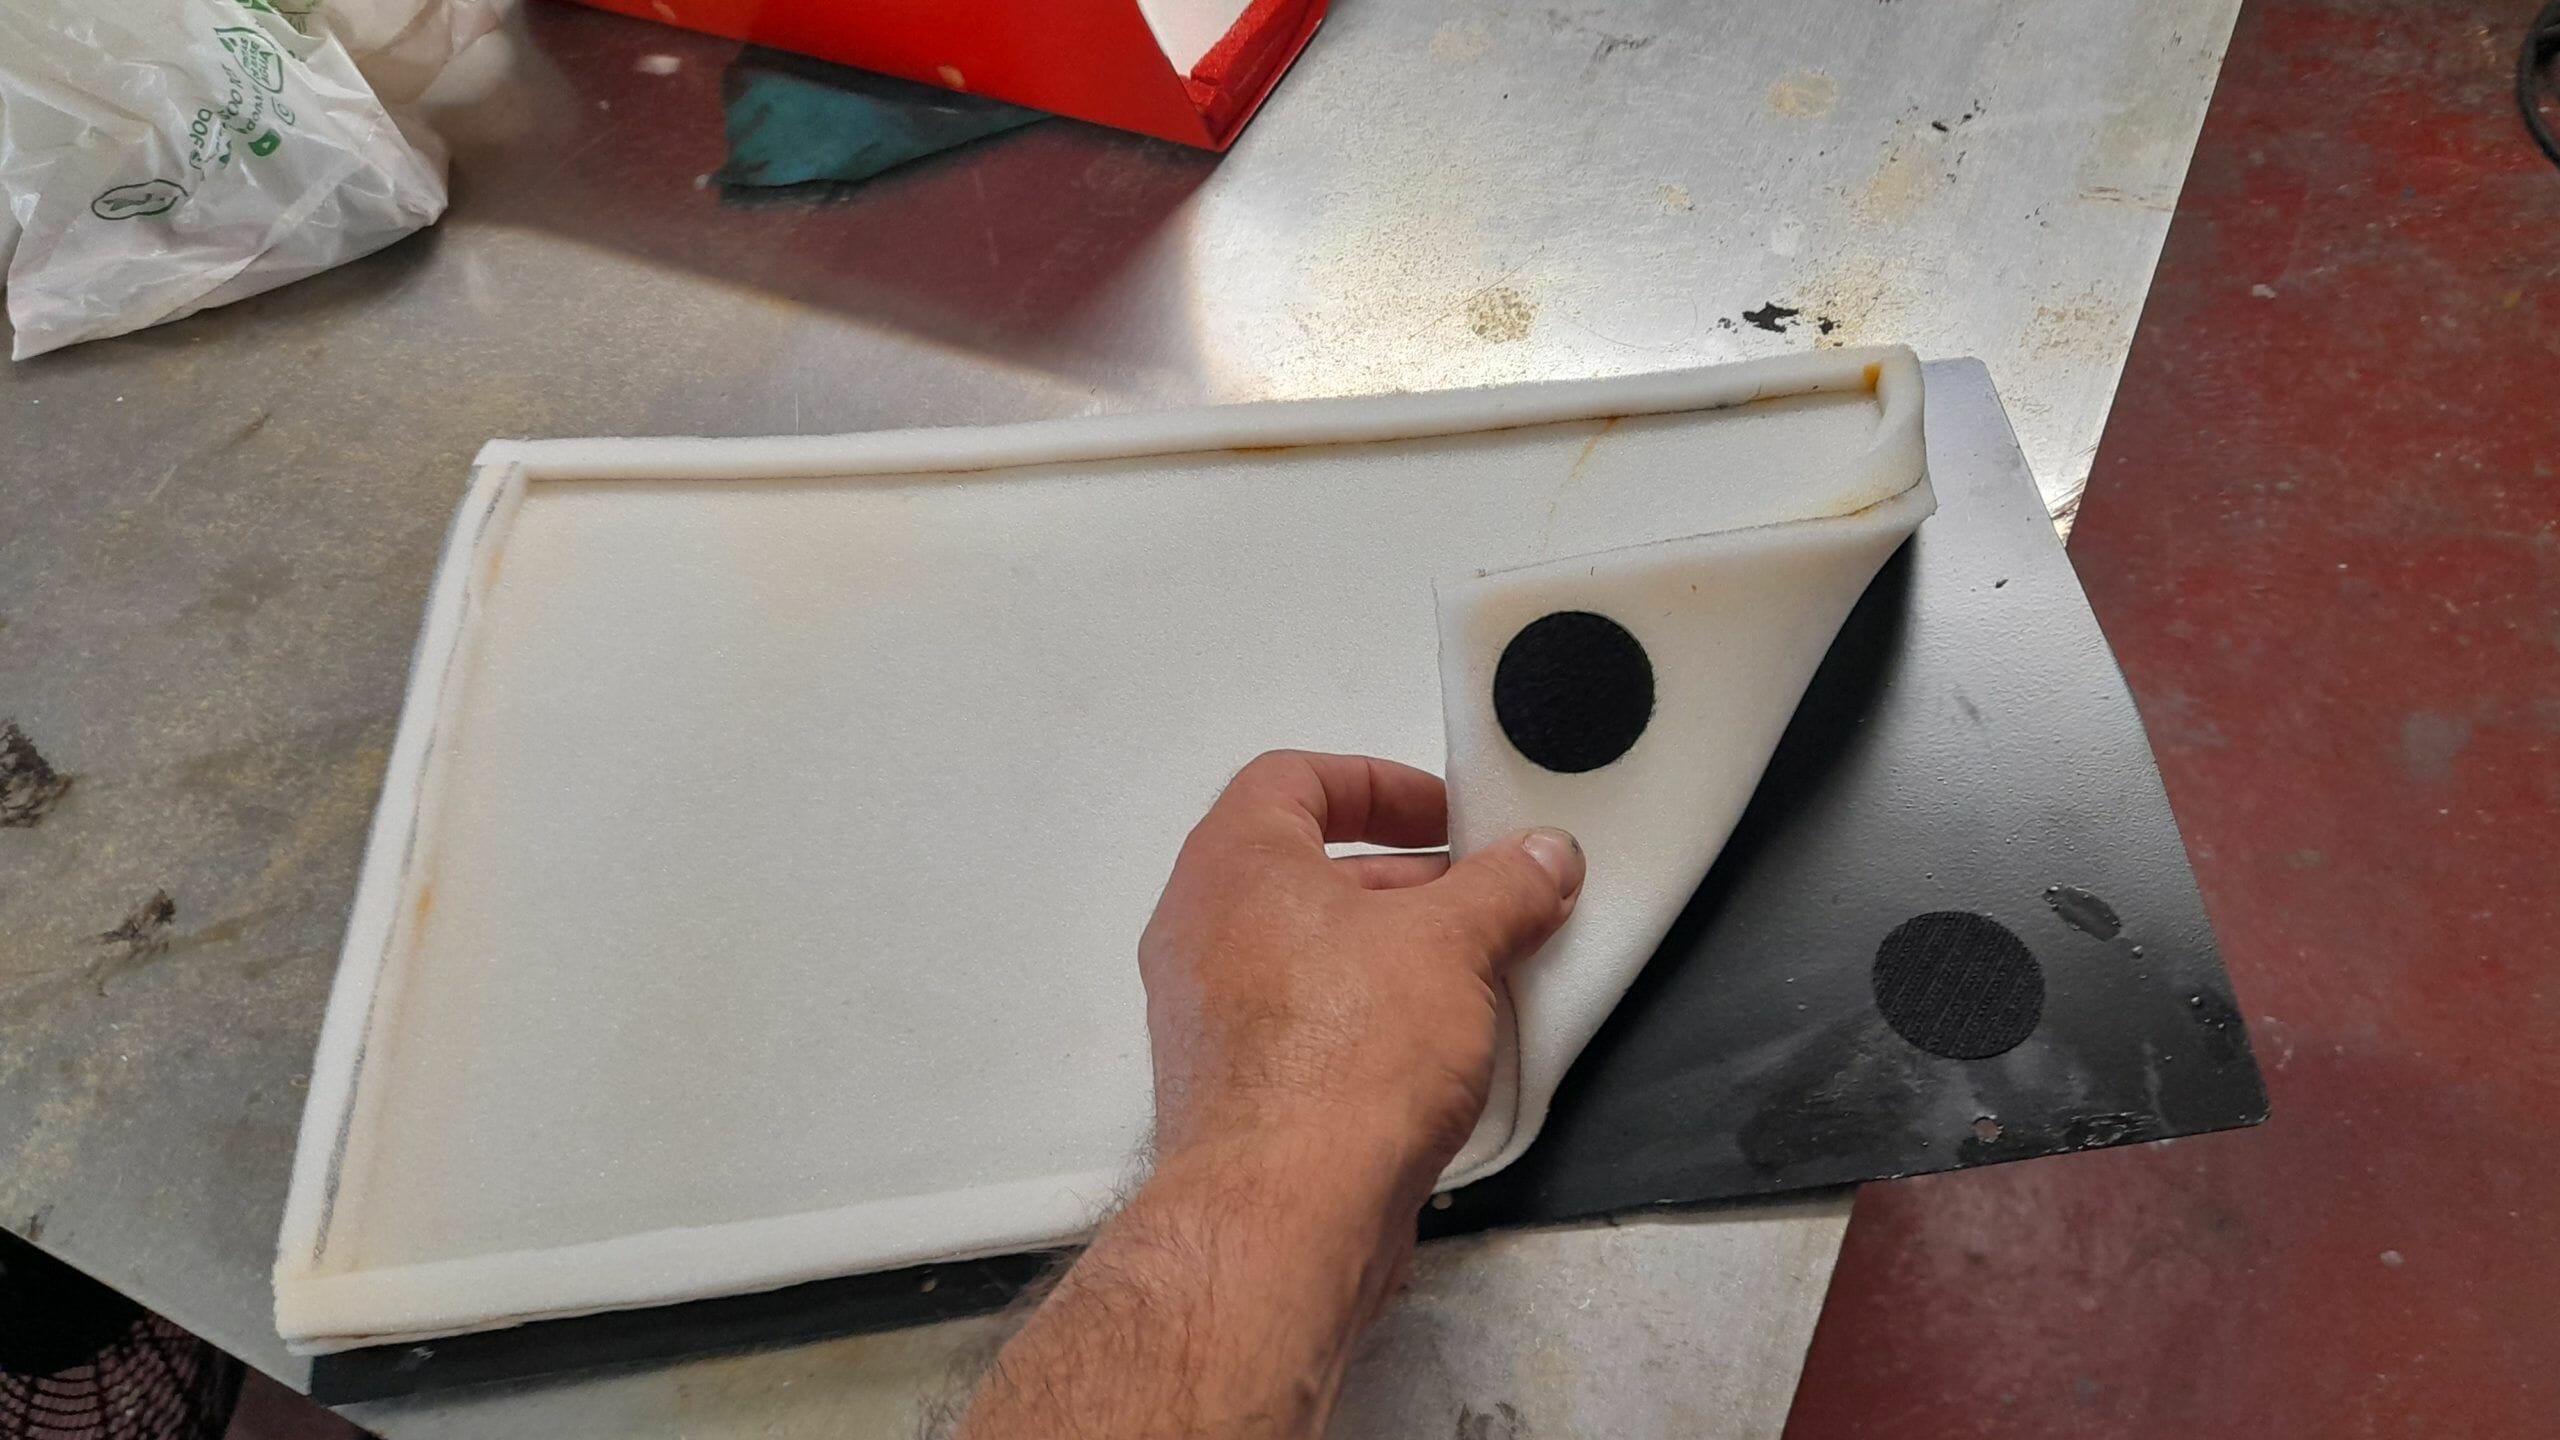
This foam is replaceable, so that after a while, simply unscrew the tray, remove the stained foam, take it to a clean recycling point for oil residues – please do not throw it in the domestic waste – and replace it with a new one. Since the temperature of the oil falling in this zone is relatively low (no more than the temperature of domestic hot water), this foam more than fulfills its purpose.

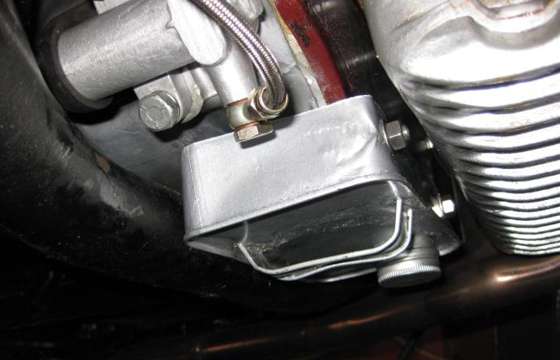
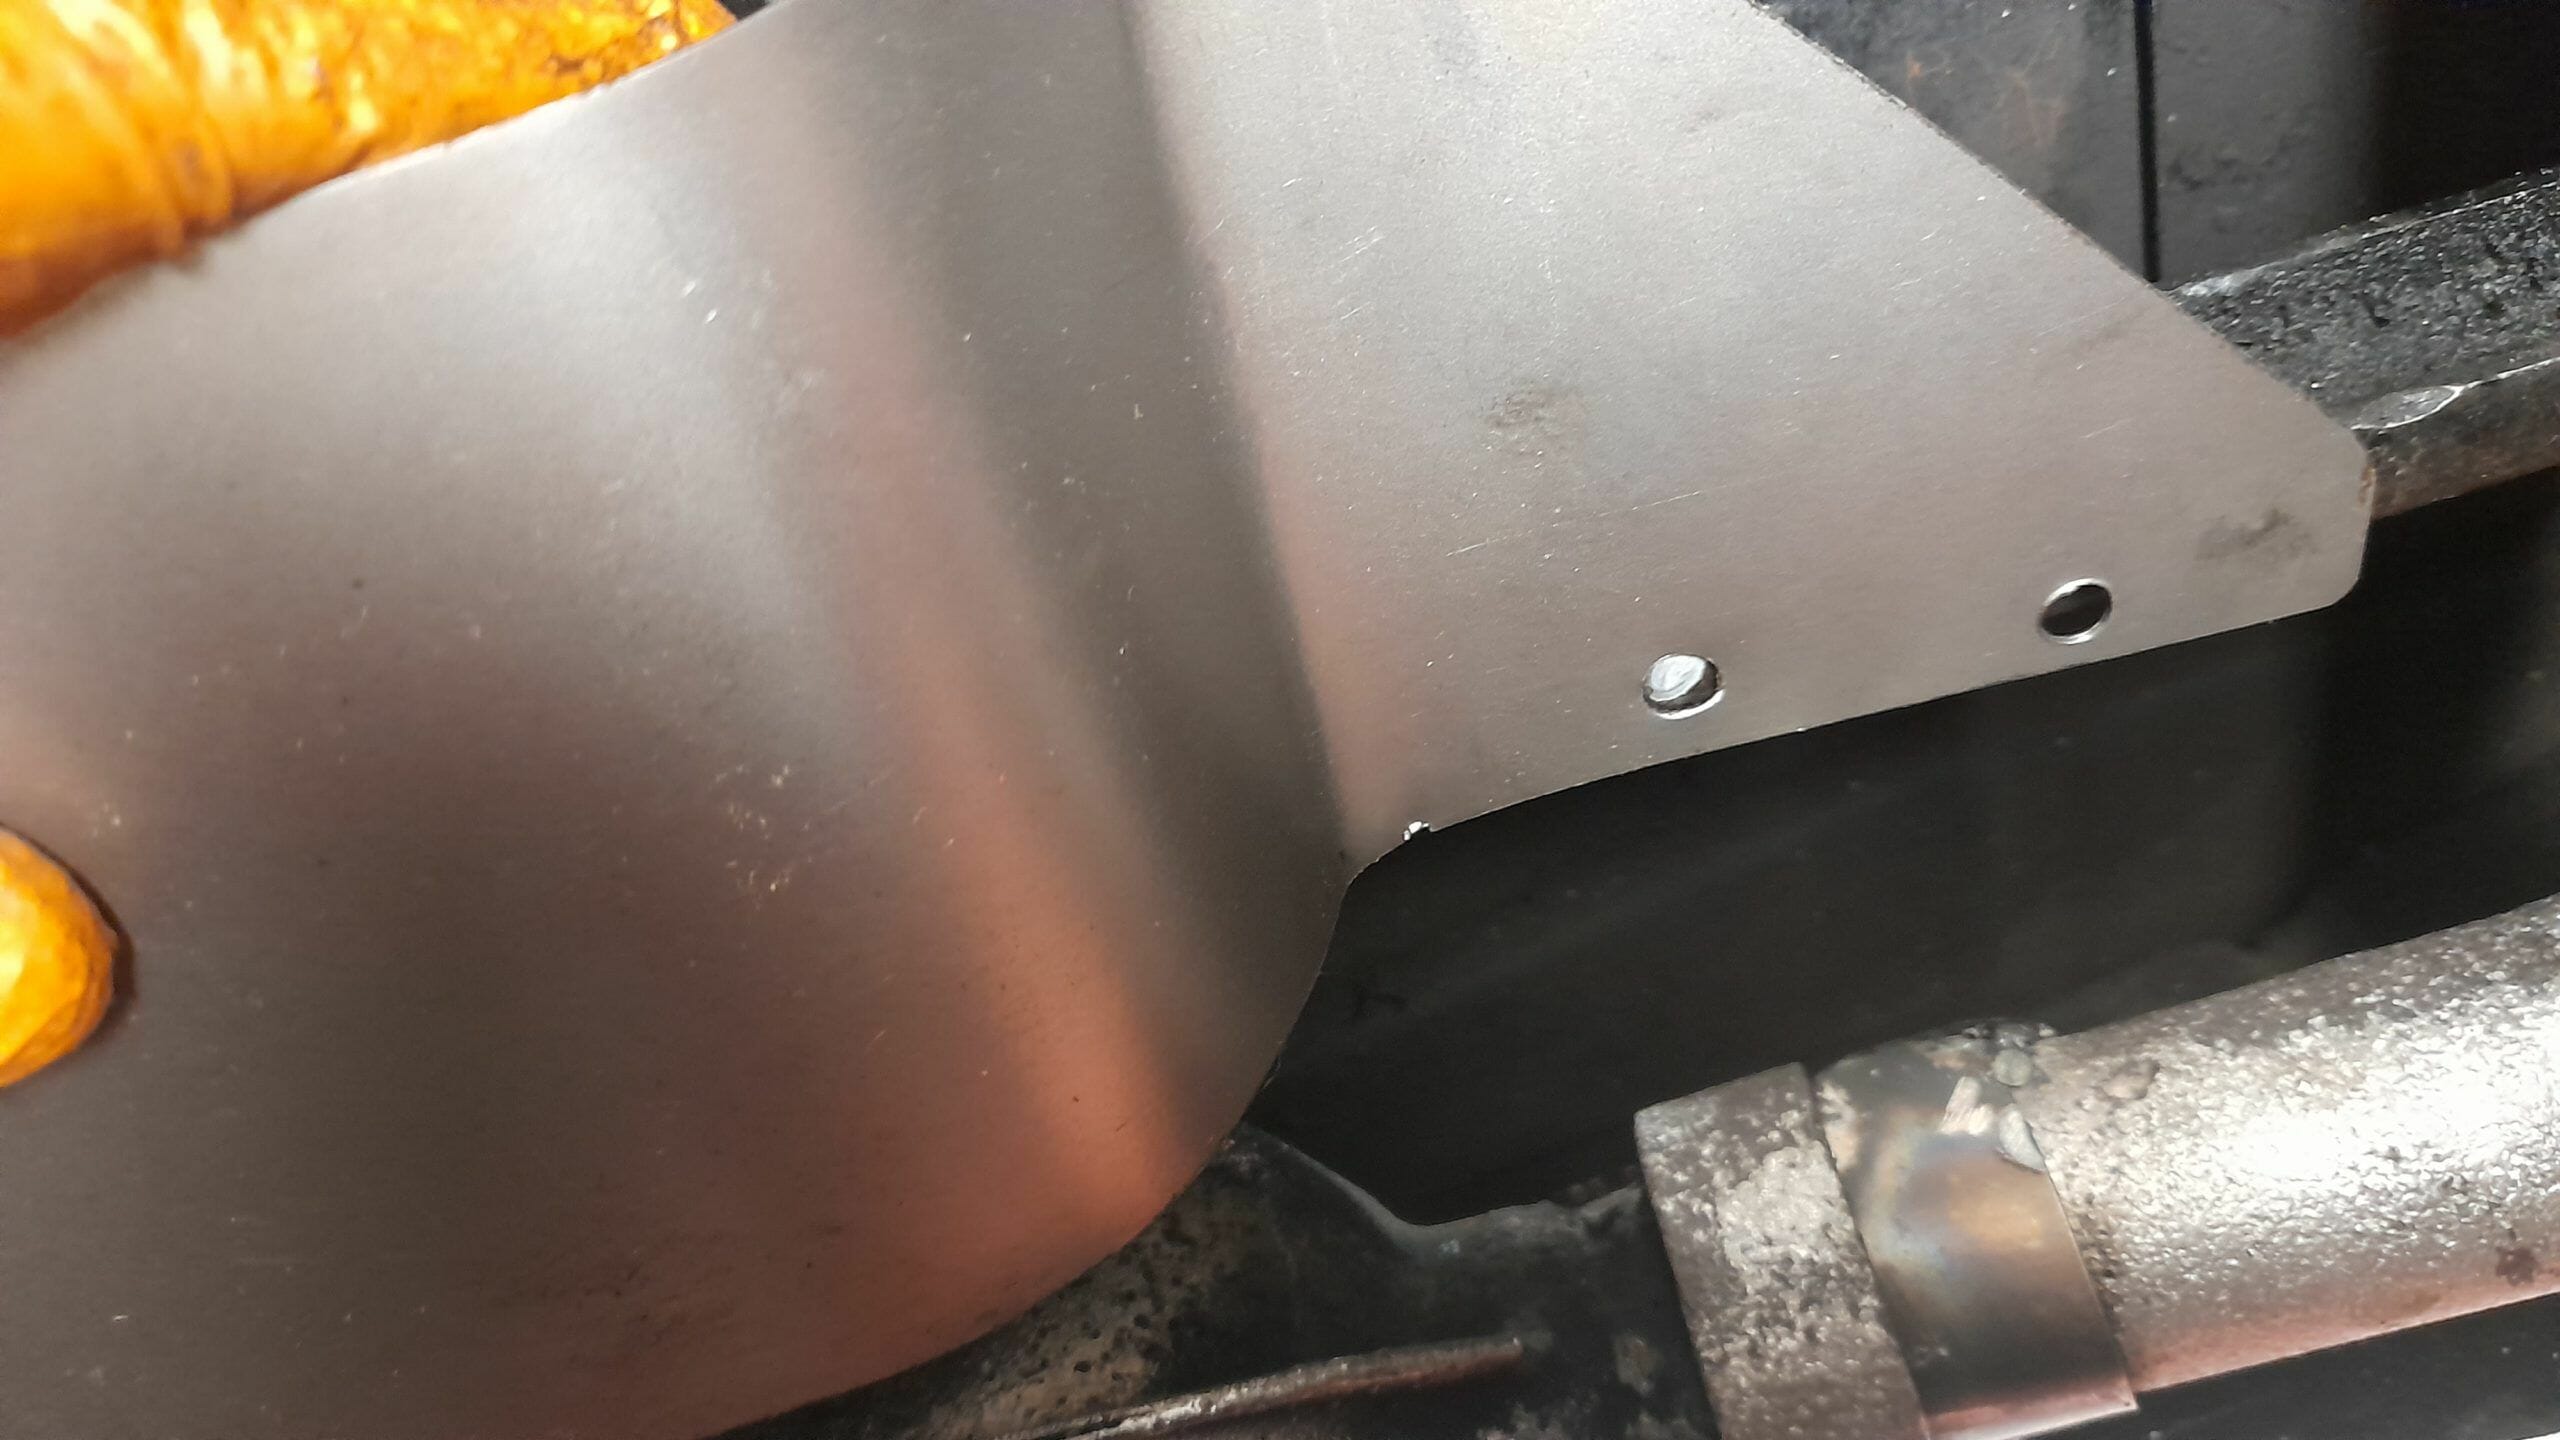
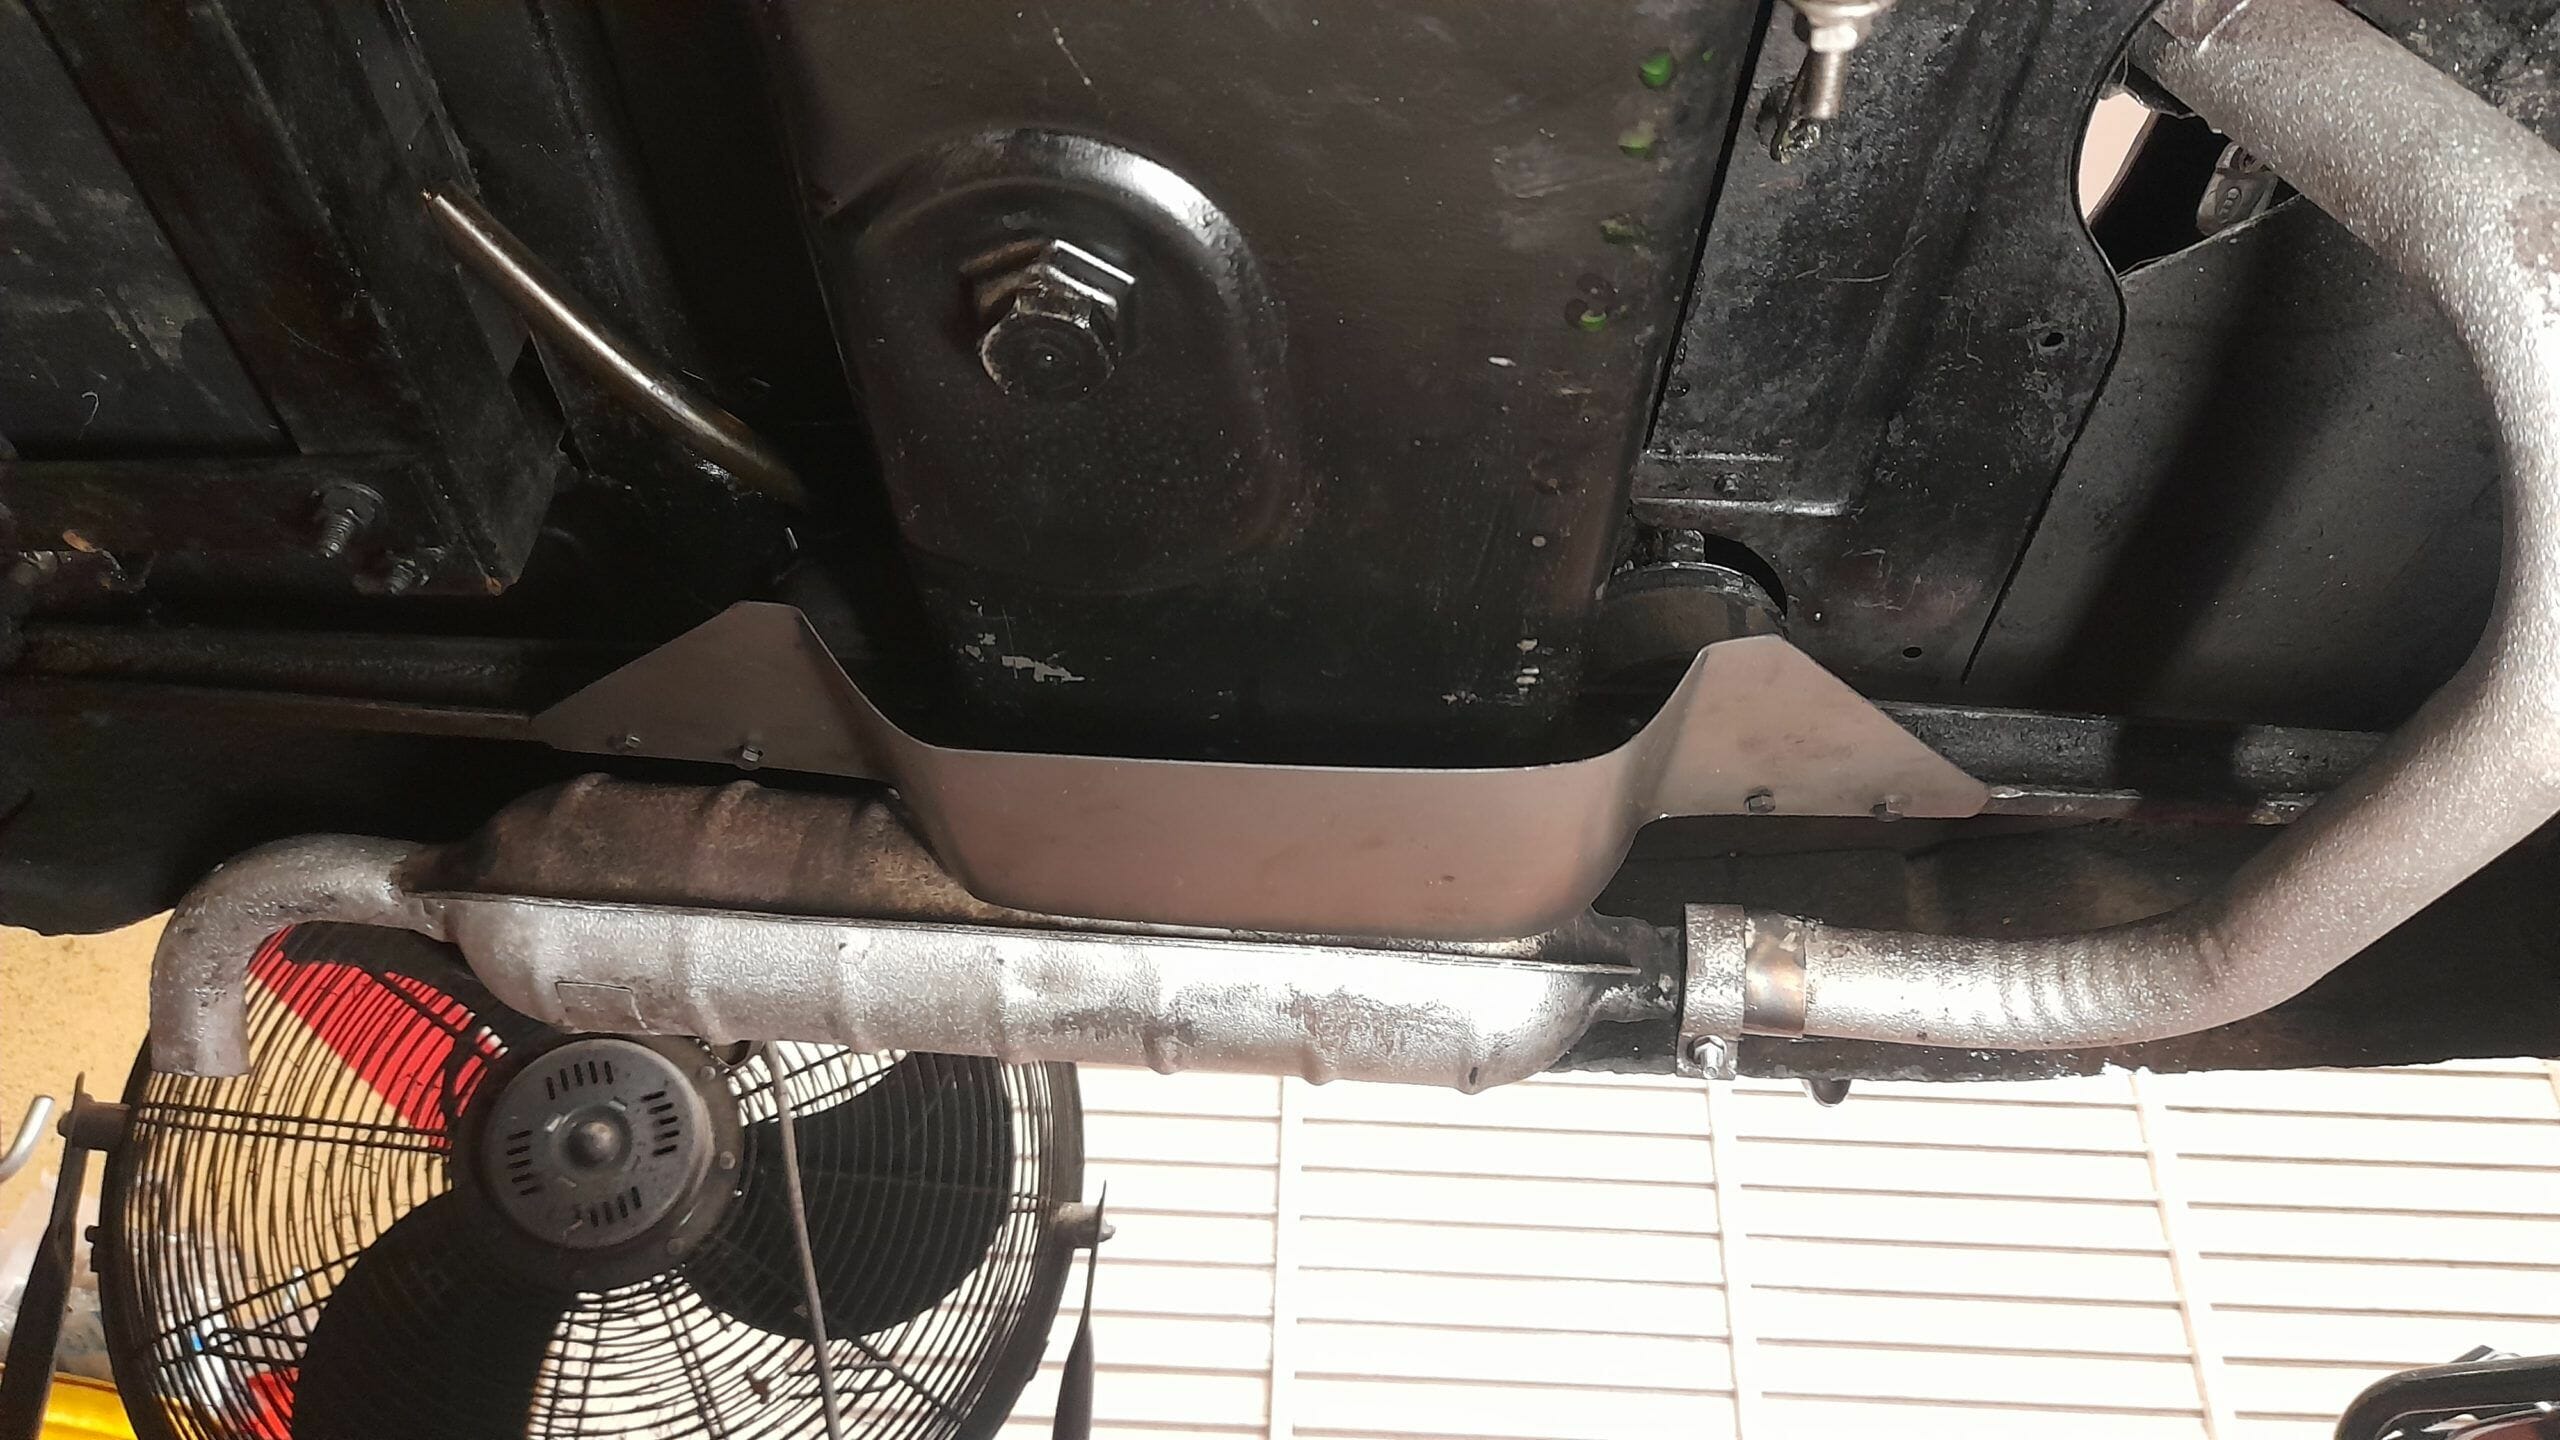
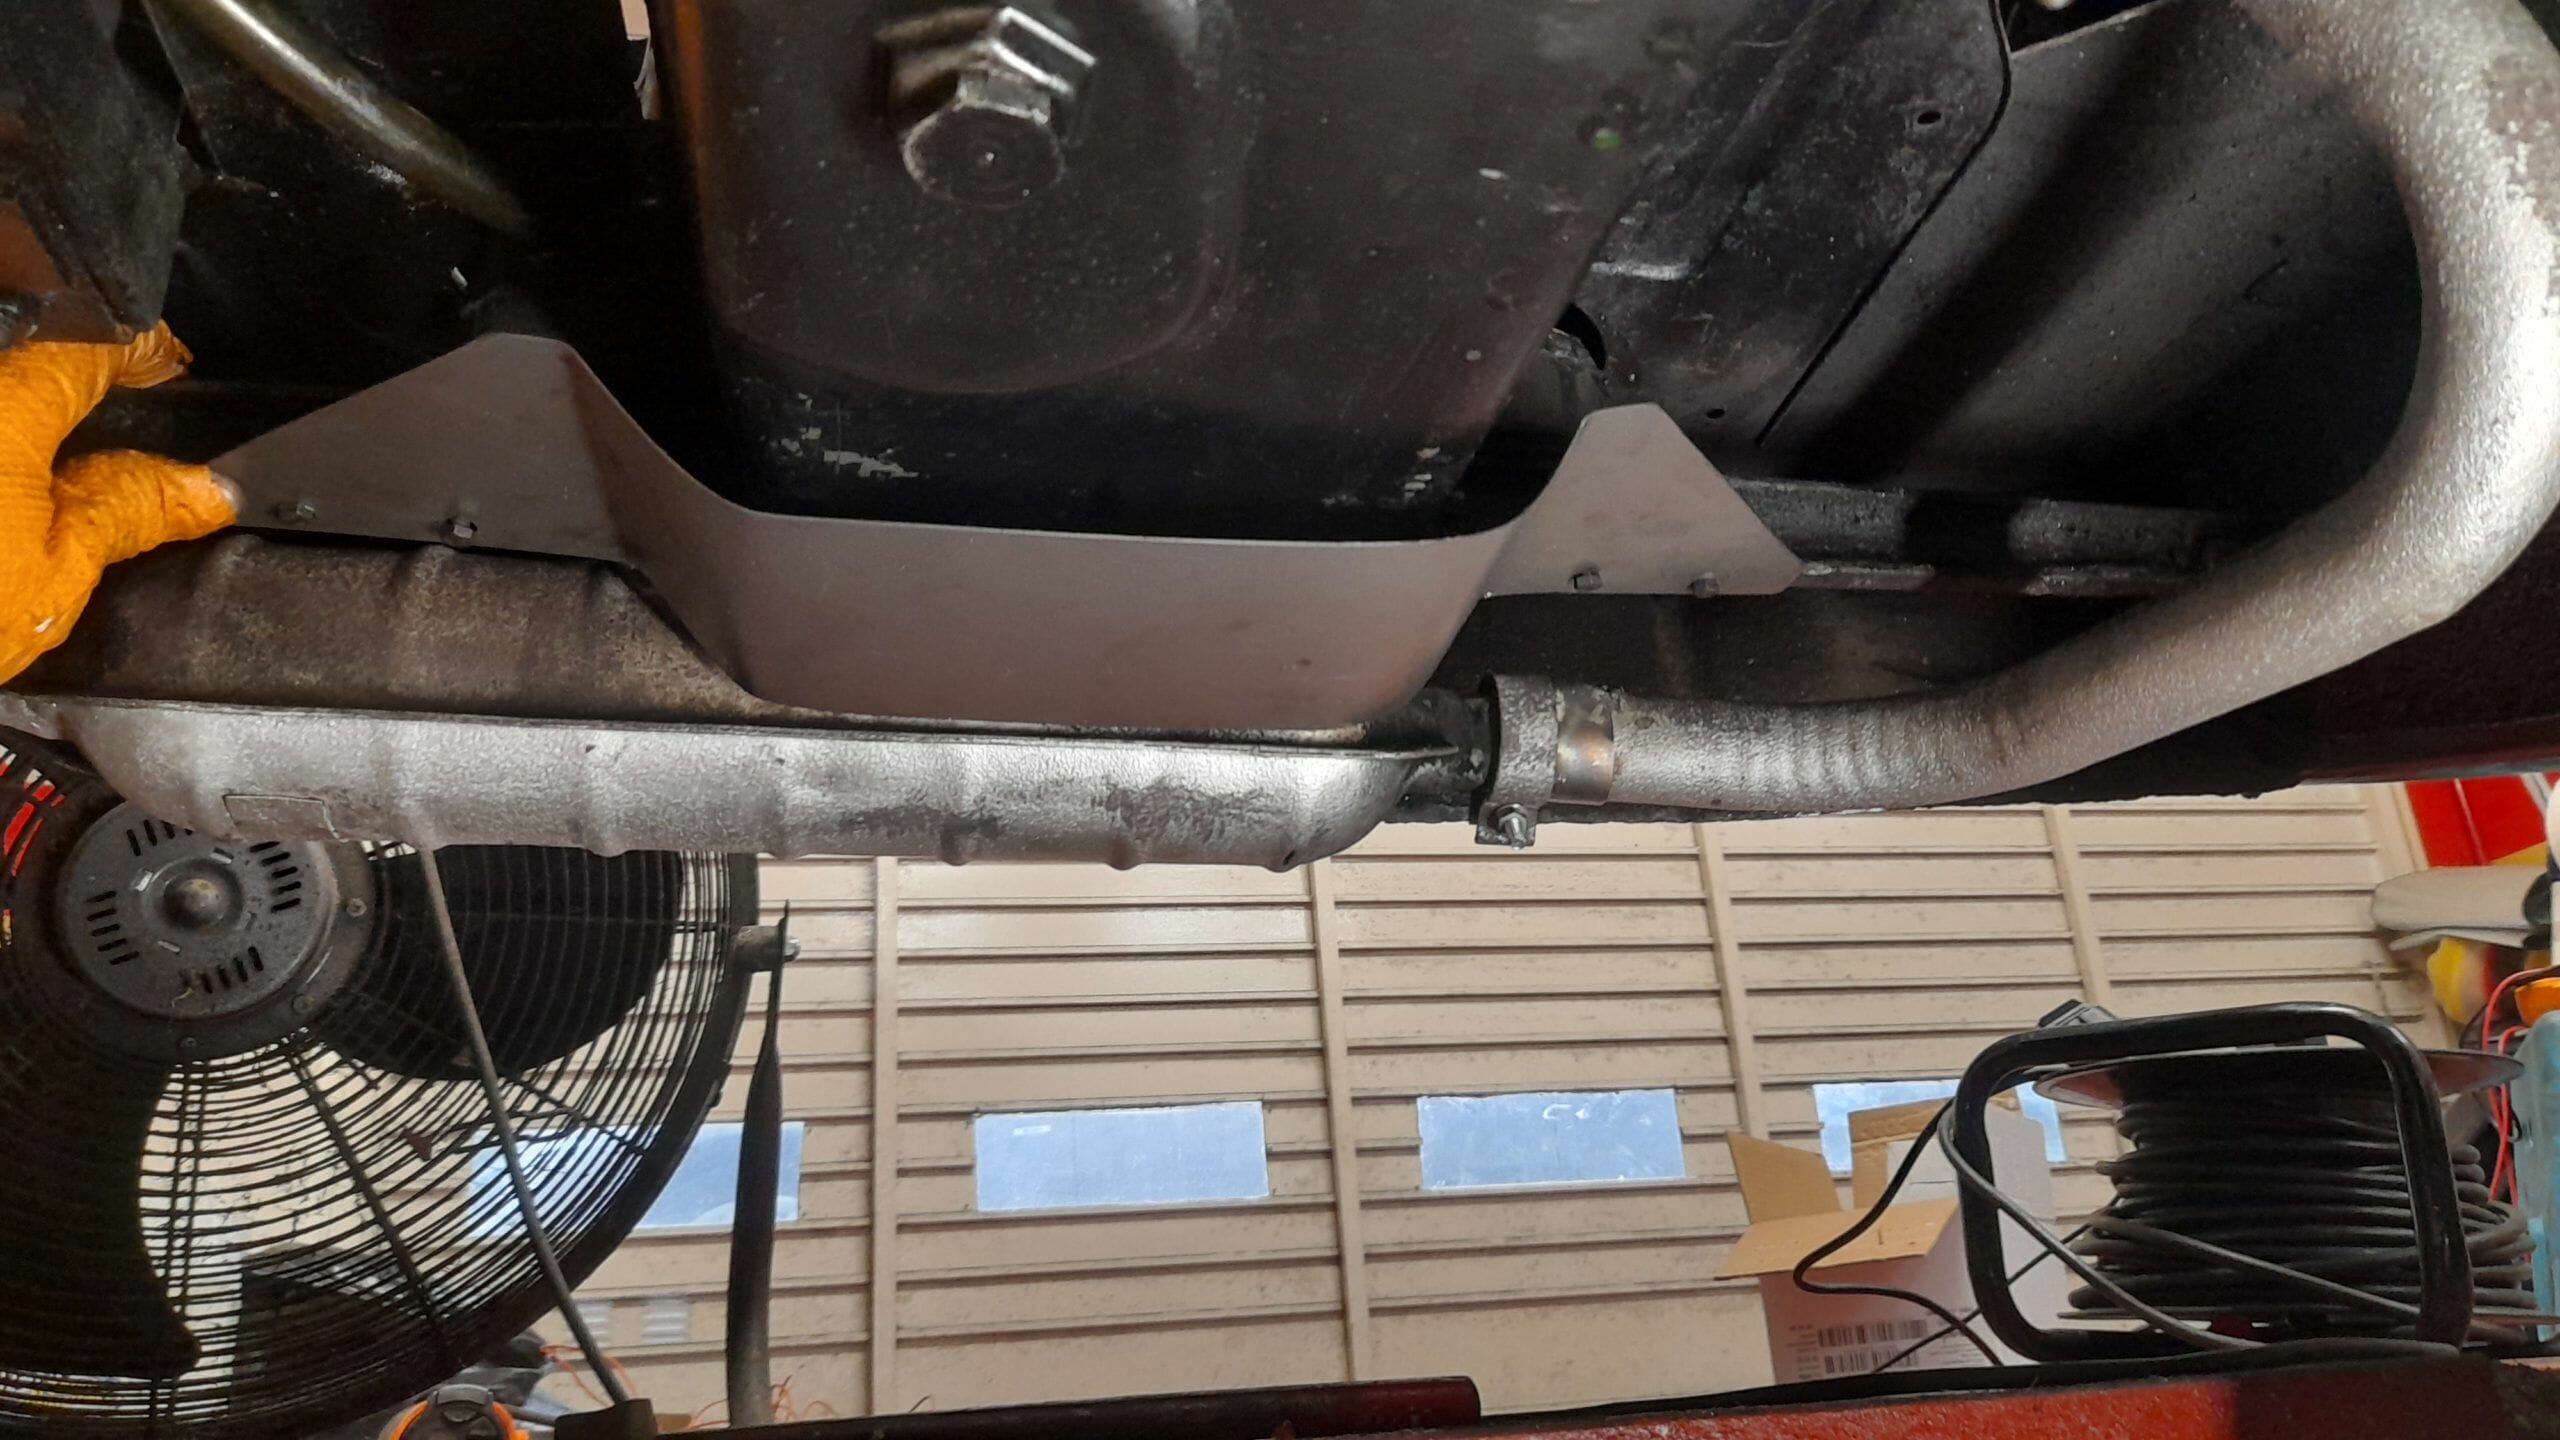
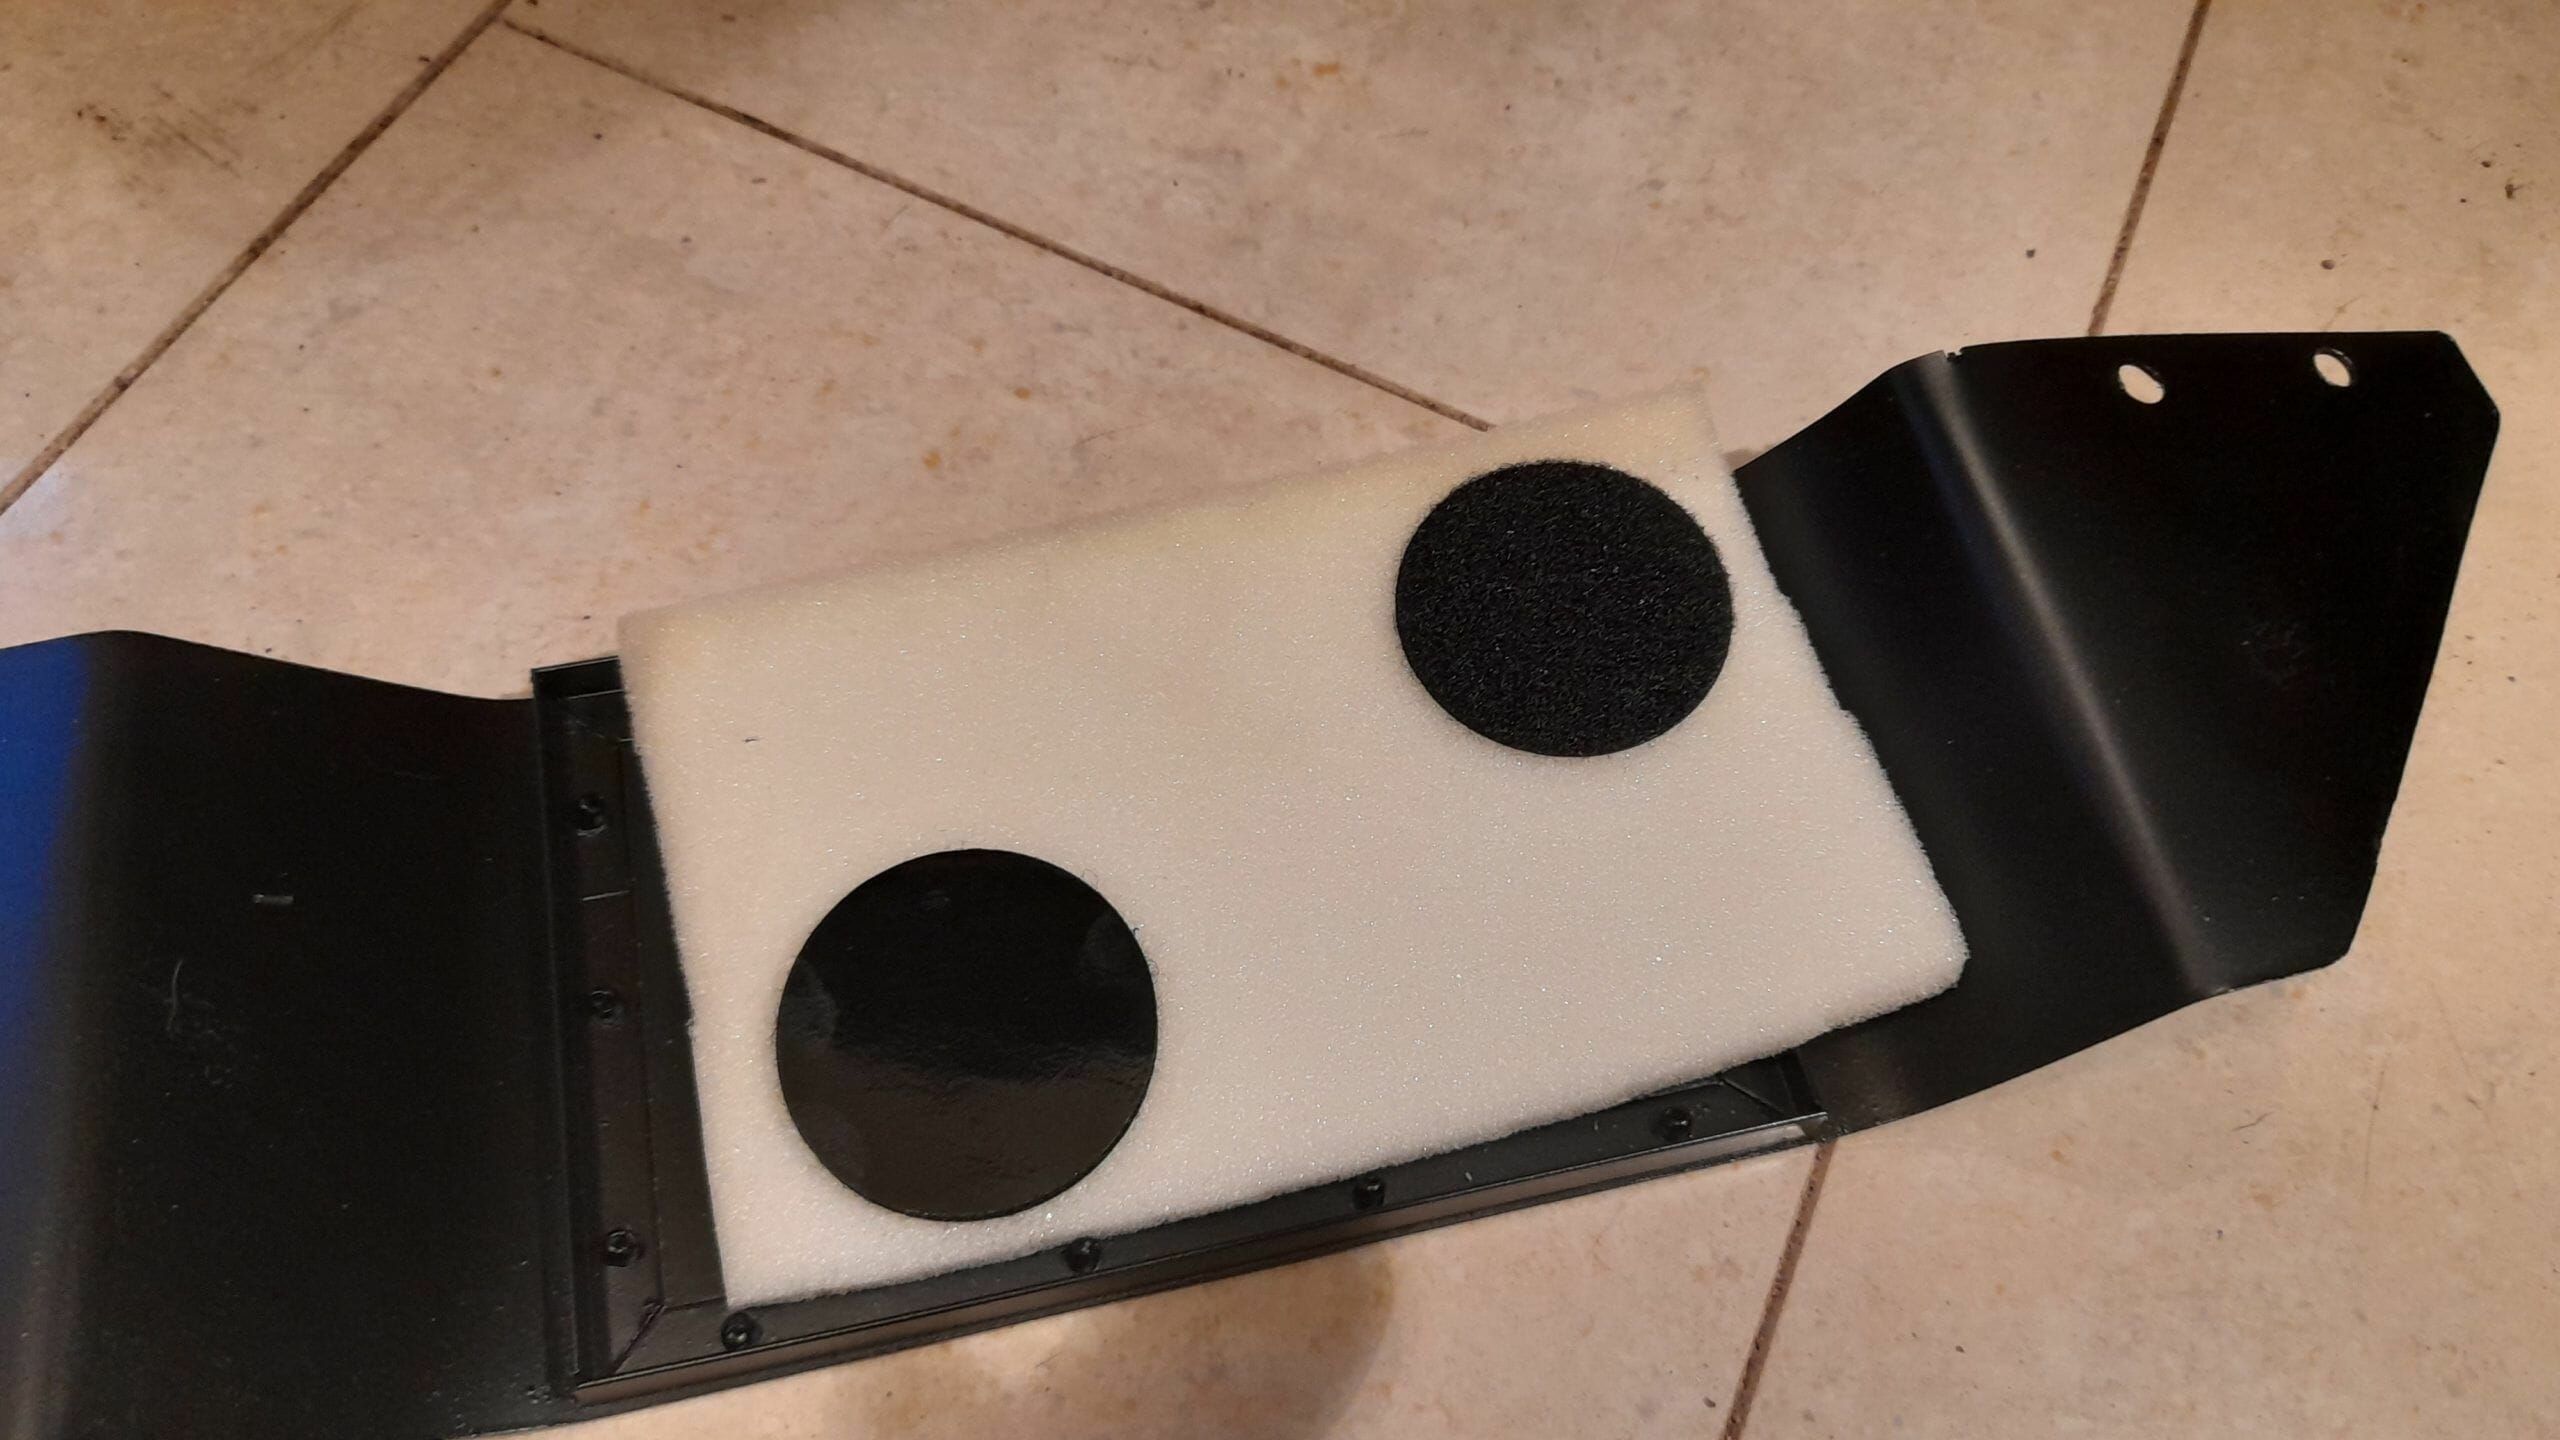
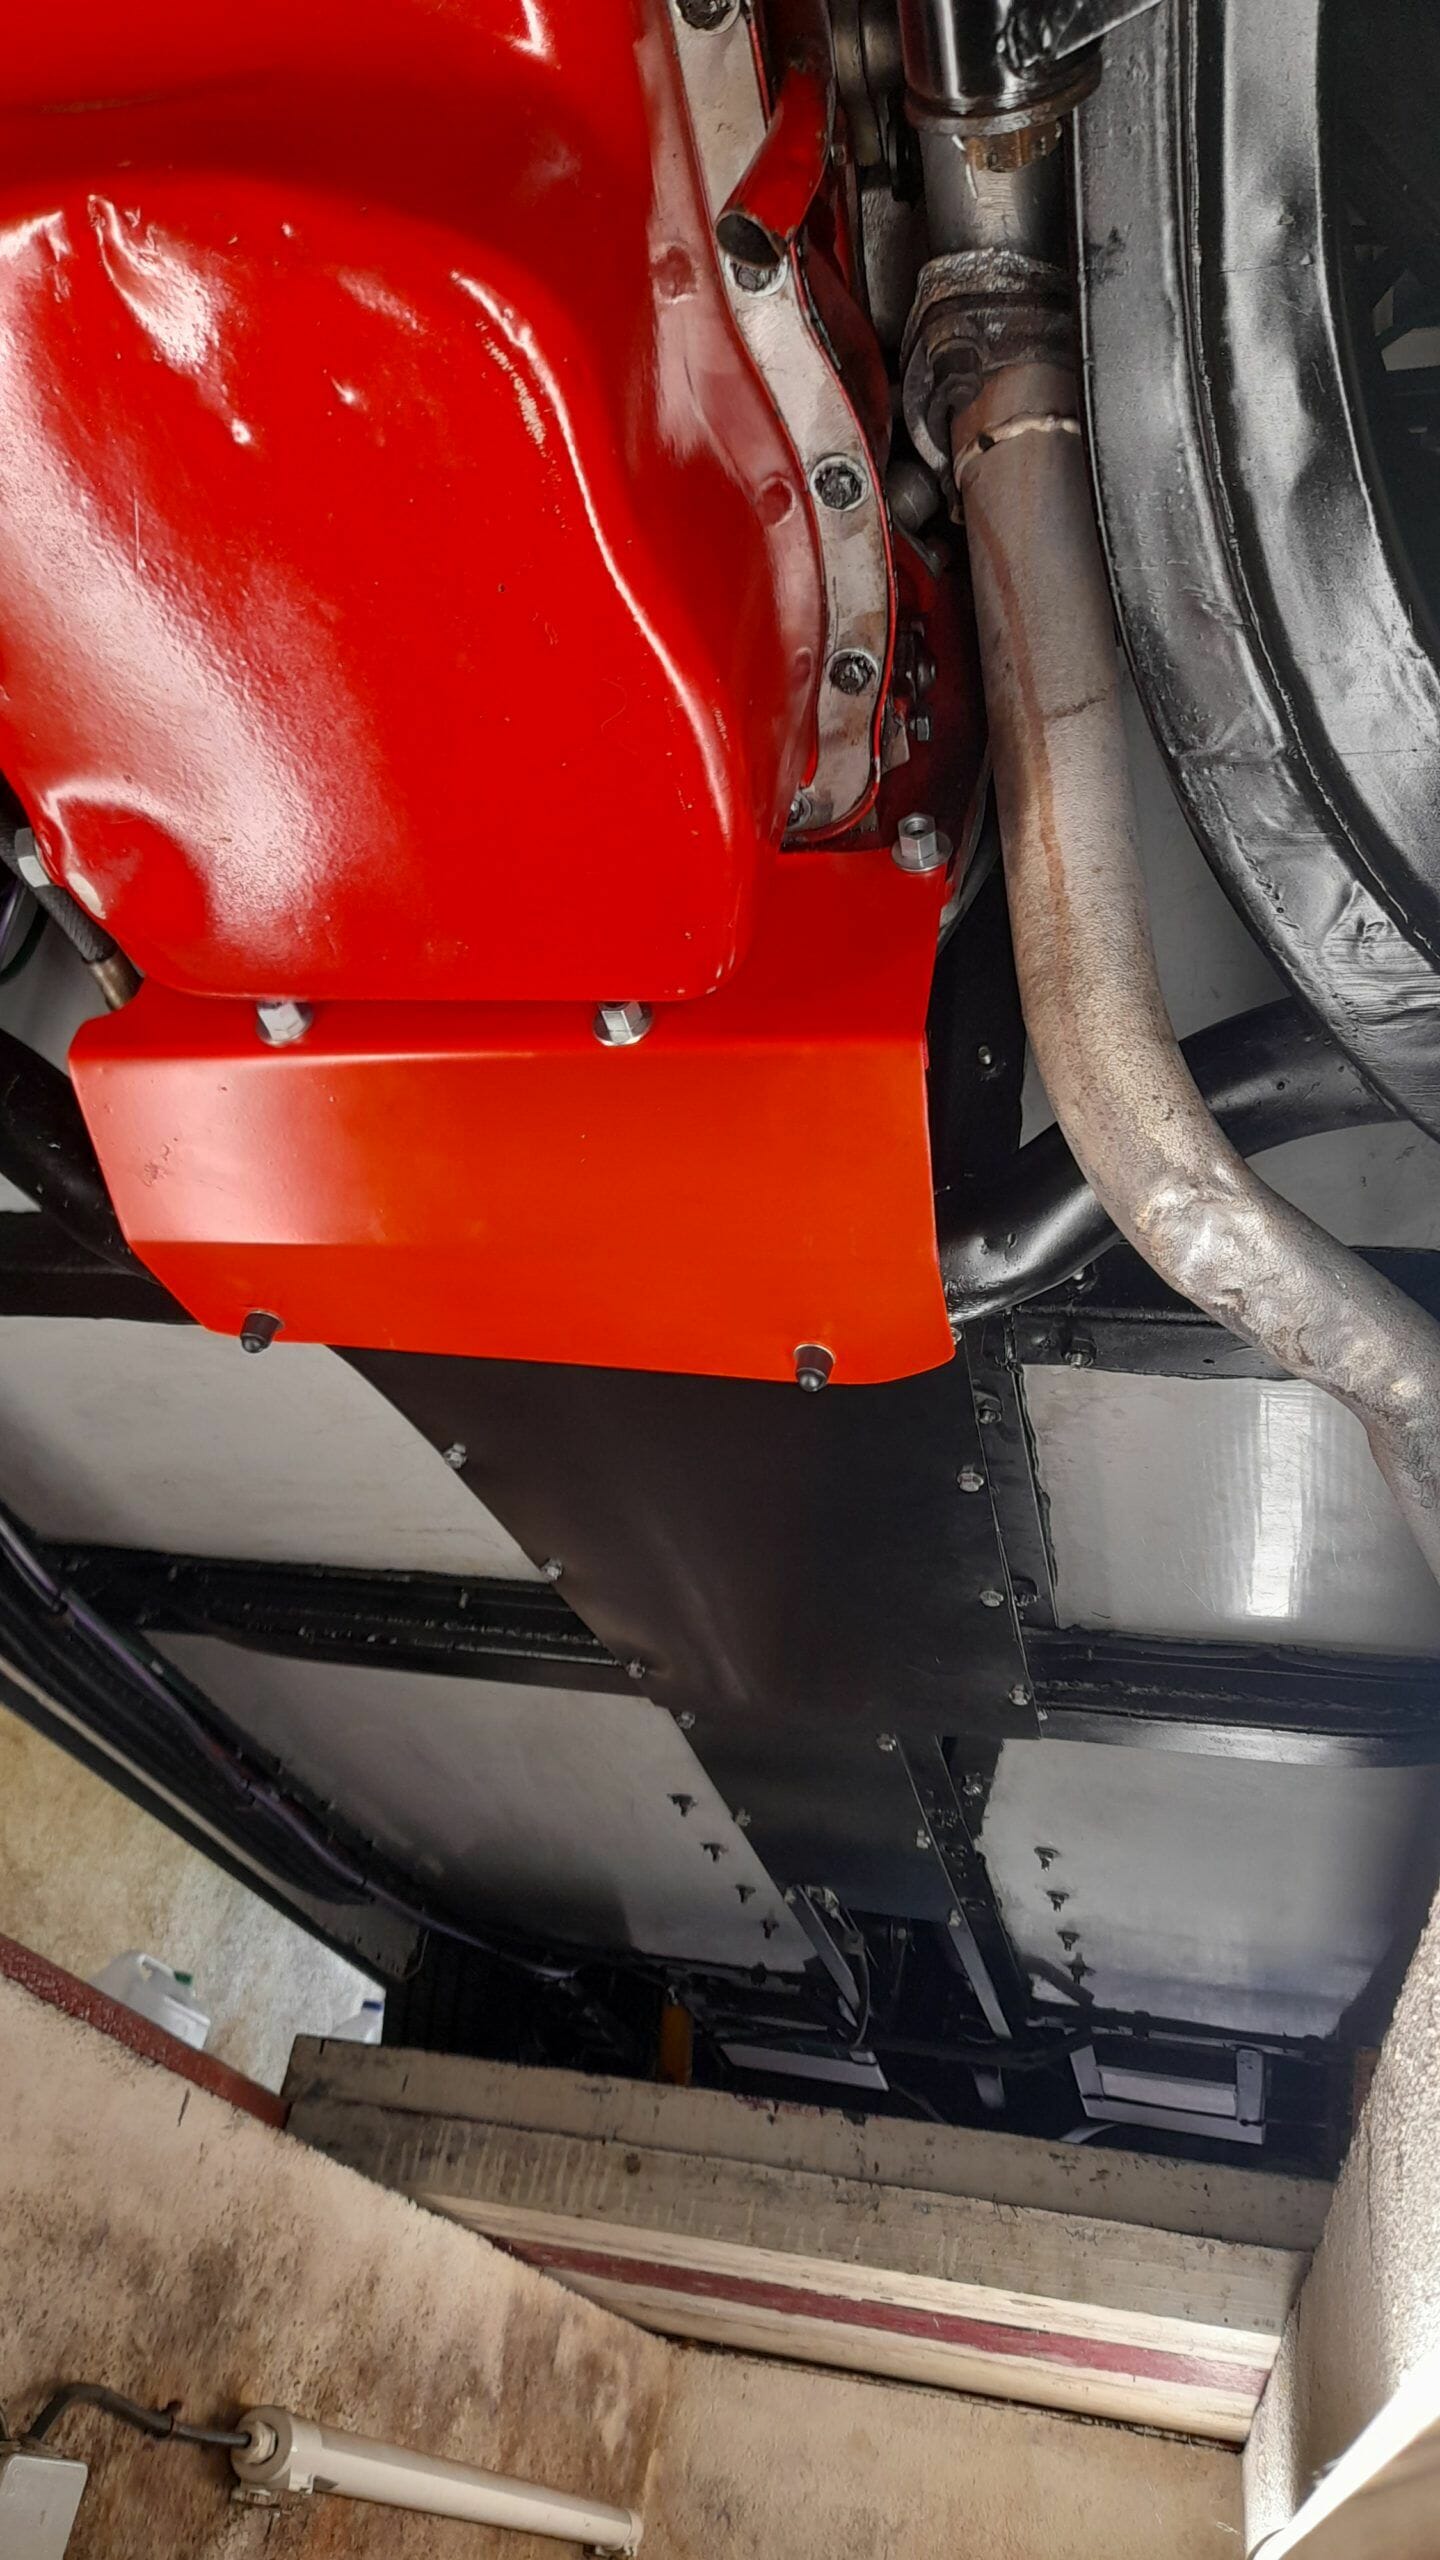
Final installation
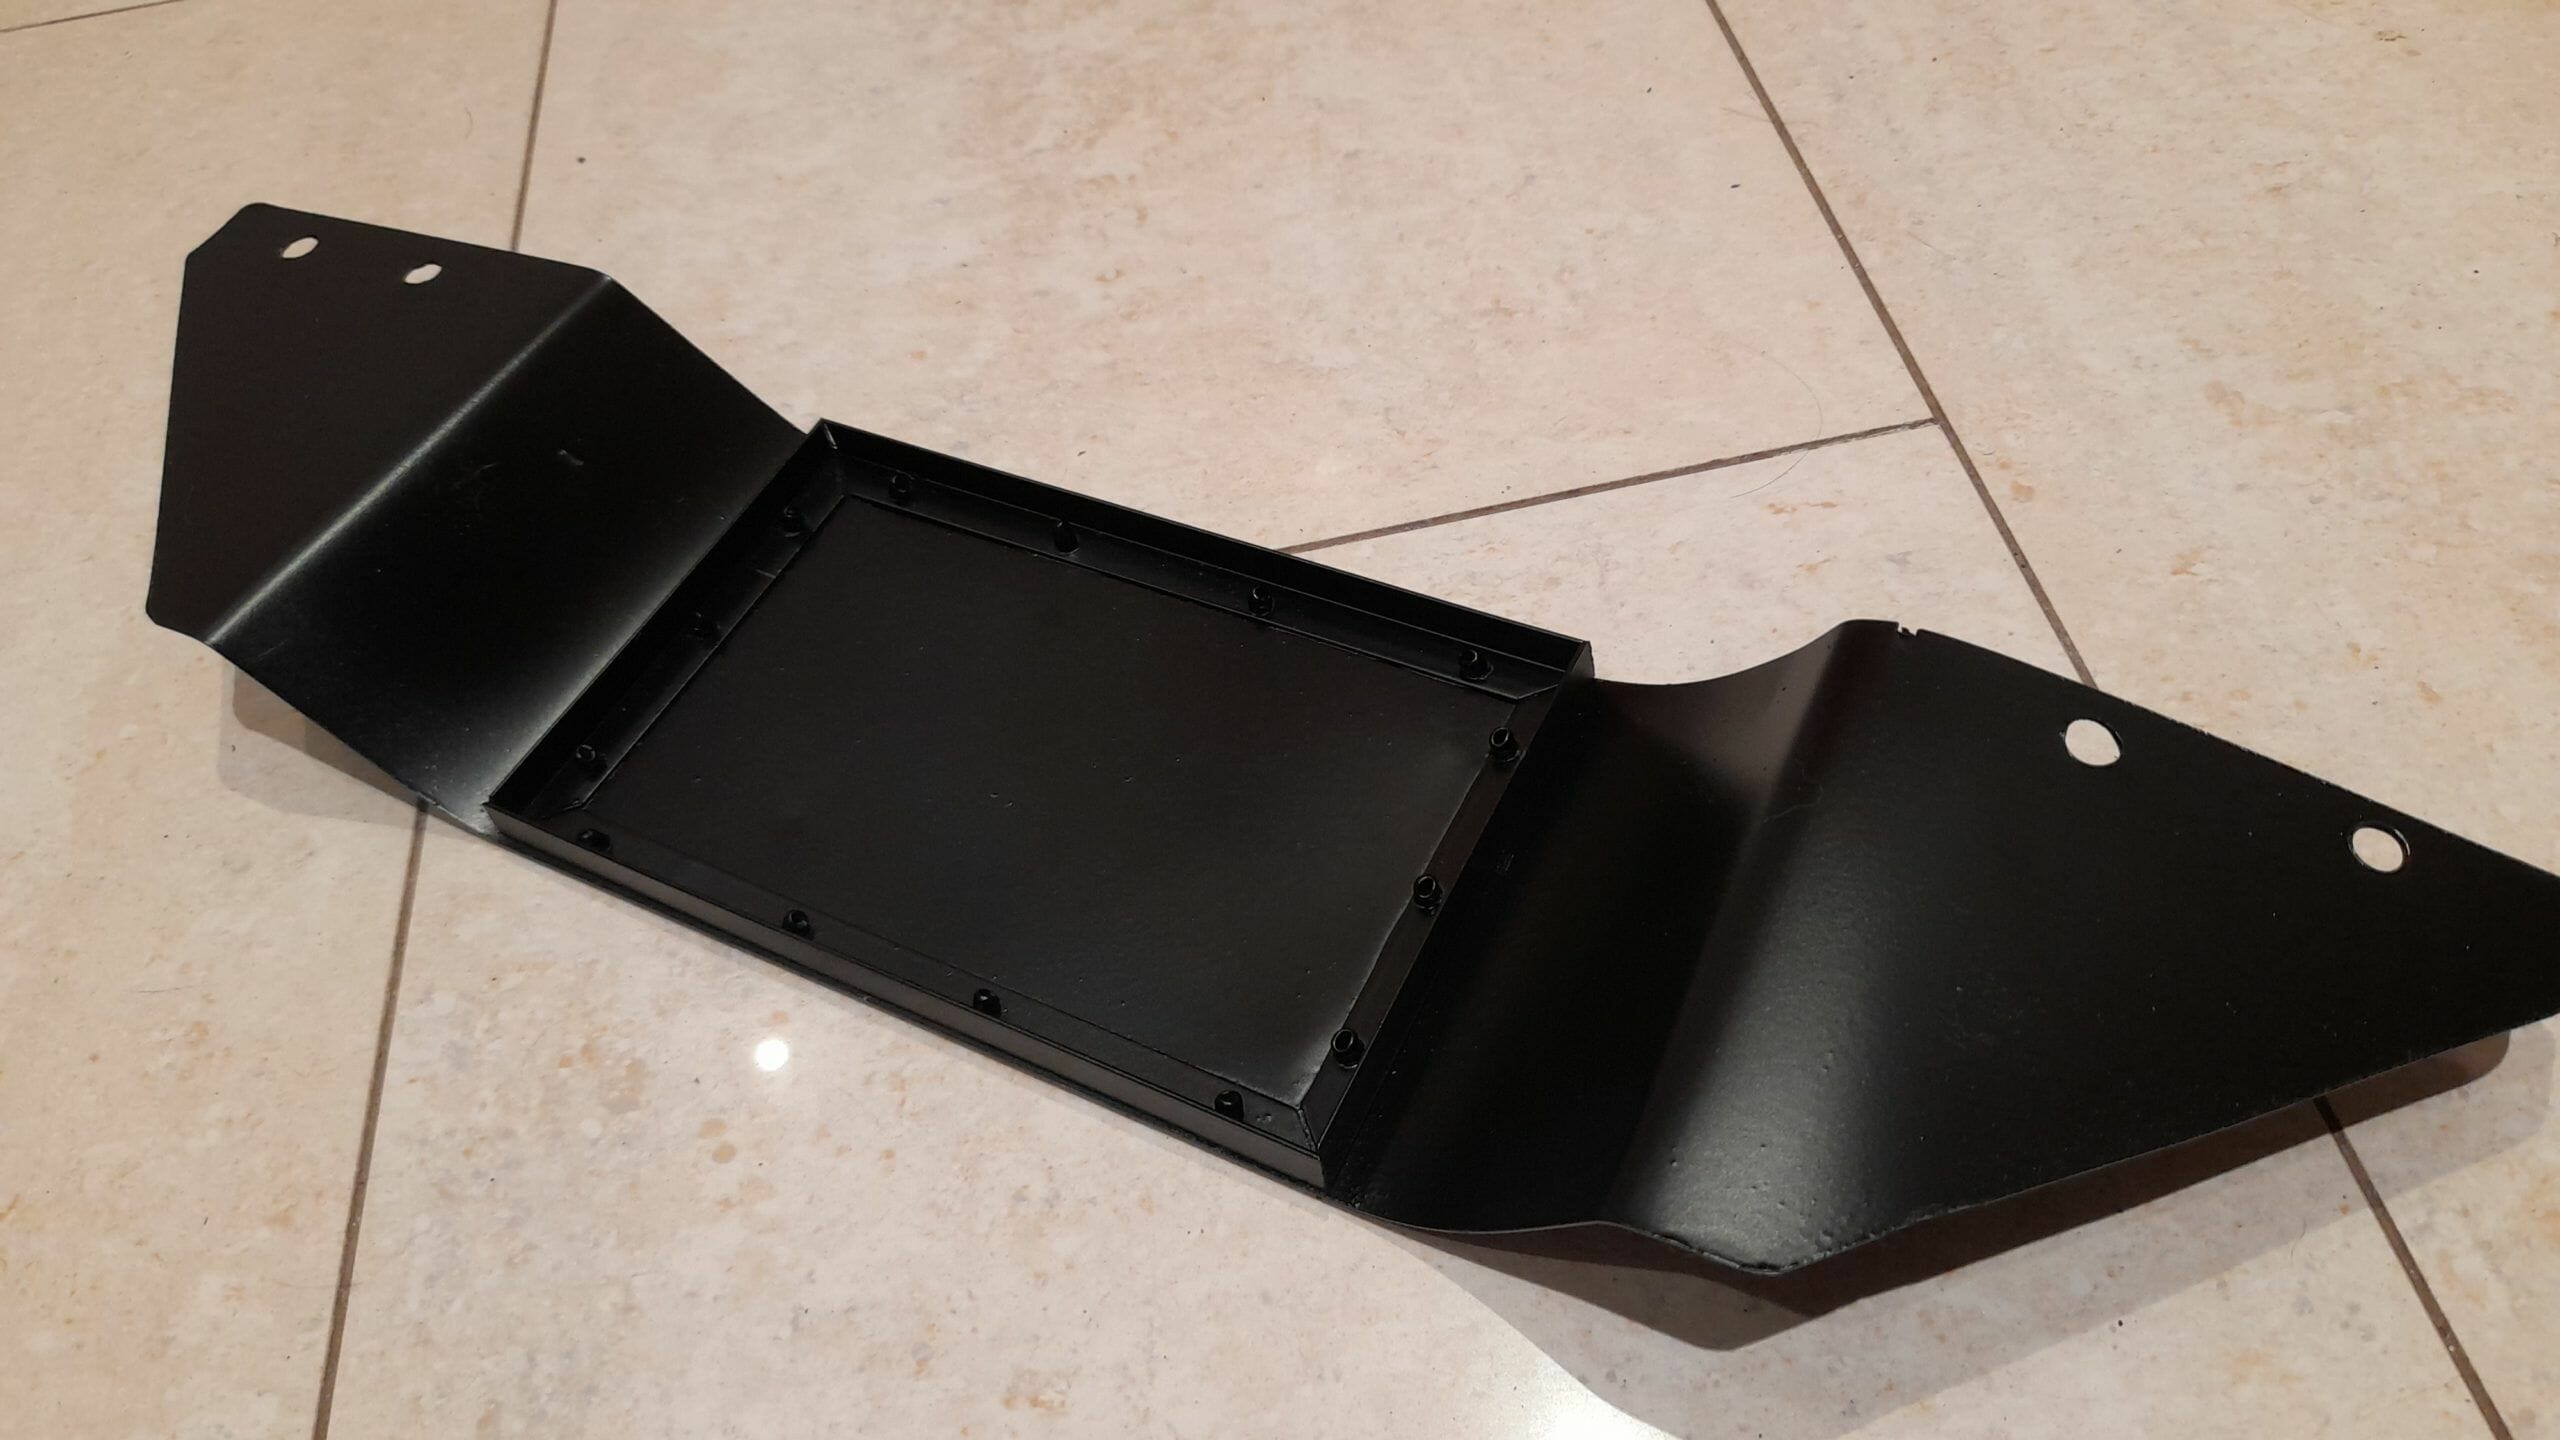
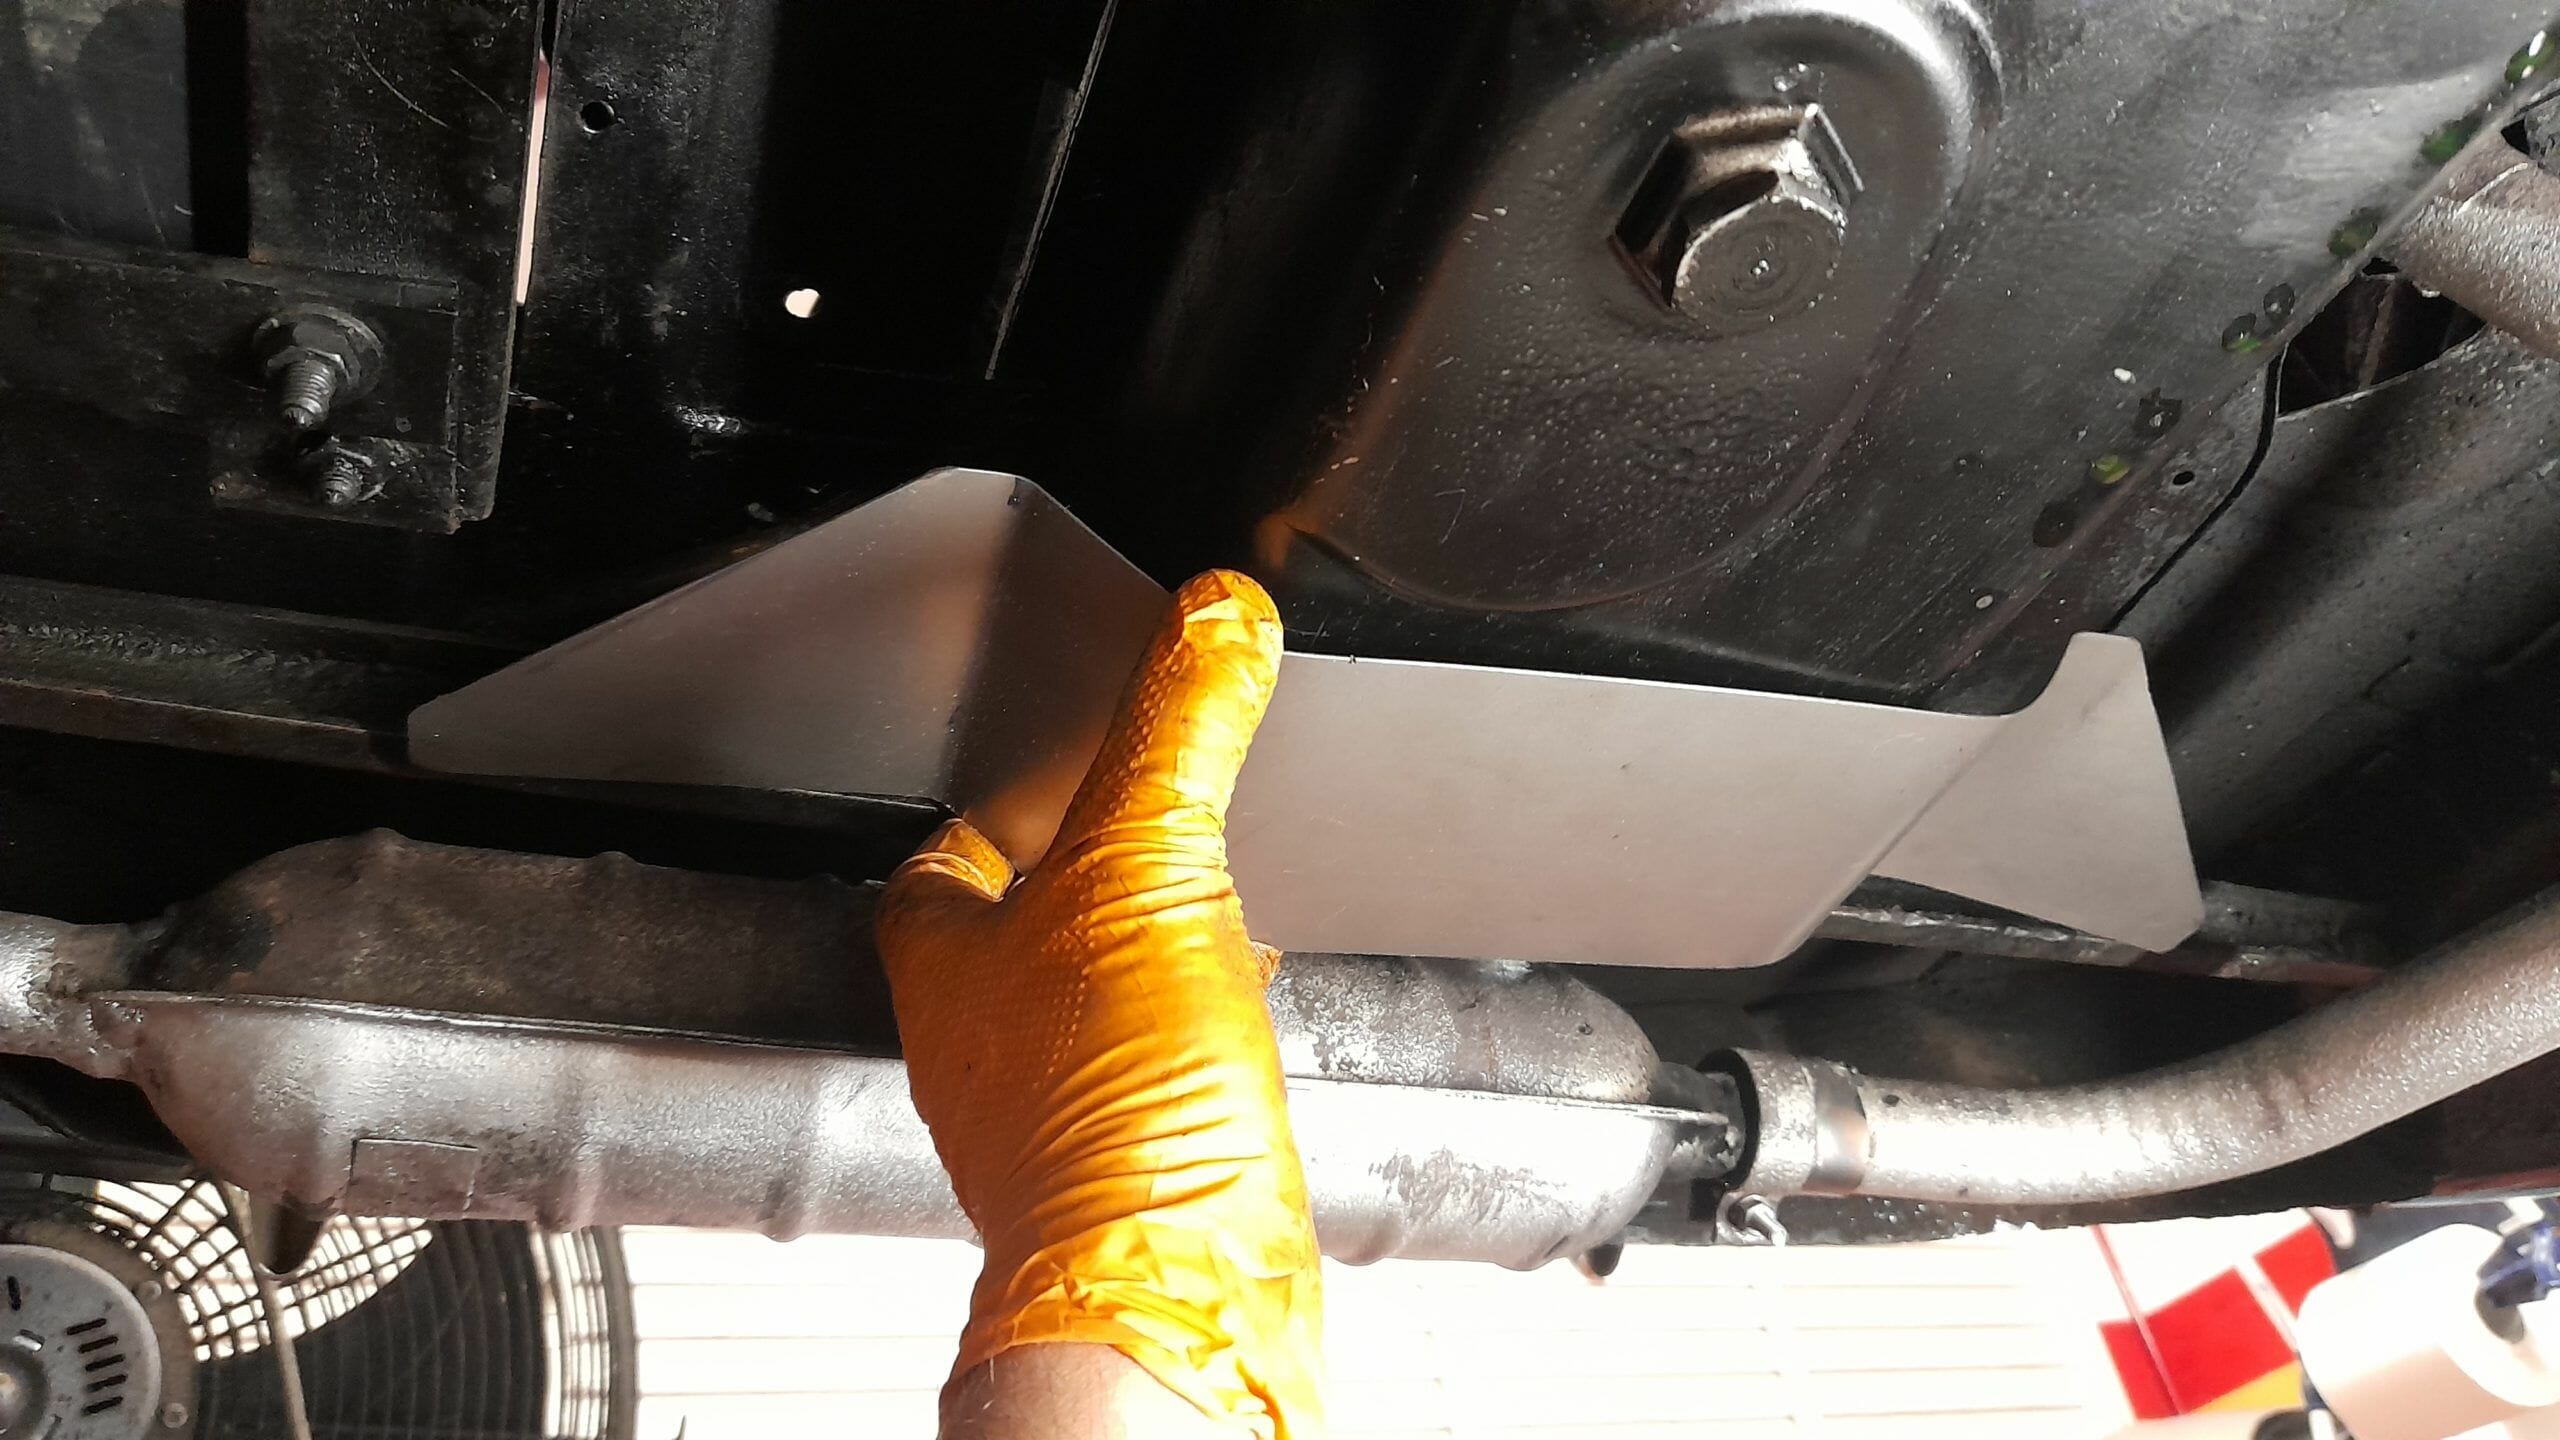
Once installed in the vehicle, we can see that it is perfectly integrated in the underbody, fulfilling its task and preventing any drop of oil from falling to the ground.
Maintenance is very simple. the tray is fastened with four screws (two on each “wing” of the tray). From time to time (e.g. every oil change) it is very easy to disassemble the tray, remove the foam, dispose of it at a clean recycling point, and replace it with a new one.

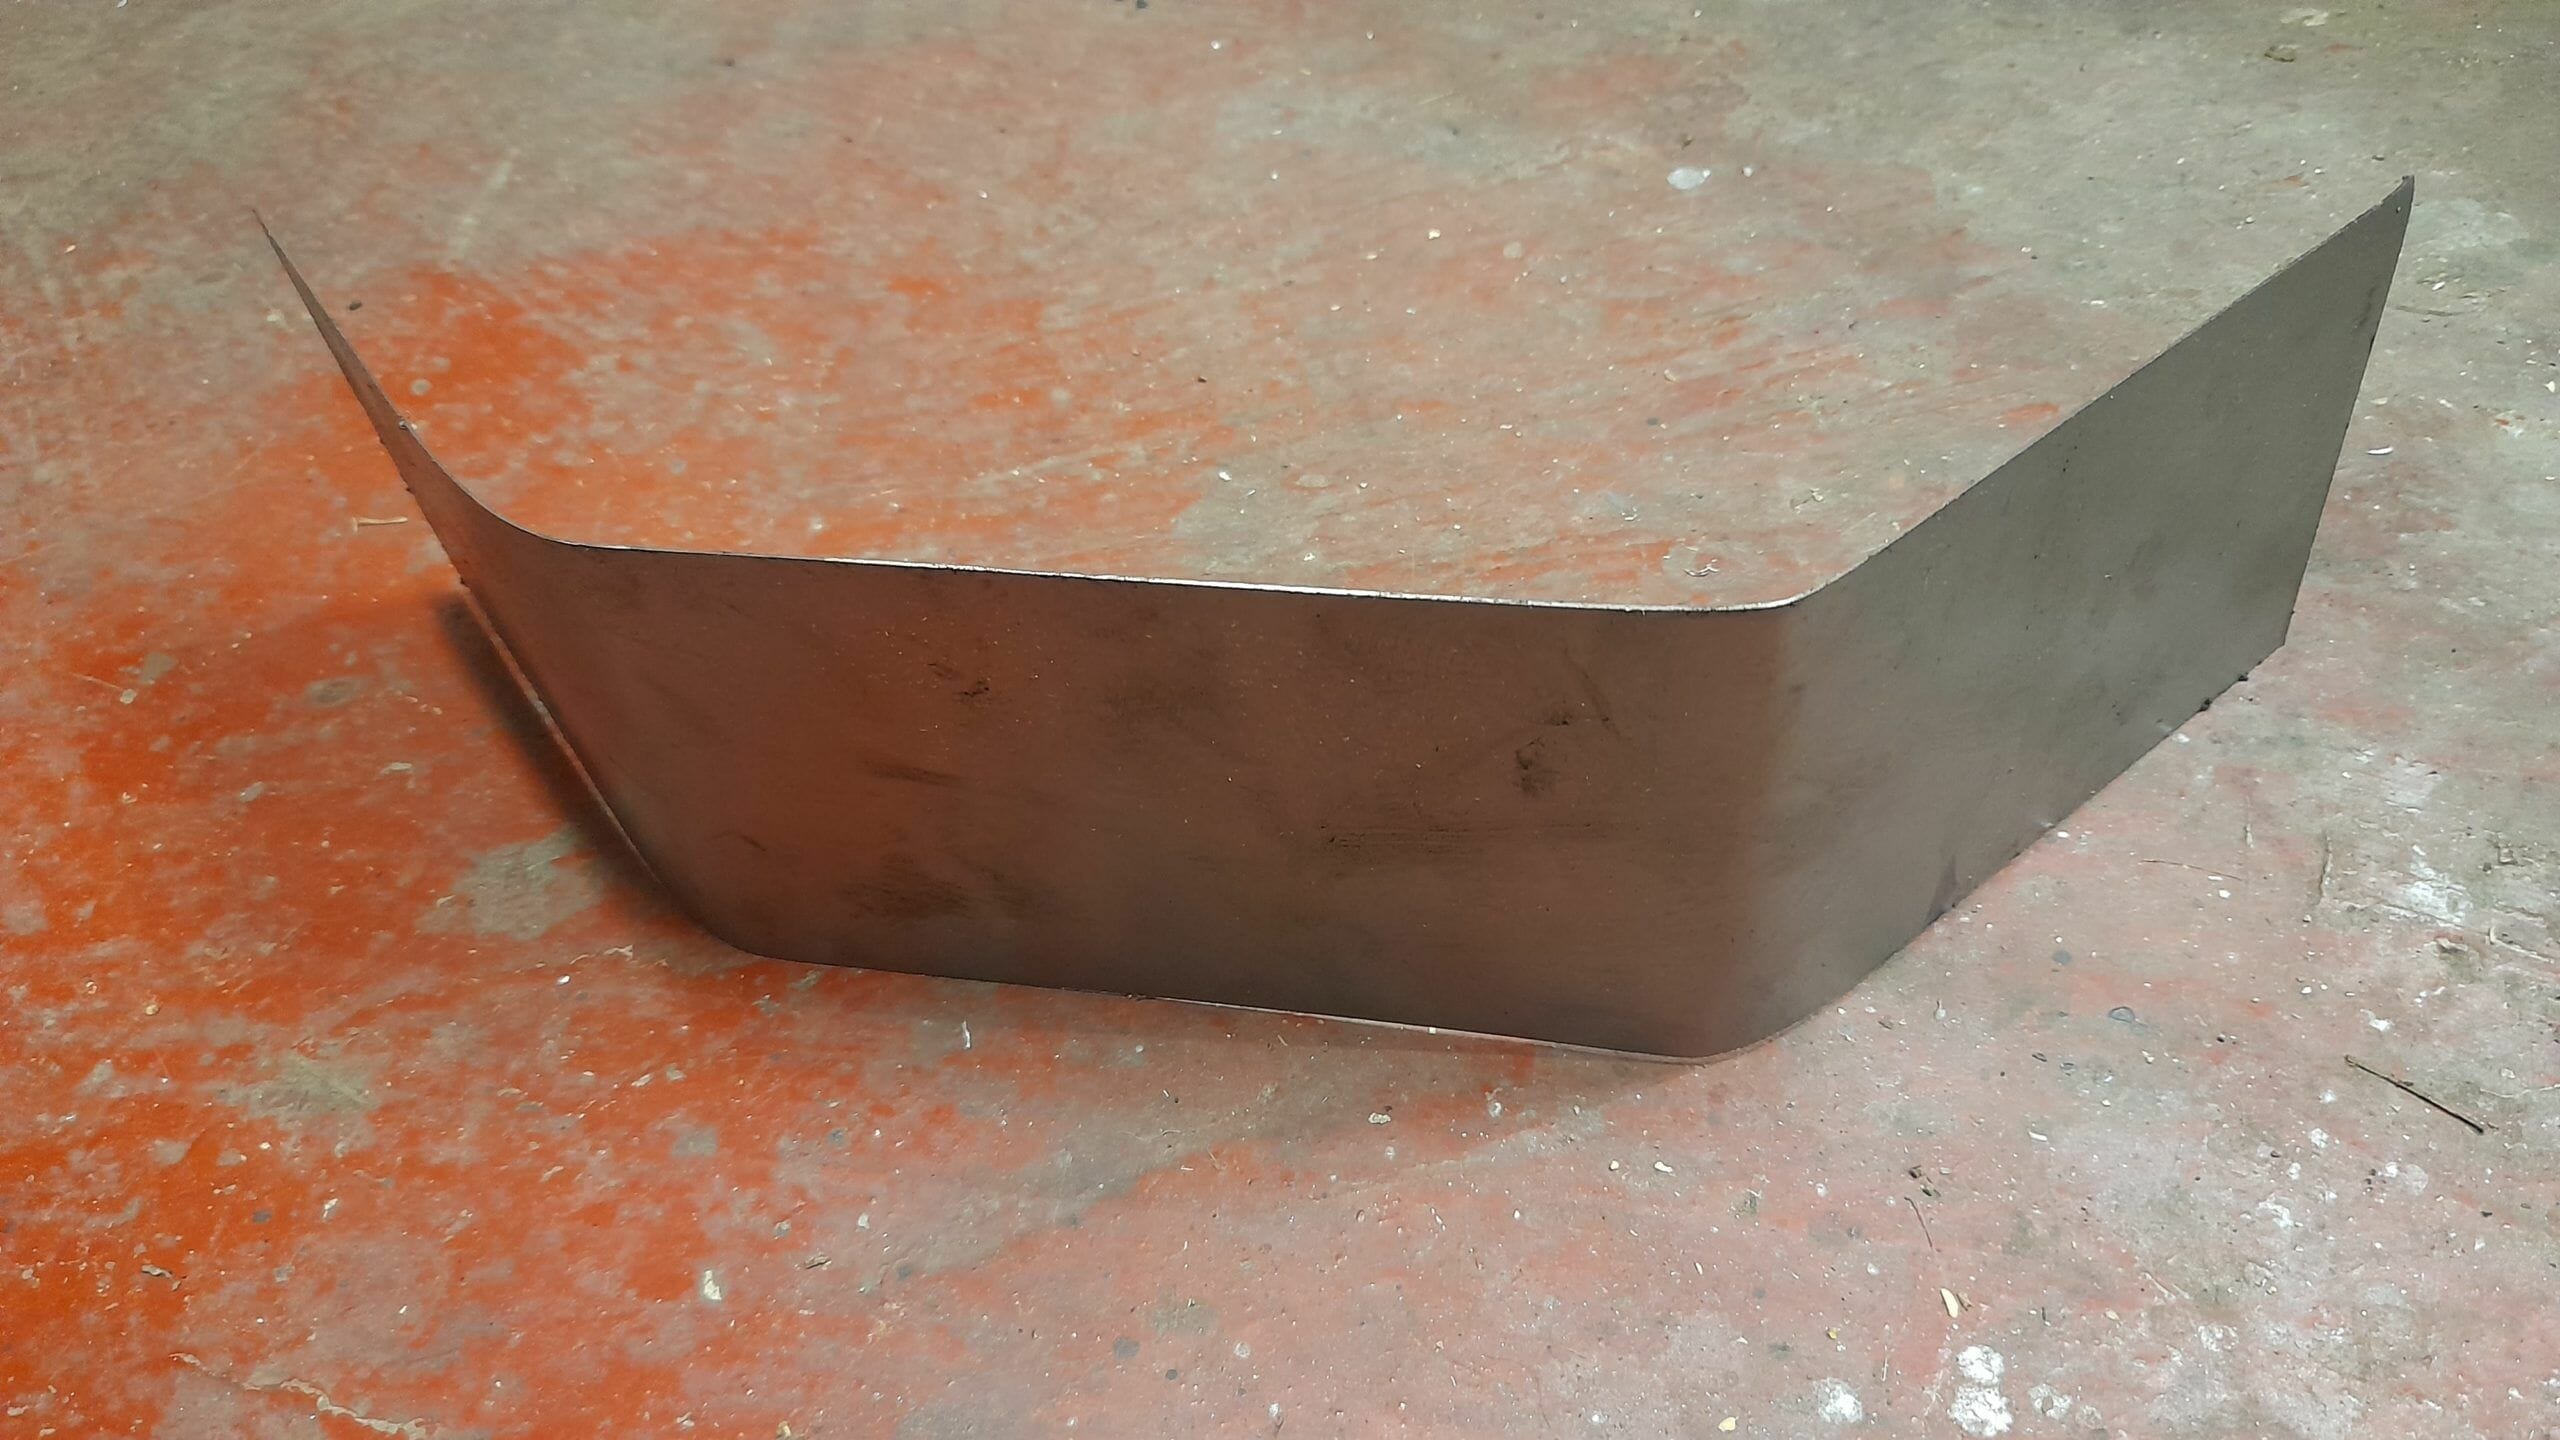
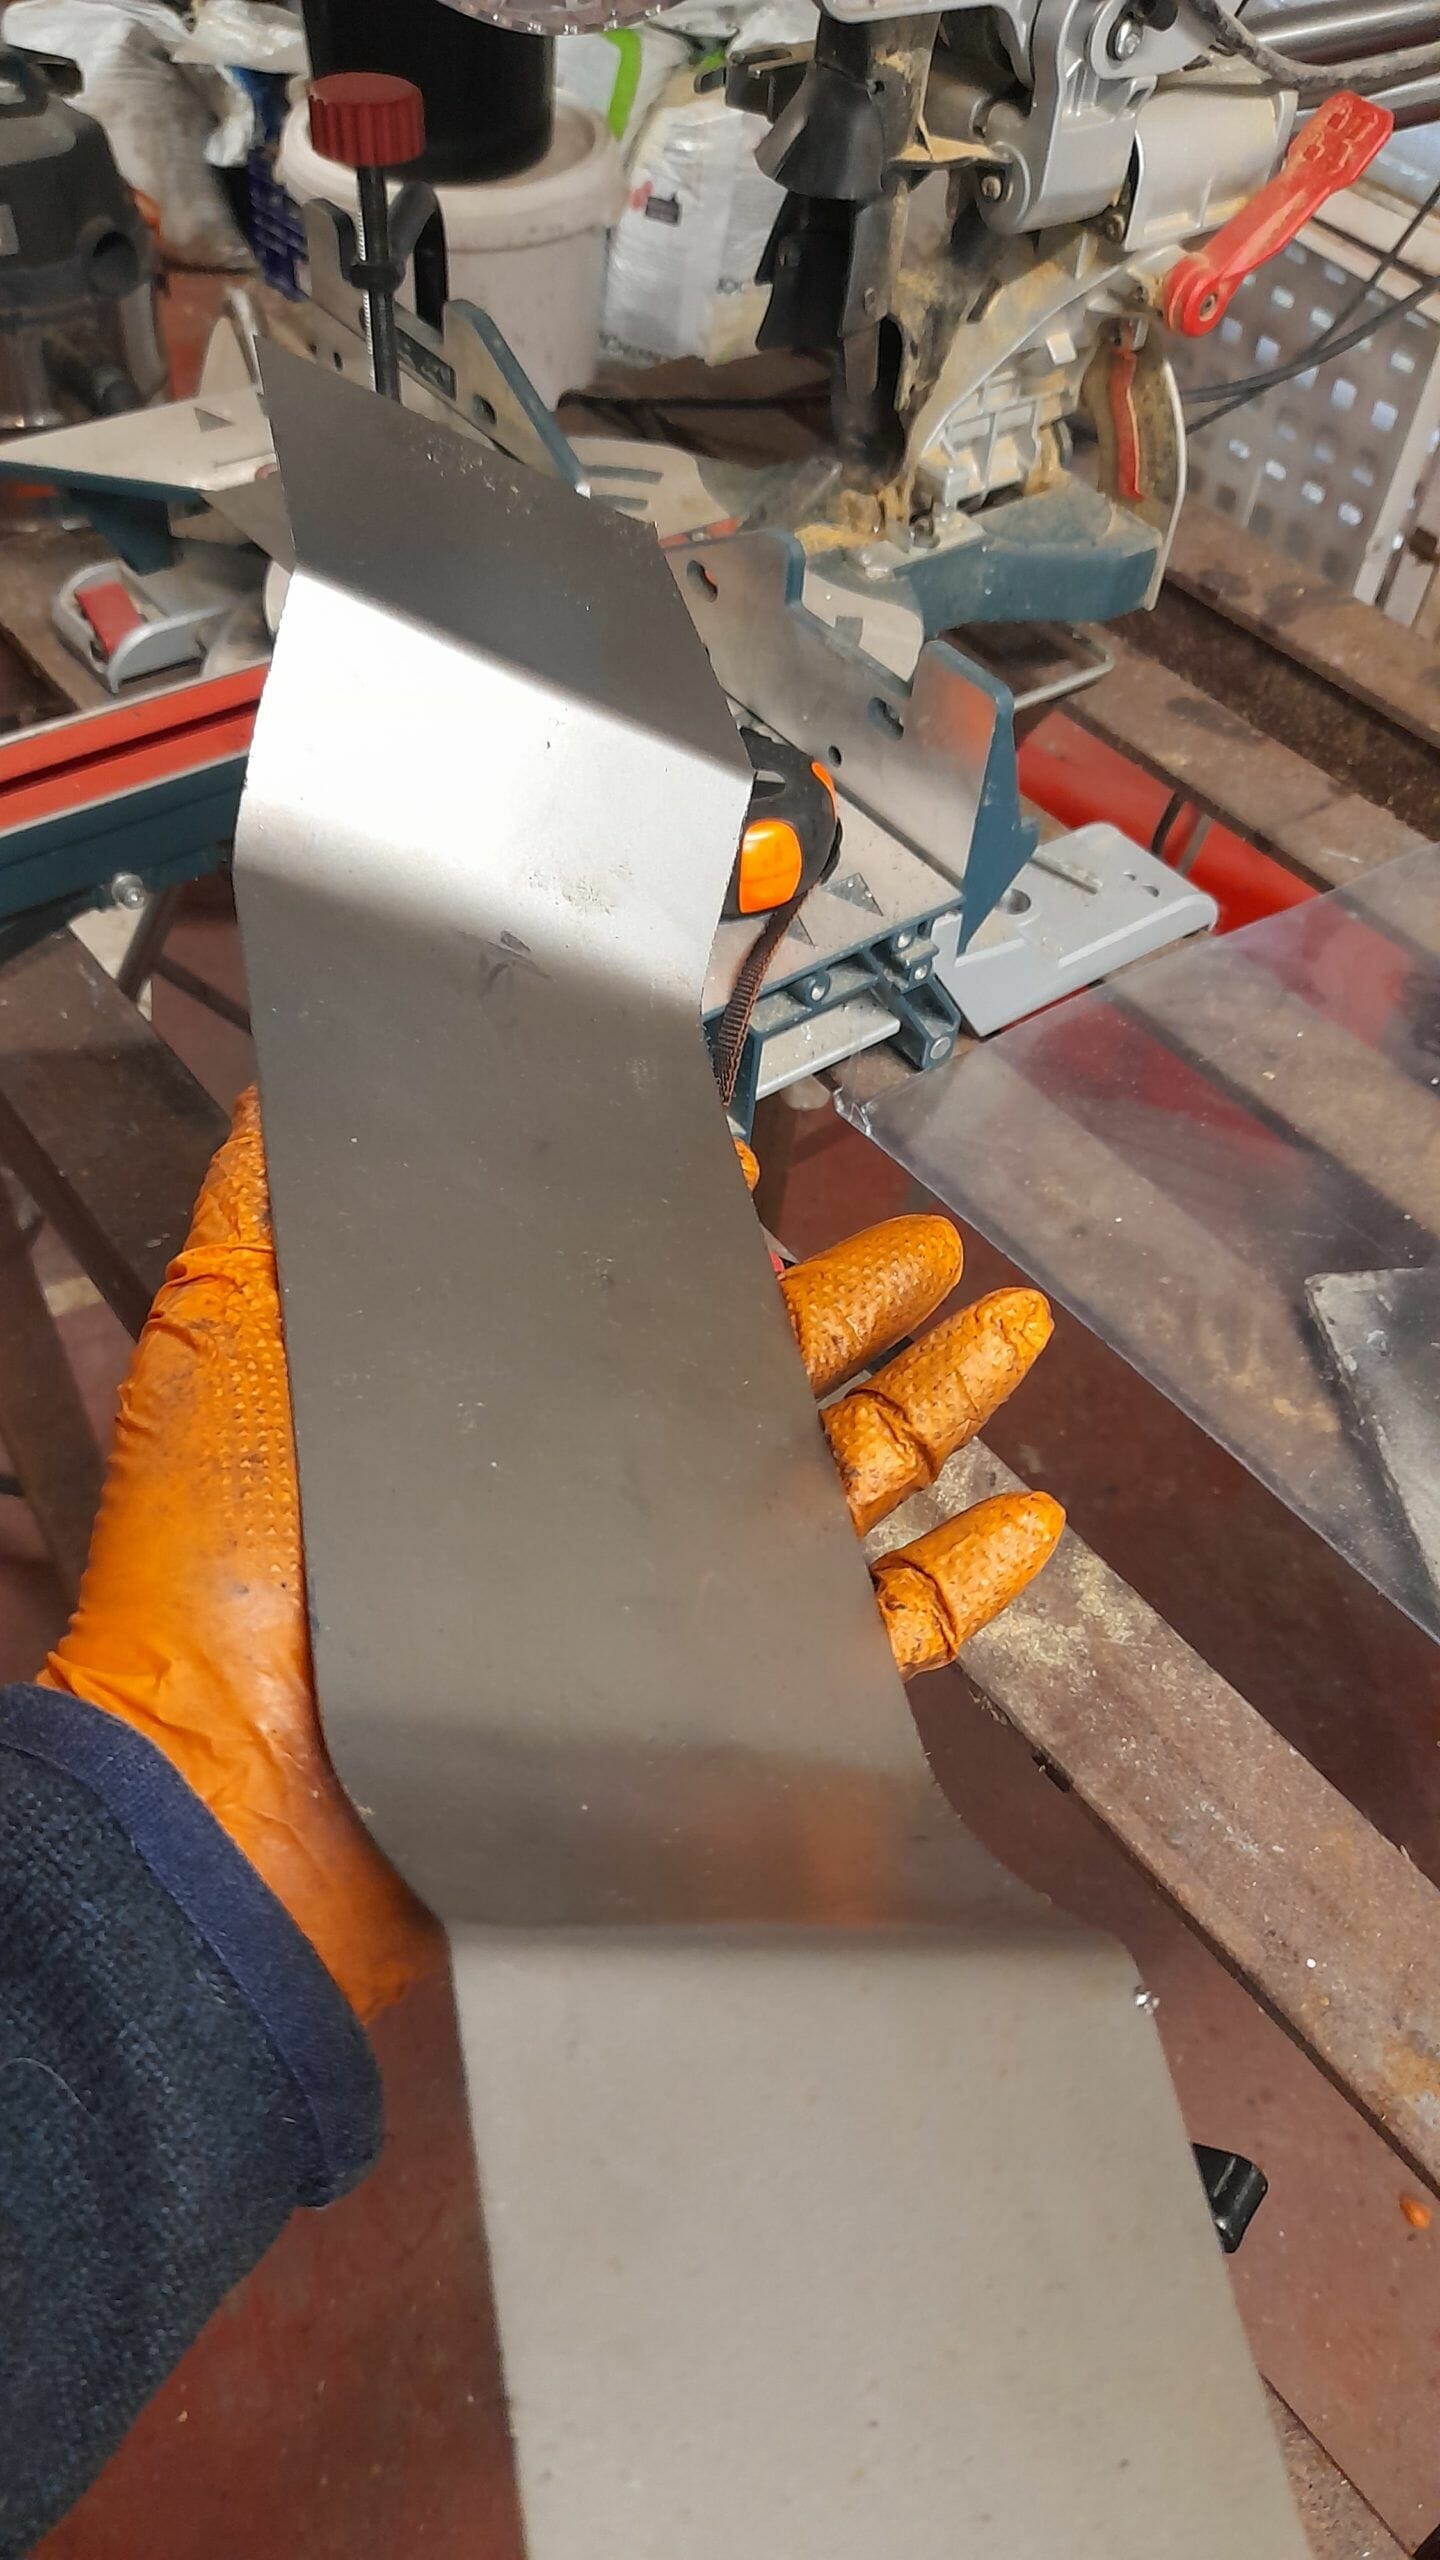
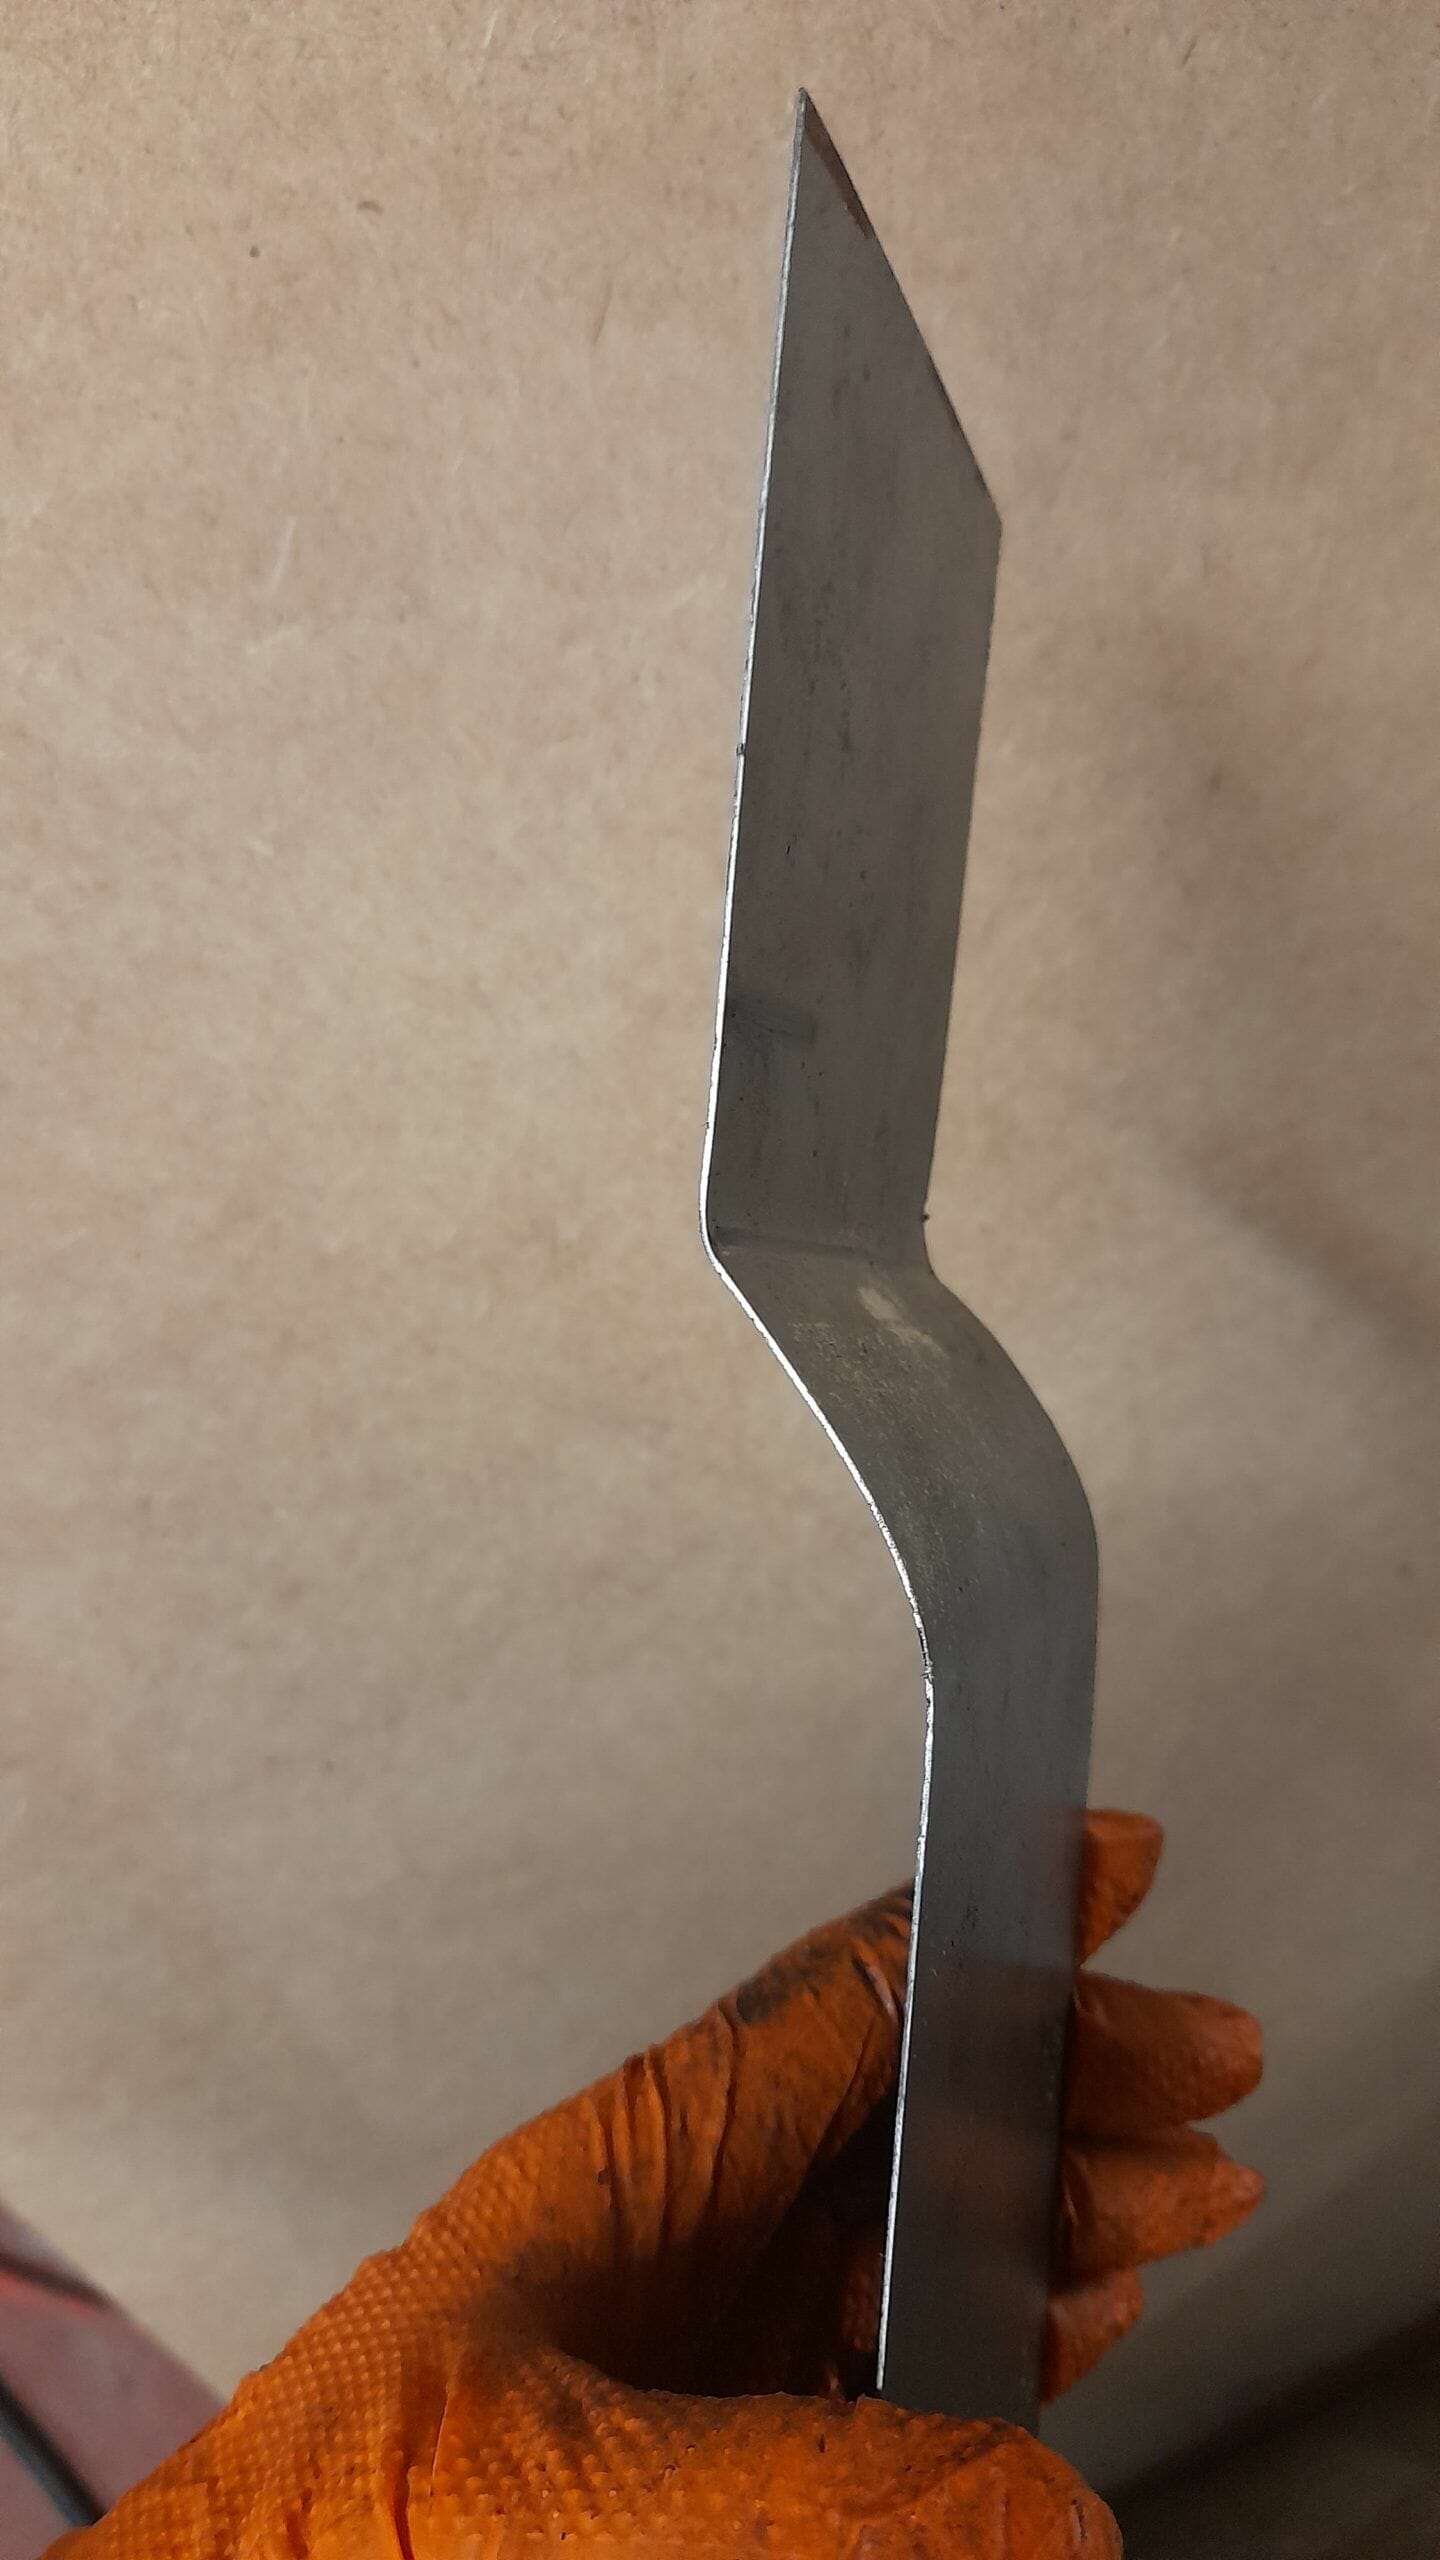
Renault 4CV Tray - Phases and details
Here you can see a small photo gallery with the different phases of the manufacture of the tray oil pan of the Renault 4CV. These are just a few images, but I hope they give you enough ideas to get you started if you want to do something similar. I also give you some details that I think may help you:
- The paint, as I said, is applied with an airbrush. The primer is water-based, while the lacquer is solvent-based. You don’t need an expensive airbrush, but much better a good air compressor that gives you a sufficient flow for your paint airbrush. In any case, it is not “so critical” painting task. But if you apply it with an airbrush, the result will be much better. Alternatively you can use a spray, but sprays are expensive and generally use more paint than necessary.
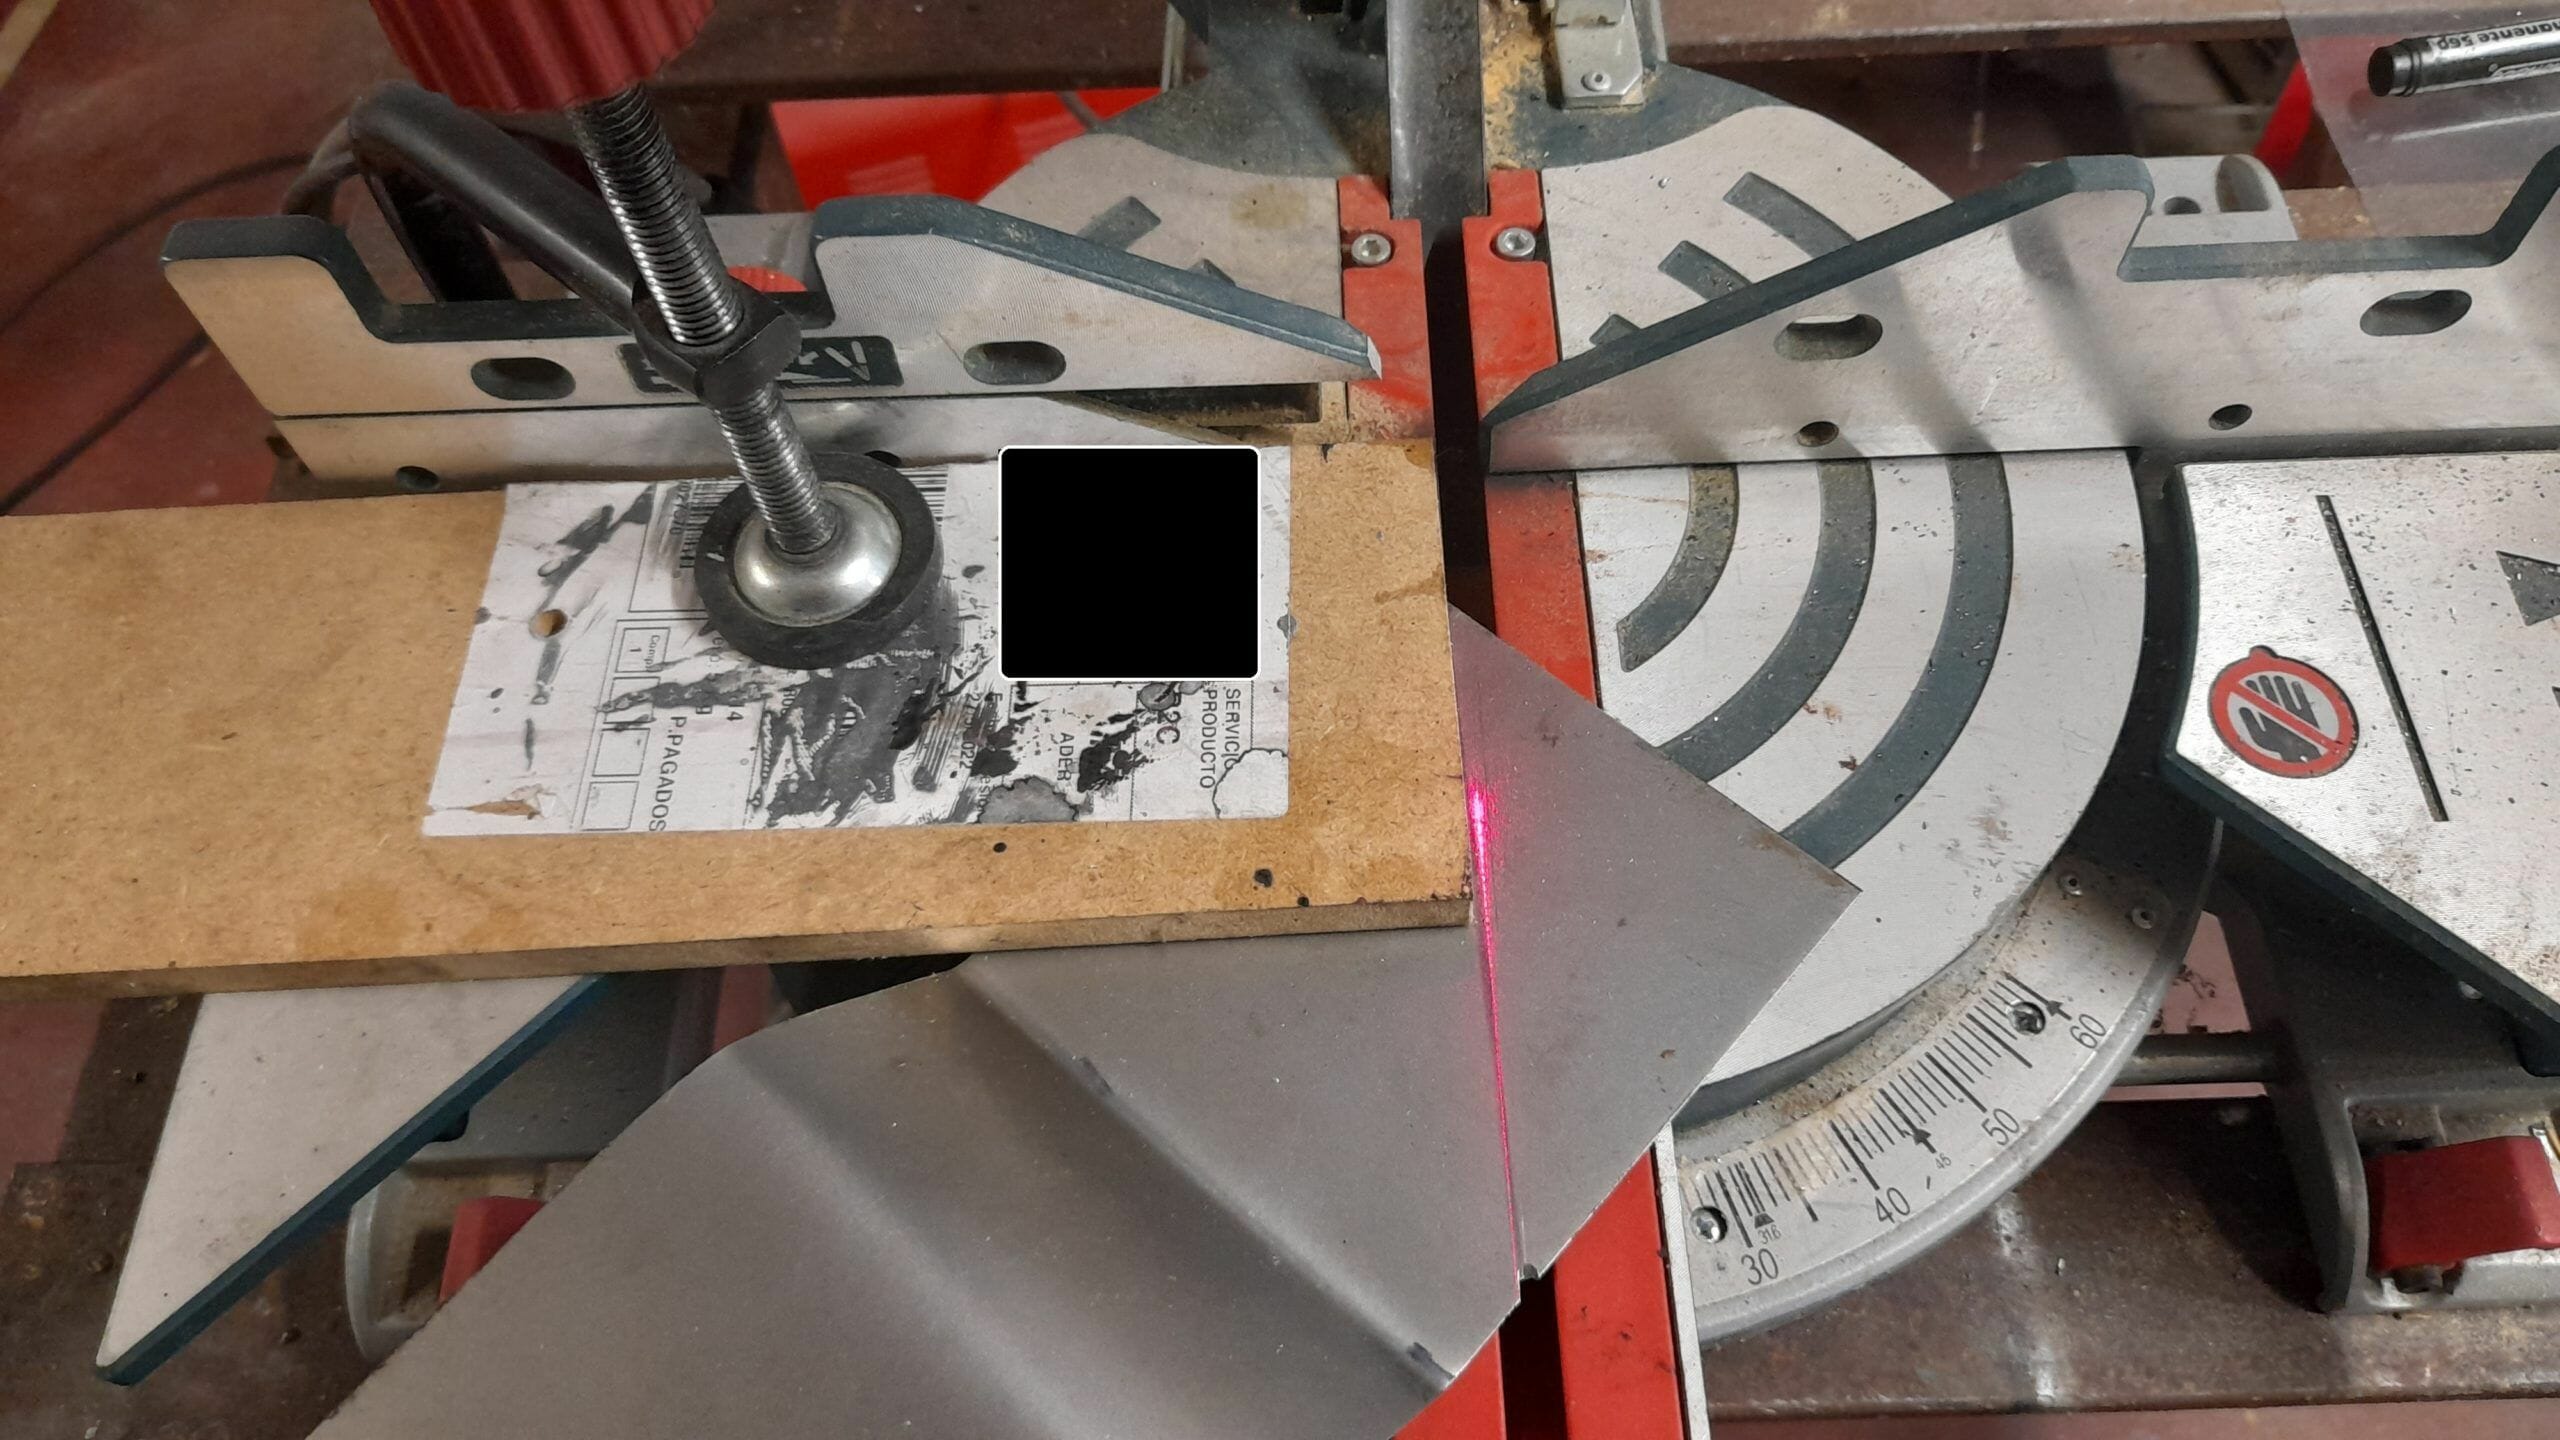
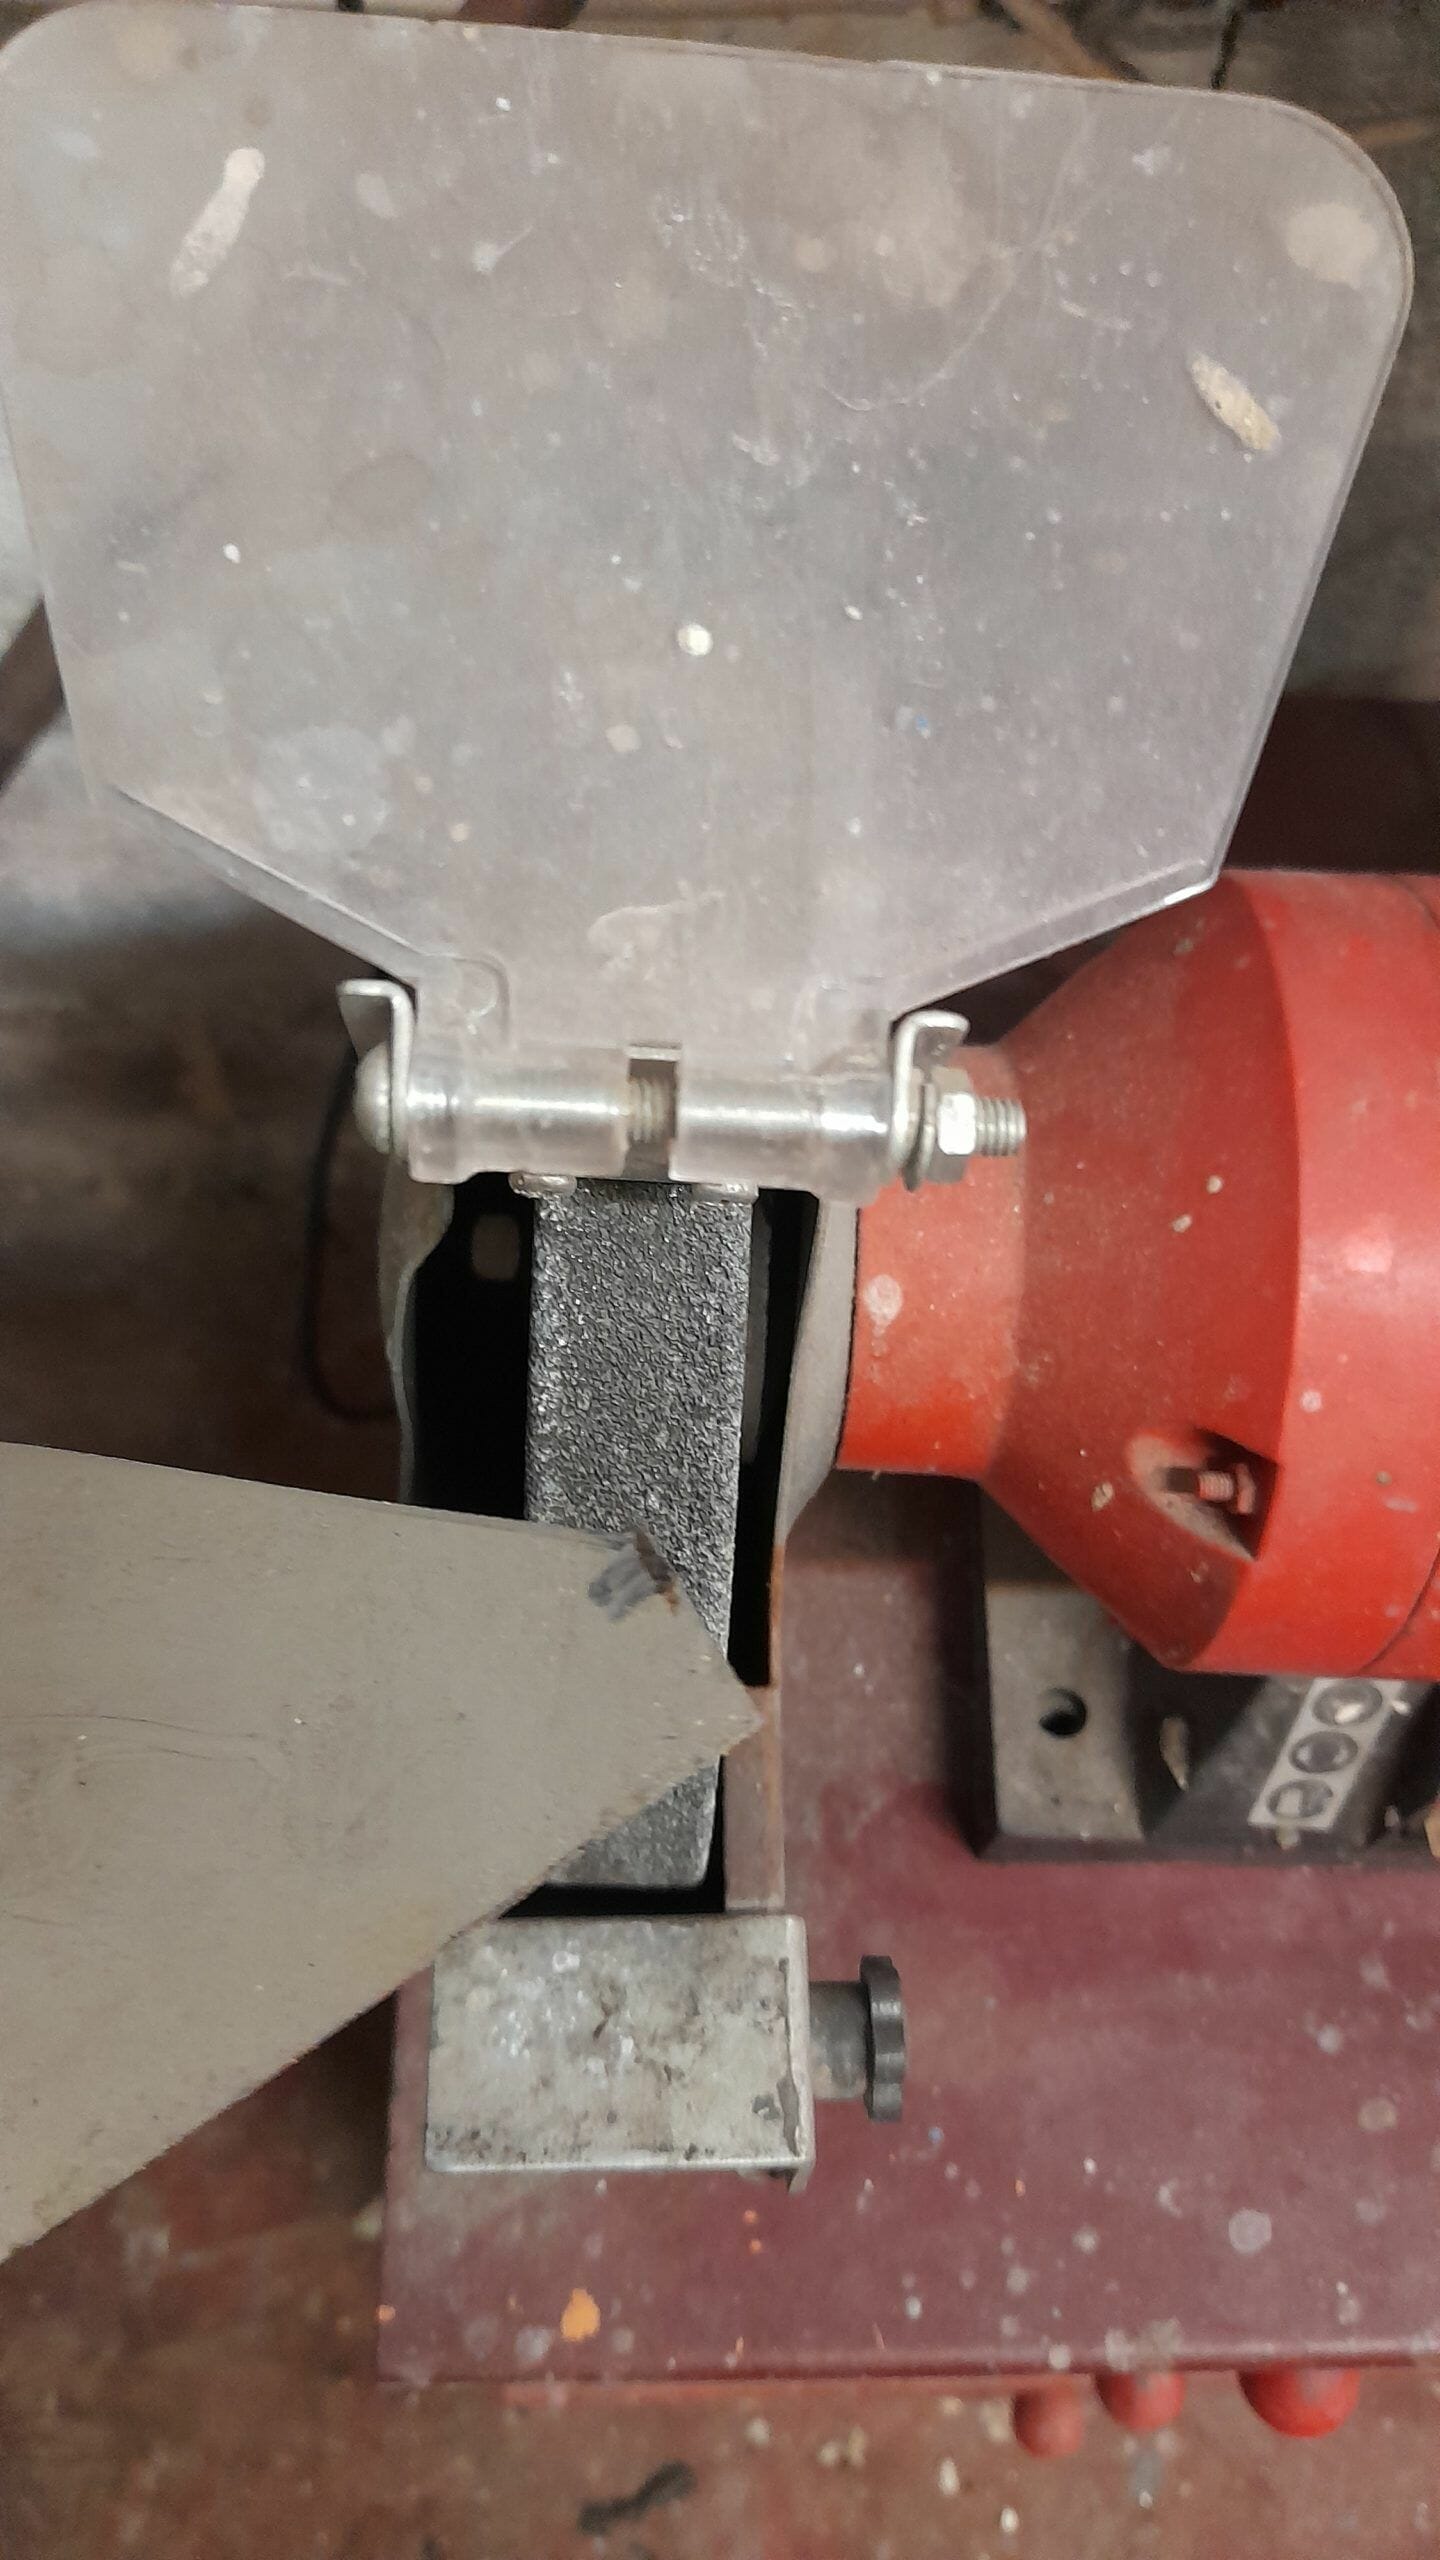
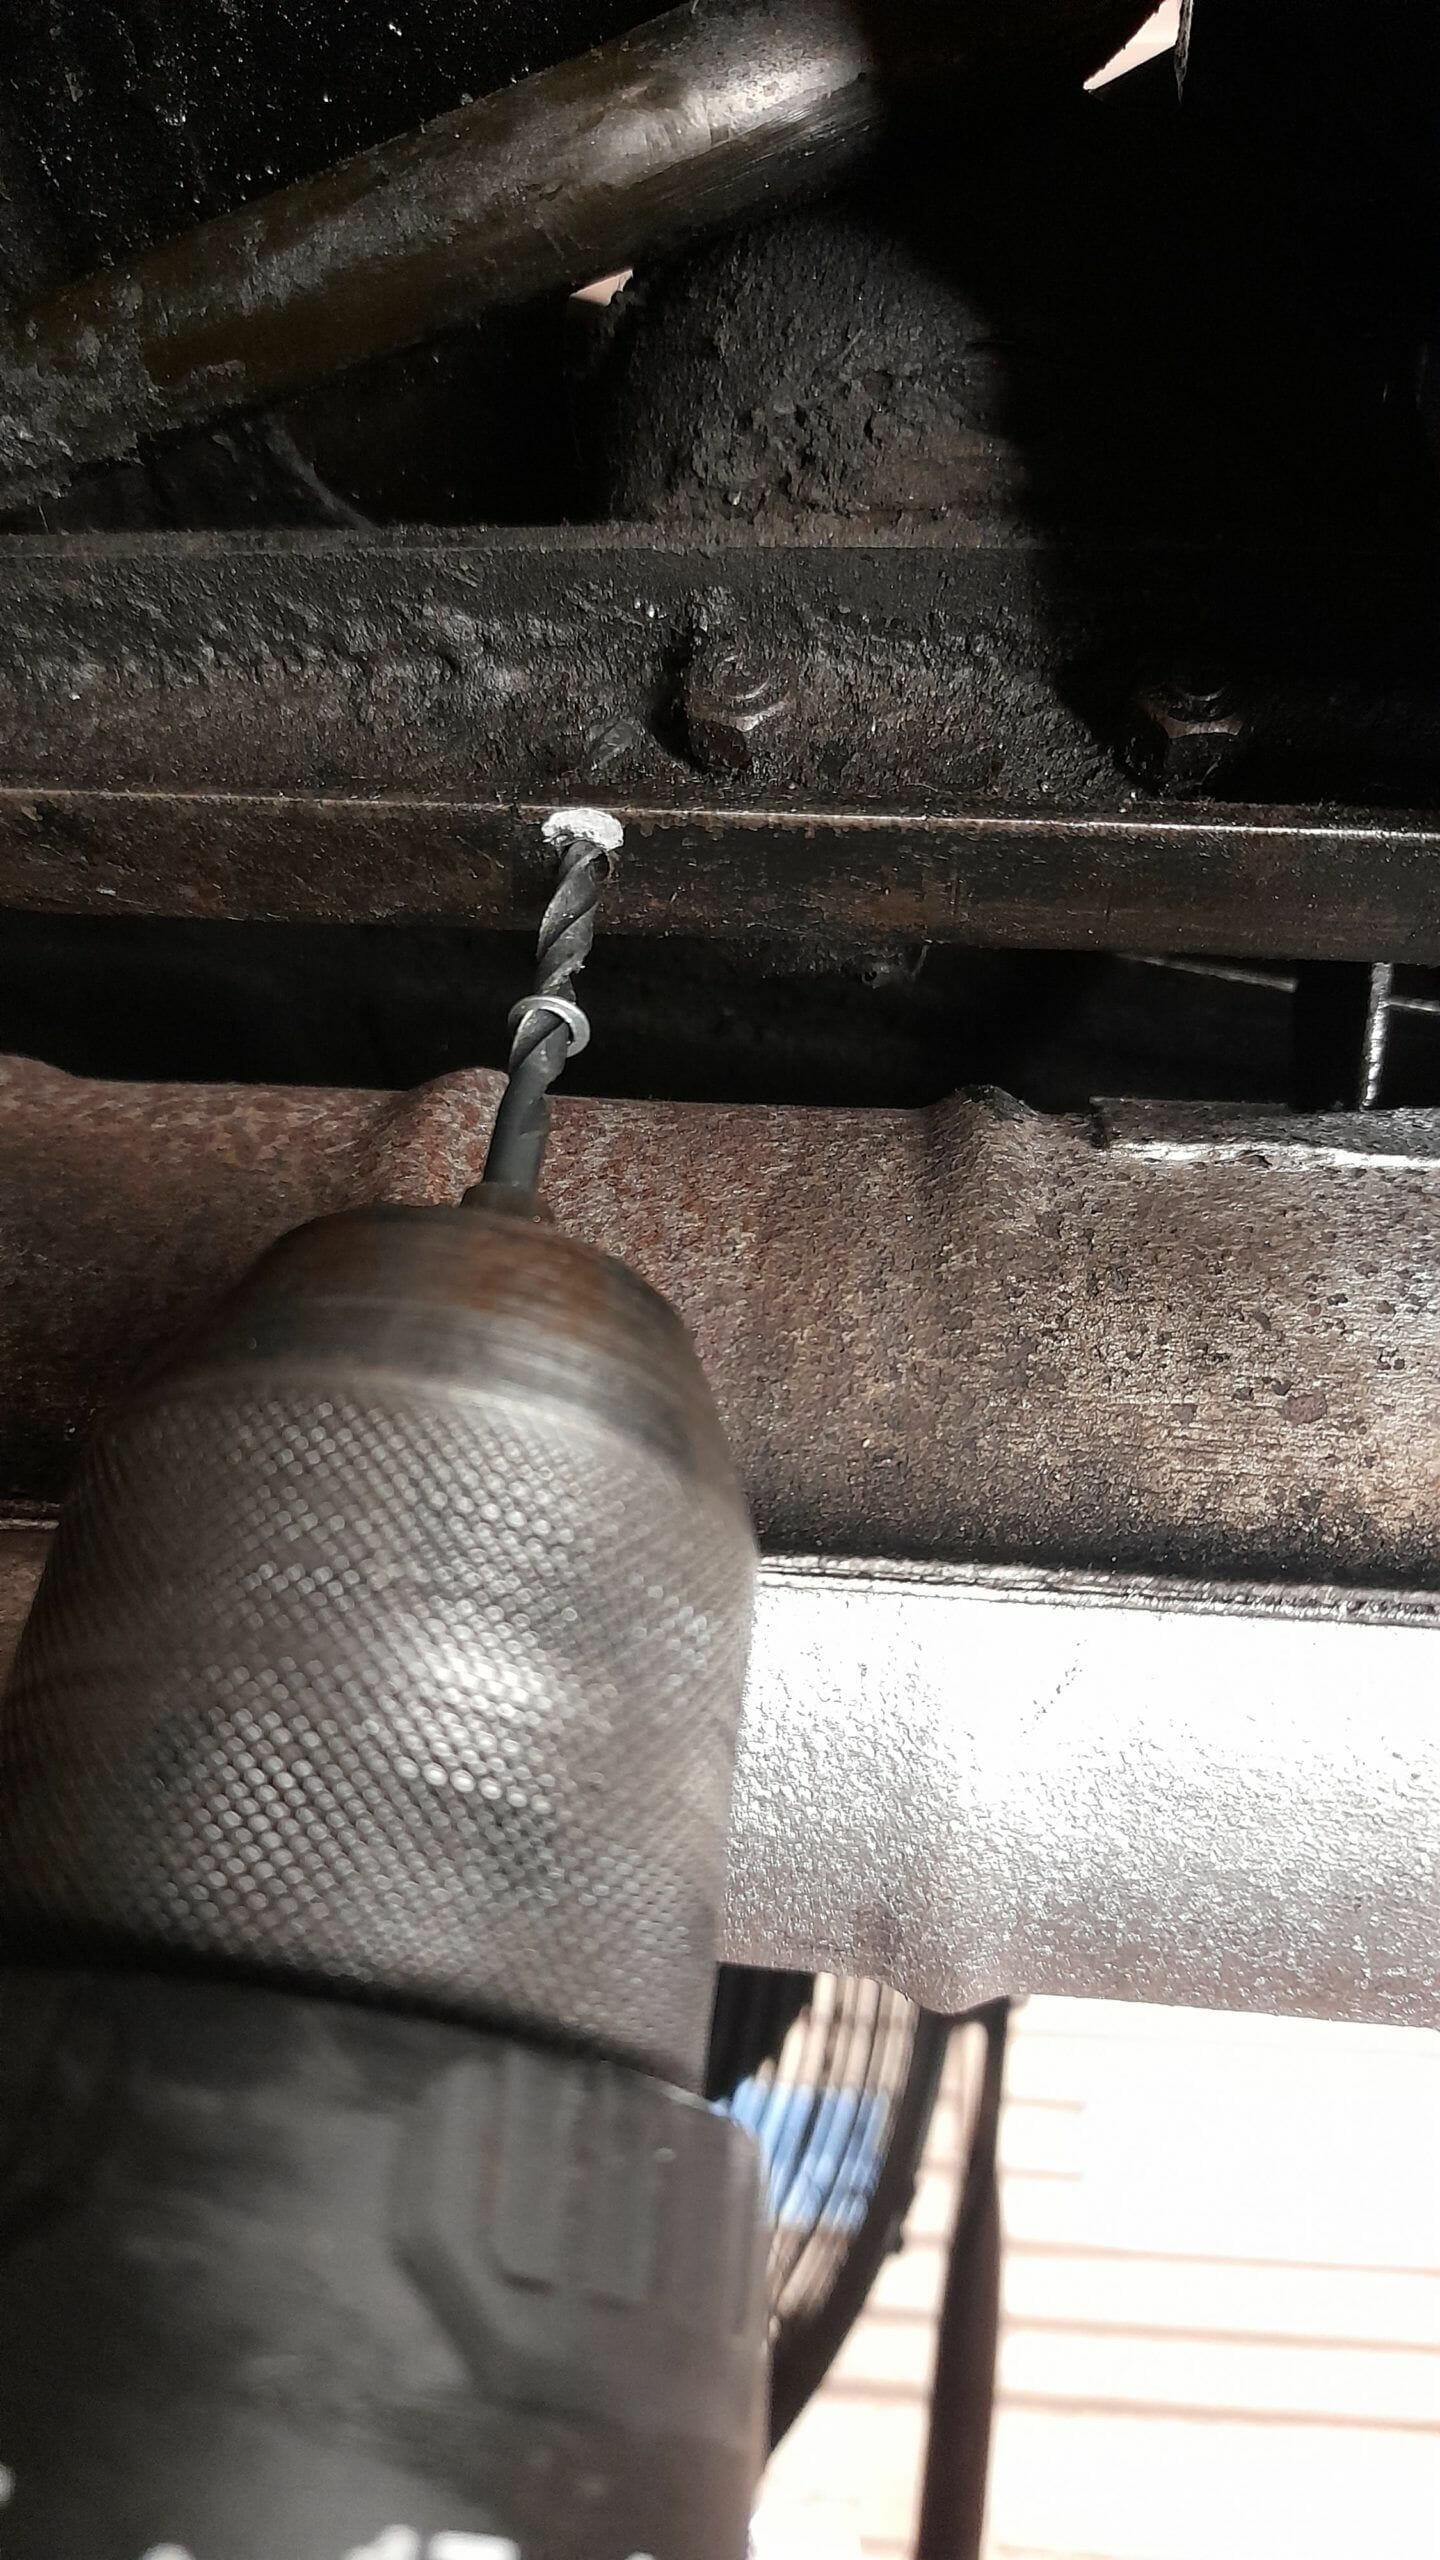
- To cut the iron sheet, you can use one of those miter saws that carpenters carry when they go to assemble doors in a house. Although they are made for wood, there exists in the market the so-called “multi-material disc” that fits these saws, with which you can cut iron and aluminum sheet (I discovered it recently and I was amazed at the good results with metal). The straight cuts are perfect, the miters are 45 degrees, the squares measure exactly 90 degrees, you can make symmetrical oblique cuts at the angle you need, etc, etc, etc. Nothing to do with hand or jigsaw made cuts. Miter saws are available in many price ranges, but you don’t need a 600 euro miter saw. If you decide to buy one, I do recommend that it has longitudinal displacement: the possibilities of use grow exponentially (they are also called “telescopic miter saws”).
- Working with iron parts and machines: That’s a combination to be respected. Please, always anchor the pieces very well with suitable jacks or clamps, and do not rely on your hands to hold them while they go through the drill, the polisher, and much less through the saw. A piece of metal flying off can be the cause of a very serious accident – I don’t even want to imagine a direct accident caused by a saw with the power of a miter saw. My personal advice: invest time and resources securing the work environment and work on the premise of “zero risk”.
- Bad riveting machines are major time wasters. The ones with a certain quality are not very expensive, and are well worth it. I would say, run away from these“riveter+kit 300 rivets for 12 euros” promos.
- Should you have someting else that you would like to know or any other details you would like to see, please feel free to write me in the comments or contact us directly and we will be happy to help you.
Click on the images to see the comments
Other examples of users who made similar things
I give you some references of owners who have adopted this solution on classic cars: These are for MGA from UK and USA users.

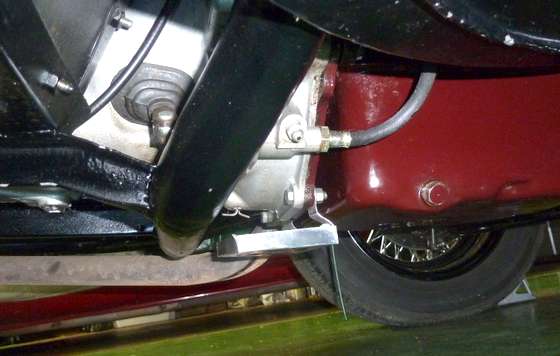
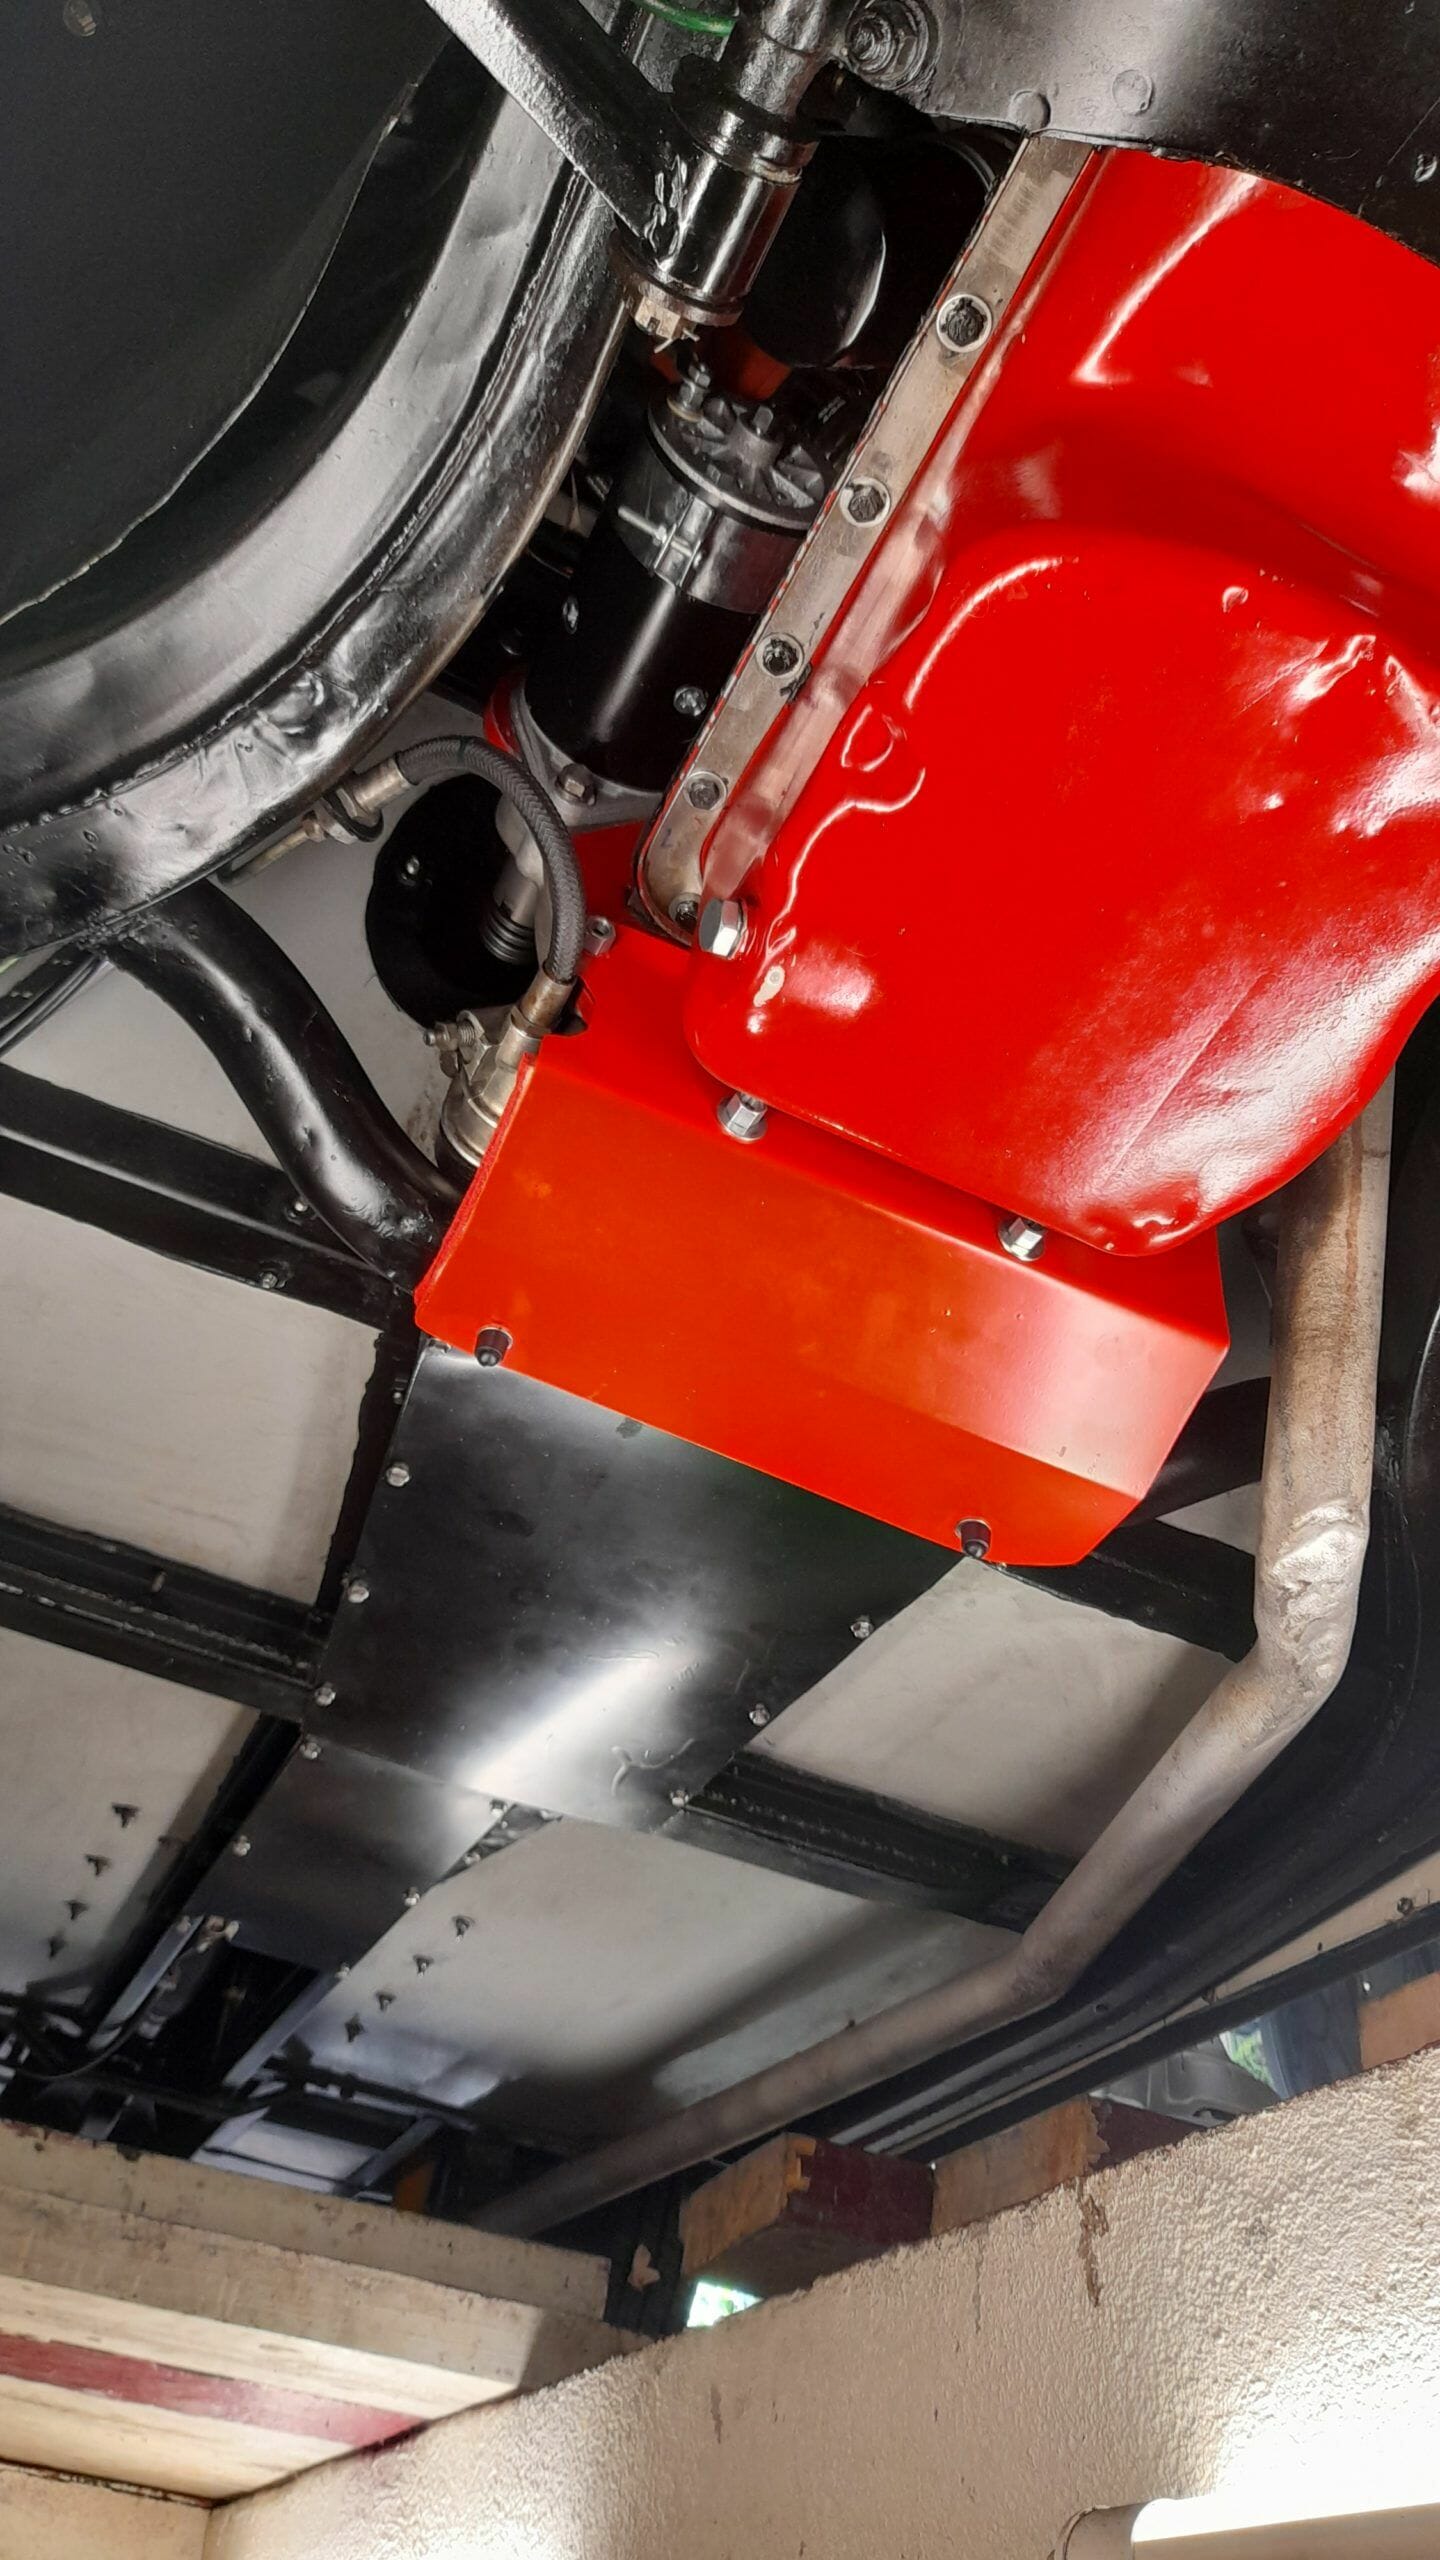
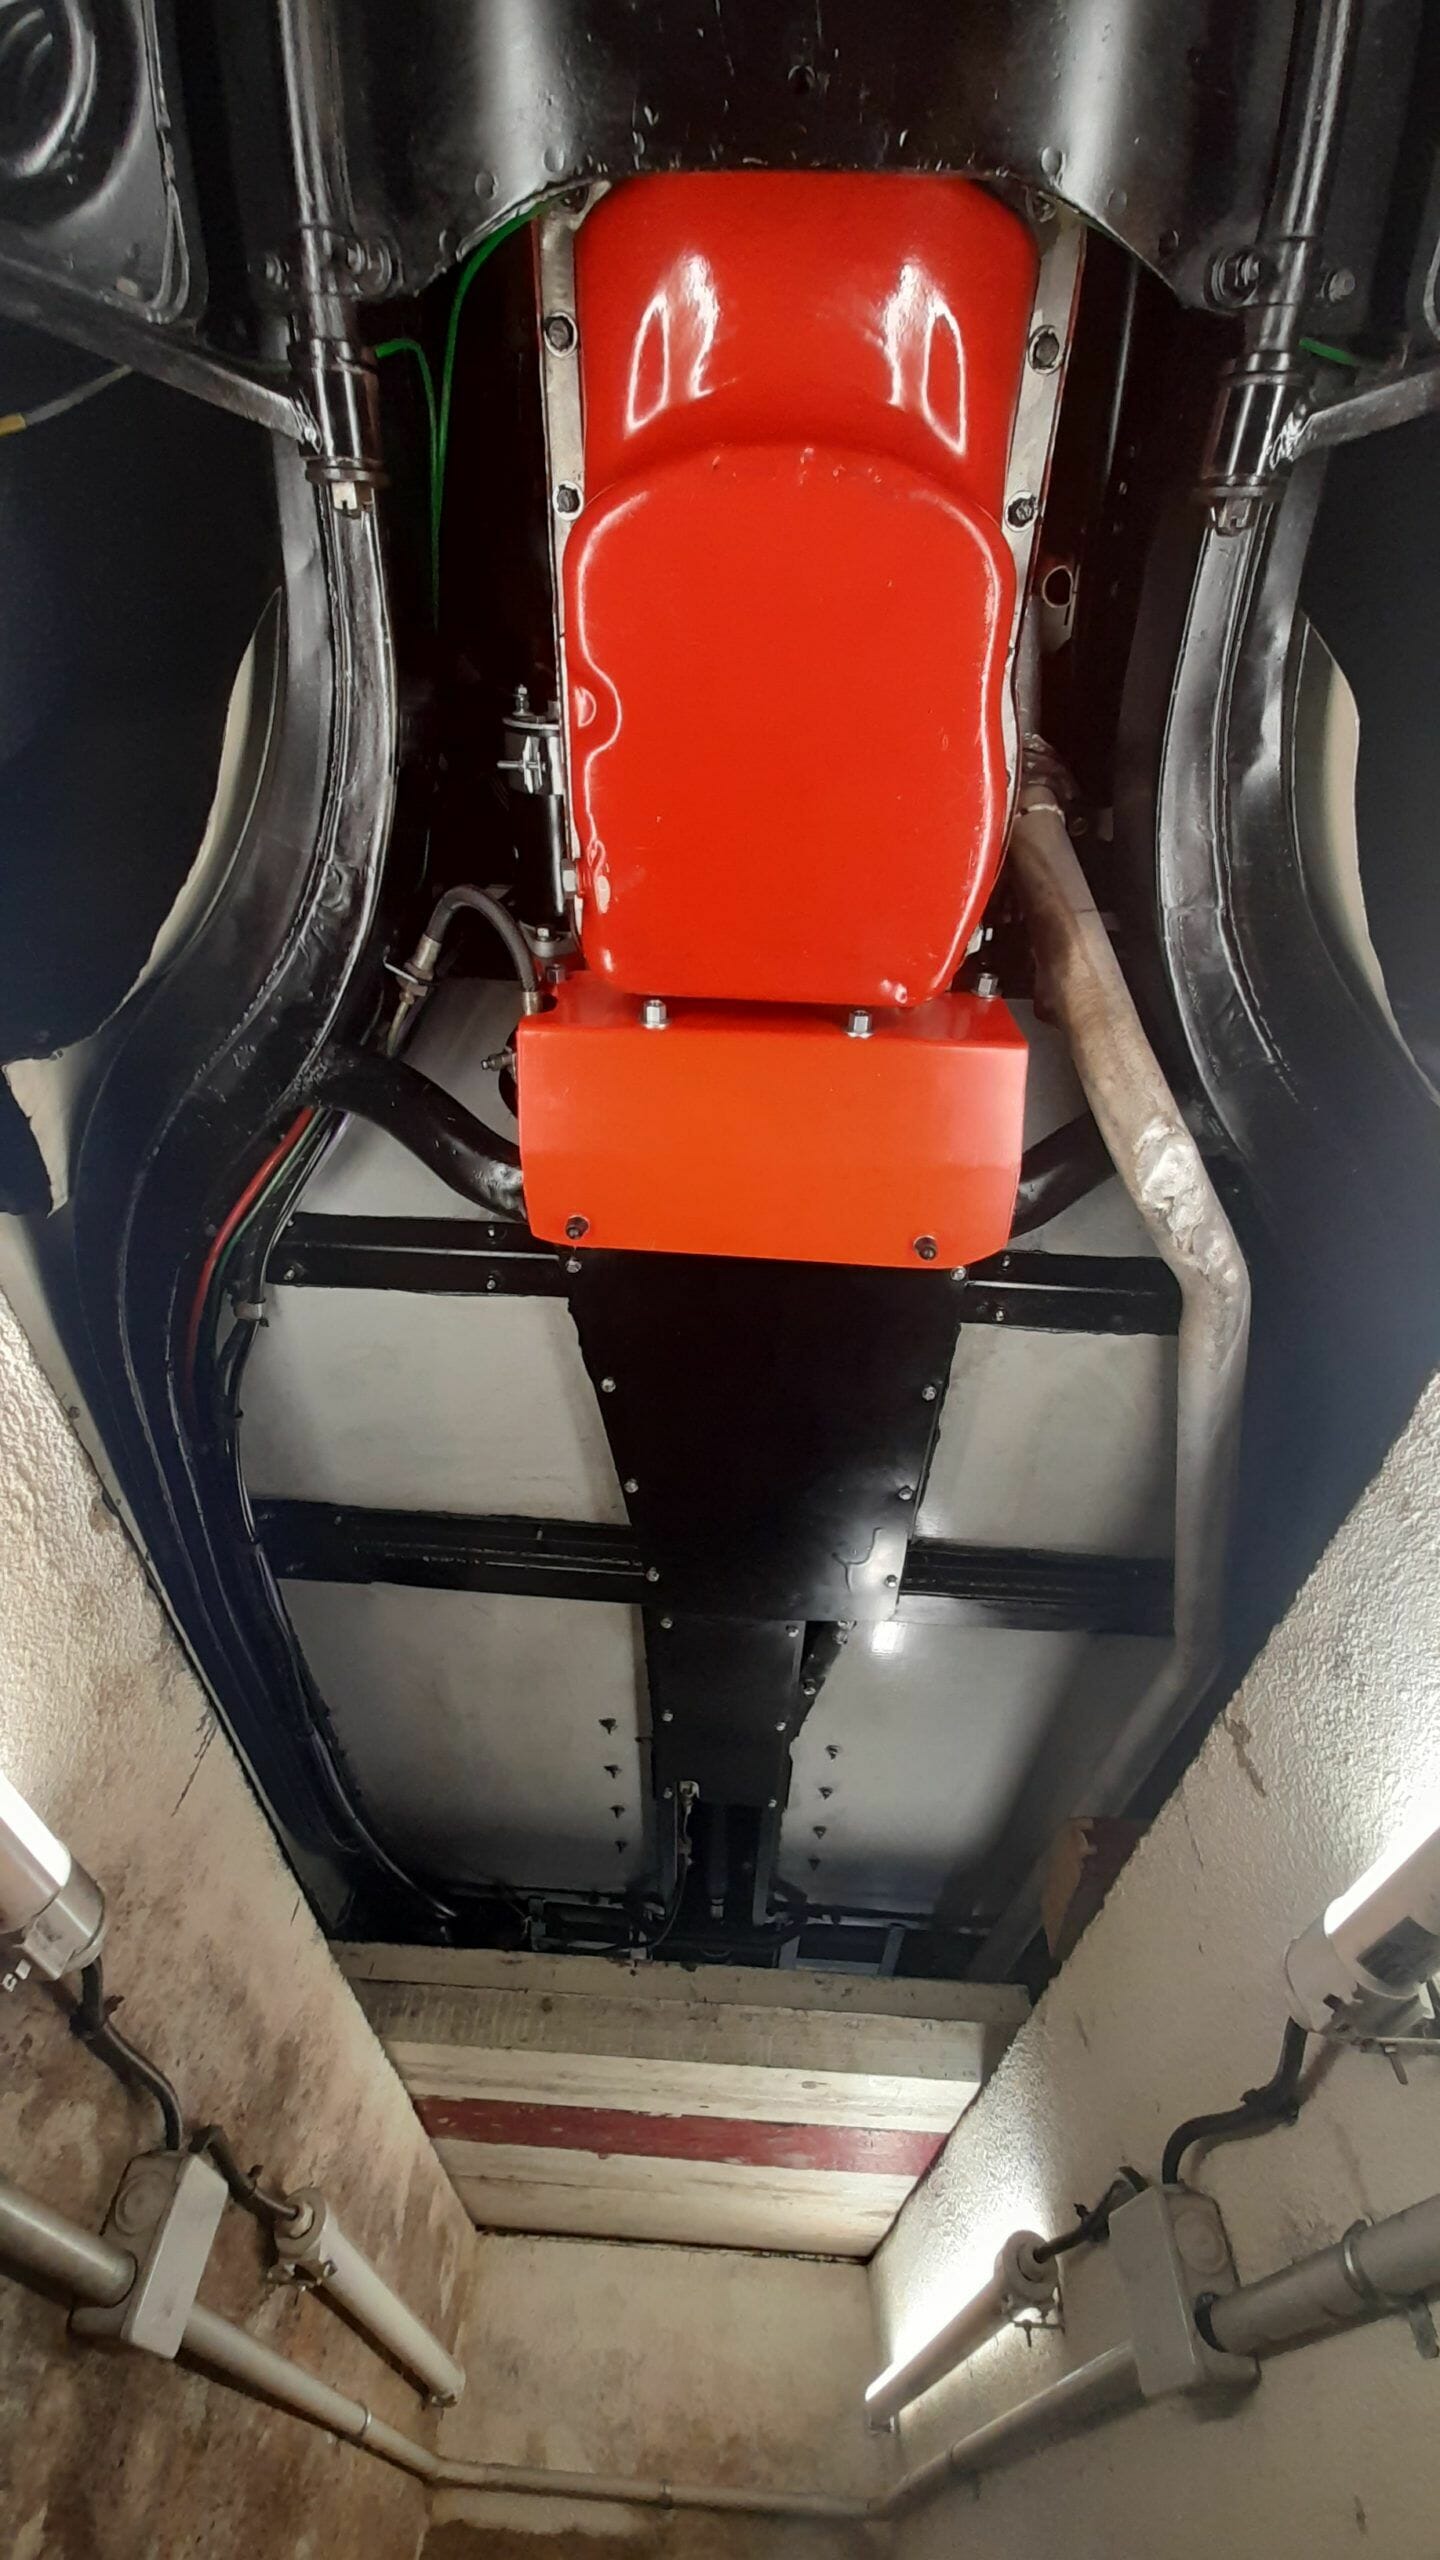
Oil pan on our MGA (engine and transmission)
Here you can see what we did in our MGA: In this job, oil collection has been extended all the way along the driveshaft. In this car the driveshaft is uncovered, so that in addition to safeguarding the oil drip, we provide protection against dust, or blows from stones or foreign objects. Here the tray is painted in black and red, matching the color of the car’s underbody and the color of the MGA engine oil sump.
Conclusion
As I told you, the idea to manufacture this small device came from three different sources:
- The oil mat that I told you that some suppliers provide.
- The noticing that all modern vehicles have the under-vehicle covered by a fairing, and therefore, small oil drips are retained by the fairing and avoid staining the environment (besides other functionalities that the fairing may have).
- Works exposed in (among others) the links mentioned here above about an EGM.
Finally, I will insist once more on the point I mentioned at the beginning of this article: This proposal is only for small external oil leaks in which the elimination is not feasible due to the difficulty of obtaining spare parts/labor, or because the leak is inherent to the design of the engine (because it is very old and does not have oil retention elements). And above all, that it does not compromise the proper good working of the vehicle.
Still, if you are not really sure and have doubts, I advise you to have the car checked by a professional who will make a complete diagnosis and give you a proposed resolution adapted to your car. If you still want to share your situation with us, you can contact us and we will gladly give you our opinion, regardless of the solution you may finally decide to adopt.