Remove crankshaft pulley bolt Renault Dauphine/Gordini/4CV
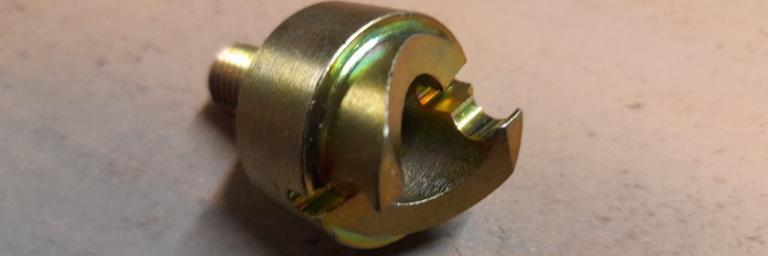
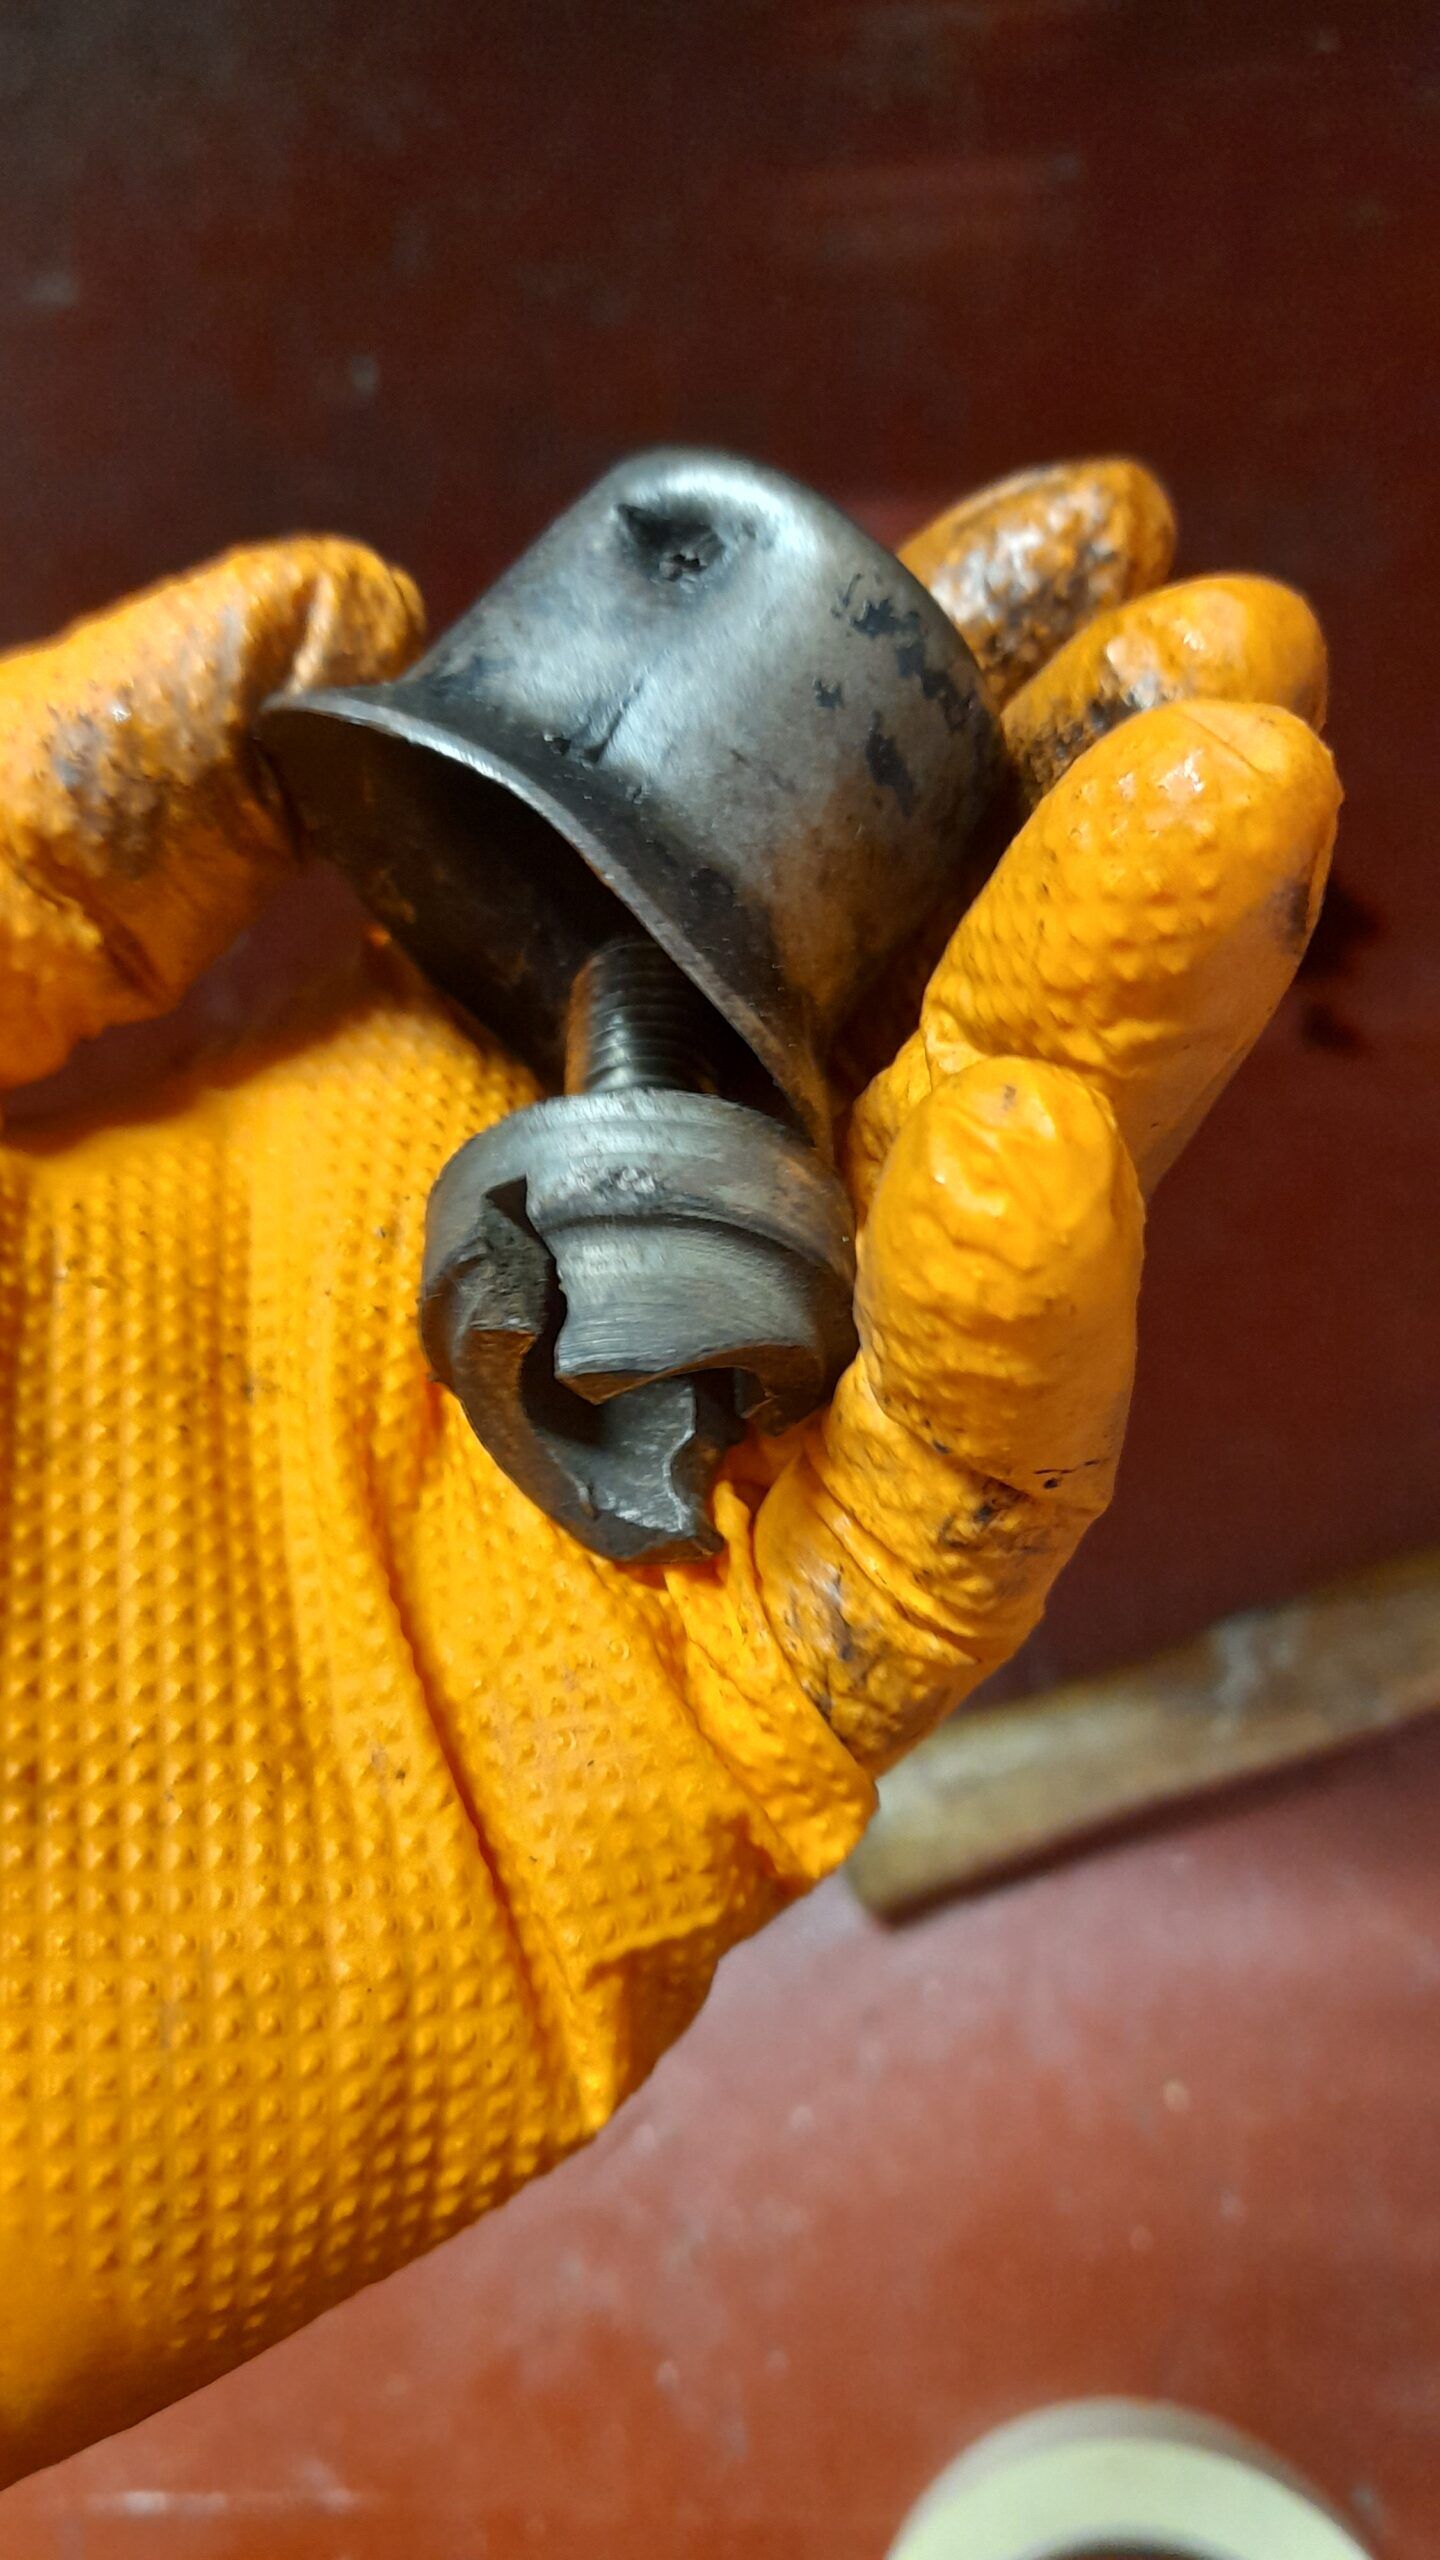
The "dent de loup".
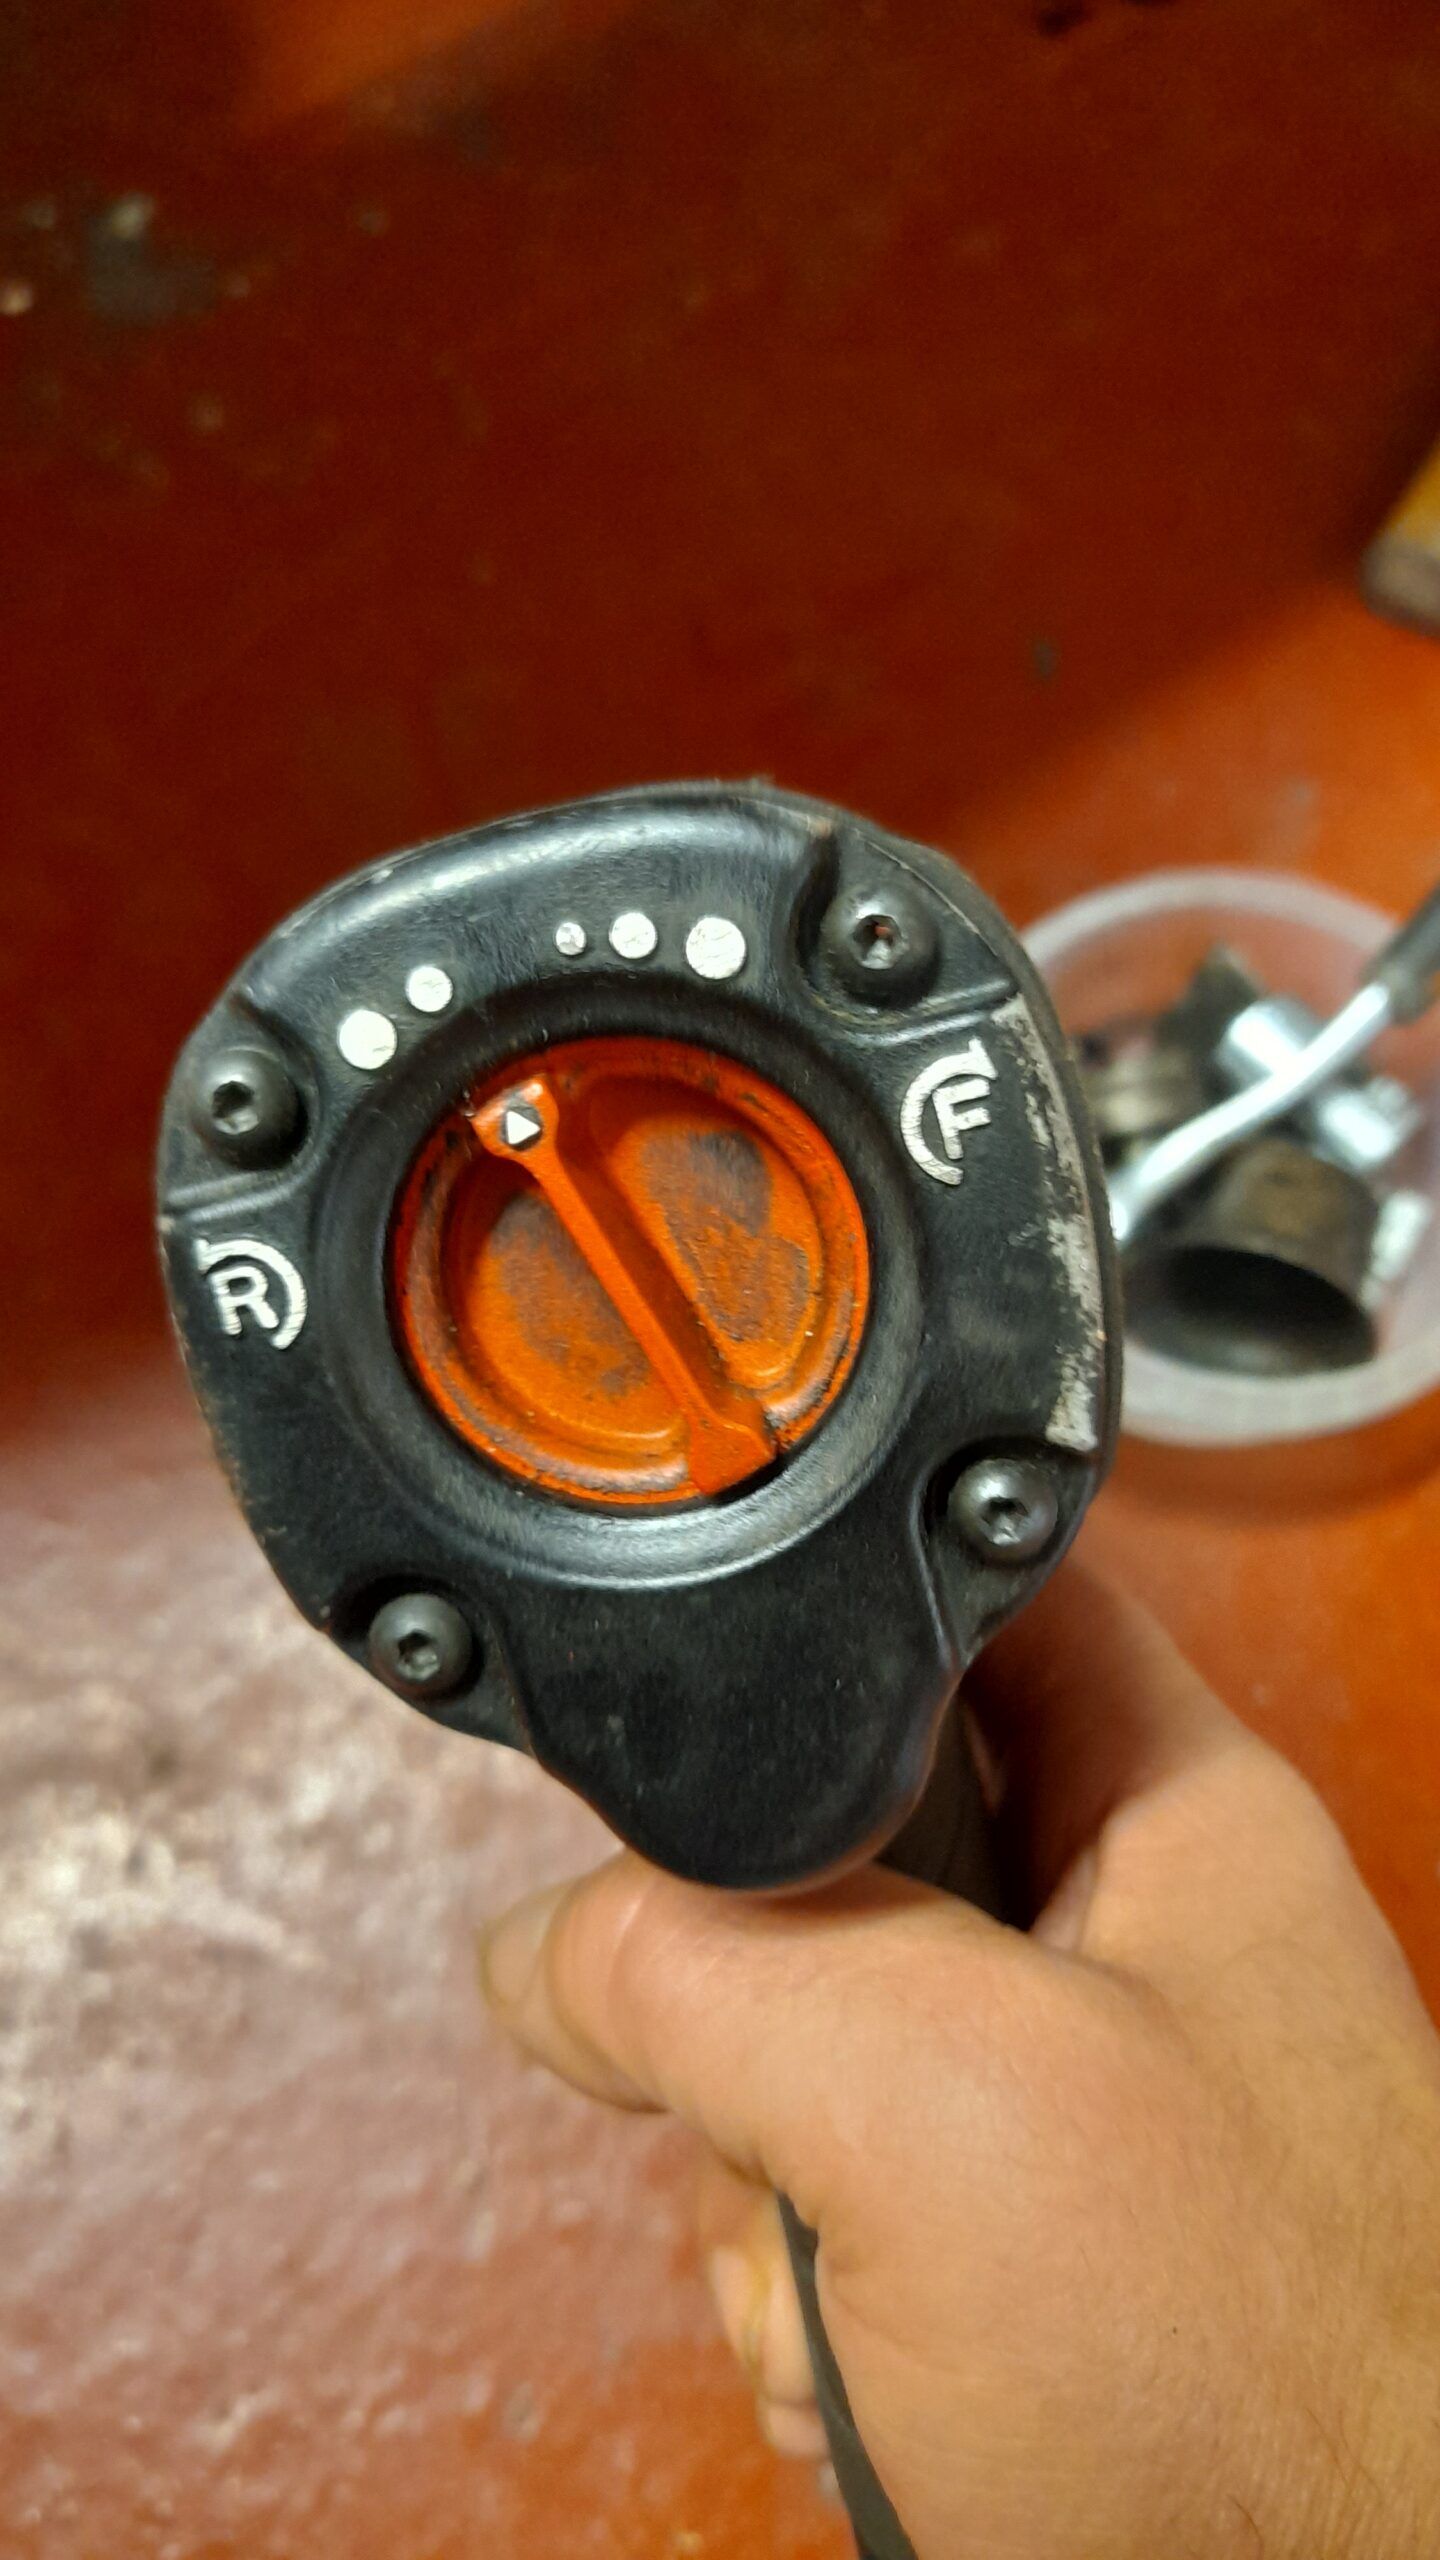
The famous "dent de loup": The crankshaft pulley bolt of Ventoux engines.
Renault Ventoux engines (Dauphine, 4CV, Gordini) have a crankshaft pulley bolt with a very peculiar shape that can make disassembly difficult. Here I show you a simple method to do it very easily (yes, with some tool, but it is not expensive at all).
The difficulty lies in the fact that, added to the peculiarities of loosening a crankshaft pulley, it has a screw with a head that is designed to engage the starter crank and that this crank is automatically ejected backwards the moment the engine starts (otherwise, it could break the wrist of the person starting the car with this method).

This screw head has no shape that resembles any more or less standard screw head.
In this post I share information that can be useful to remove a crankshaft pulley in general, but if you want to go directly to the specific points of the Renault Dauphine/Gordini/4CV, you can click
HERE
General: Removing the crankshaft pulley
Generally speaking, the removal of a crankshaft pulley is something that requires a certain amount of mechanical expertise. Even for professionals, in some cases it represents a major challenge (or headache) in certain models. Basically, it has three points to consider:
- It is a pulley bolted to a shaft that also rotates.
- The tightening torque is very high: In most vehicles it is the part with the highest tightening torque: It can be between 100 ft/lb and 300 ft/lb.
- Sometimes there is not much space to access with a specialized tool and other elements (radiators, steering rack) have to be removed. In some cases (fortunately few) the workshop manuals suggest the removal of the engine.
There are many articles, books, forums, and sources of information on the general ways to remove it. Be that as it may, the first two points outlined above can be overcome in two possible ways:
- Immobilizing the crankshaft: This is usually done through the flywheel, with a specialized piece that locks the pinions, or some vehicles have a procedure to insert a pin that locks it. The nut is then loosened with the help of a bar that extends the wrench and acts as a powerful lever.
- Loosen the screw by means of a “shock”.
Impact screwdrivers
For me, it is undoubtedly the best option. If you use an impact screwdriver, you will usually solve both problems at once:
- Since the tool provides a series of brutal and very fast shocks (very high acceleration when starting to rotate as if a sledgehammer blow is given in the direction of rotation) , it is usually not necessary to lock the crankshaft because the screw “yields” to the shocks and the crankshaft does not have time to start turning.
- Impact screwdrivers can work with very high torques (between 150 and 350 ft/lb, even more). You will solve the problem of exceeding the tightening torque without the need to use leverage.
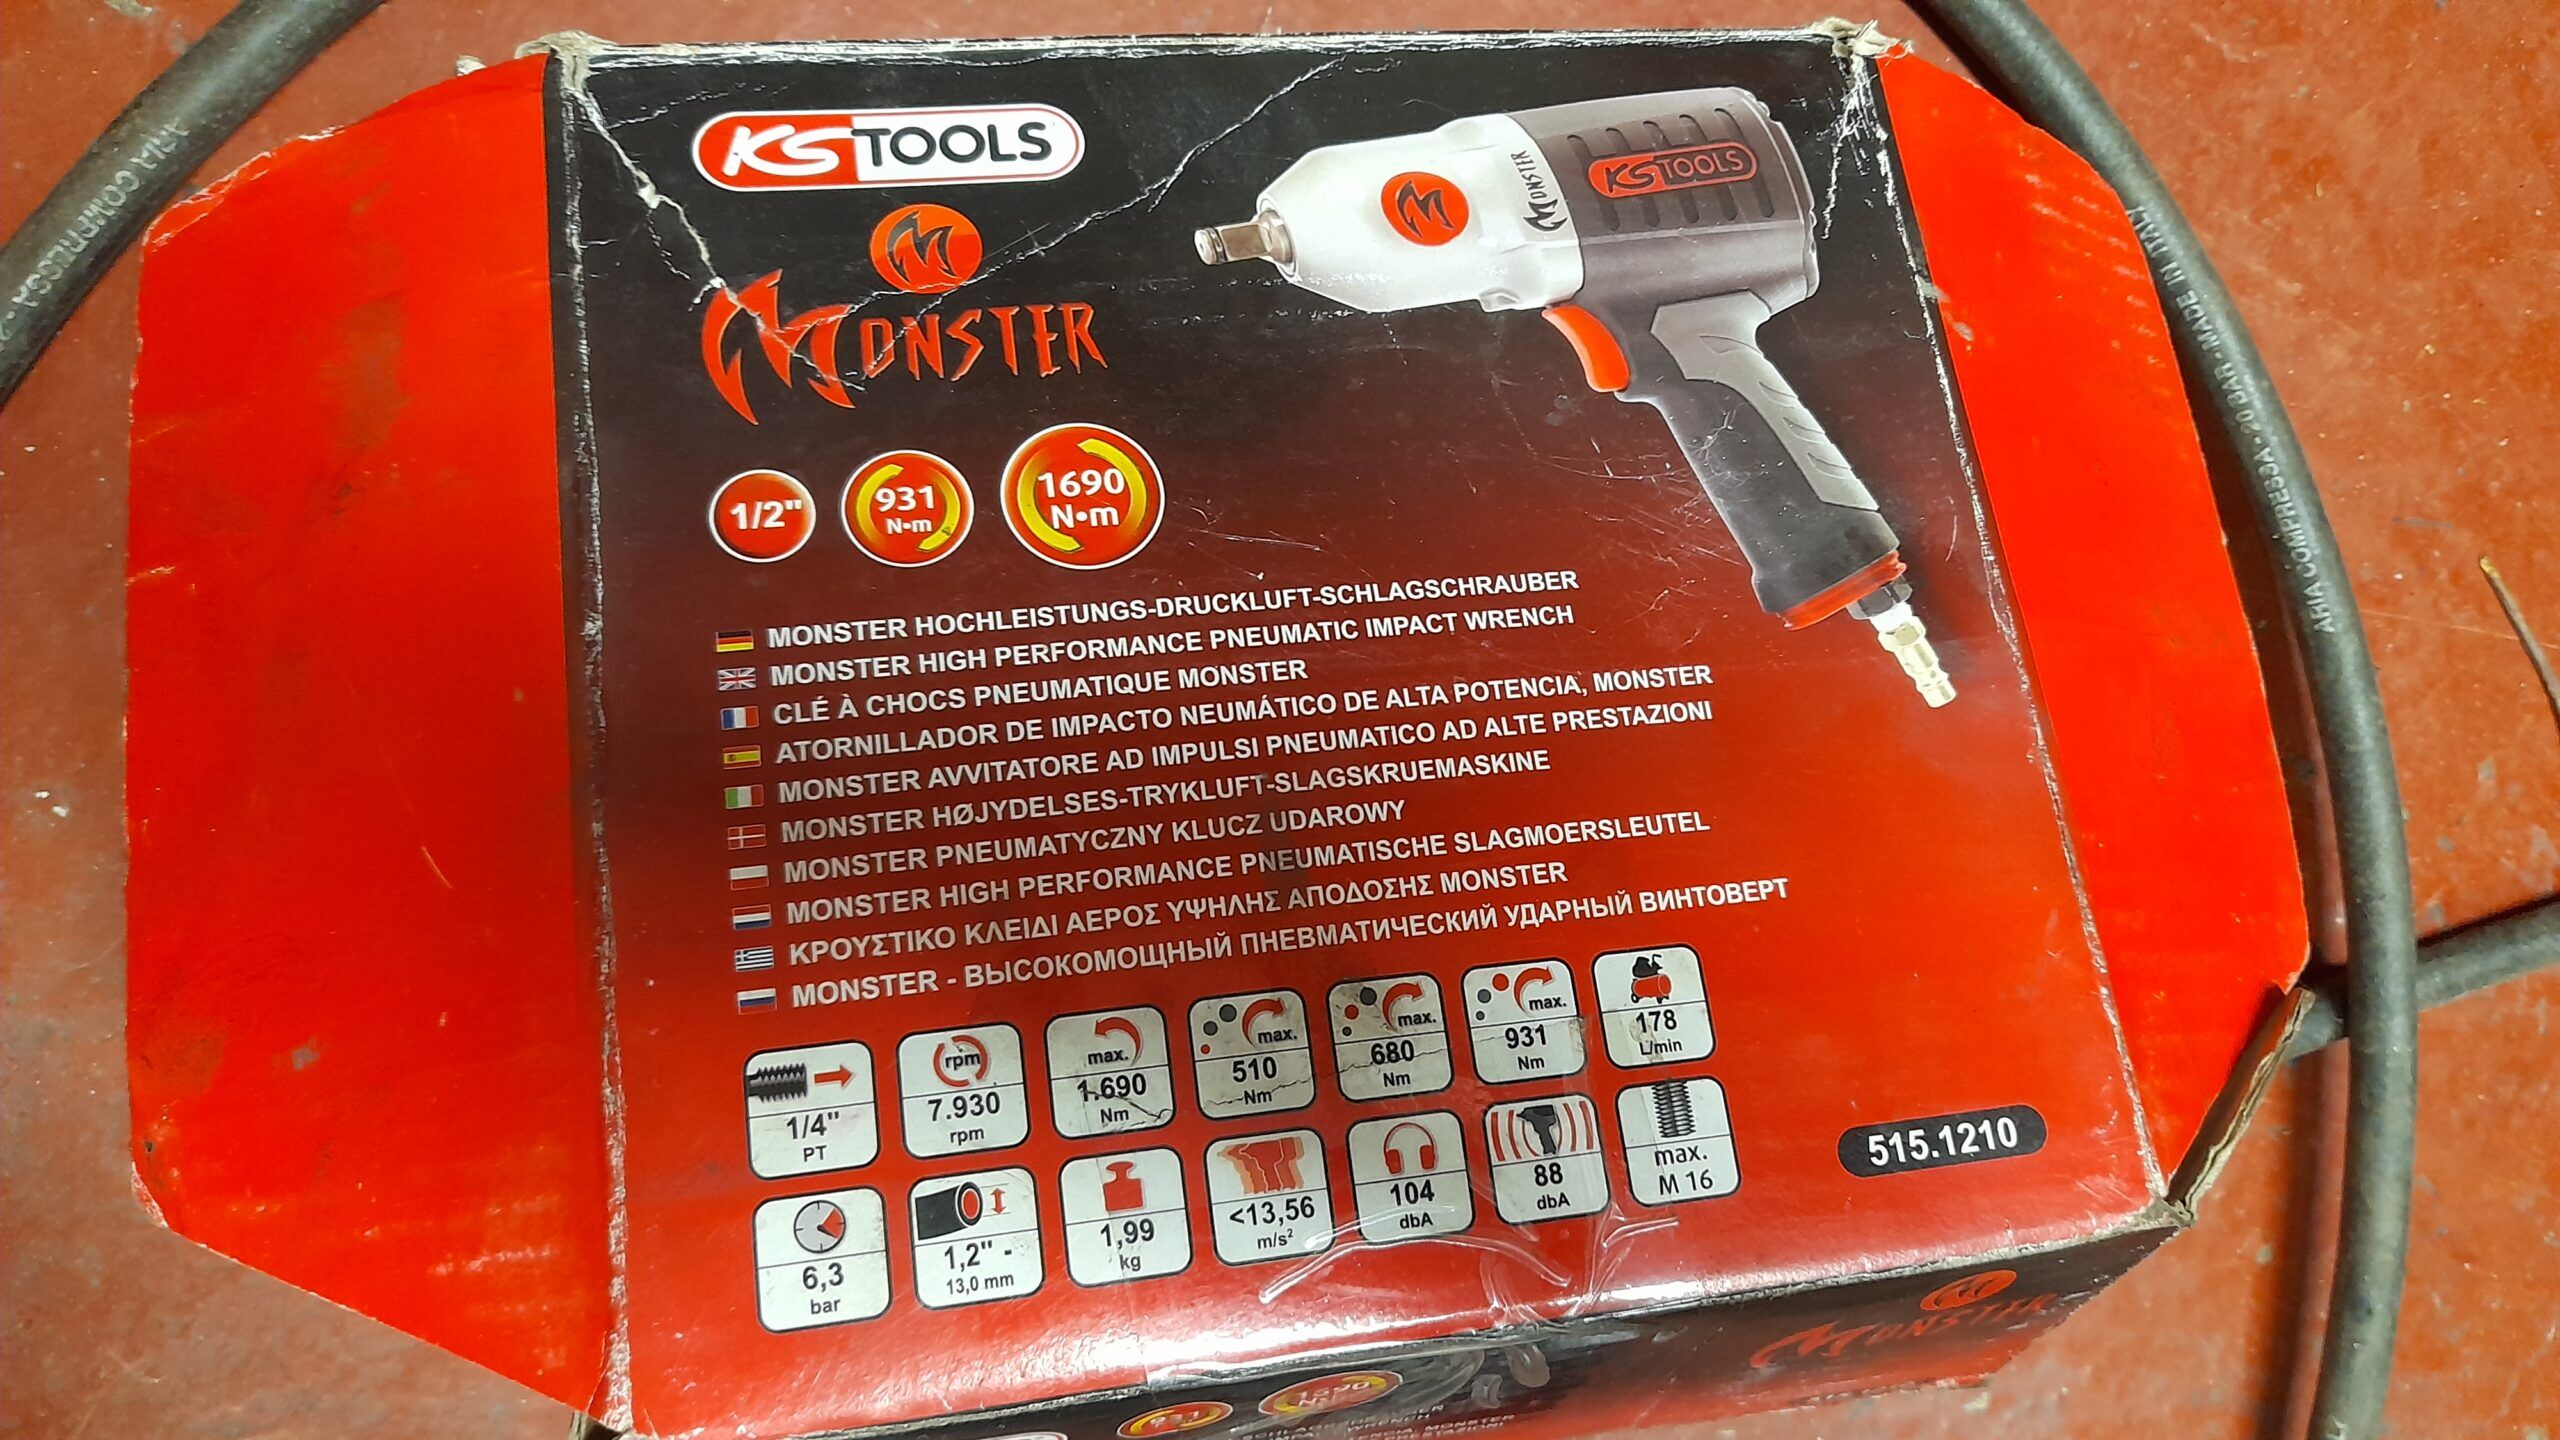
So my (personal) recommendation is: If you are going to undertake this task, get one. Borrow it, or buy it. Until recently, they were exclusively pneumatic and also required a compressor of a certain magnitude (they use a lot of air flow and need a fairly high constant pressure to perform), but recently there are electric options that provide great results. As I was saying: You will save yourself the crowbar, the immobilization and quite a few headaches.
Other ways: Manually by lever
If you want to use a bar for leverage, there is obviously no problem with that. However, my personal suggestion is to make sure that the screw coupling (socket wrench usually) is exactly the right size/shape. Otherwise, you may deform/corrode the screw head. If that happens, believe me you will be in trouble.
If you use a lever, you will need to lock the crankshaft properly (with specific tools or with the manufacturer’s method, if available). Below you can see a picture of a typical crankshaft locking tool by the flywheel crown. If you want to lock it, there are tools that block it by the crown or as I said, in many cases the manufacturer provides it by leaving a hole that can be accessed when the engine is in a certain phase of rotation, through which you can put a pin that blocks the flywheel (for example the M20 BMW engines had this system).
Unadvisable methods. How NOT to try to loosen the crankshaft pulley
Methods NOT advisable: As in all jobs, there are some of them. They are part of the ideology of “bar chat” comments, procedures of “my brother-in-law/friend/neighbor told me that…” 😊. A professional will never use them (or at least I don’t know of any). I, personally, strongly encourage you to NOT use them.
As you will also see them described in forums and the like, they are no mystery so I will give you a summary of some that as I write this, come to mind that I remember seeing/hearing/reading. So I can give you my commentary on why, for me, they are NOT advisable. Here is a list of some of the terrifying methods which really deserve an “ARRRG!!!!”:
- Locking the flywheel by inserting a thick flat screwdriver between the teeth of the flywheel: And yes, I know it is very common. But you can break or deform the teeth of the flywheel ring gear. If you are also doing it on a classic car, you may find that the replacement is no longer available. Wrong
- Locking the crankshaft by engaging 4th gear and braking the car: You load all the force of the lever and the brutal torque you have to apply on the transmission, gearbox and clutch. Wrong.
- That of locking the camshaft so that the crankshaft does not rotate either: As in the previous case, you will load all the force where it should not be: in this case on the timing chain/belt and/or the camshaft sprockets/camshaft crowns. One or more of these things may happen to you:
- Deformation of the timing chain.
- Stretch the timing chain/belt.
- Breaking the timing chain/belt.
- Damage the shaft/bearing around which the camshaft sprocket rotates.
- Damage to the camshaft supports/camshaft gear.
- To “jump” one or more teeth of the timing system – in the chain ones it is more difficult, but not so much in the belt ones – and if you do not realize it, you will have an unbalanced timing system (and if the “unbalance” is too big, the first start-up will be the death of the engine due to the valves colliding with the pistons).
- The one with the large flat wrench hooked to the pulley bolt, put the engine in gear and have the shock of the wrench hitting the ground loosen the bolt: This is, for me, by far the worst of them all. The previous three, after all, can only end up damaging the engine and that’s it. In short, nothing that a little money, some material and a few hours of work can’t fix. Here, on the other hand, the risk of the key flying off is high. If the key shoots out and hits a person, I don’t think I need to explain much: such a blow to someone can be deadly if necessary. Believe me. I don’t think it’s worth the risk.
Crankshaft pulley in the particular case of Renault Dauphine/Gordini/4CV
TIGHTENING TORQUE:As information I share with you that according to the old Renault manuals of the time, the specified tightening torque on this bolt is 5 MKg (or about 49 Nm). It is a reduced torque compared to other models, but it is also true that this is not a large engine.

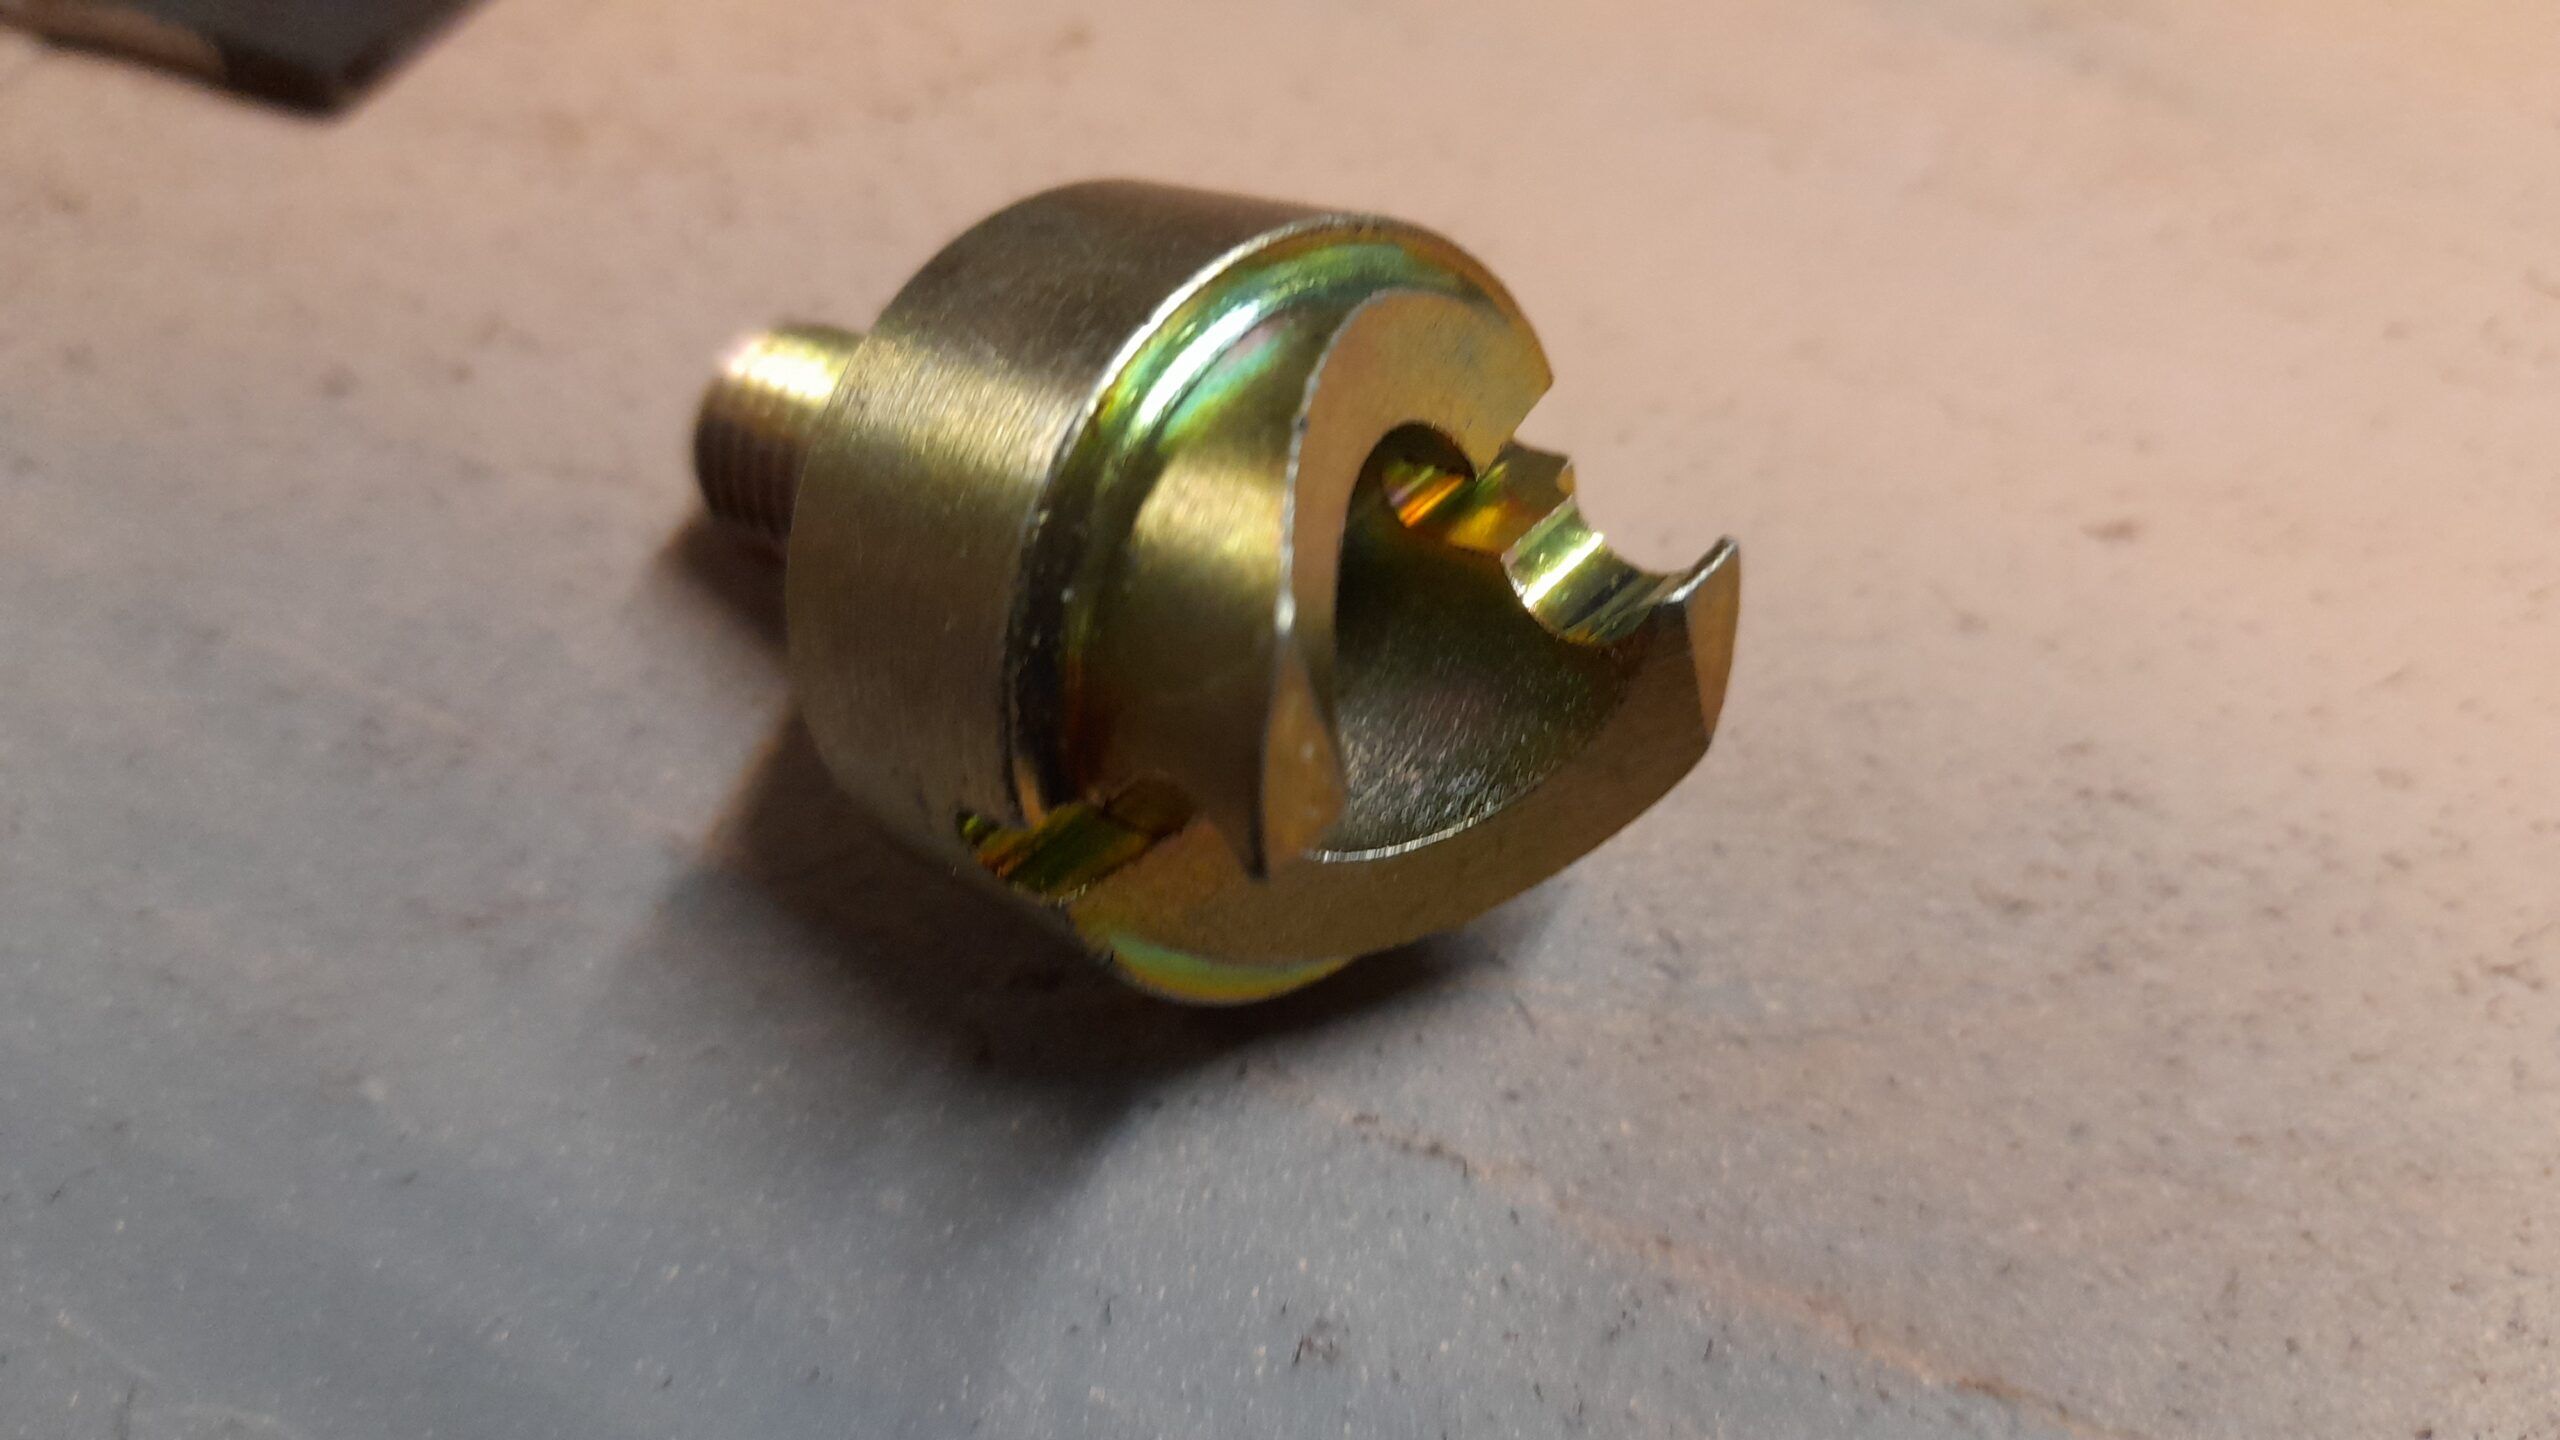
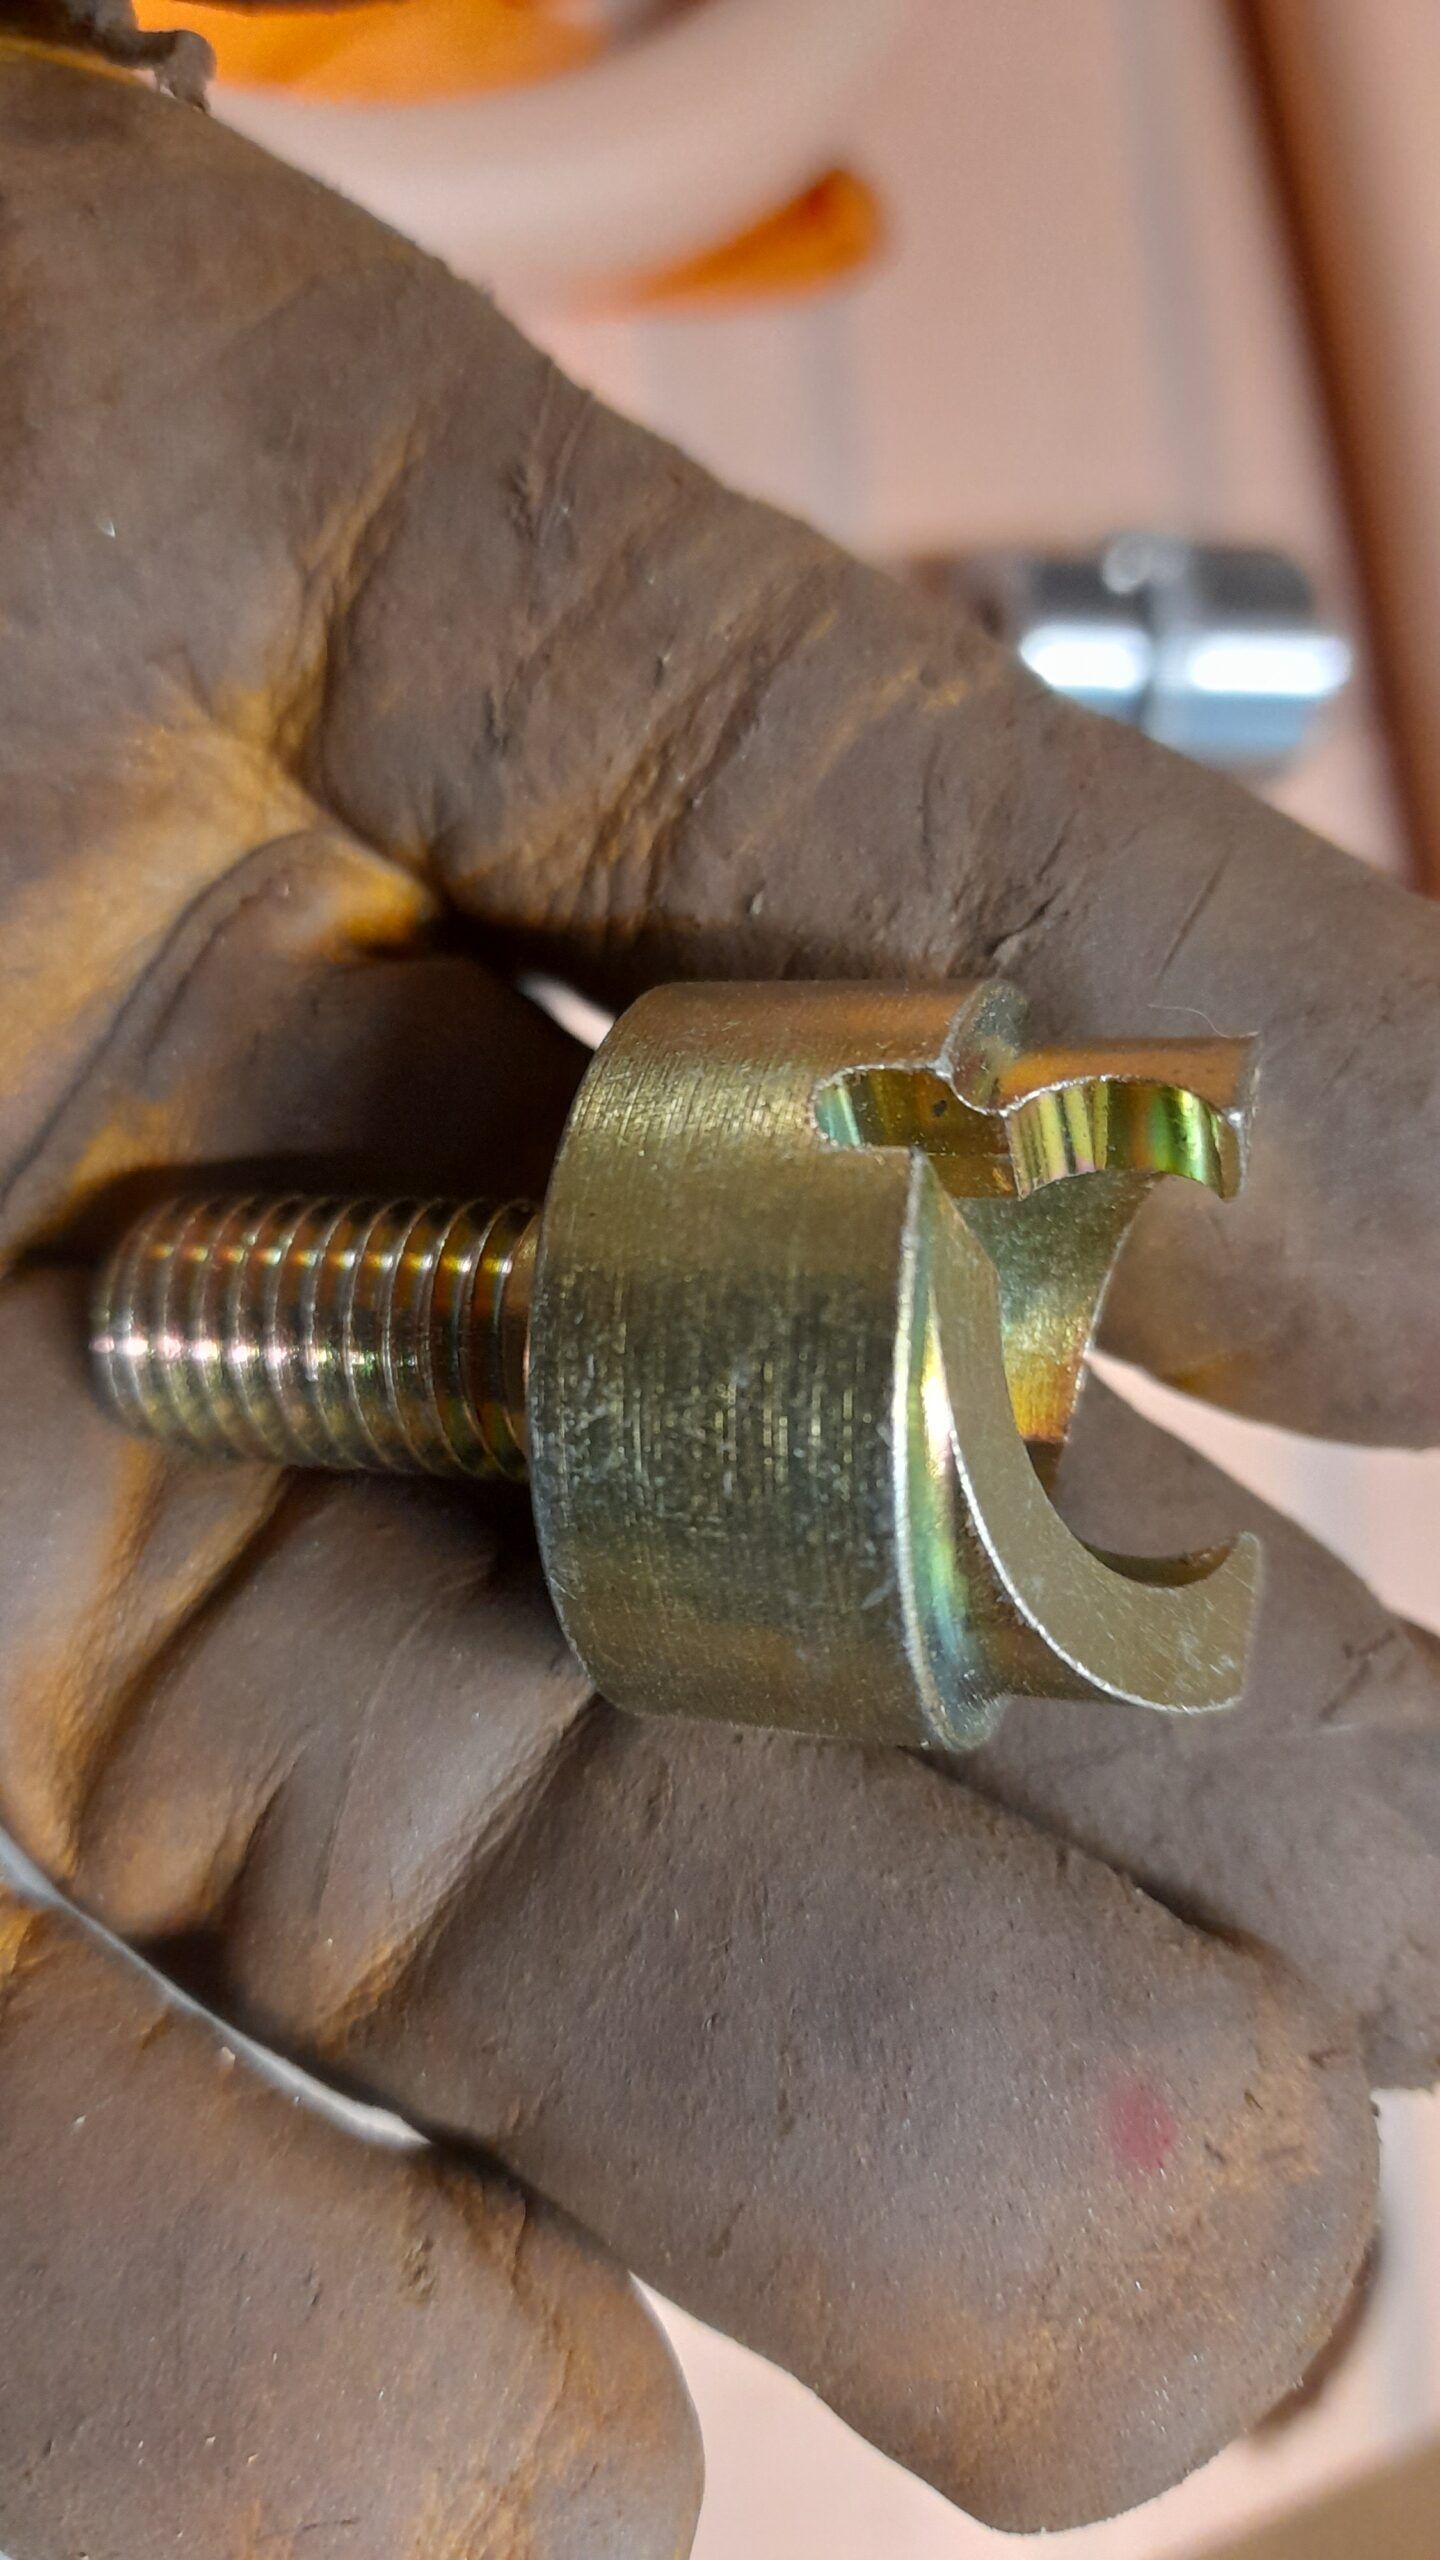
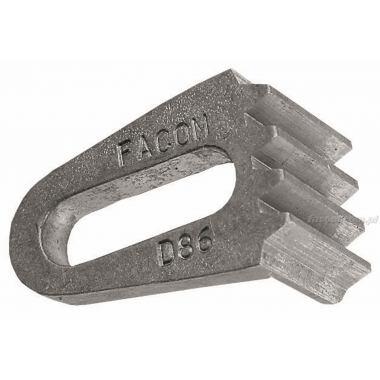
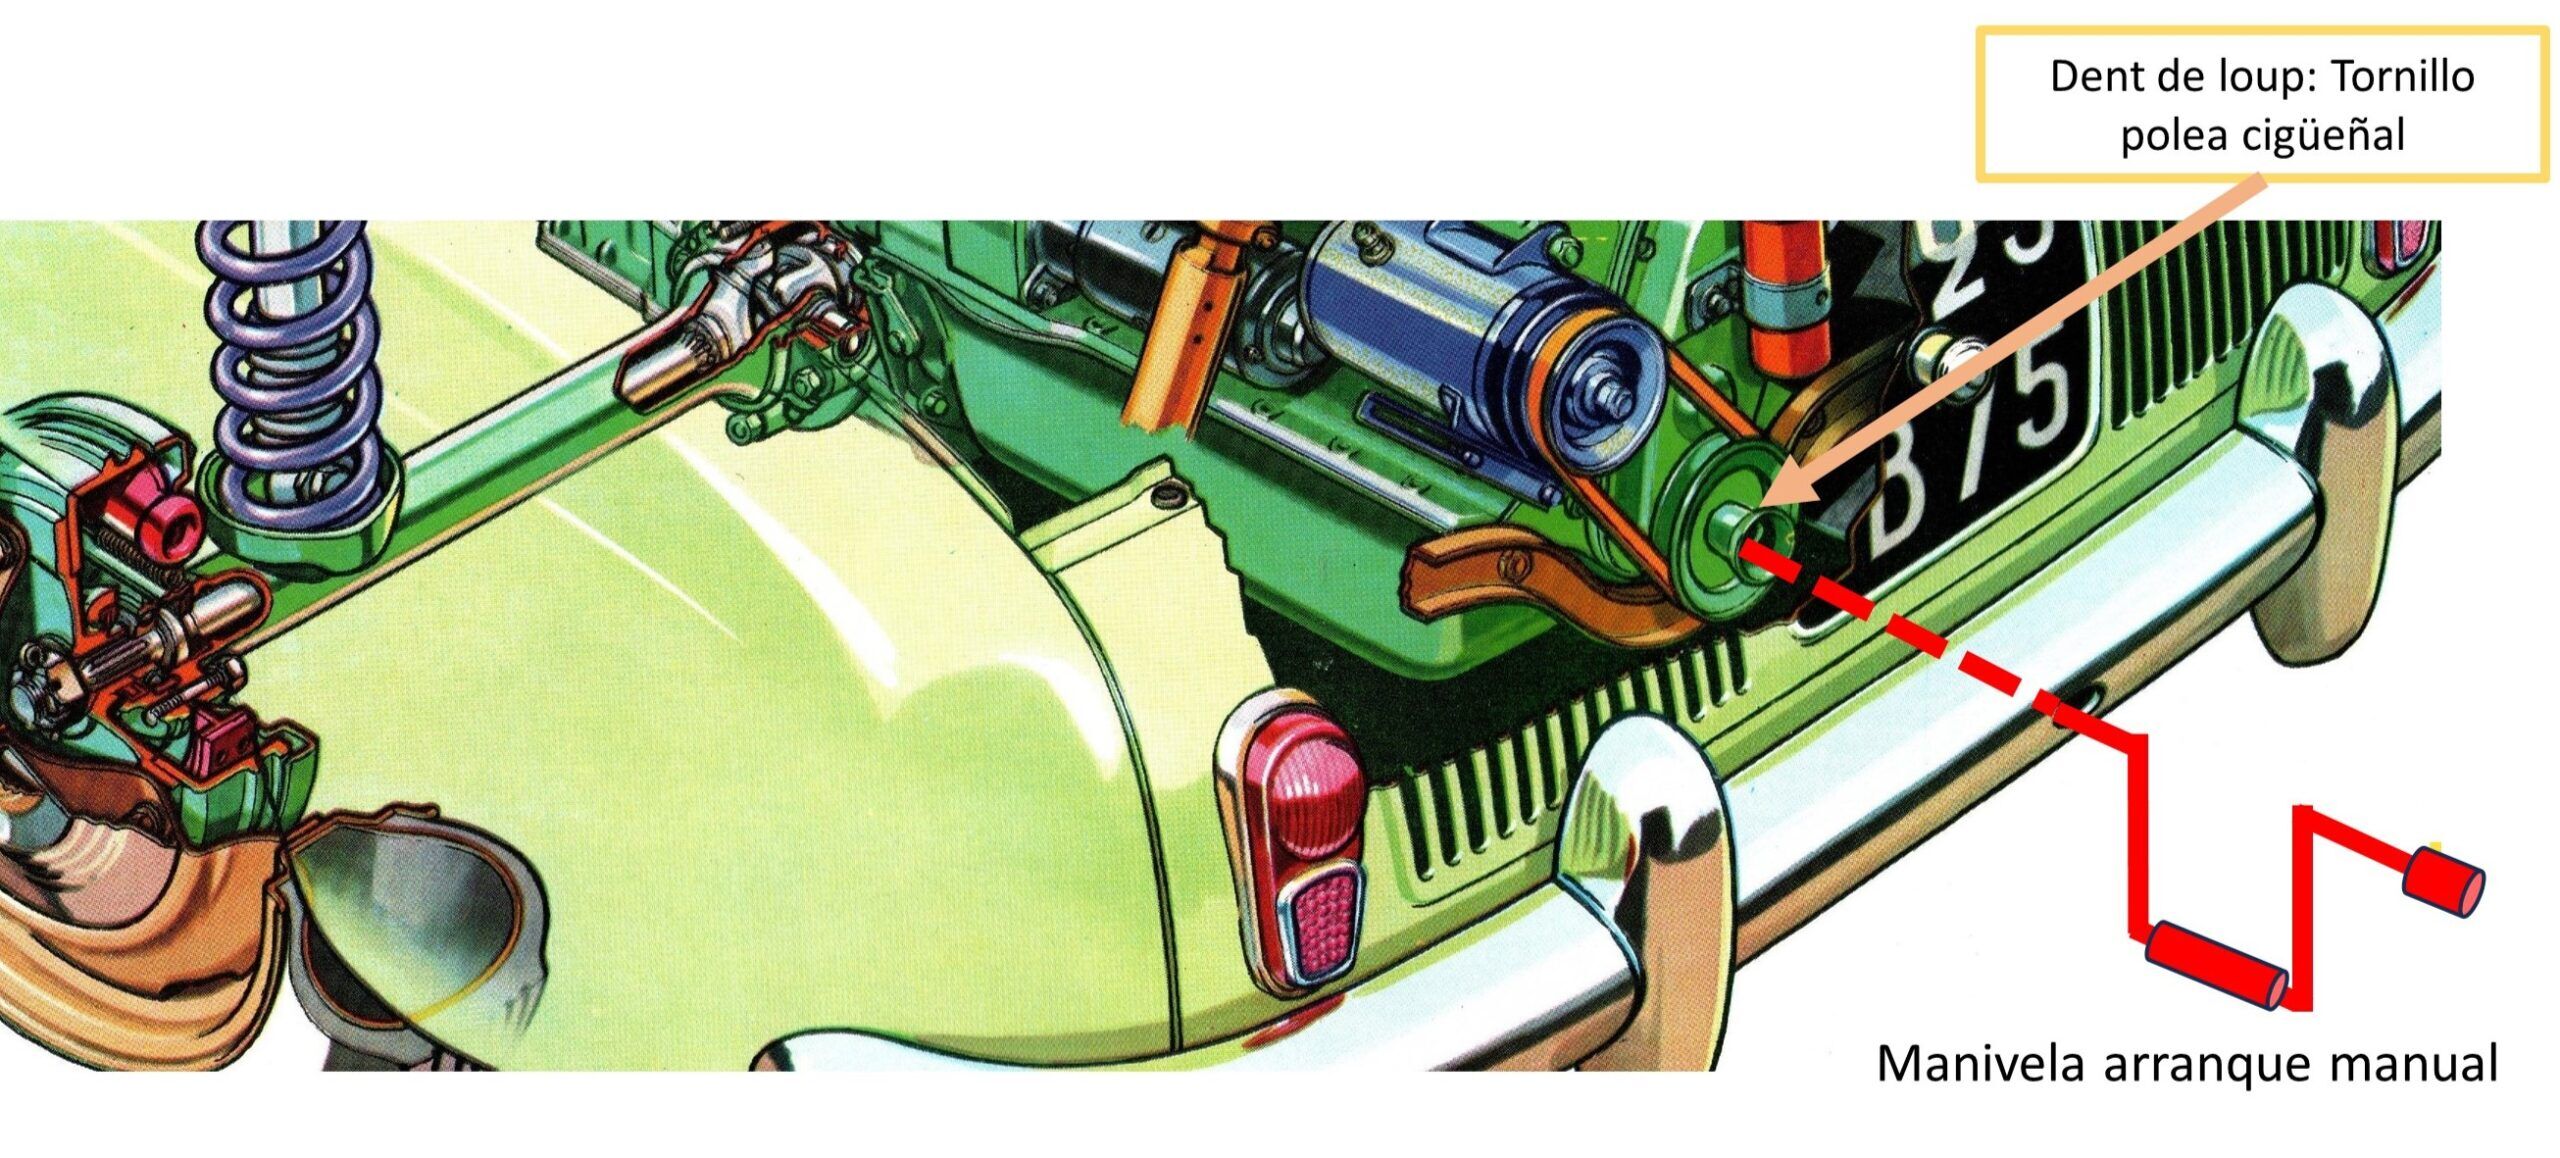
As I said, in this model of car, the crankshaft pulley bolt has a somewhat peculiar head. In France it is called the “dent de loup” (“wolf tooth” in English). This peculiar shape you see is because it actually has two anchors. The “shallower” is to engage the starter crank – as you know these models can be started with a crank – The shape of the two “fang” shaped protrusions (hence the French nickname) is so that once the engine starts, the crank is ejected avoiding injury to the person handling the crank (otherwise it would probably be a broken wrist).
The second, deeper anchor is the one used to loosen or tighten the screw.
As you can see, it ends up being a sort of “giant screw” of a “flat” screwdriver.
As I said at the beginning, in this article I show you how to make a tool to loosen or tighten the screw.
There was an official Renault tool at the time that consisted of a kind of right angle iron that attacked the head of the screw:
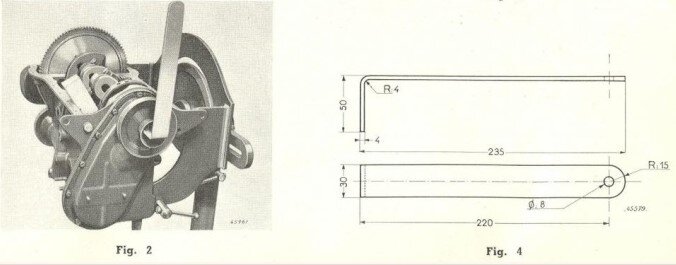
There also runs an old reference of a tool that tangentially “gripped” the screw in order to turn it:
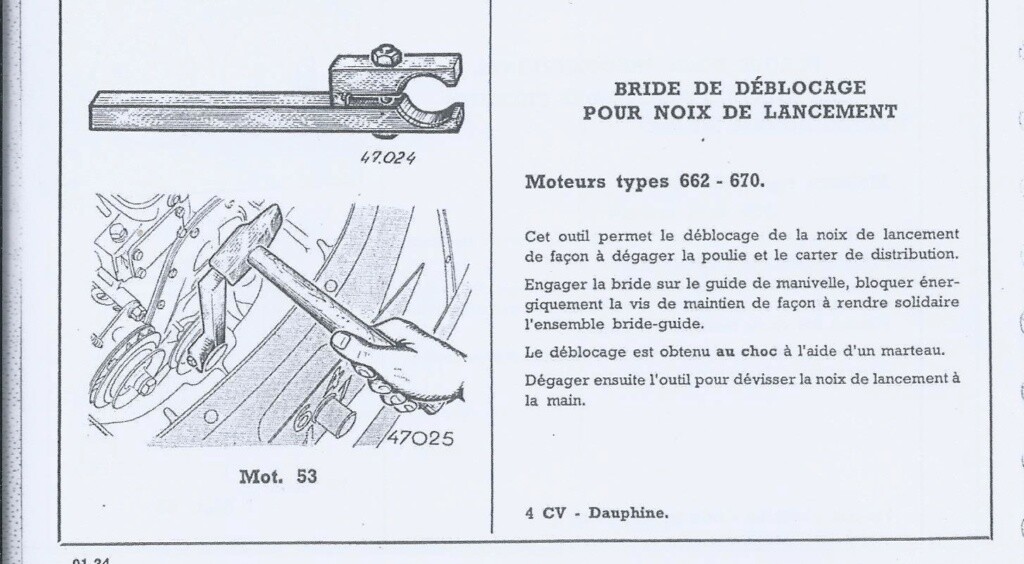
Both tools assumed that the loosening of the screw was done by a hammer blow. While the first impact pistol was invented in 1934 (as far as I could tell from digging through documentation and articles), they probably didn’t become popular in shops until quite a few years later.
How to make for the Renault Dauphine/Gordini/Renault 4CV
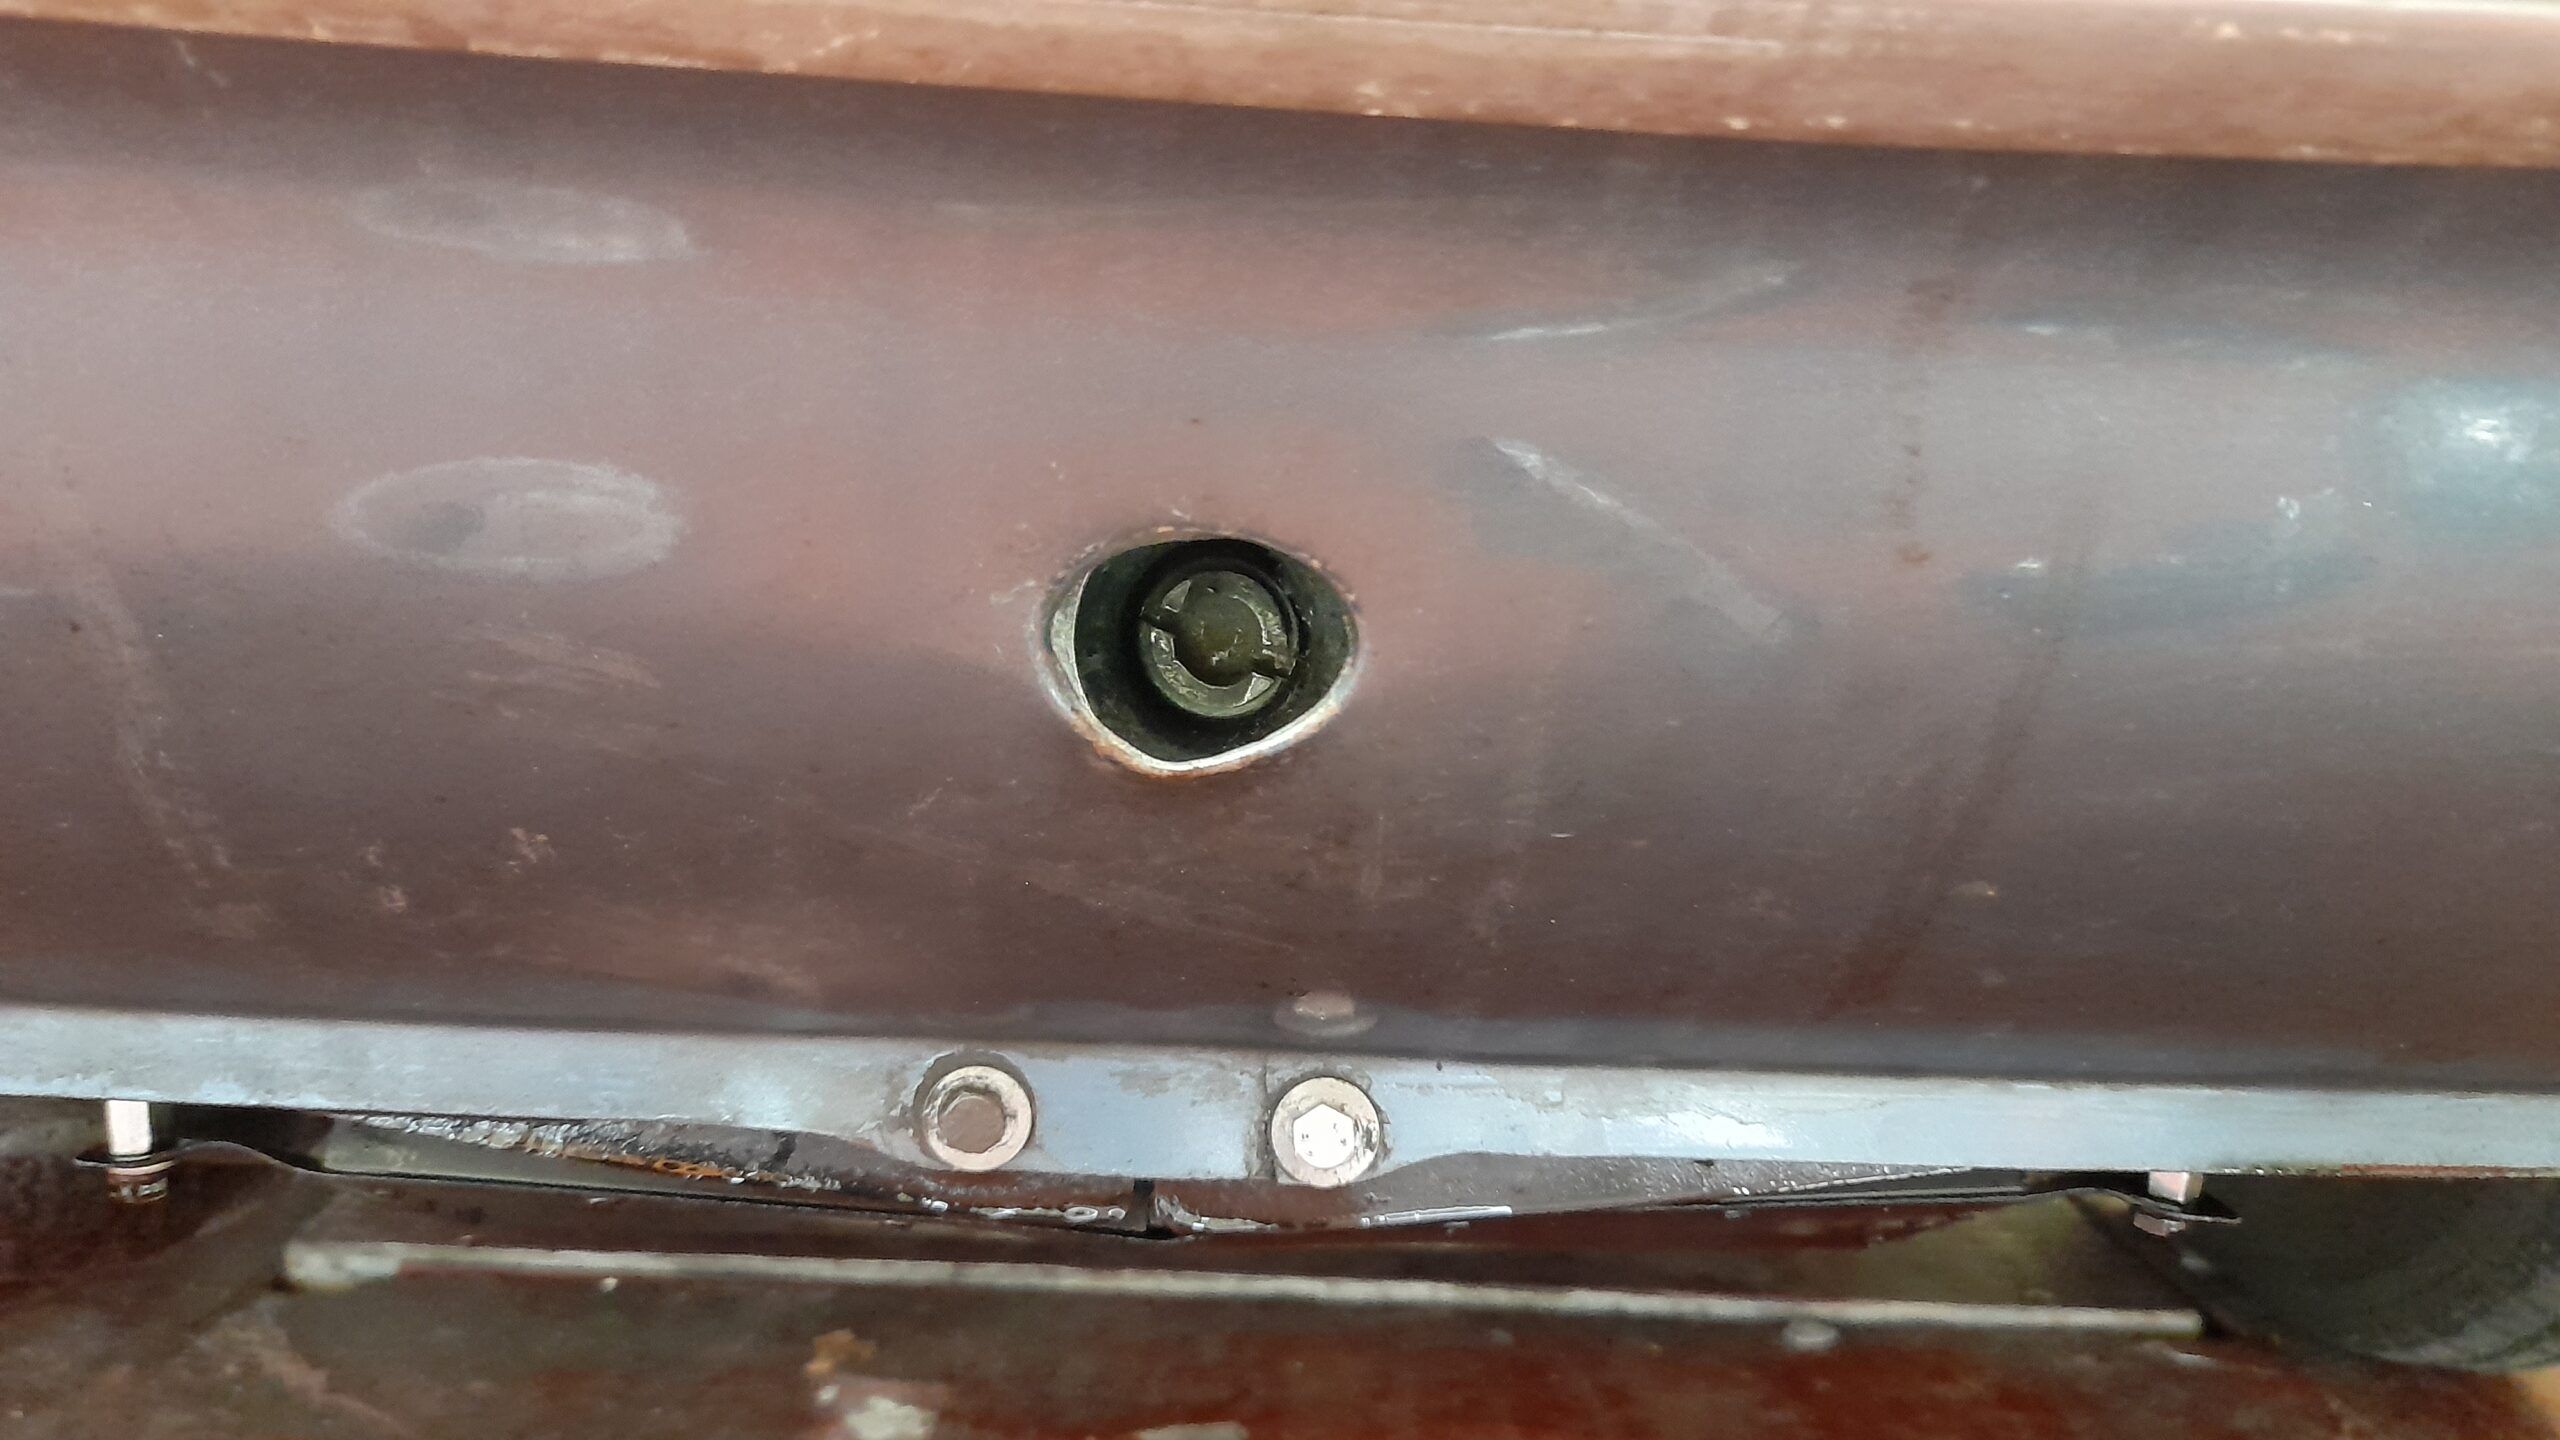
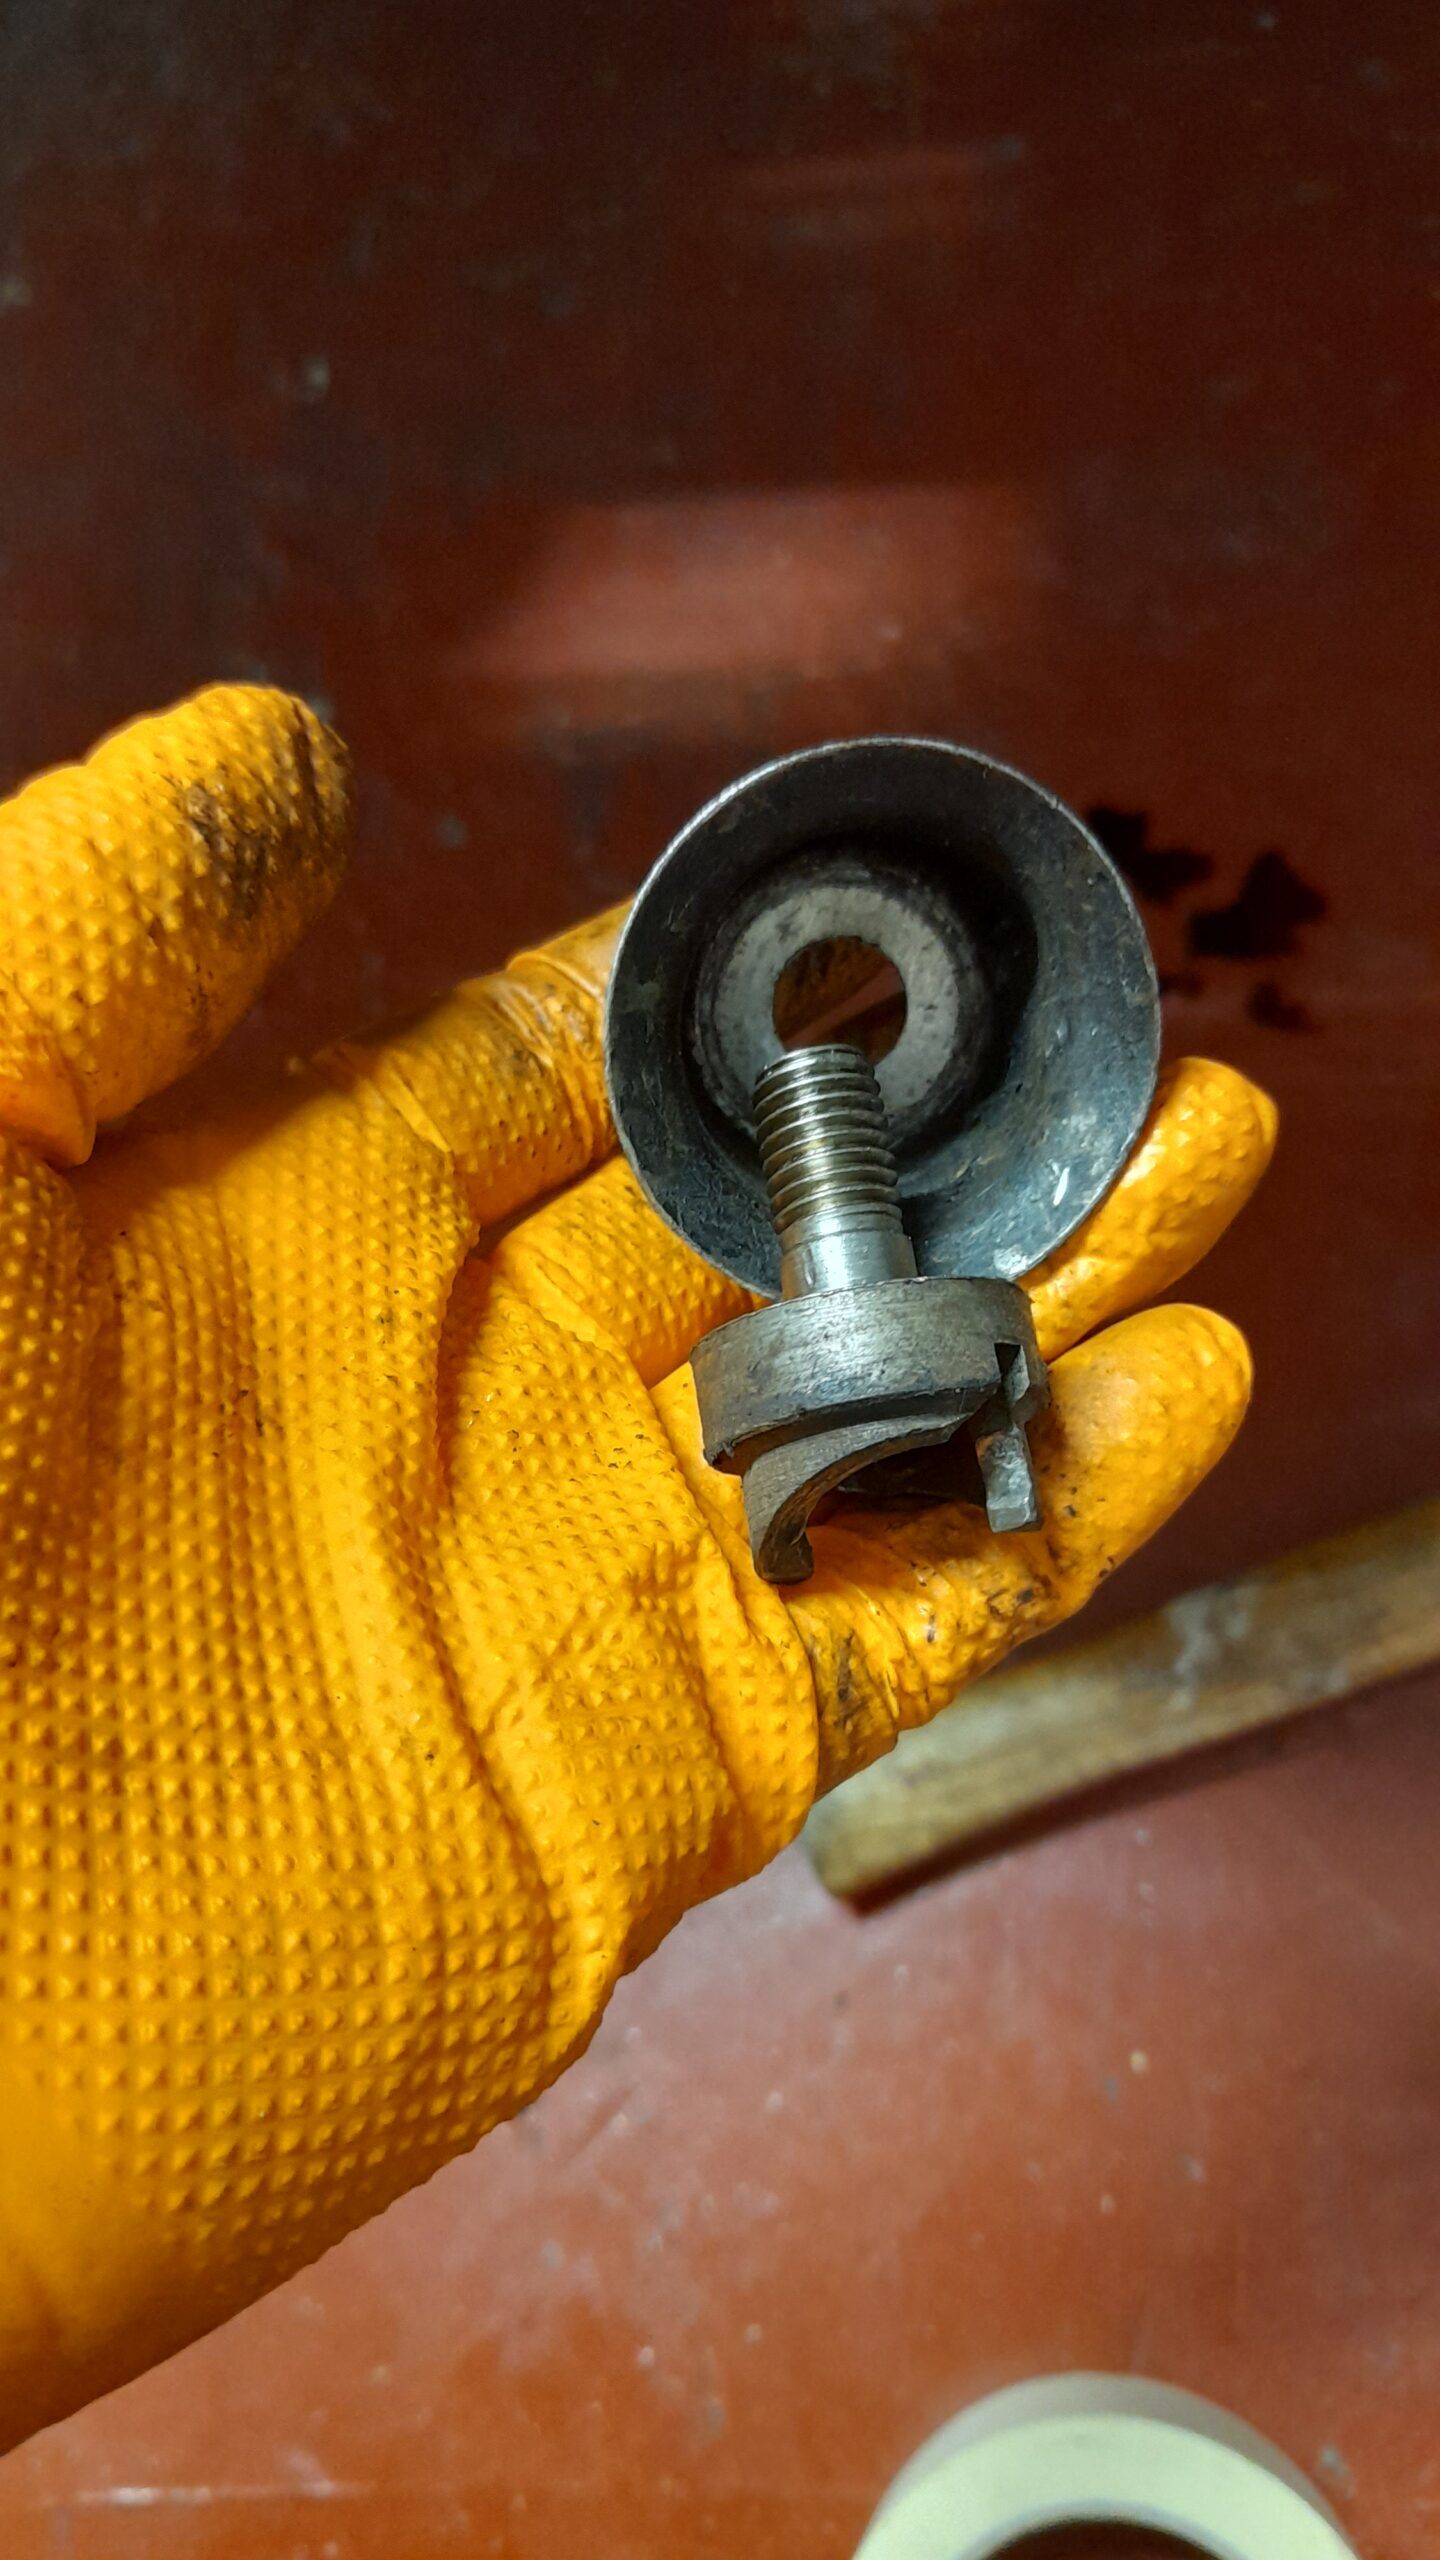
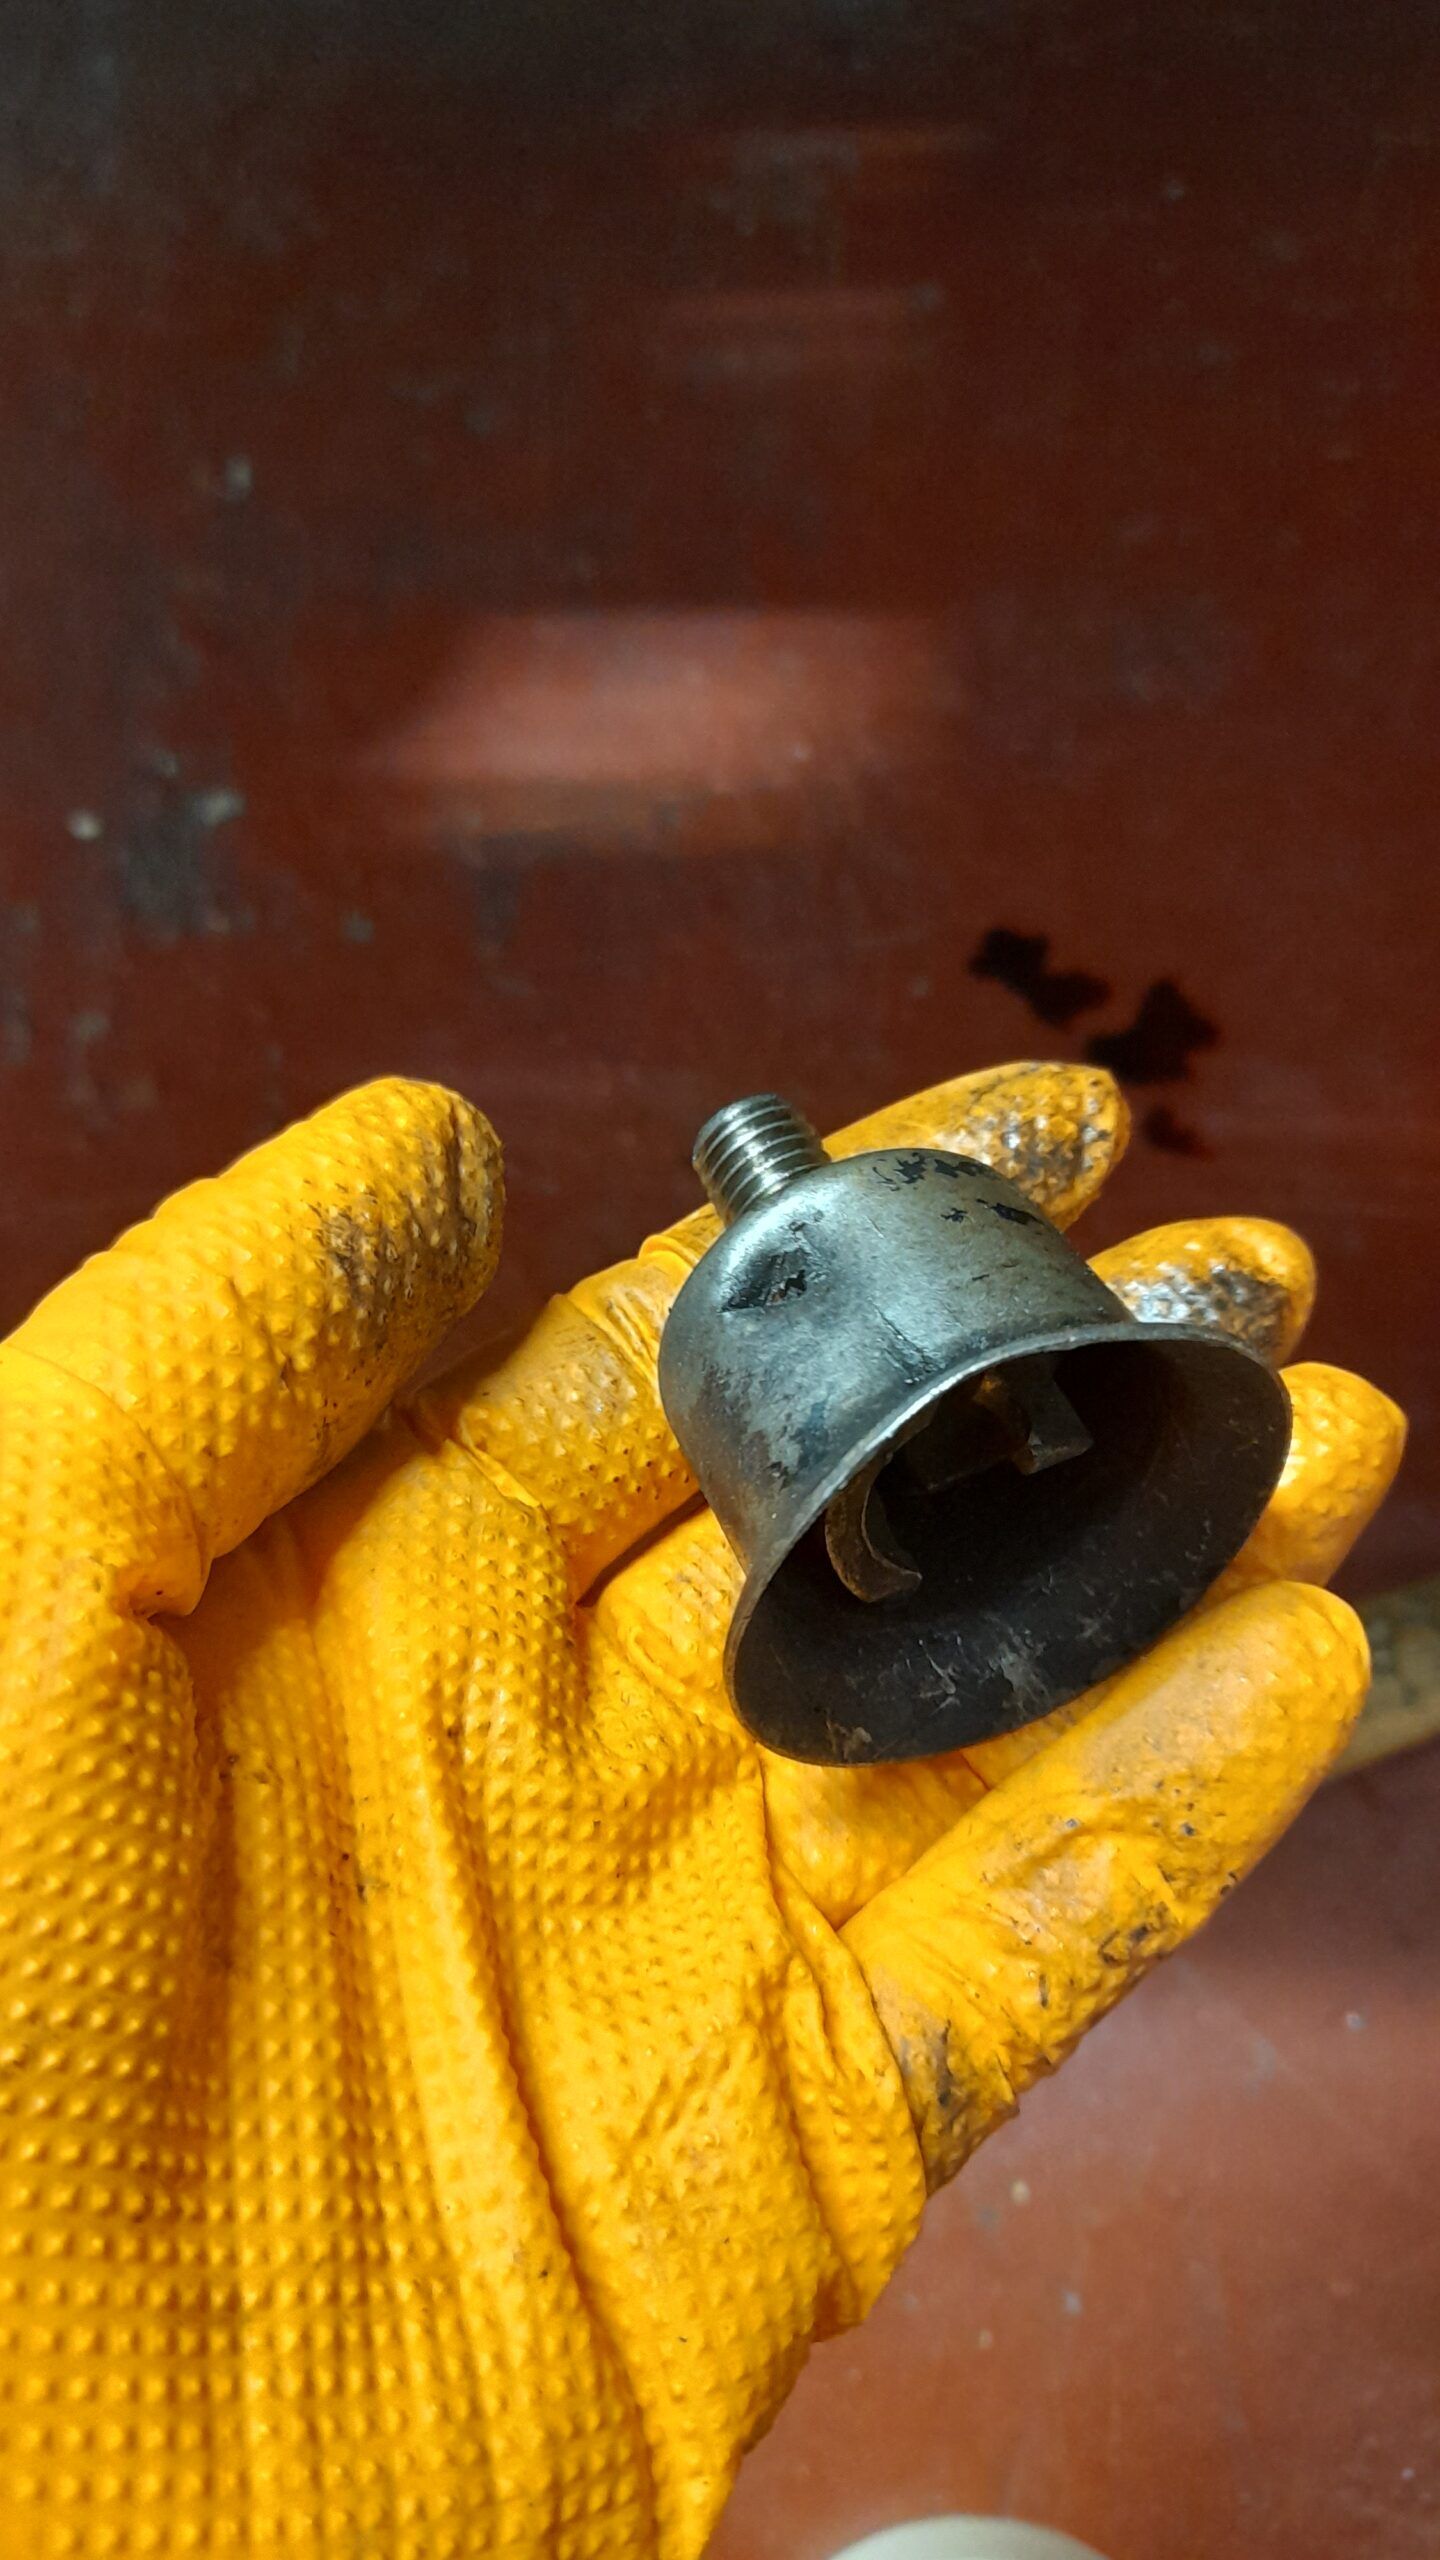
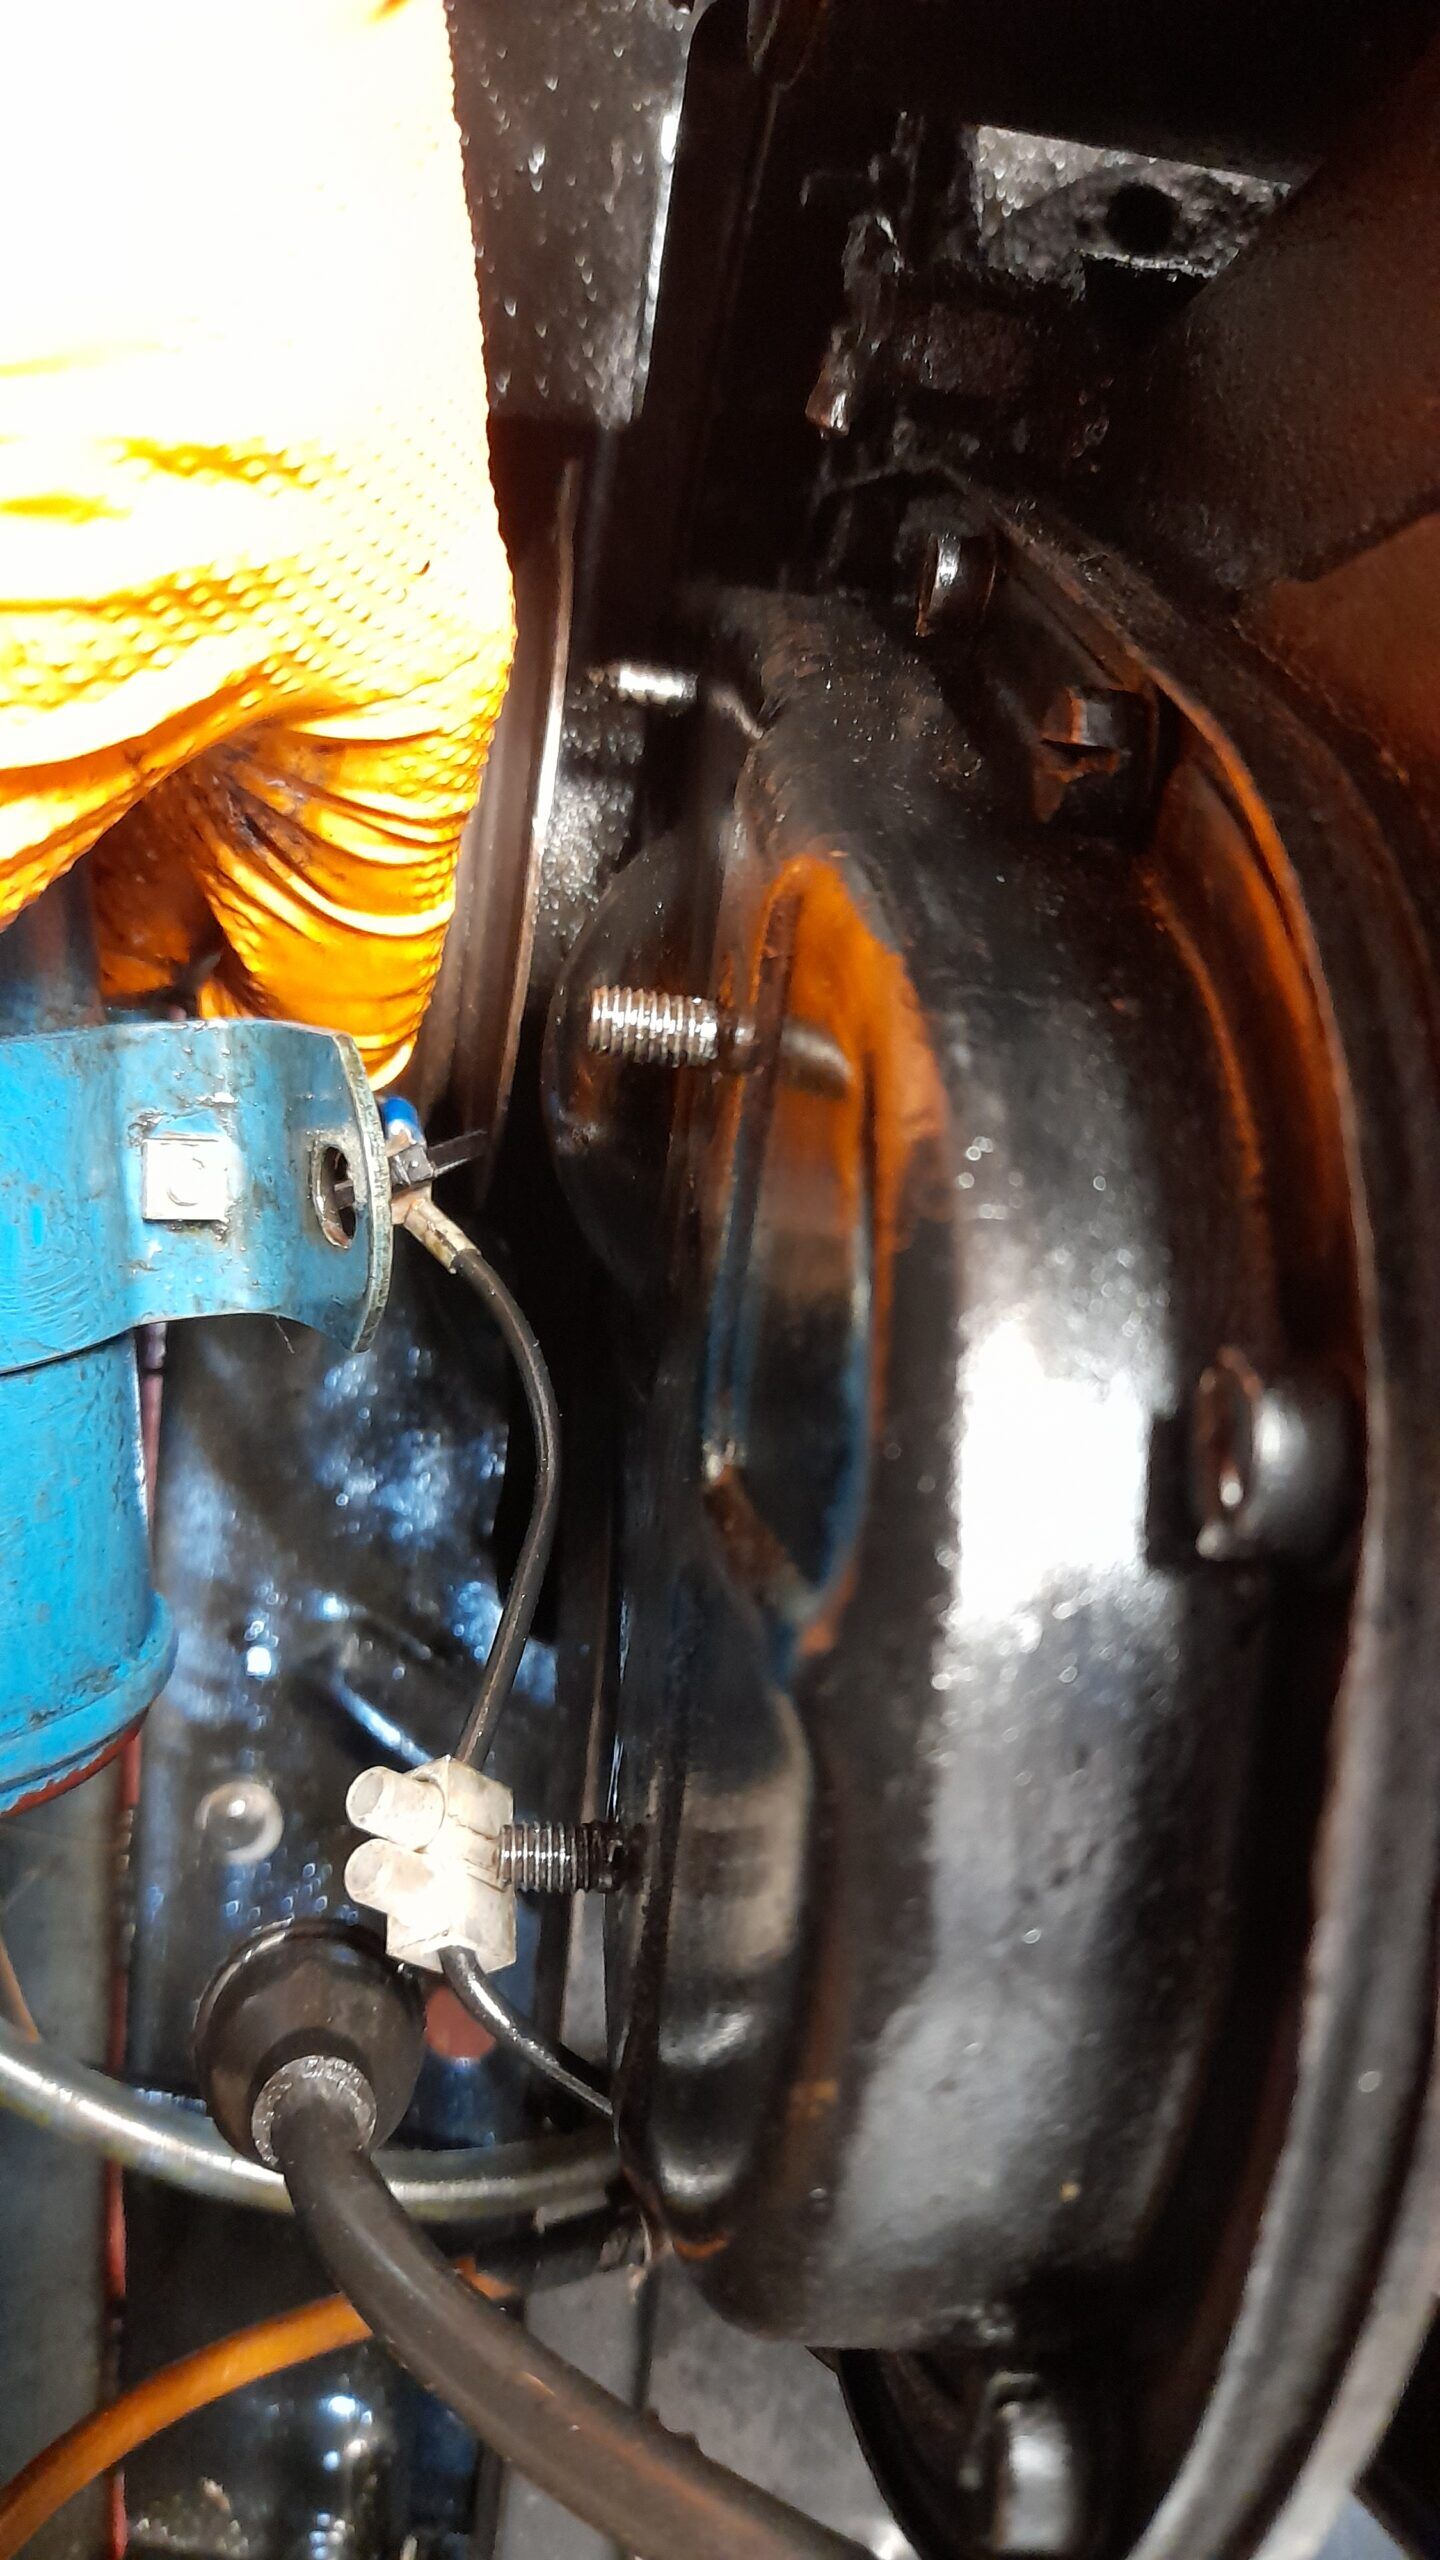
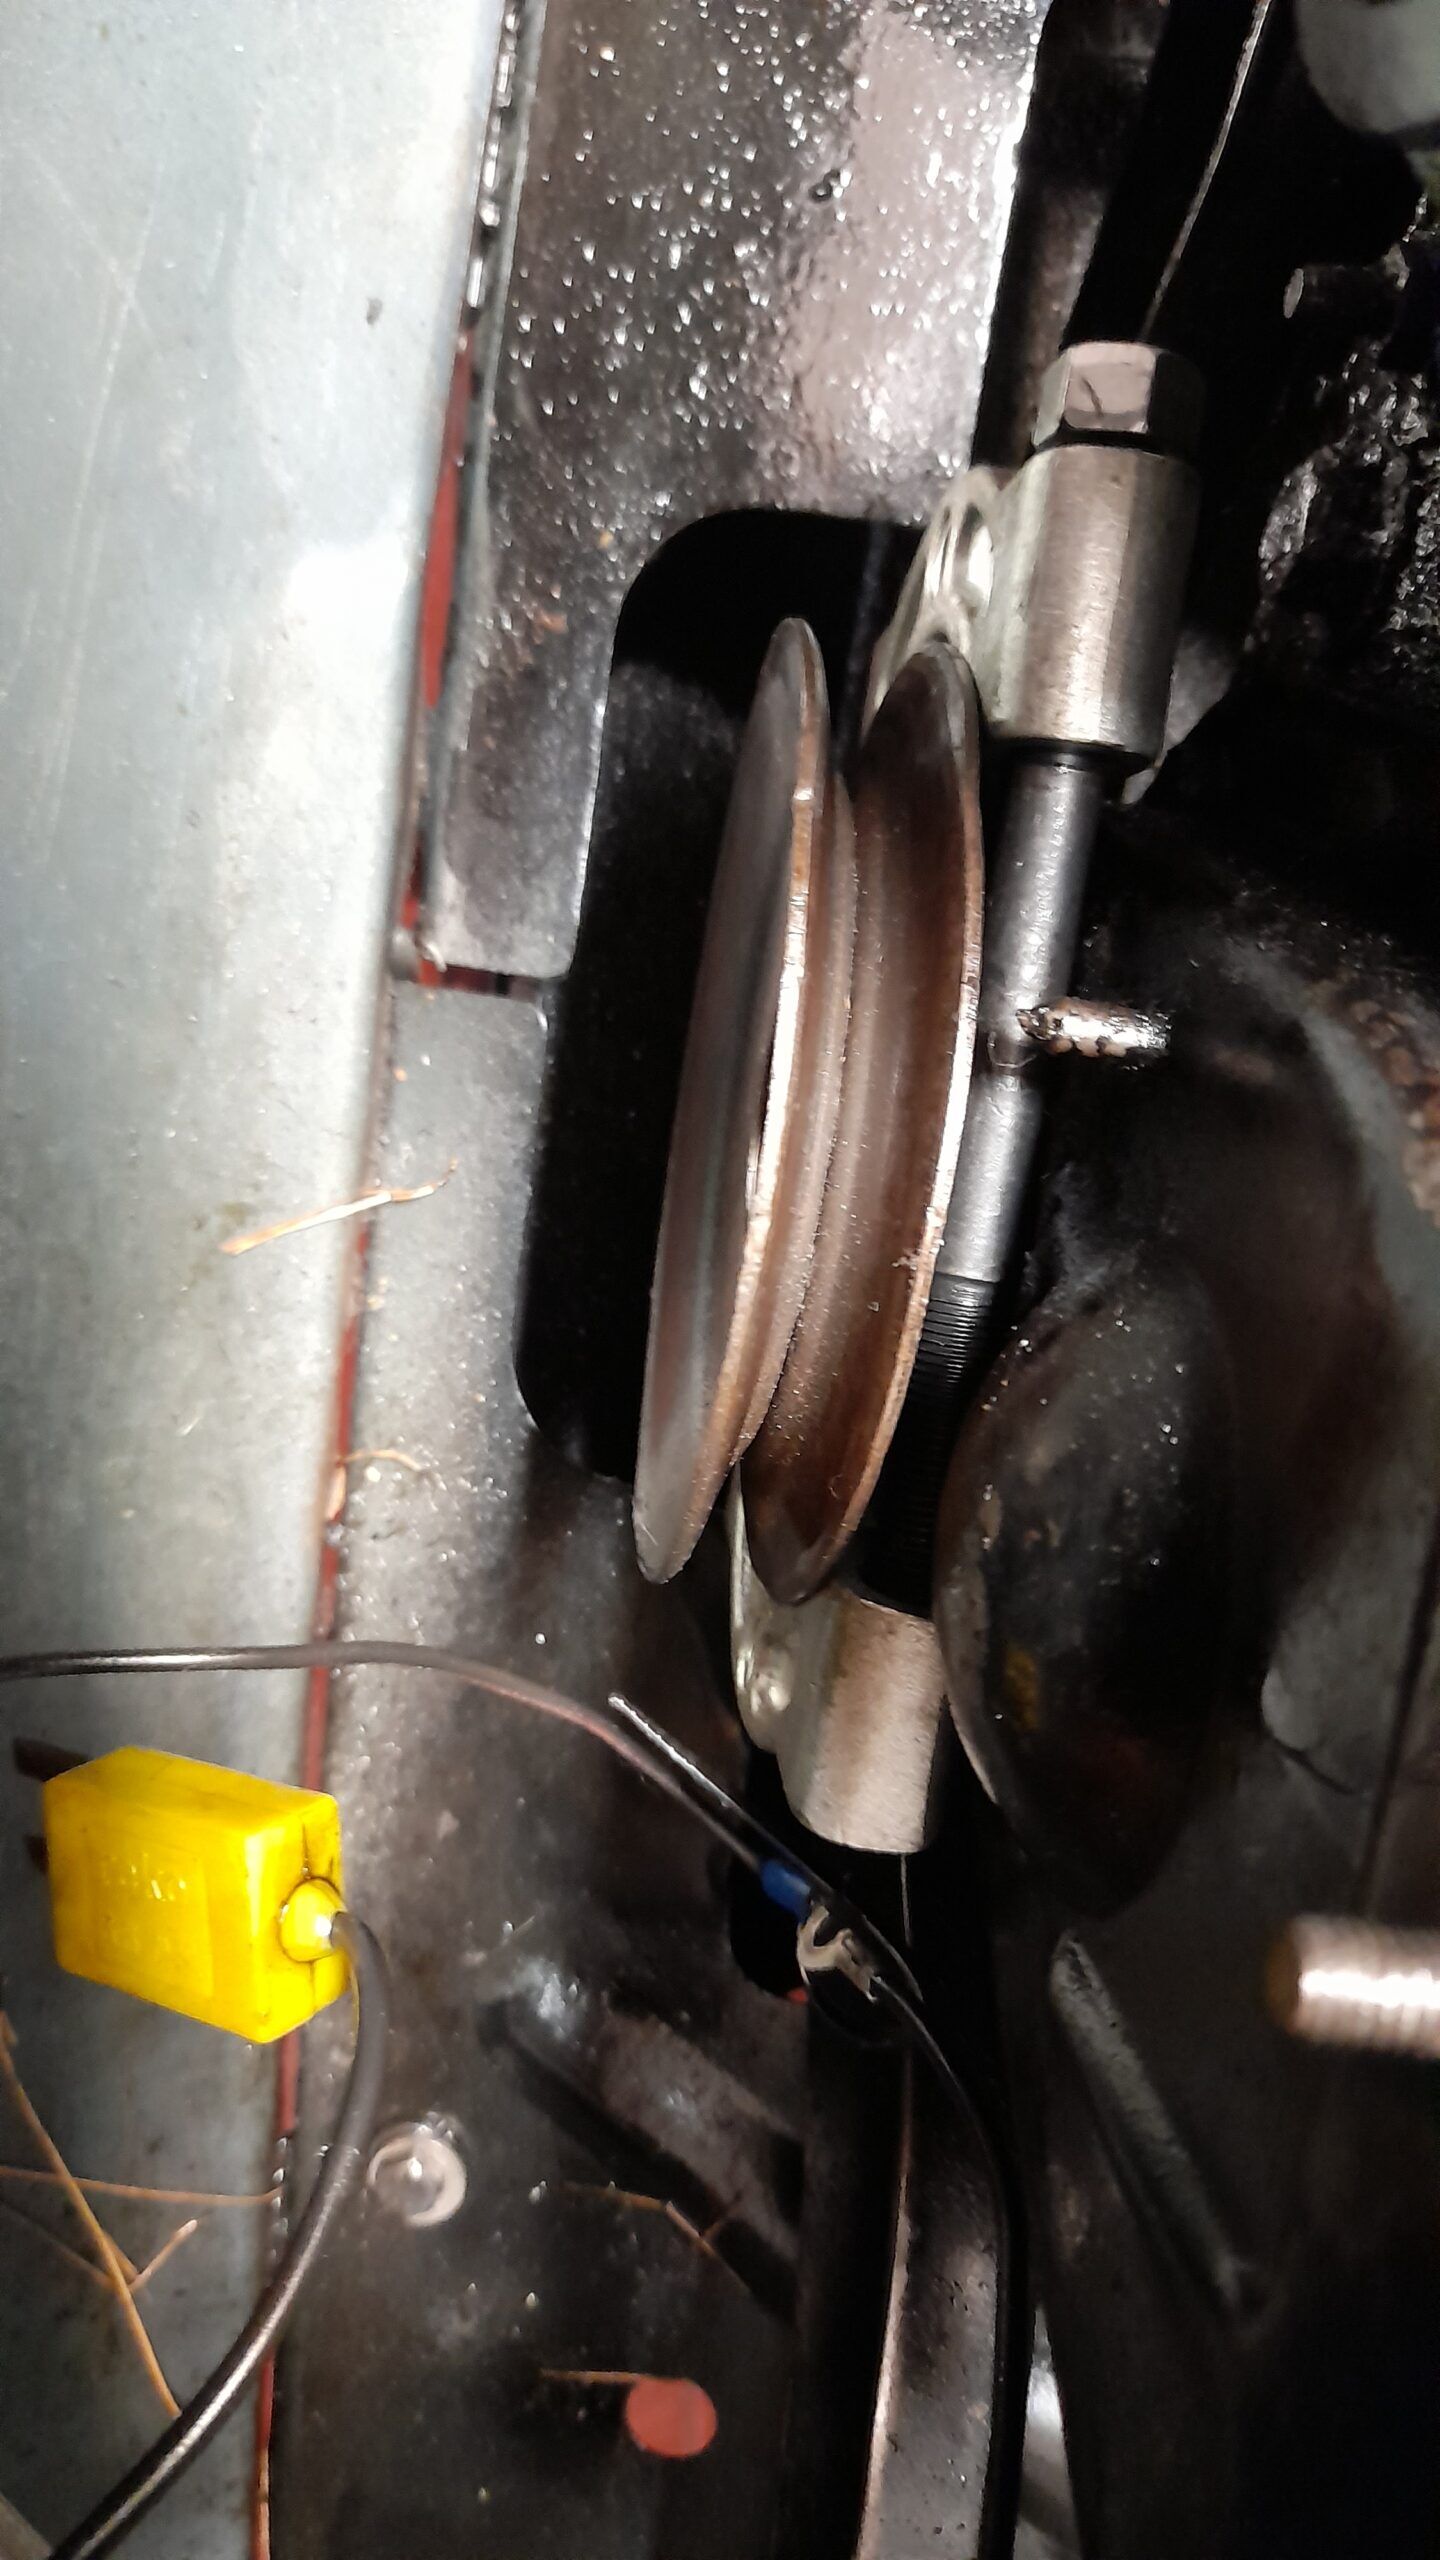
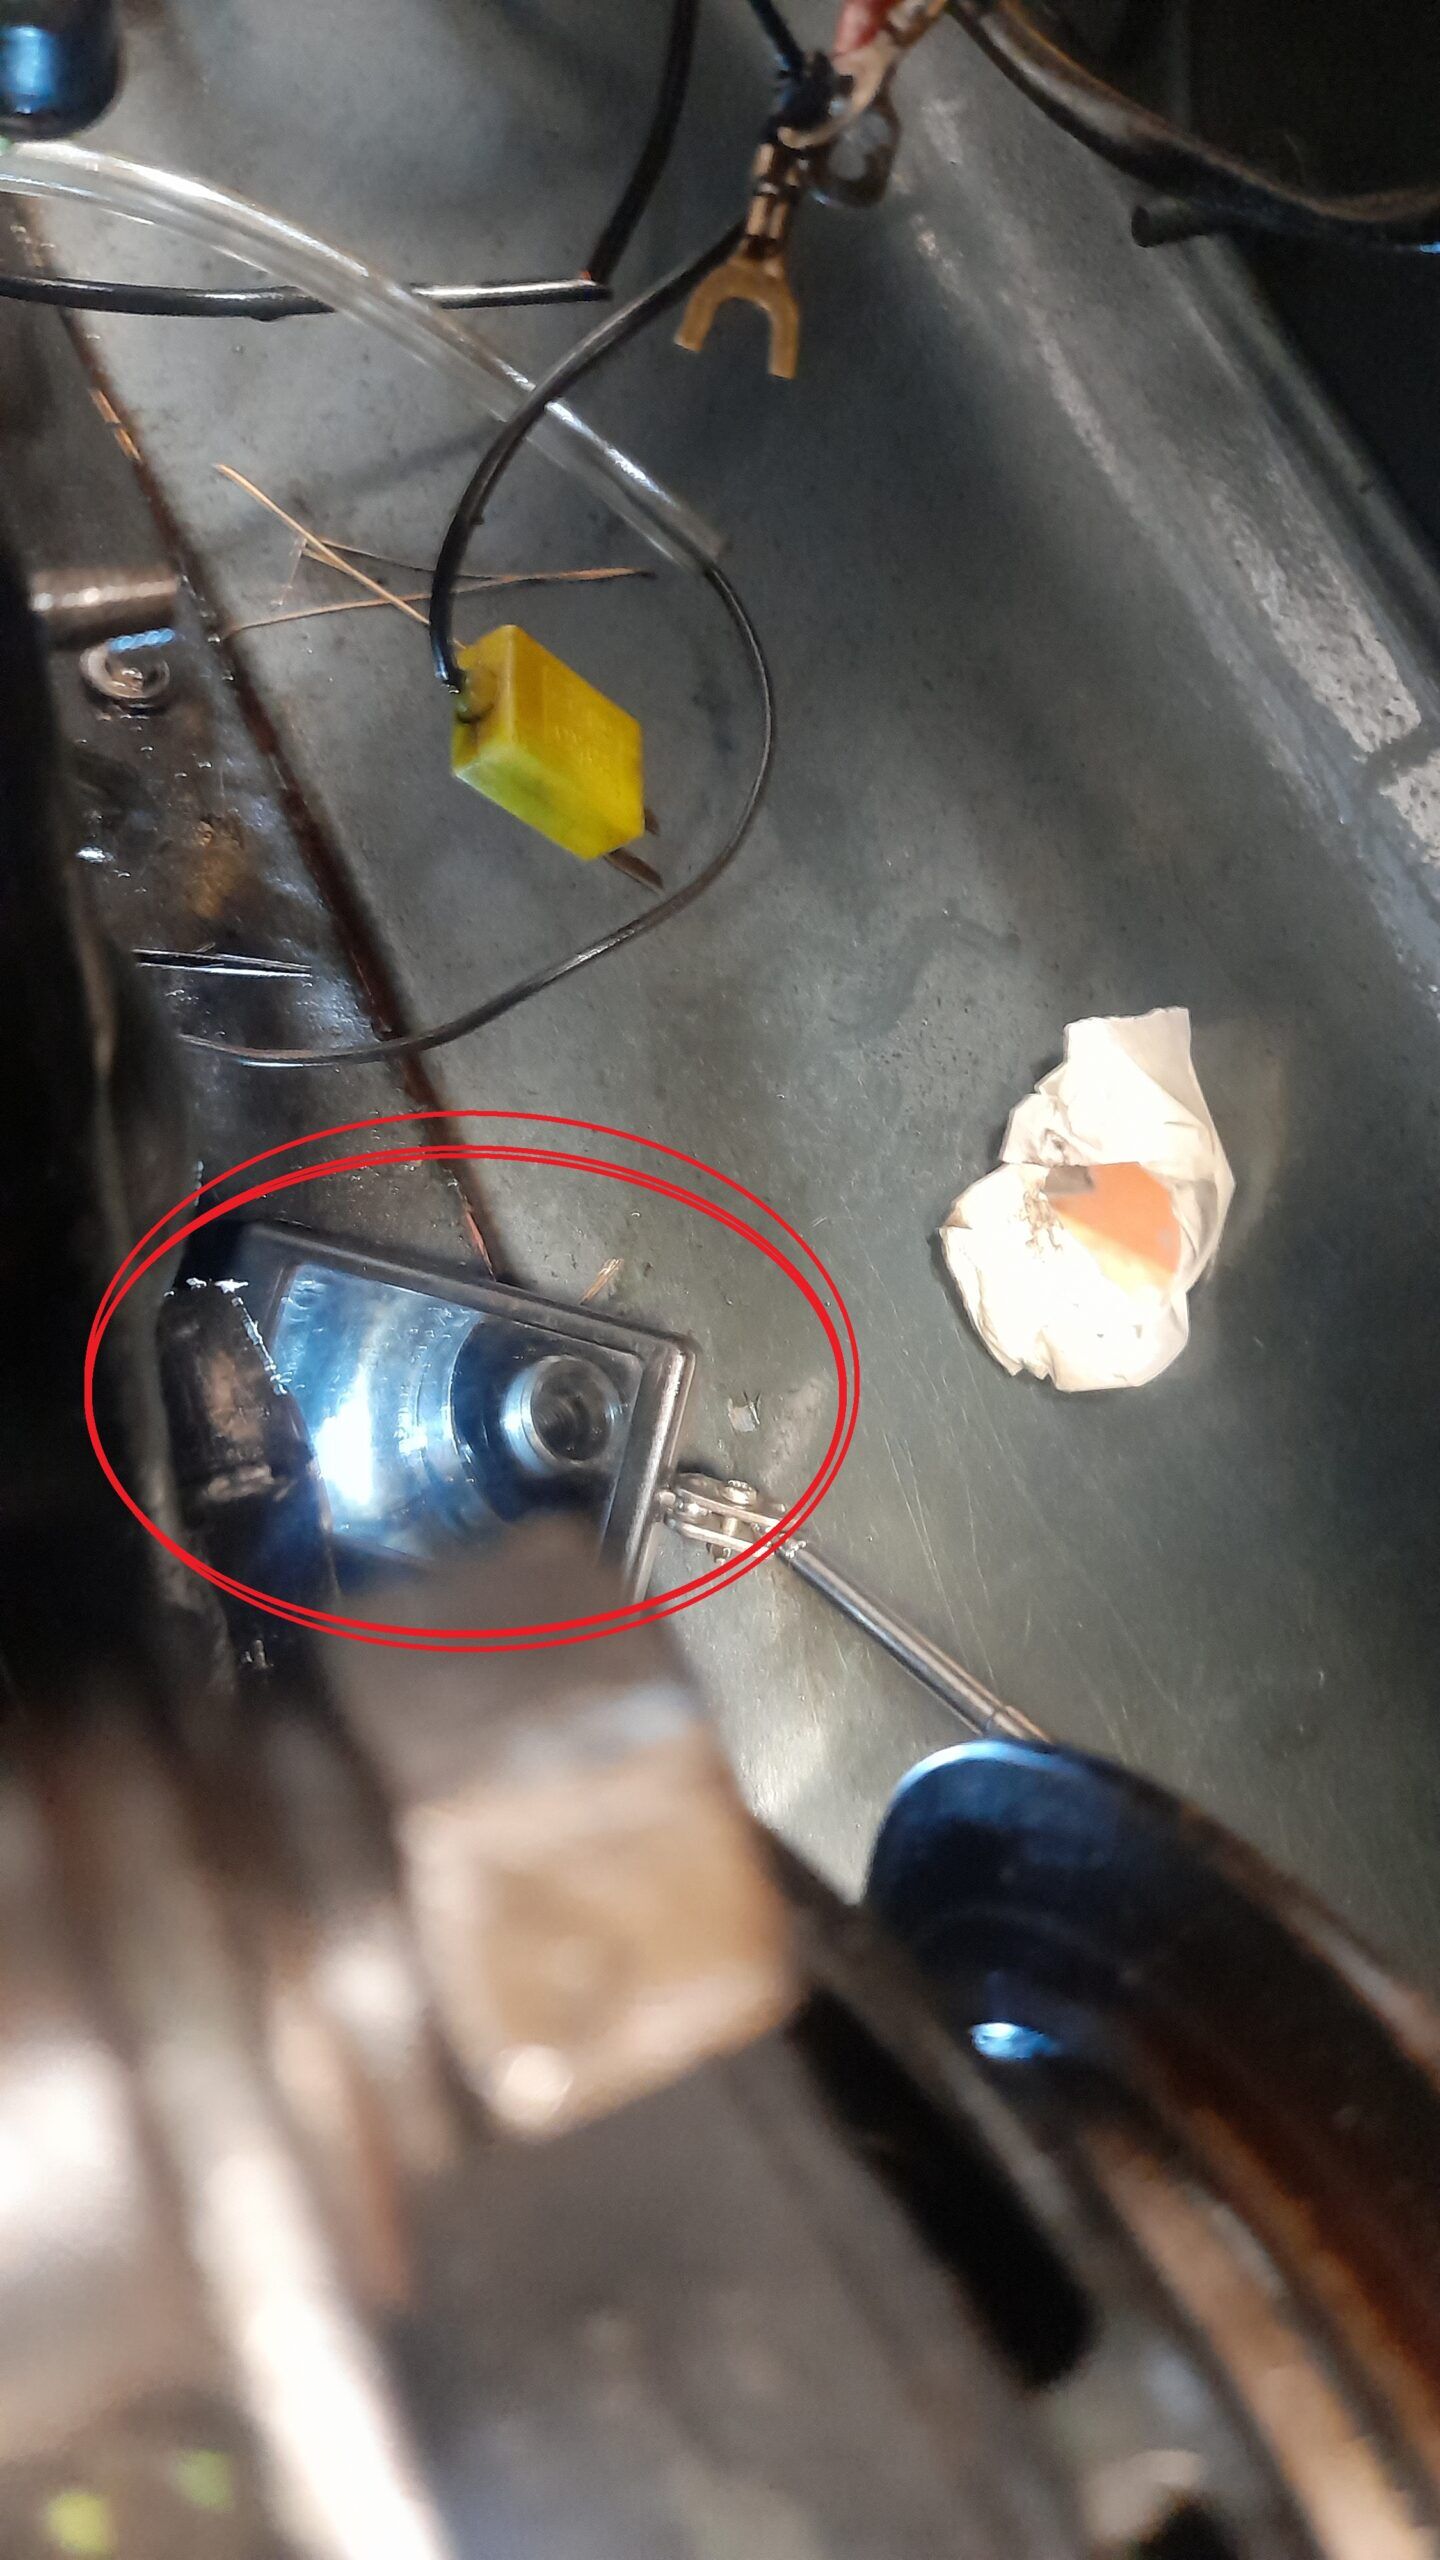
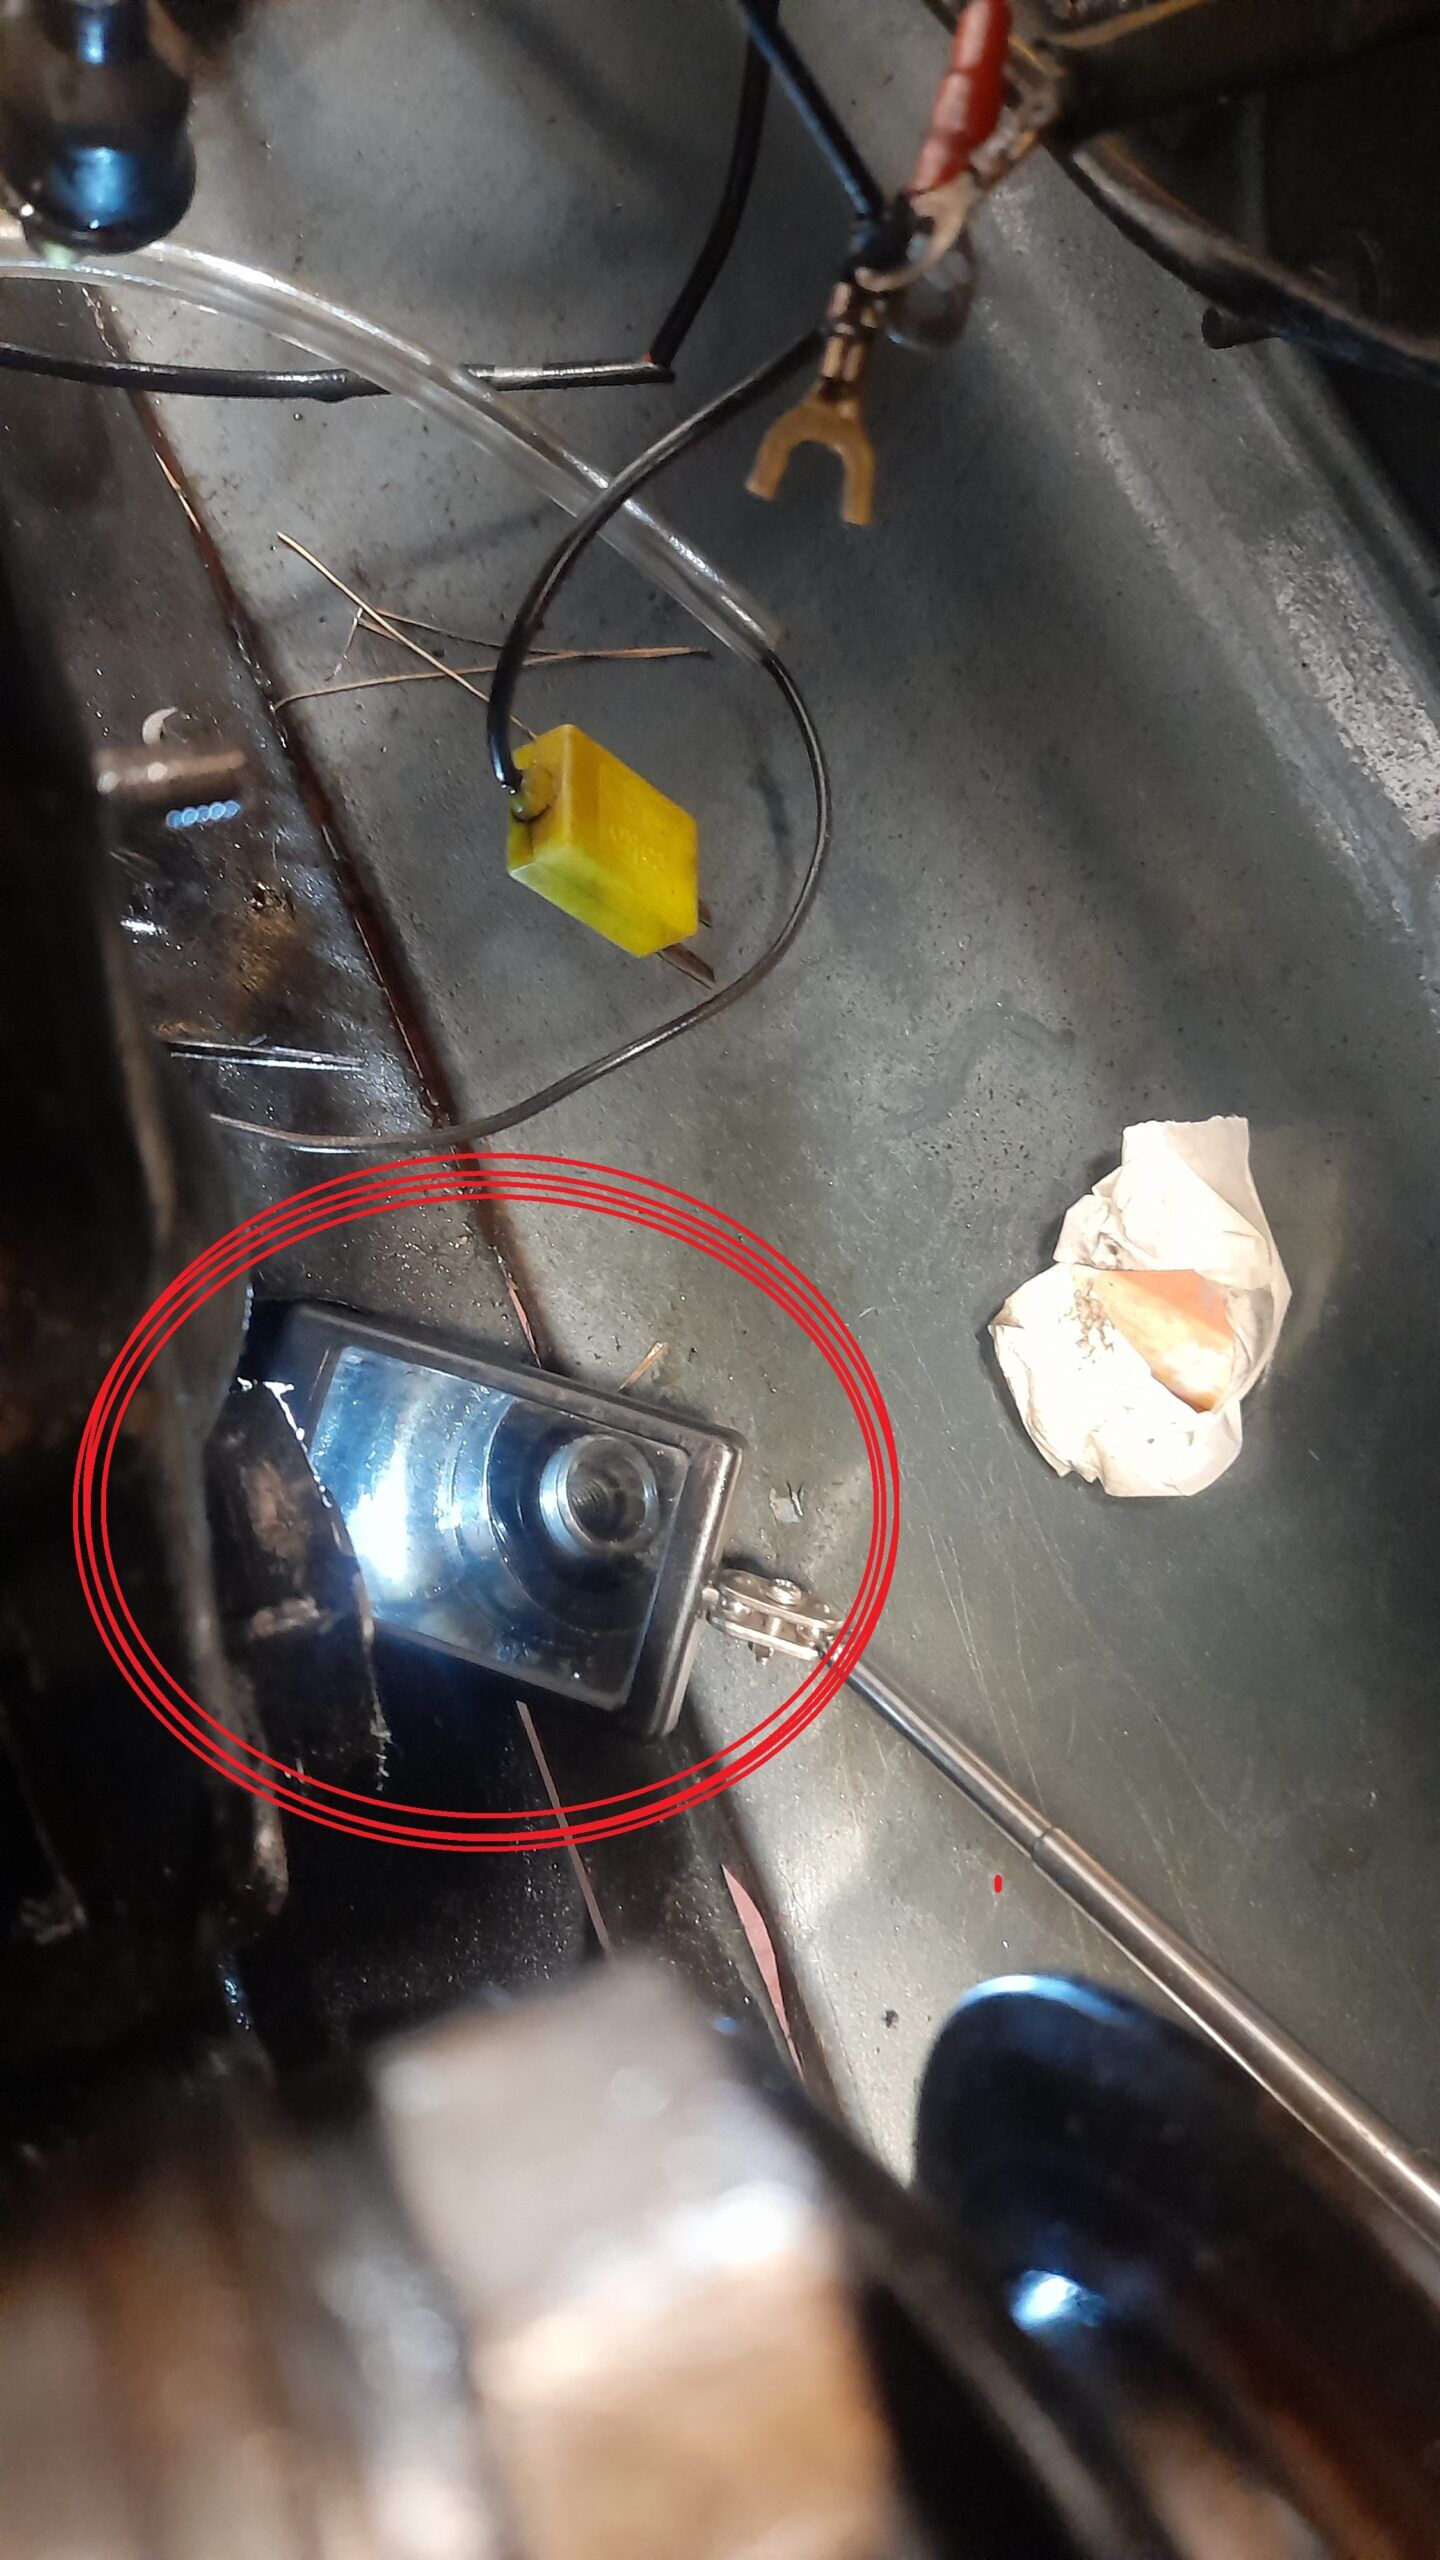
As you may know, and/or have seen in several of the photos on this page, the screw is protected by a “bell” around it. This bell is used to center the crank when you want to crank start the car. And therefore your tool has to “pass” inside the bell.
Material you will need:
You will need:
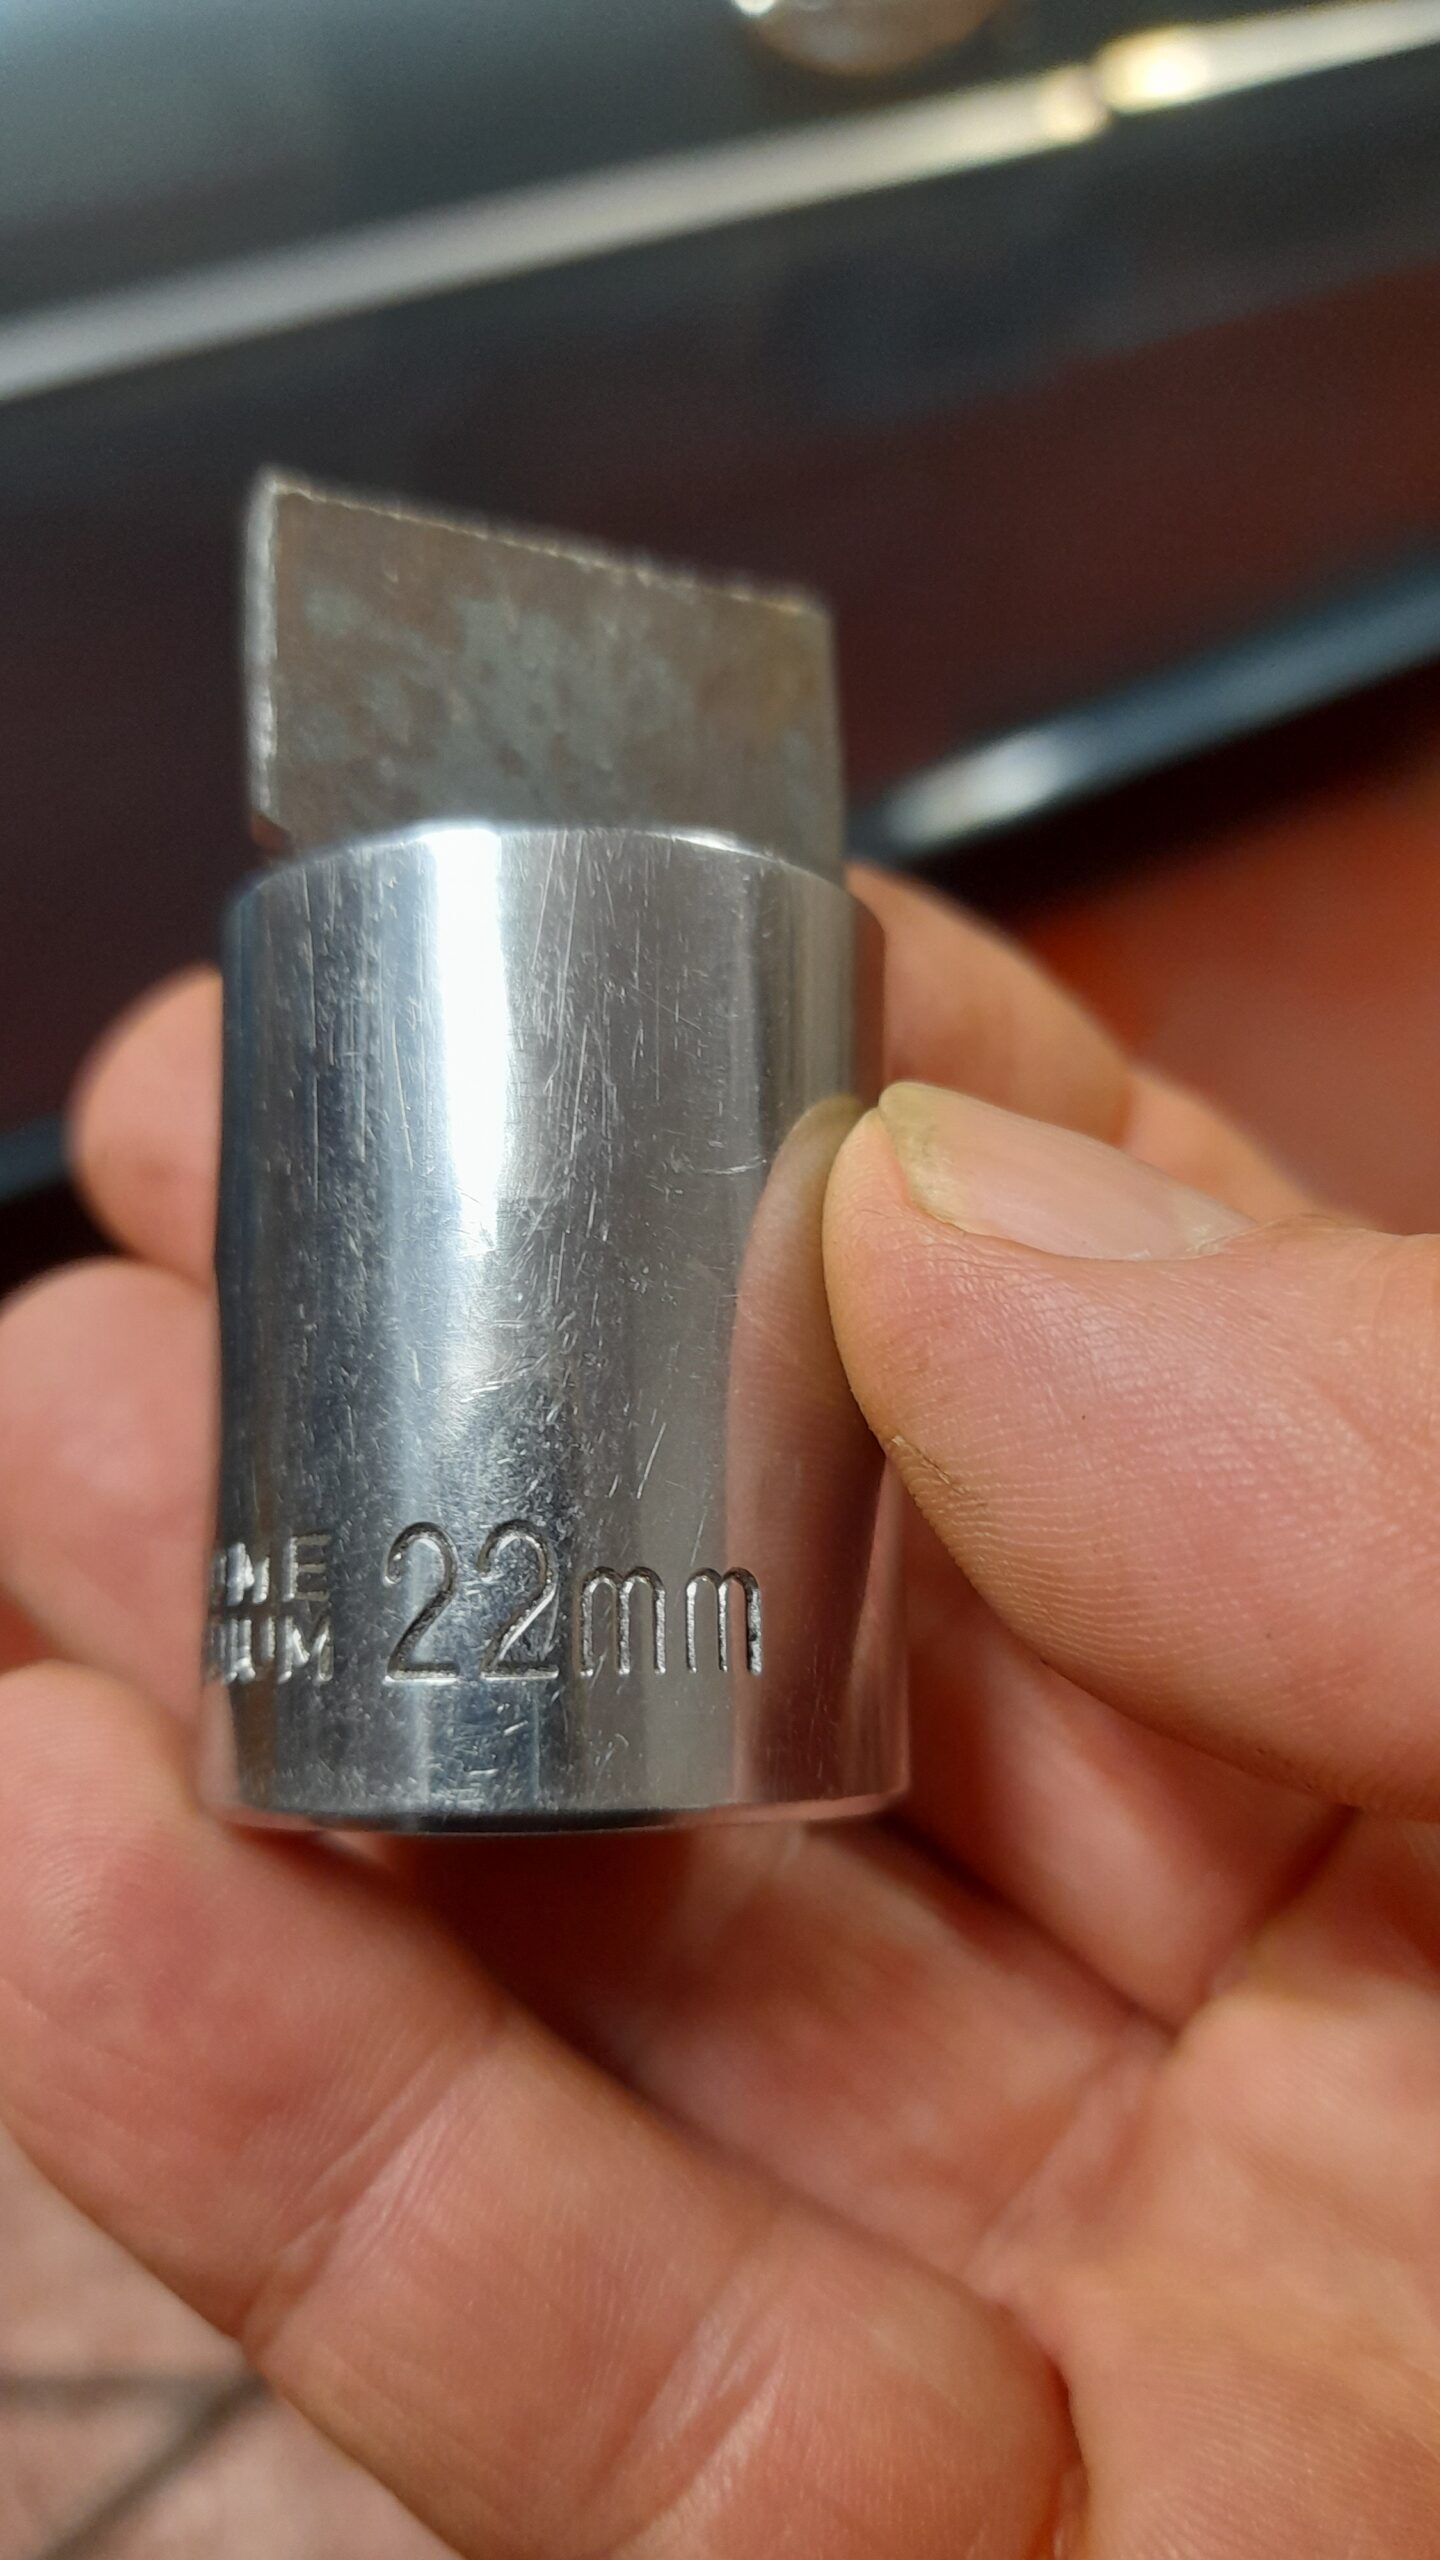
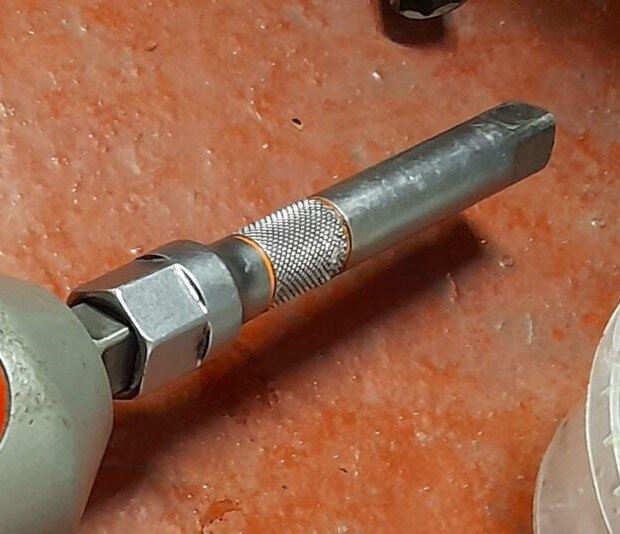
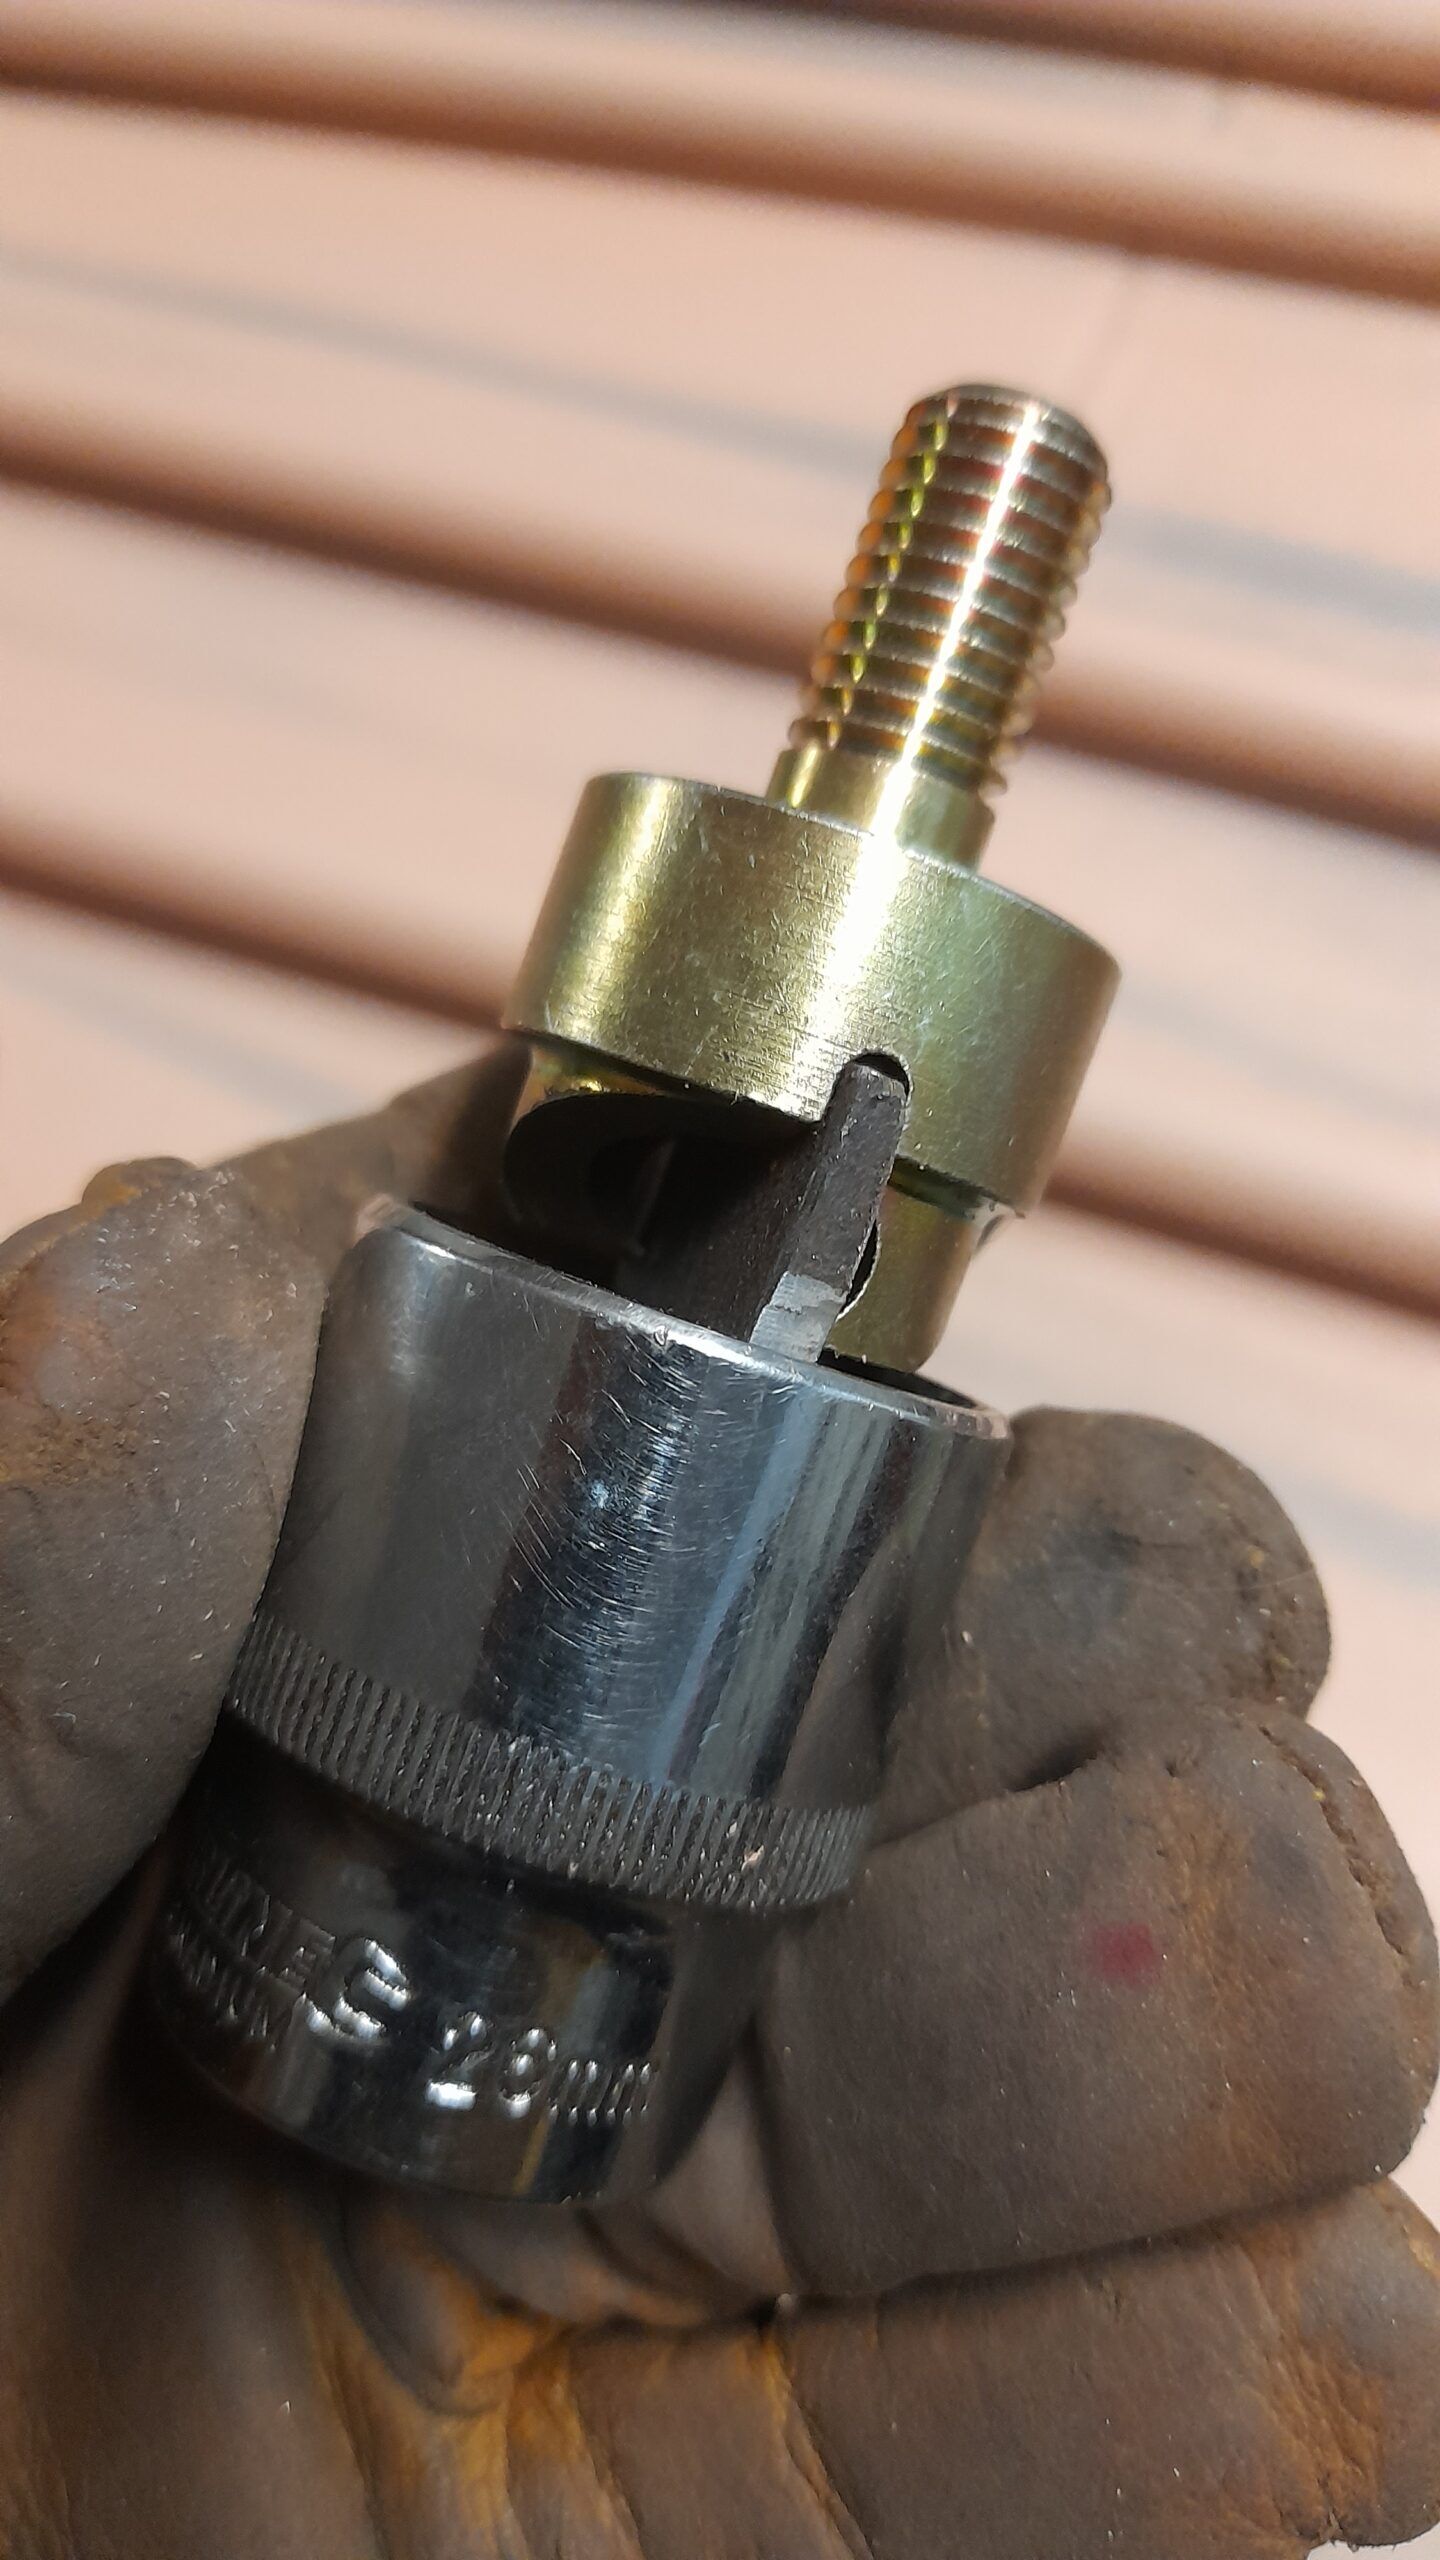
- One 22mm socket wrench. It has the exact width of the crankshaft pulley bolt head so you are guaranteed that it will not “trip” on the bell housing.
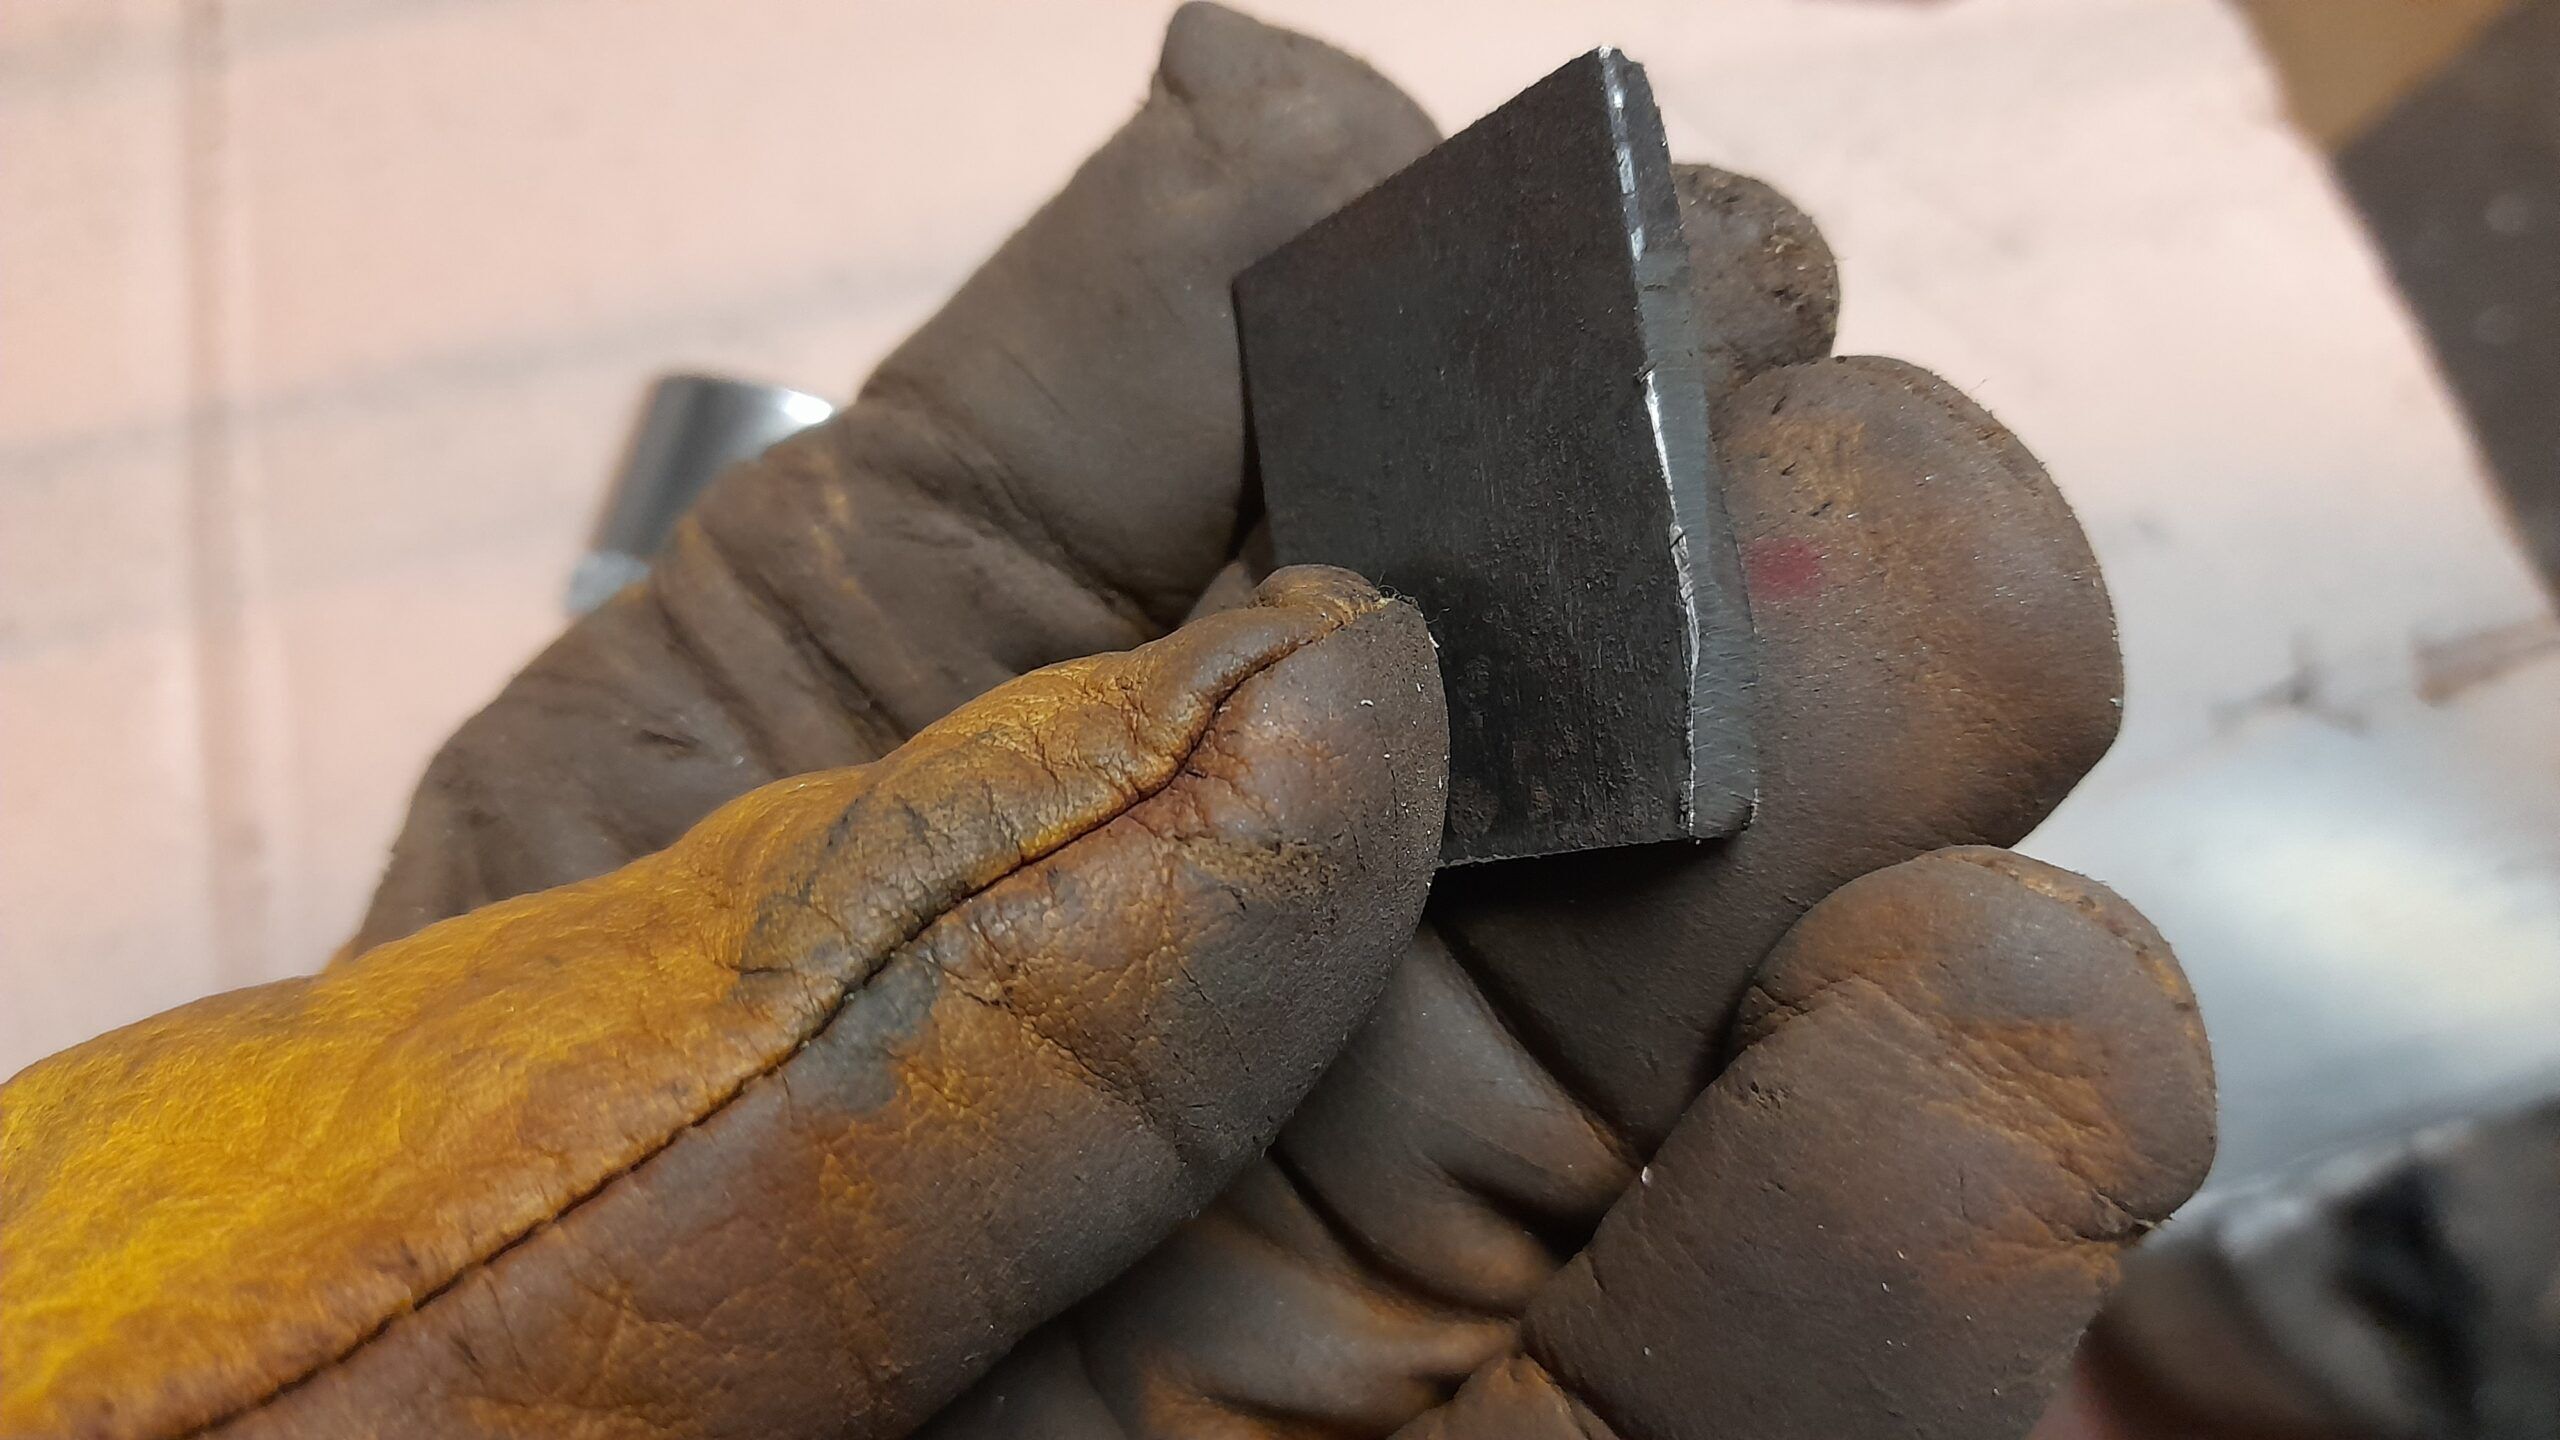
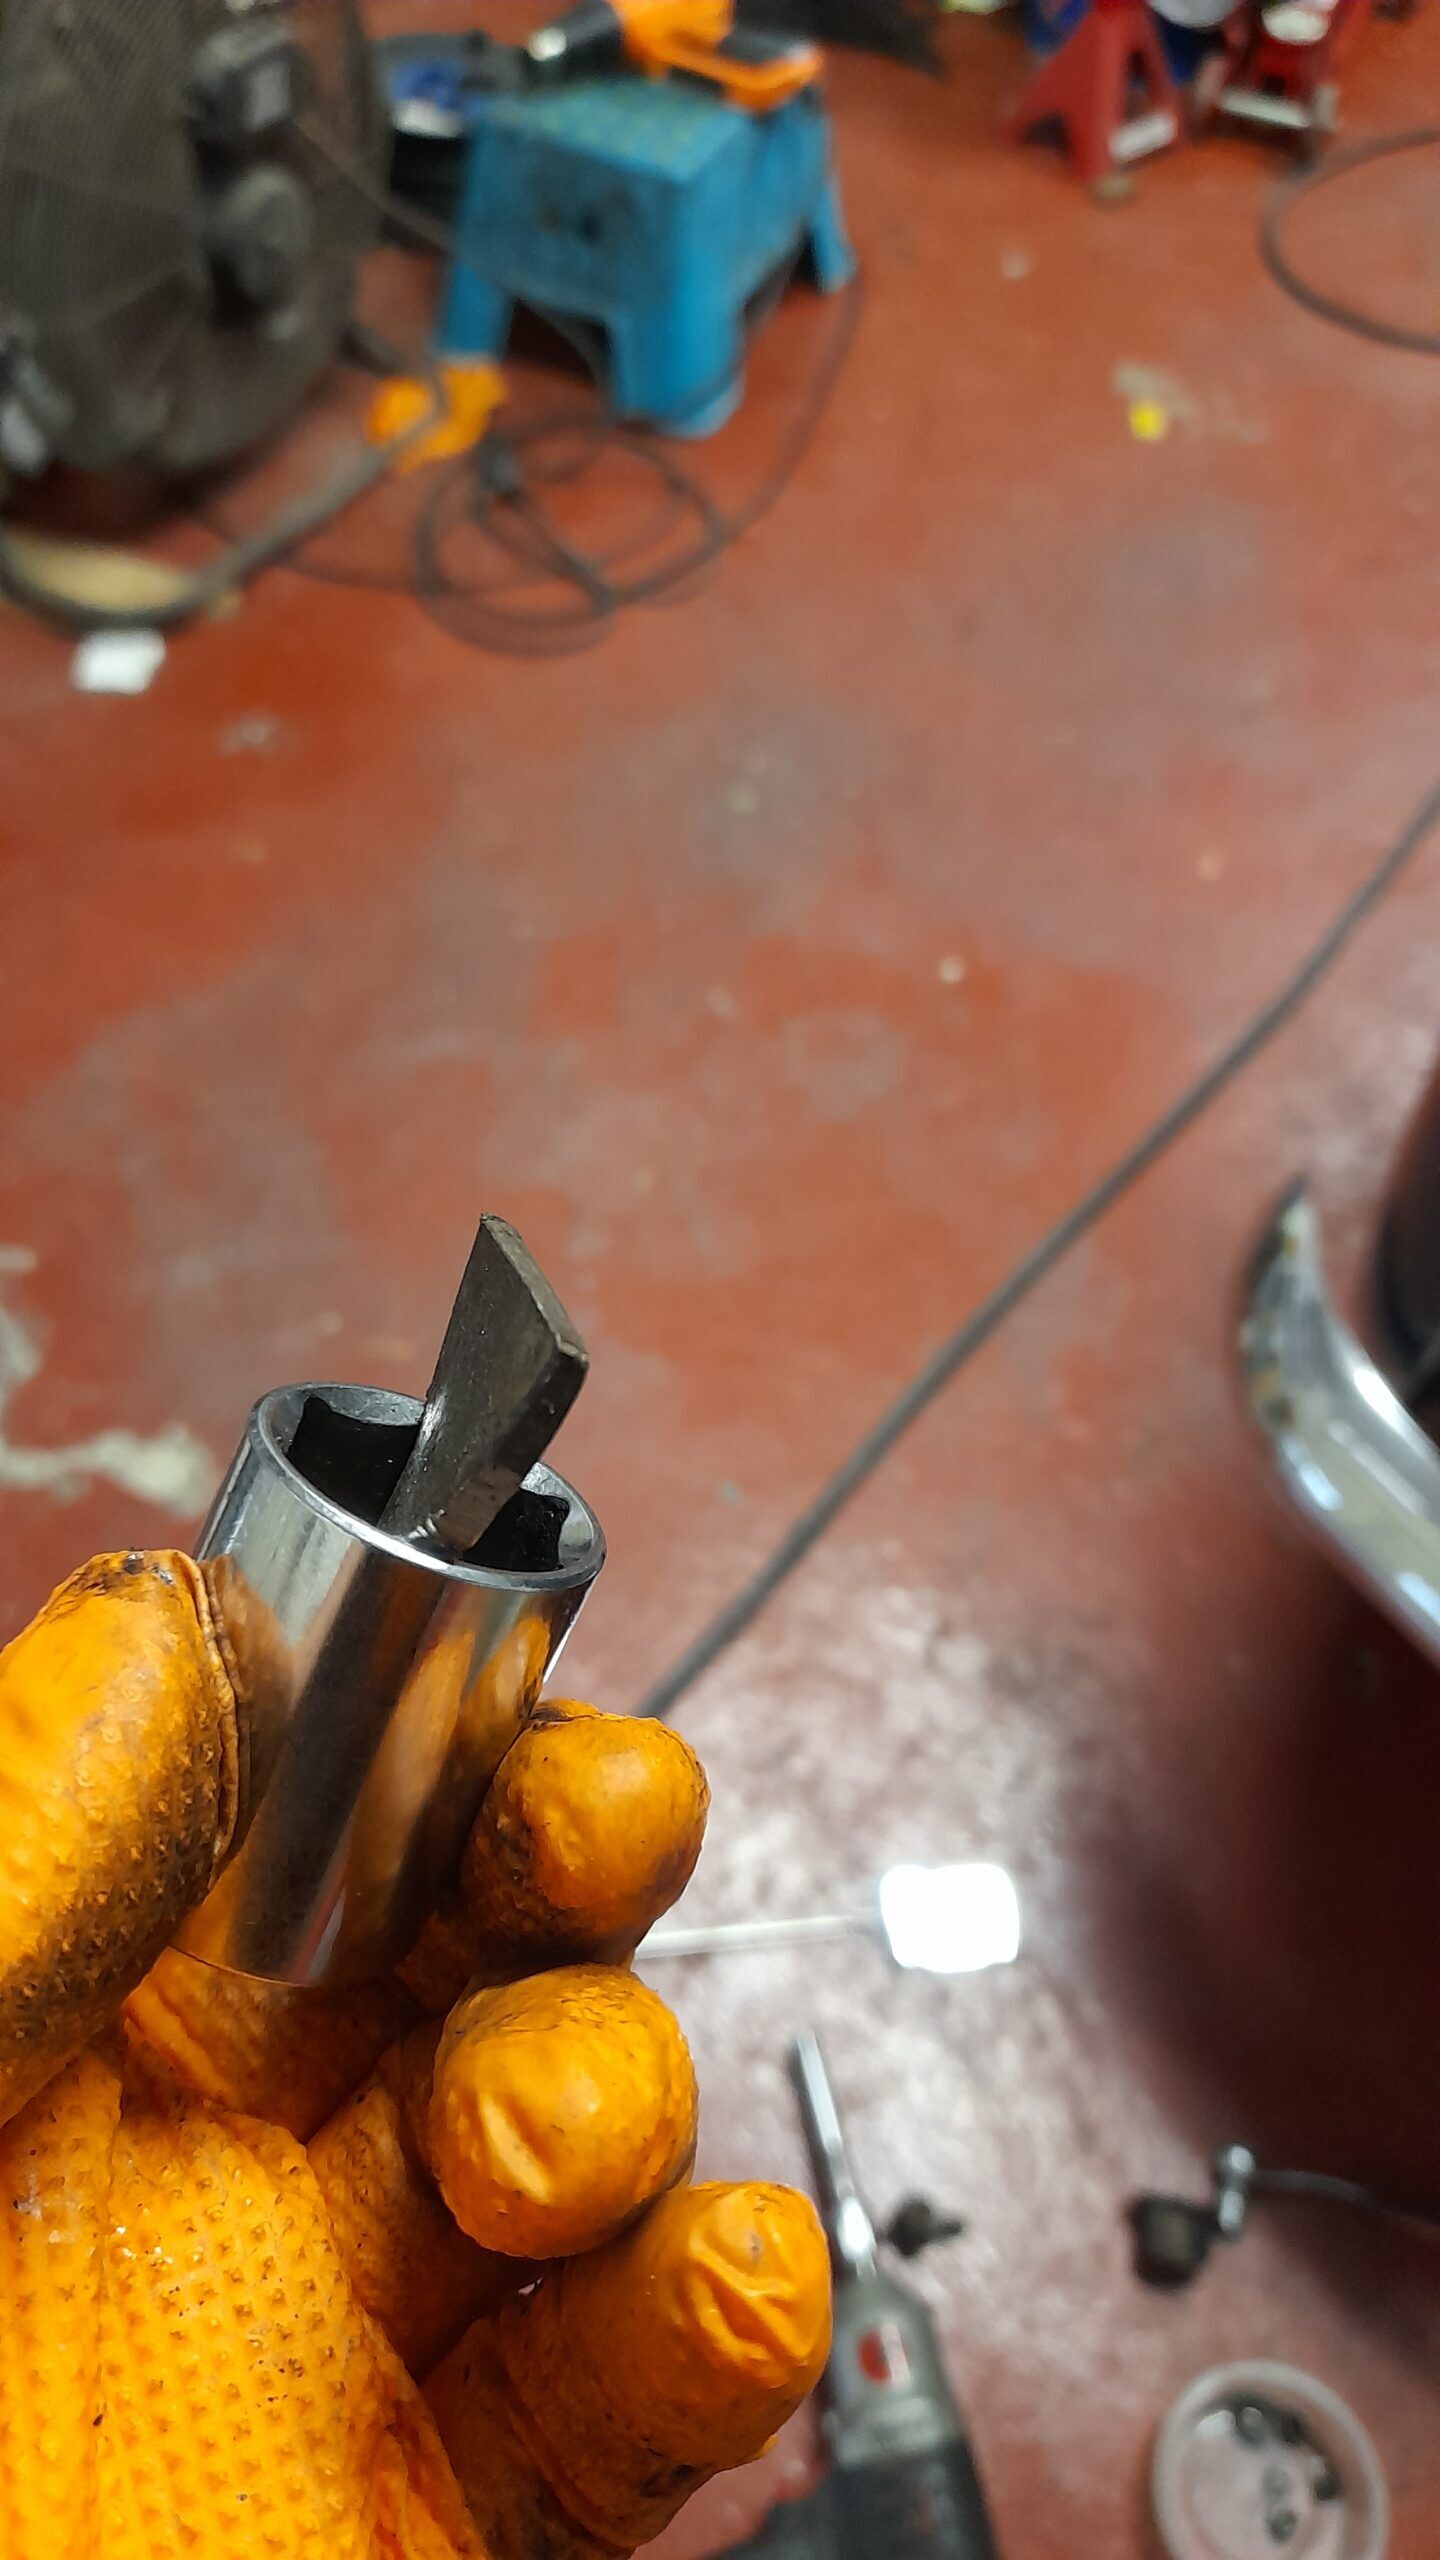
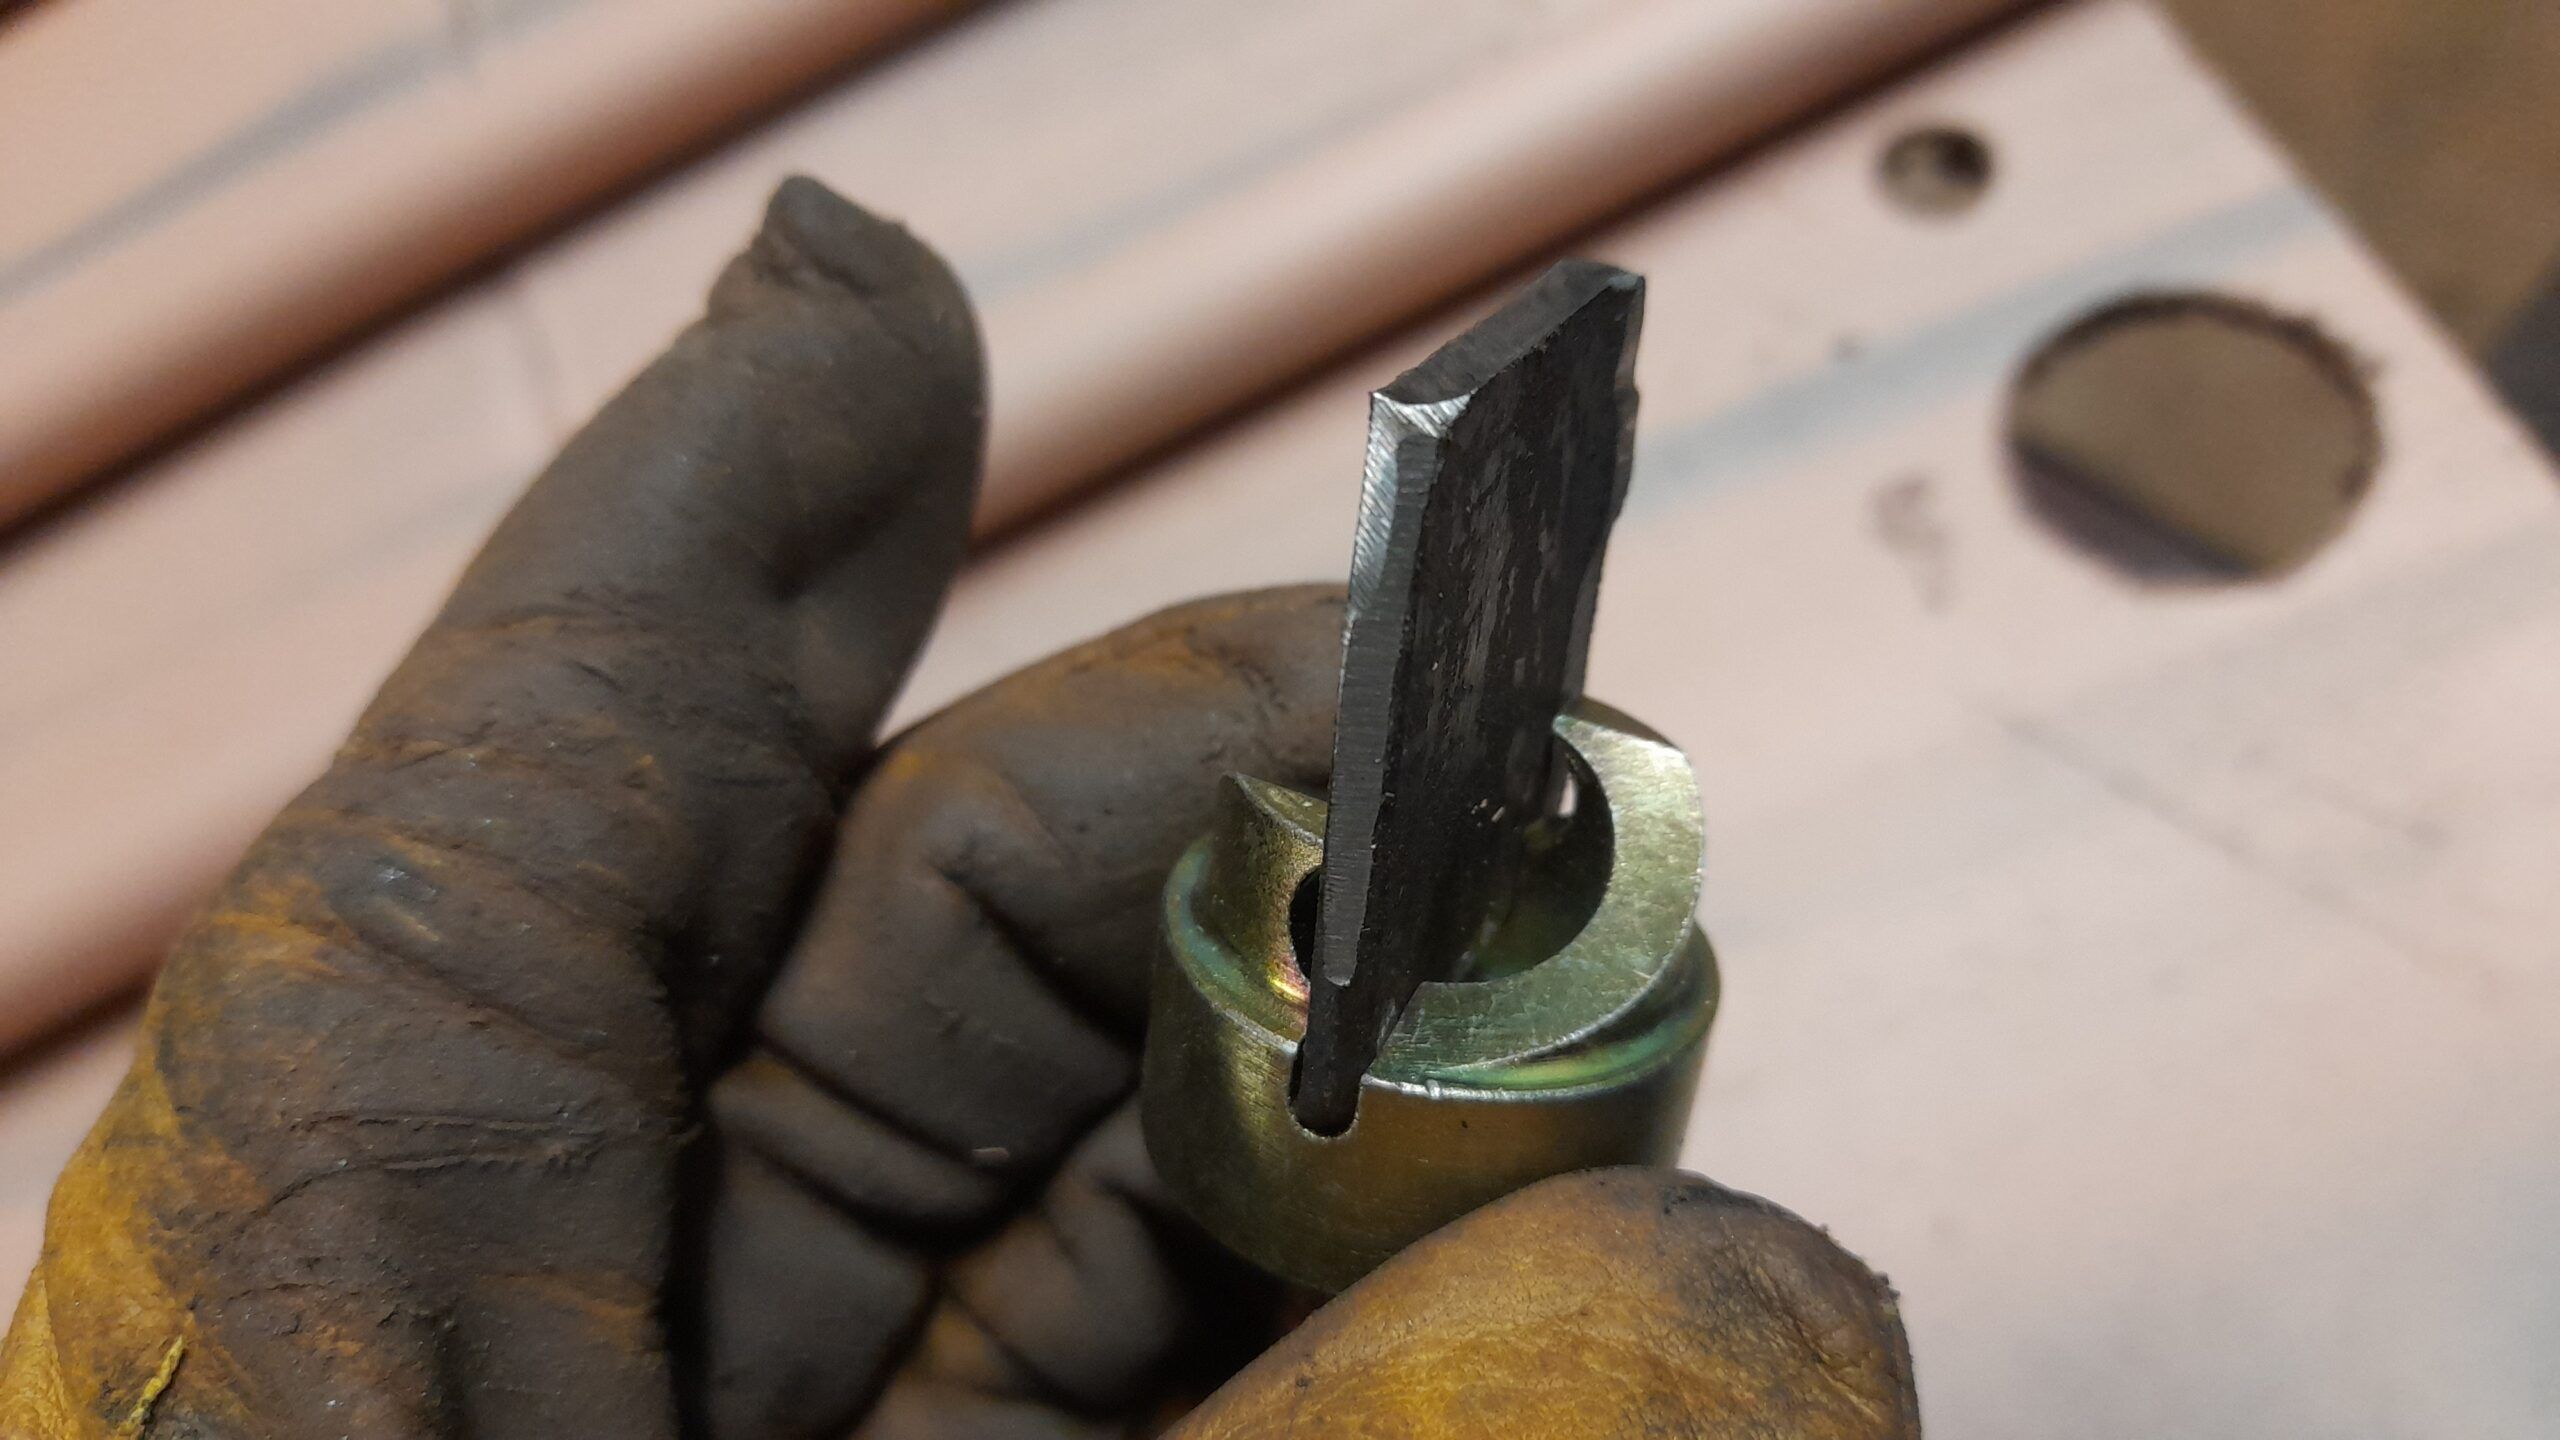
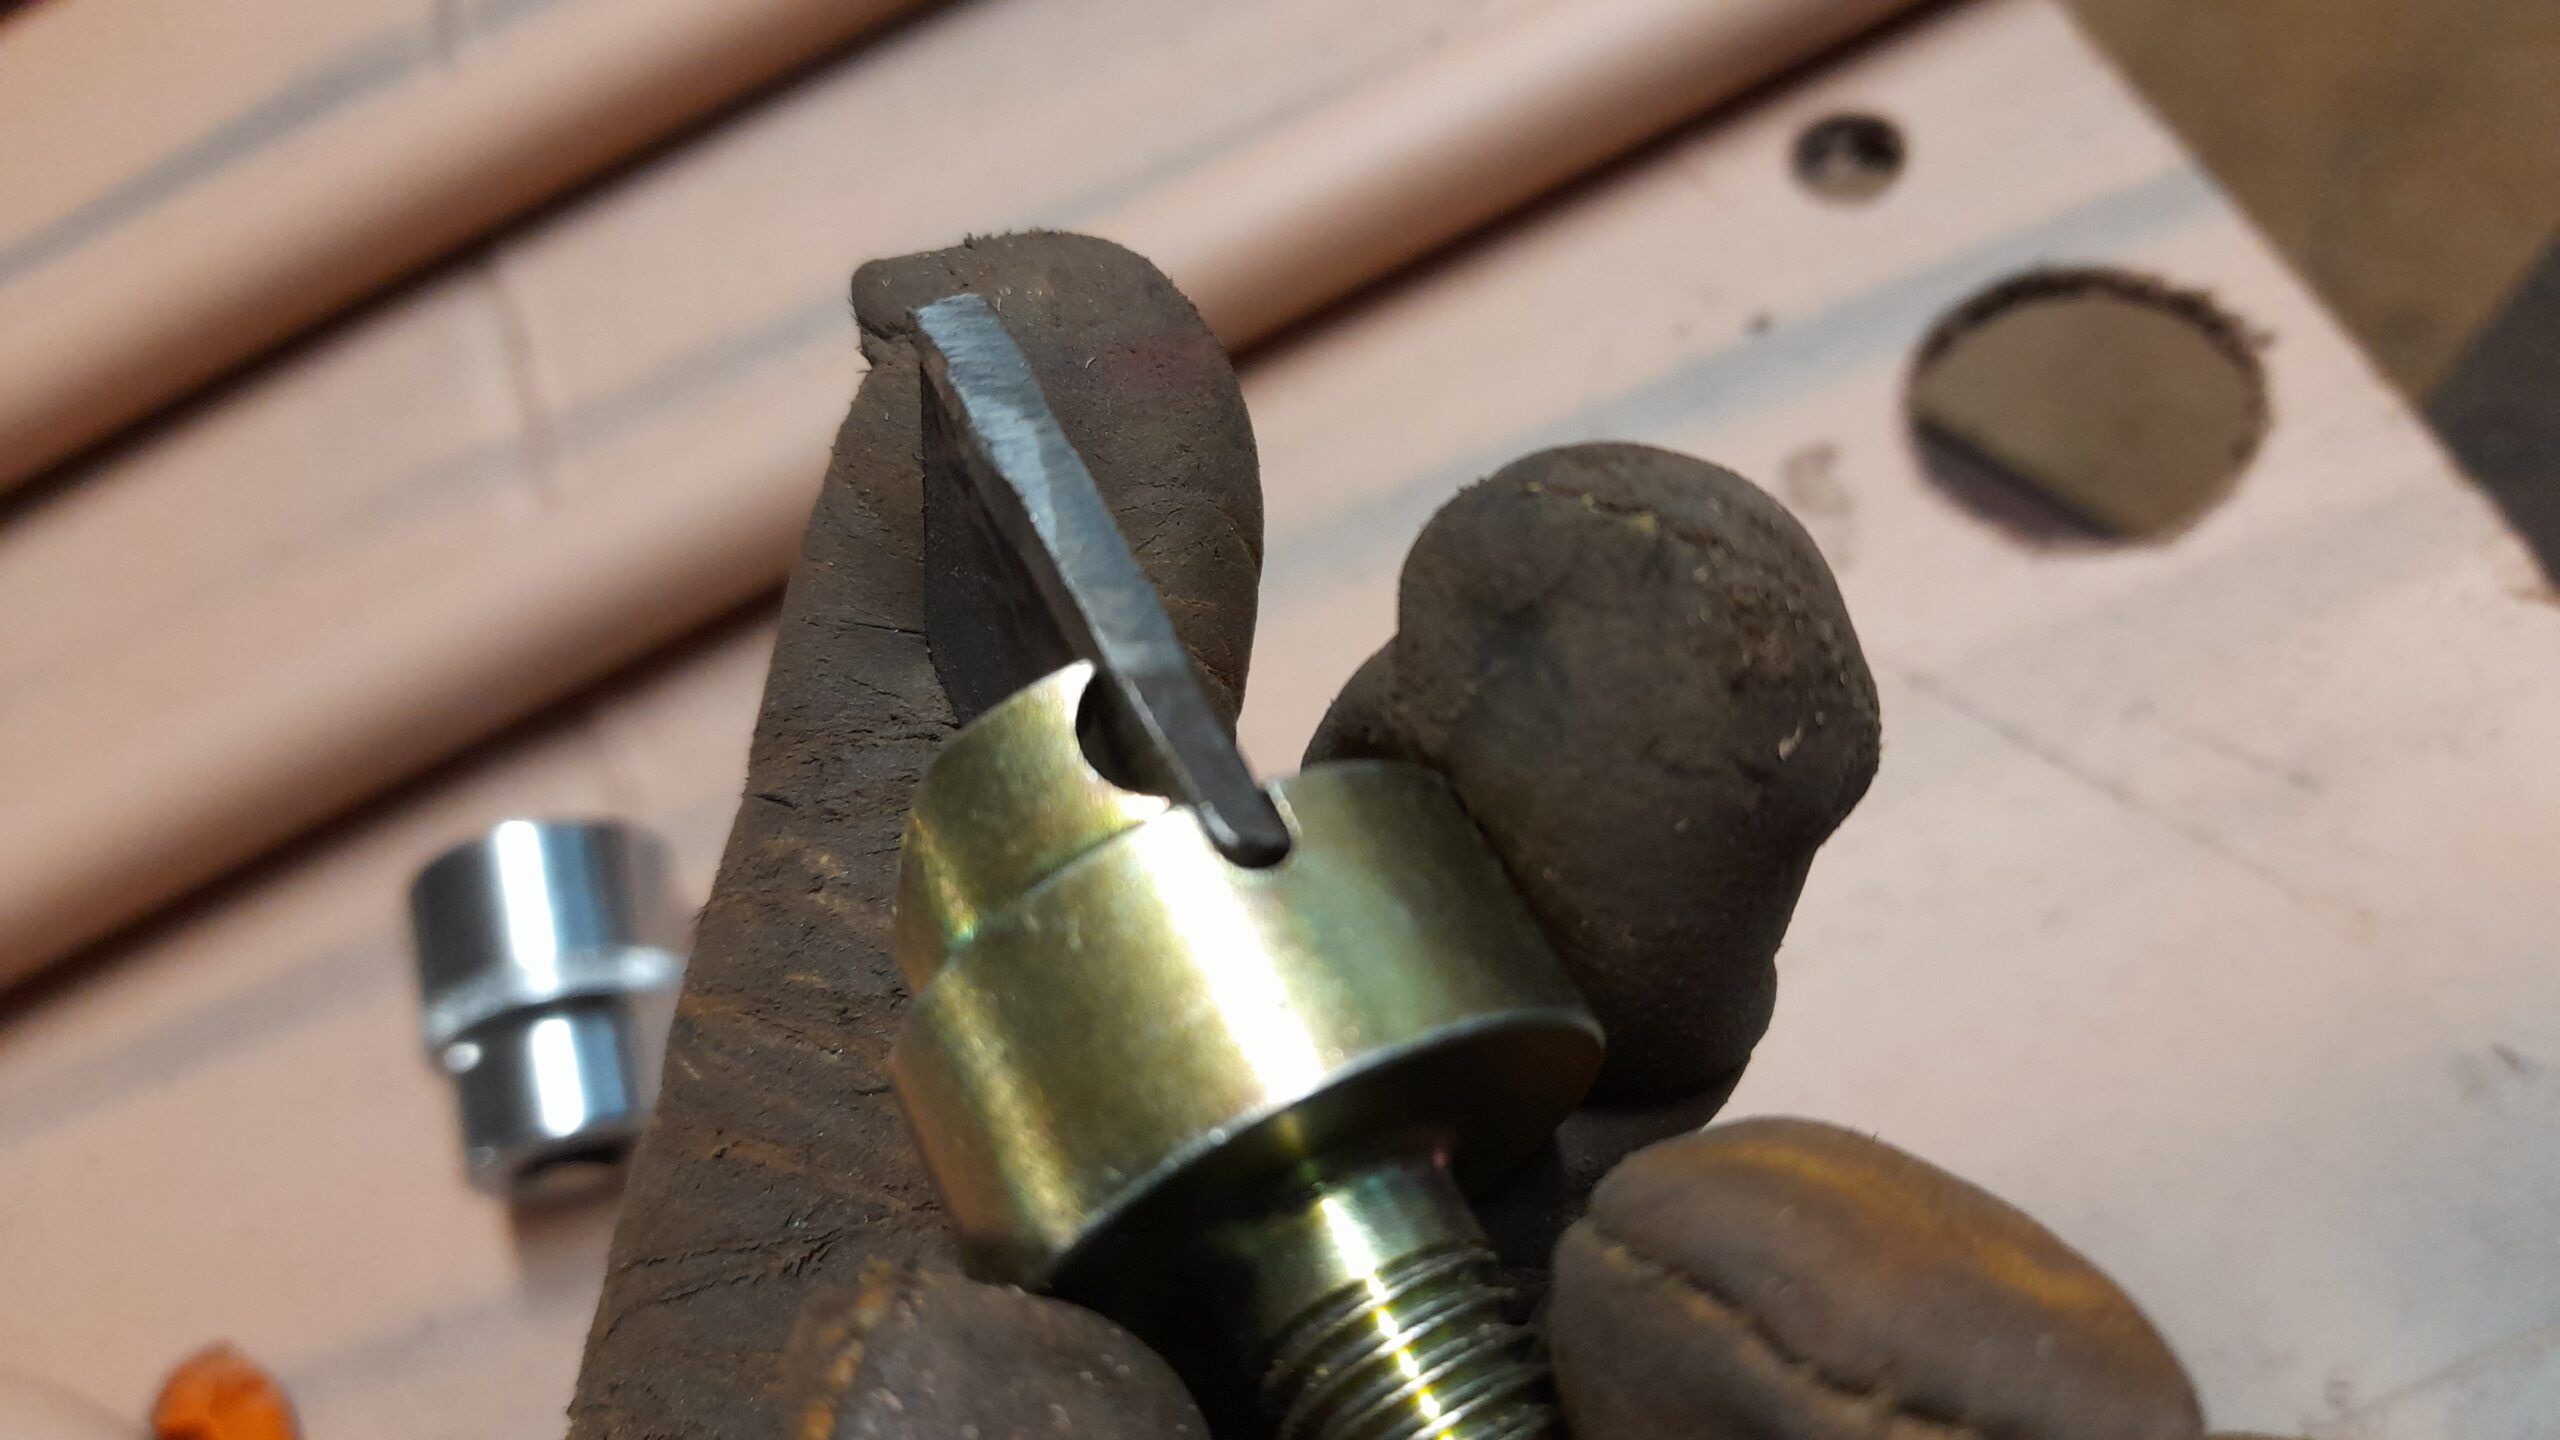
- A 3 mm thick iron plate. If it is less, it will bend and its deformation may cause it not to loosen the screw. It must be 35 mm long x 30 mm wide. This width must be such that it fits very tightly inside the socket wrench. You can cut the piece with a radial saw from a piece of iron handrail. I recommend that you cut it with a slight wedge shape. Like this (click on the image below):
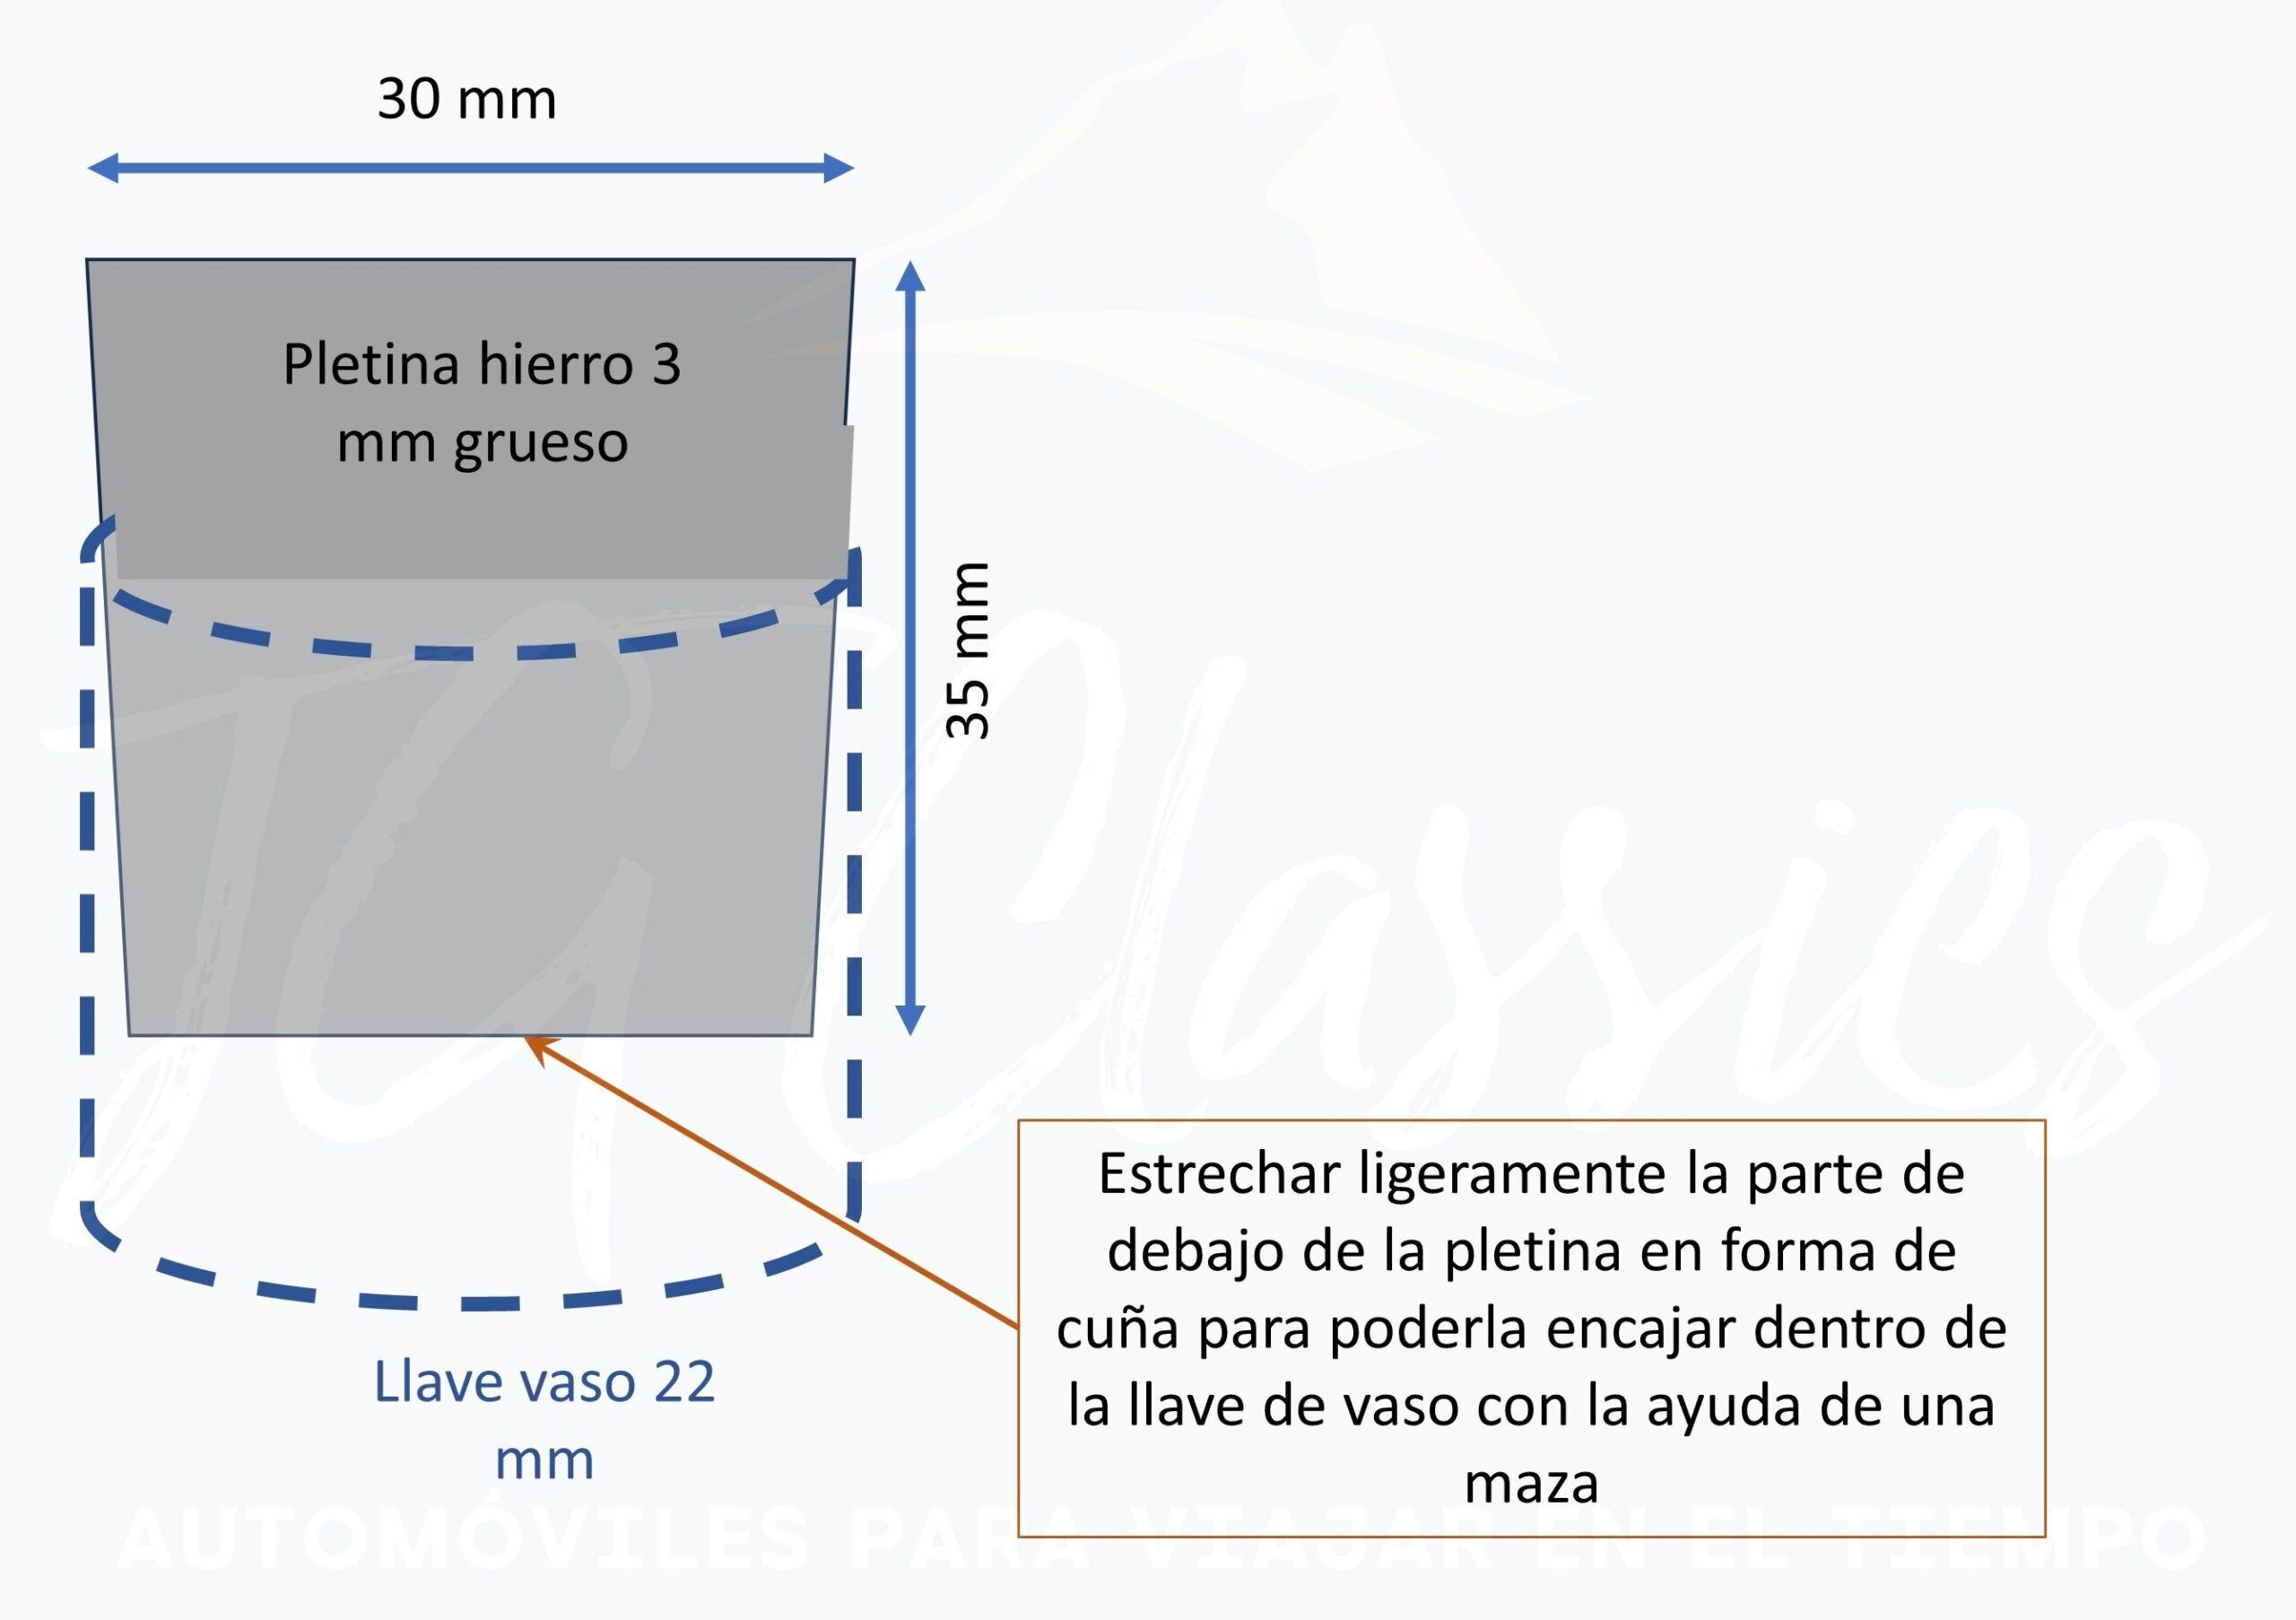
… in such a way that you can orient it in the keyway of the key and be able to drive the plate into the key with a hammer blow. In this way you ensure that the part is completely fitted inside the key.
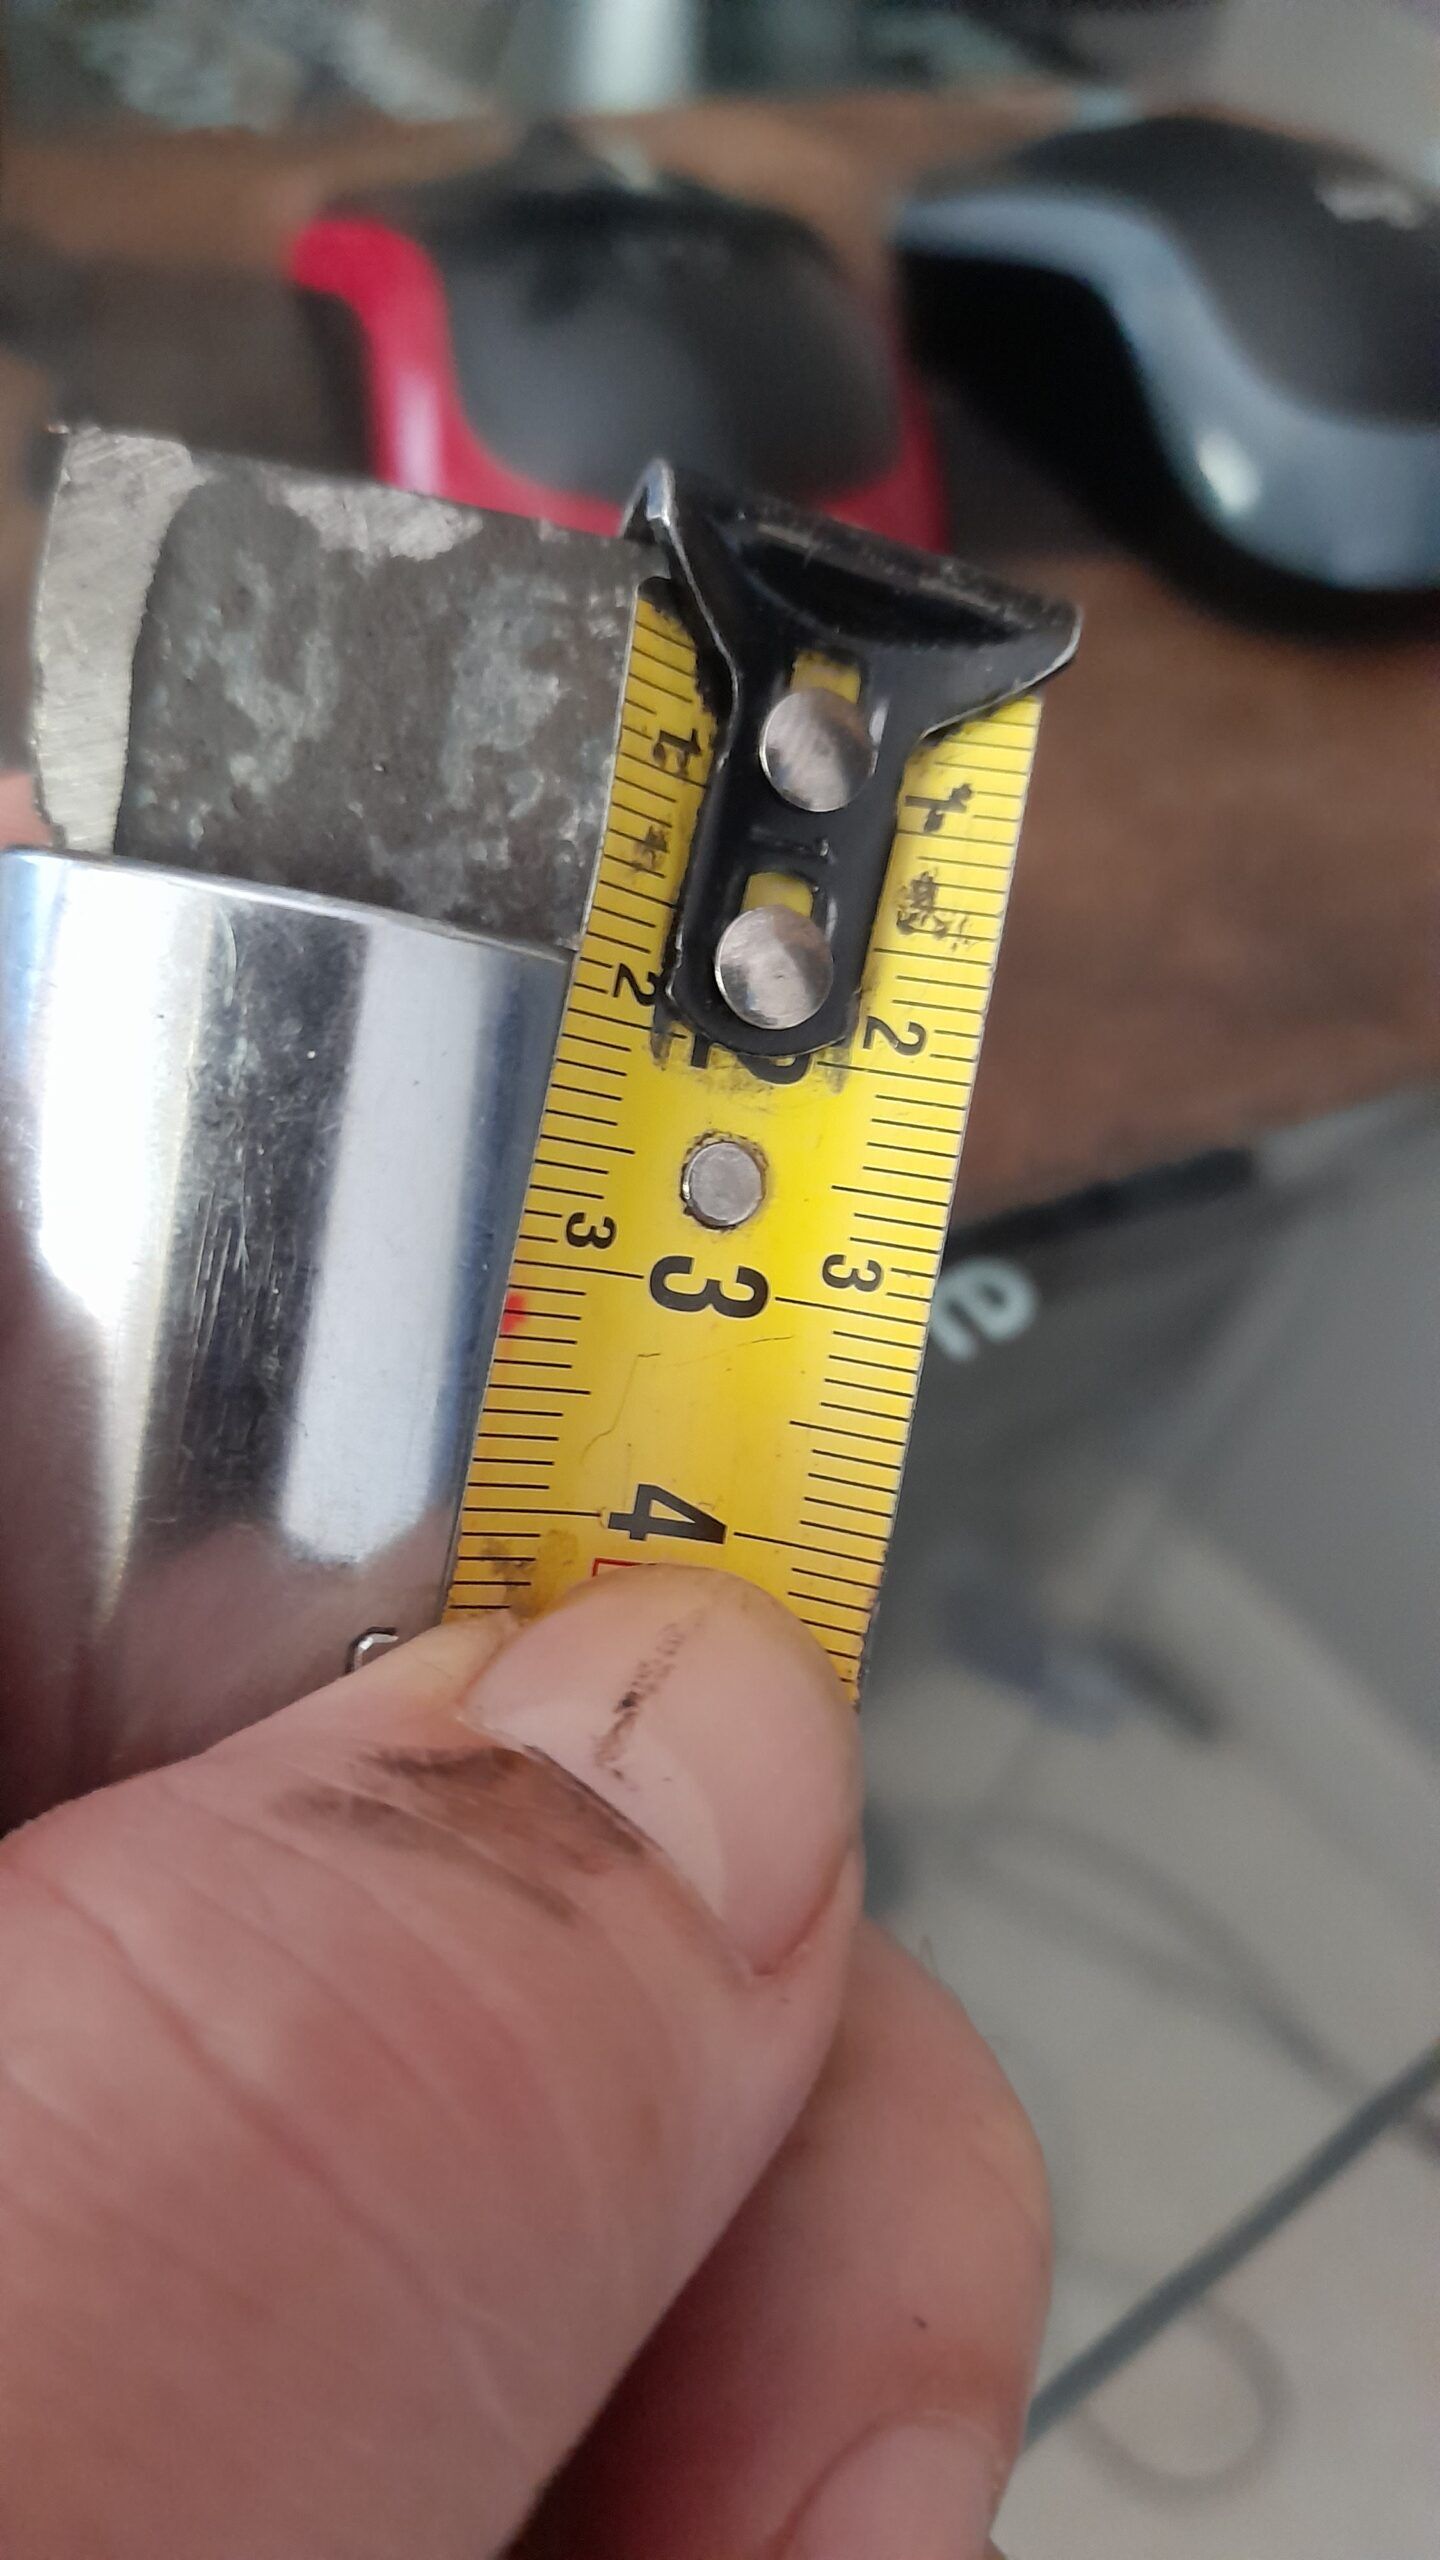
As you can see, I have made the piece with a length such that only 2 cm protrudes. We are not interested in lengthening the piece much more because as it will loosen by “blow”, the longer the iron plate is, the more prone it will be to twist and deform.
You will also need a socket wrench extension of about 11 or 12 cm. The one I have measures 11 cm plus 1 cm of the socket wrench coupling, that is, 12 cm in total: This length is enough to reach the screw. That’s all you need.
Here you can see the socket + socket wrench assembly and its coupling on a screw like the one on the pulley:
VERY IMPORTANT: The screw of the crankshaft pulley of the Renault Dauphine/Gordini/4CV has STANDARD turn, so LOOSEN IT TO THE LEFTi.e. counterclockwise. In short, like 99% of bolts.
Procedure:
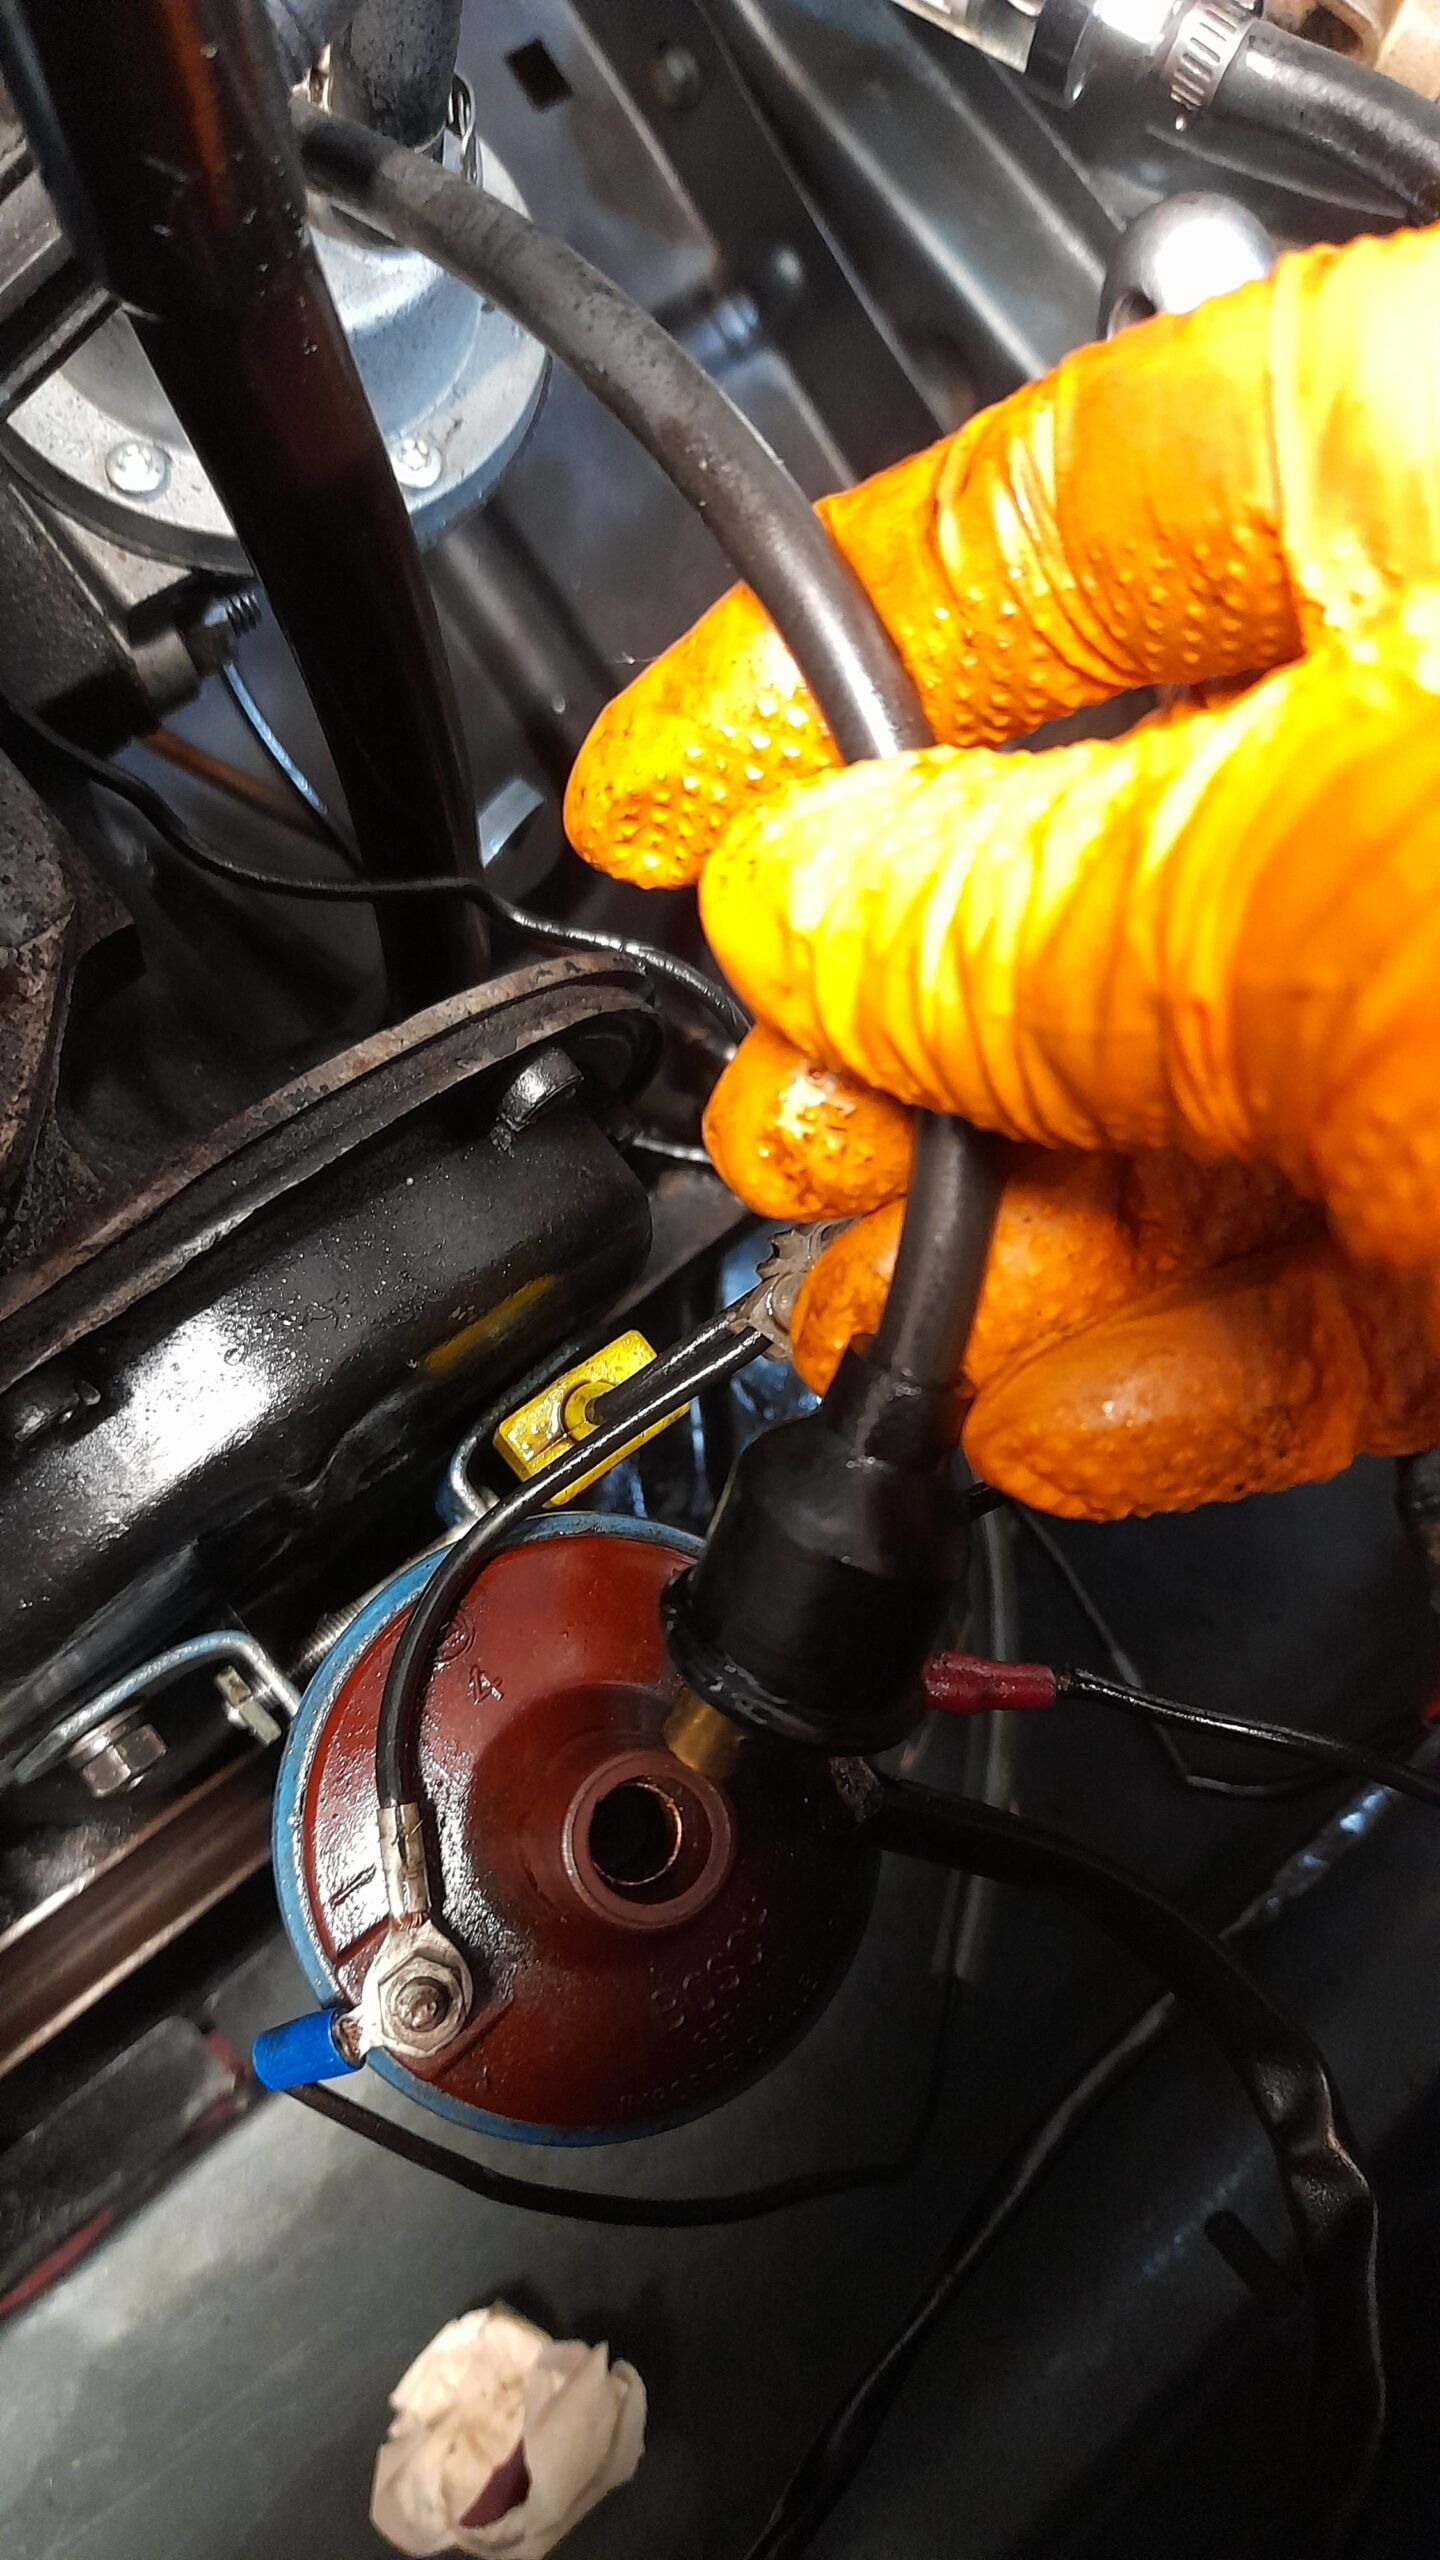
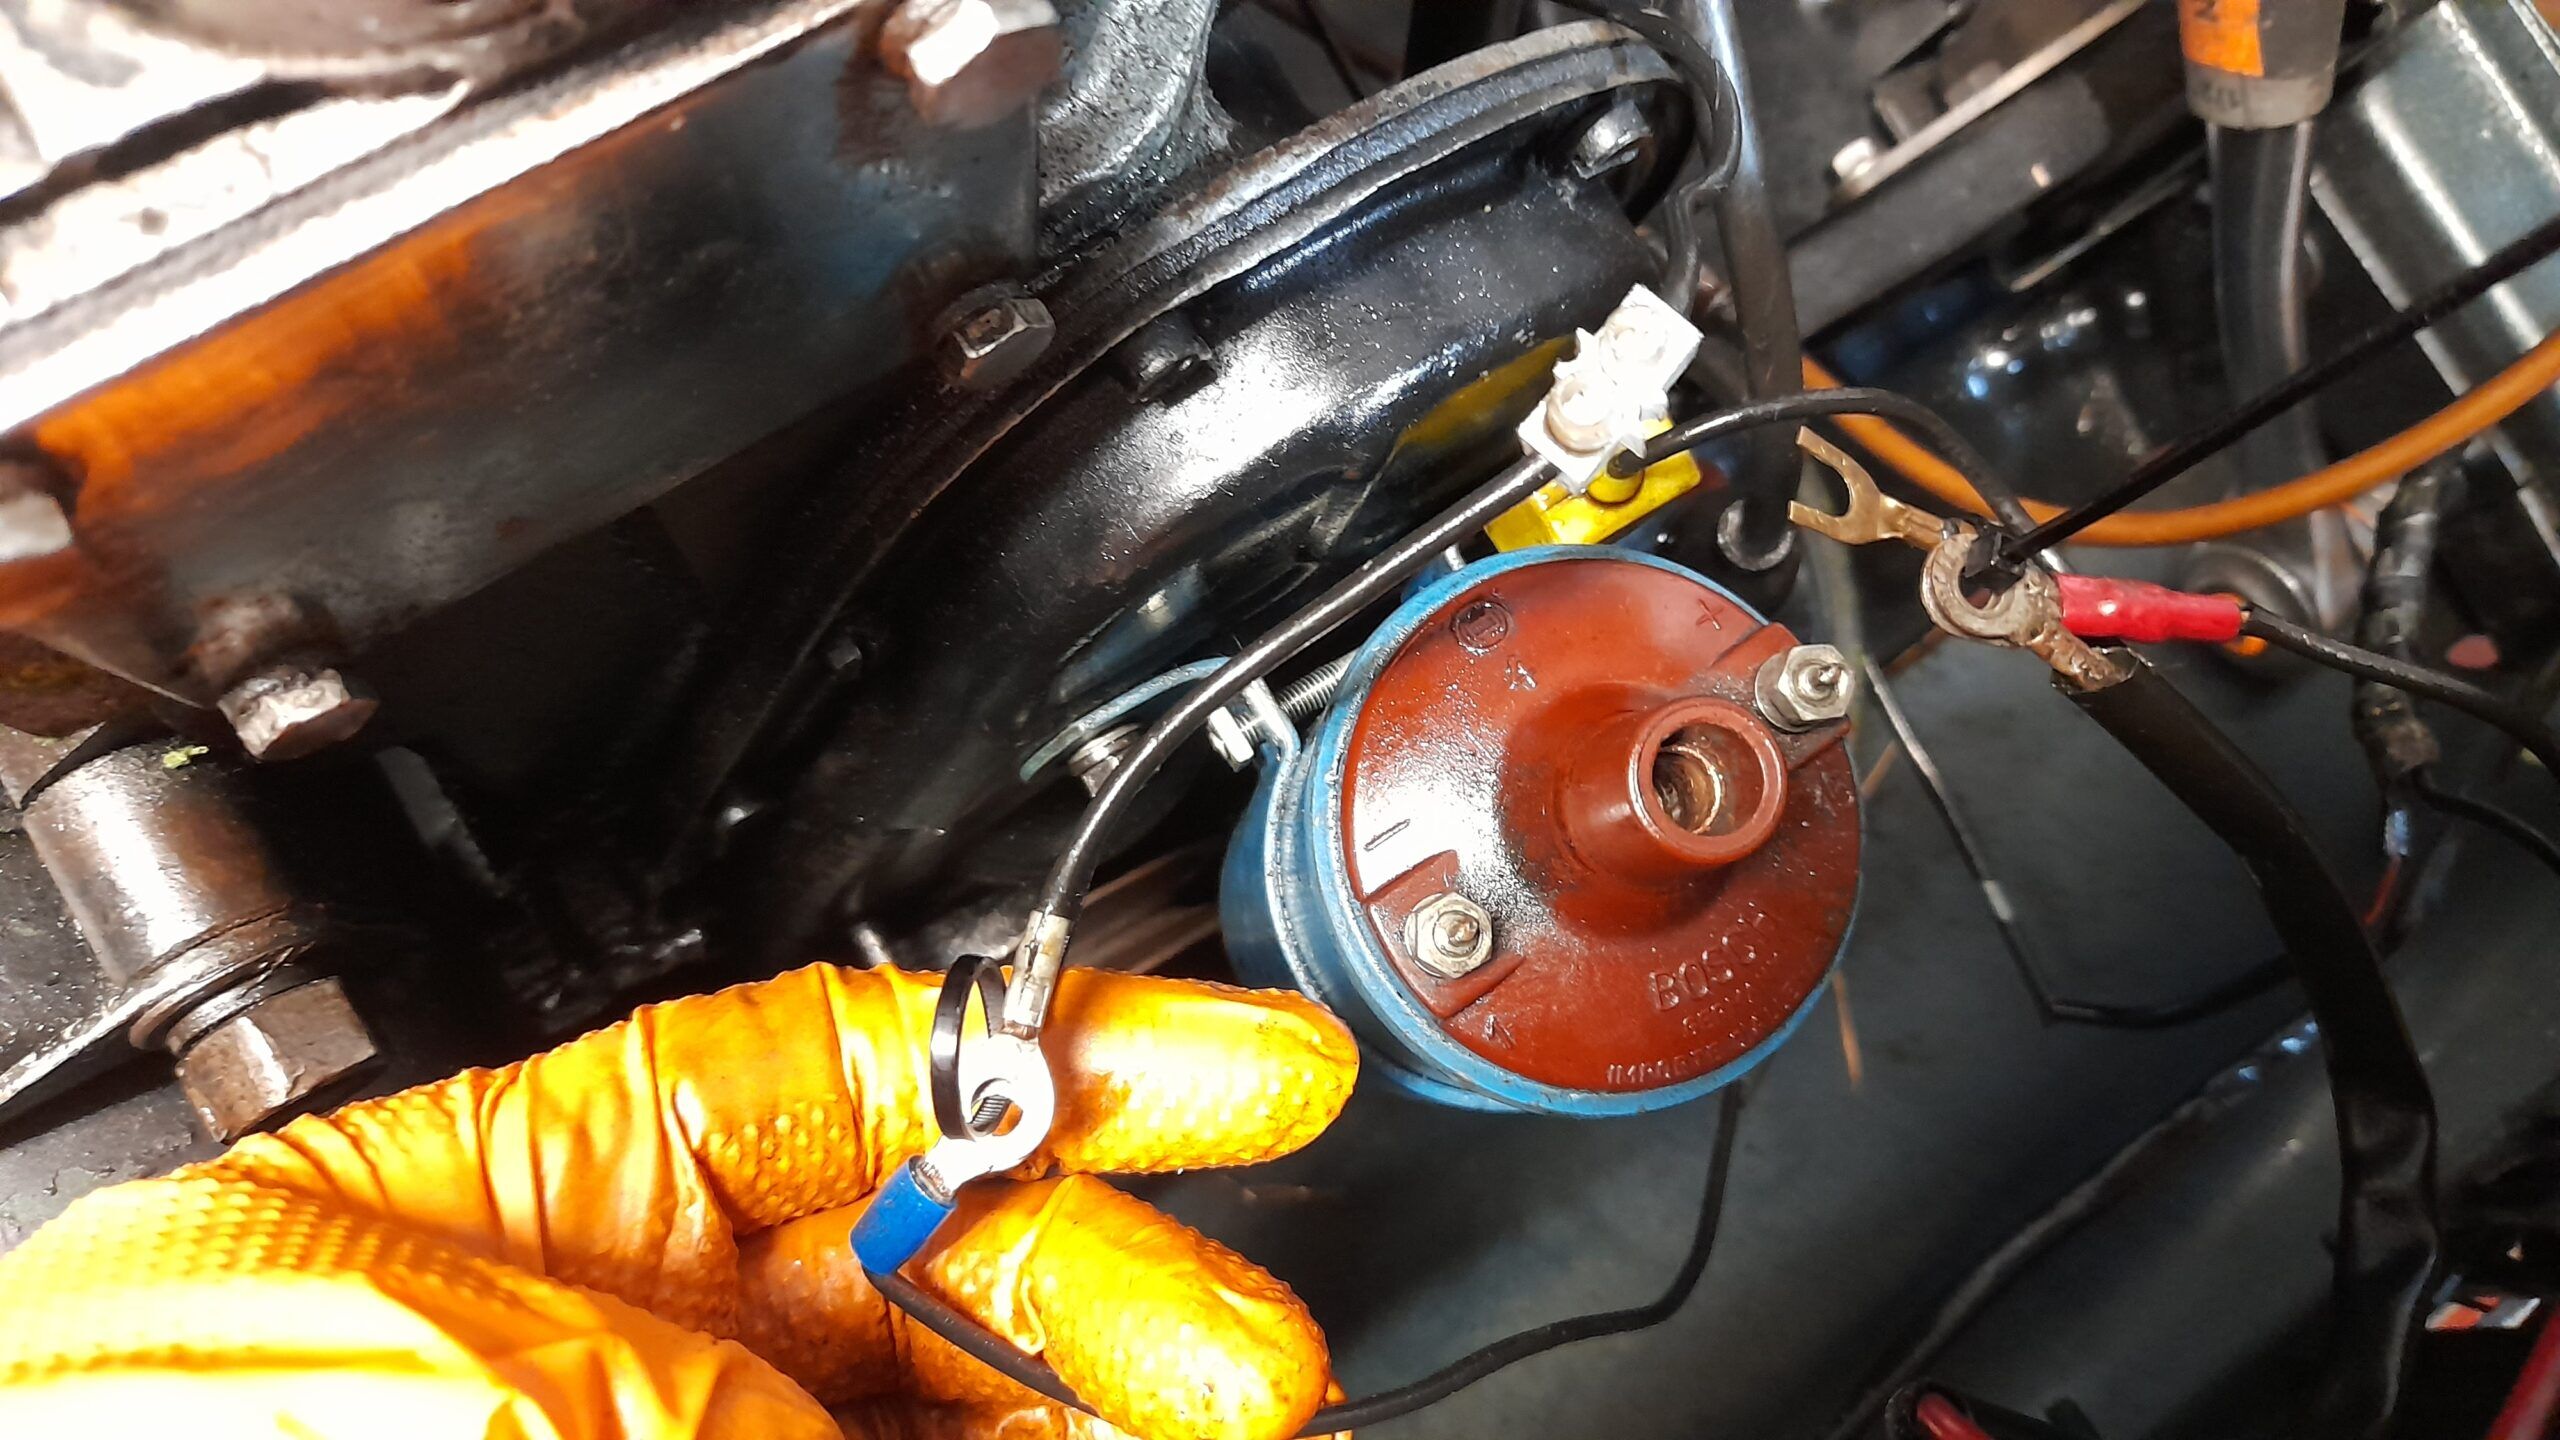
- Disconnect the battery. Important because later you will have to disconnect the coil, and in that area you have some positive terminal of the regulator that is uncovered and you do not want a wrench or screwdriver to accidentally make contact between a “live” positive that you have over there and the bodywork.
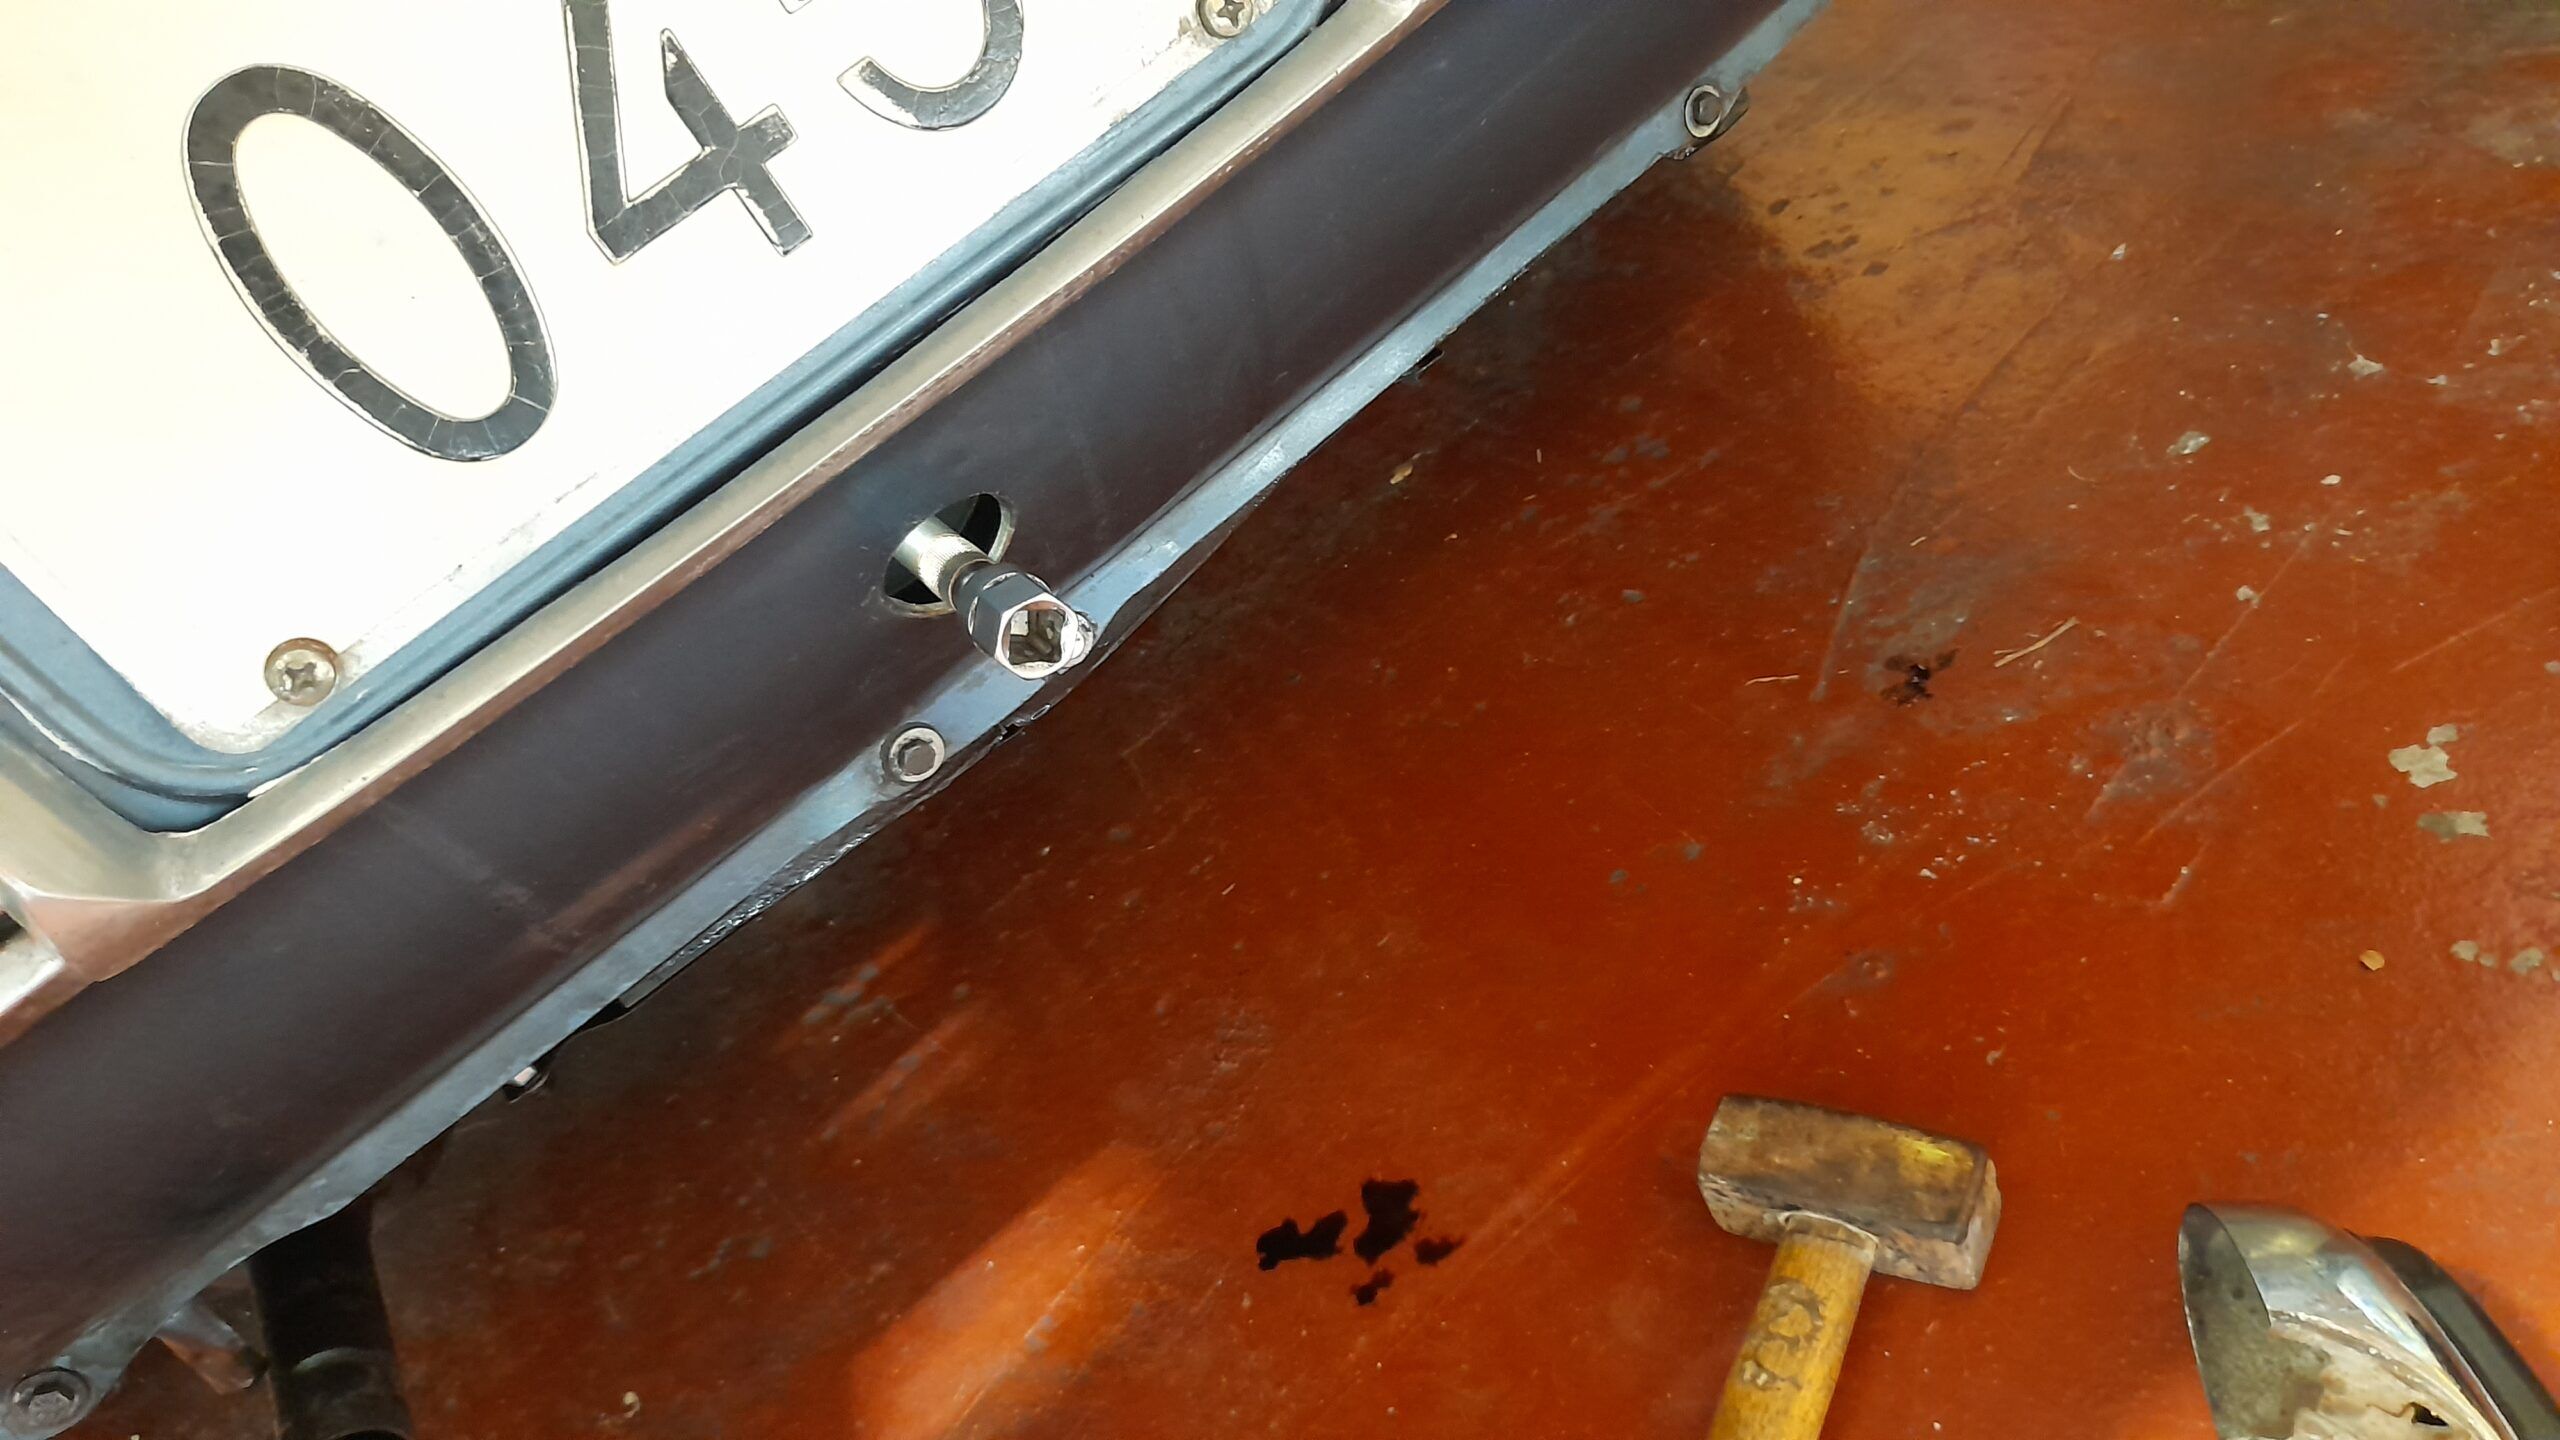
- Remove the bumper from the vehicle (or at least the central part): On the Gordini, the screws that join the central part with the two ends are easily accessible, so you can remove only one of the two ends of the bumper, loosen the other one and remove the central section. In any case, you can do whatever is most comfortable for you.
- Protect the hole in the body used to insert the crank handle with masking tape. I suggest that you apply several coats: This will protect the paint in the area from unintentional movement of the key.

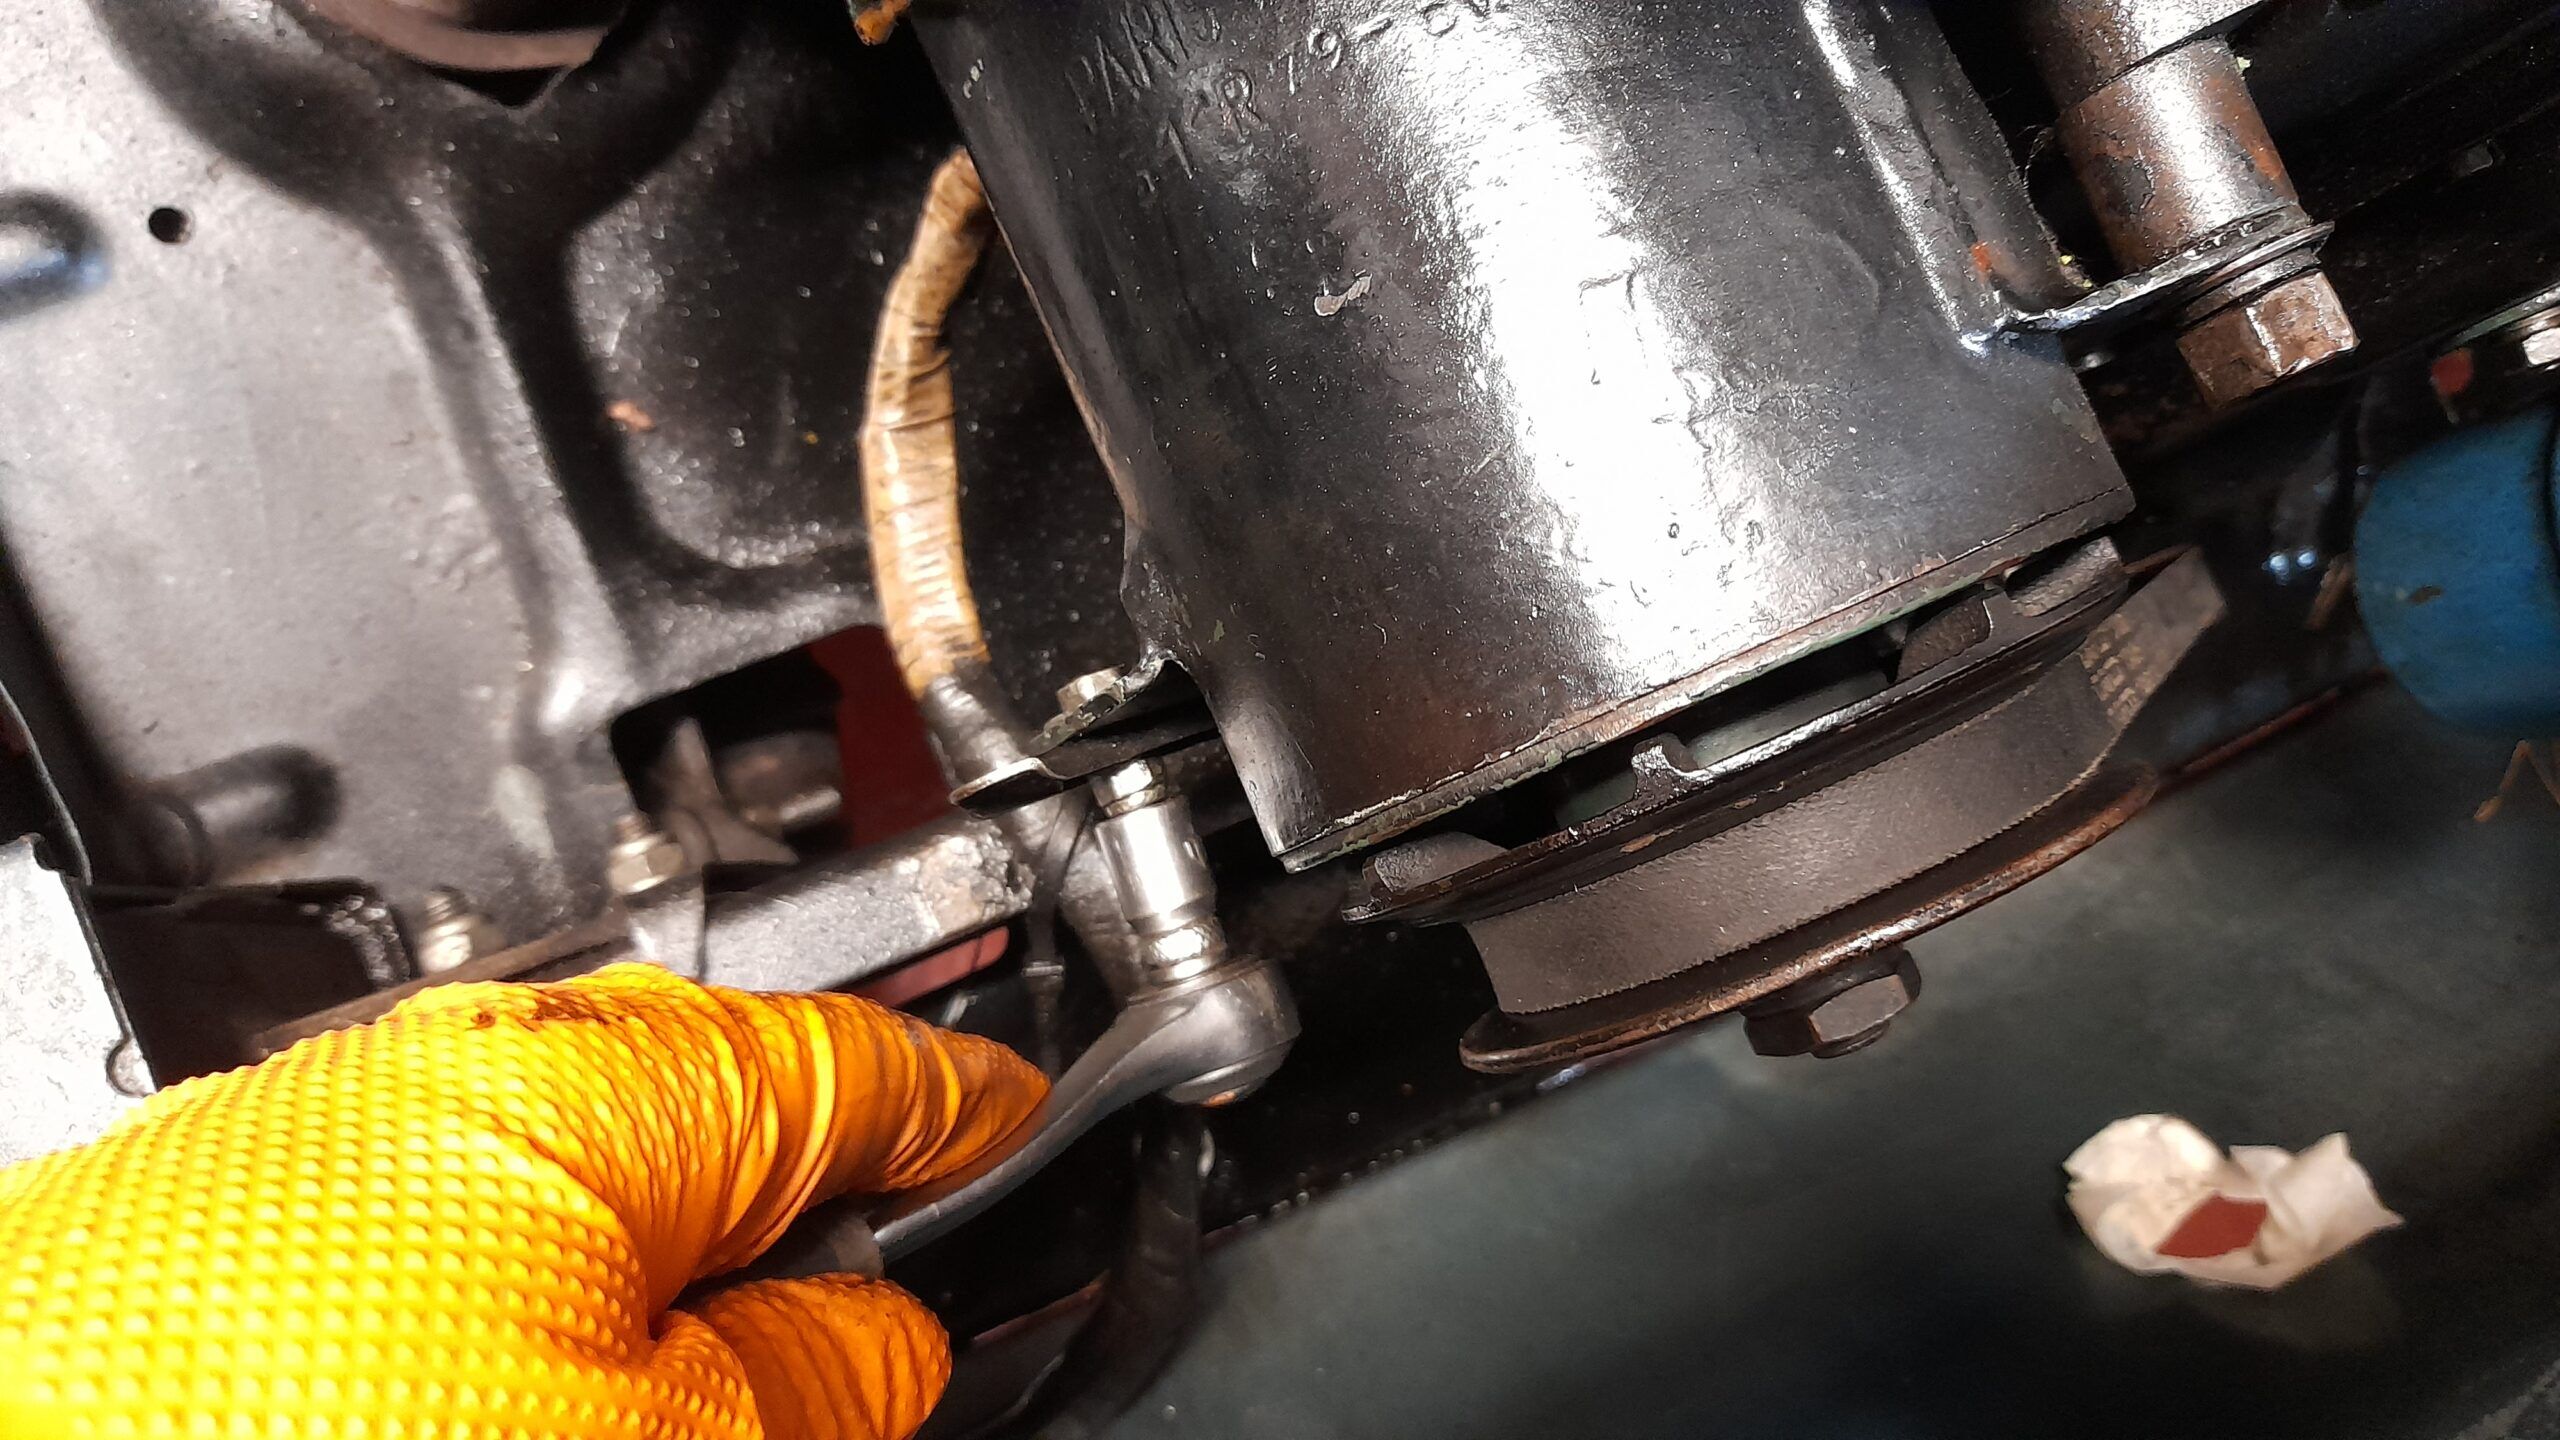
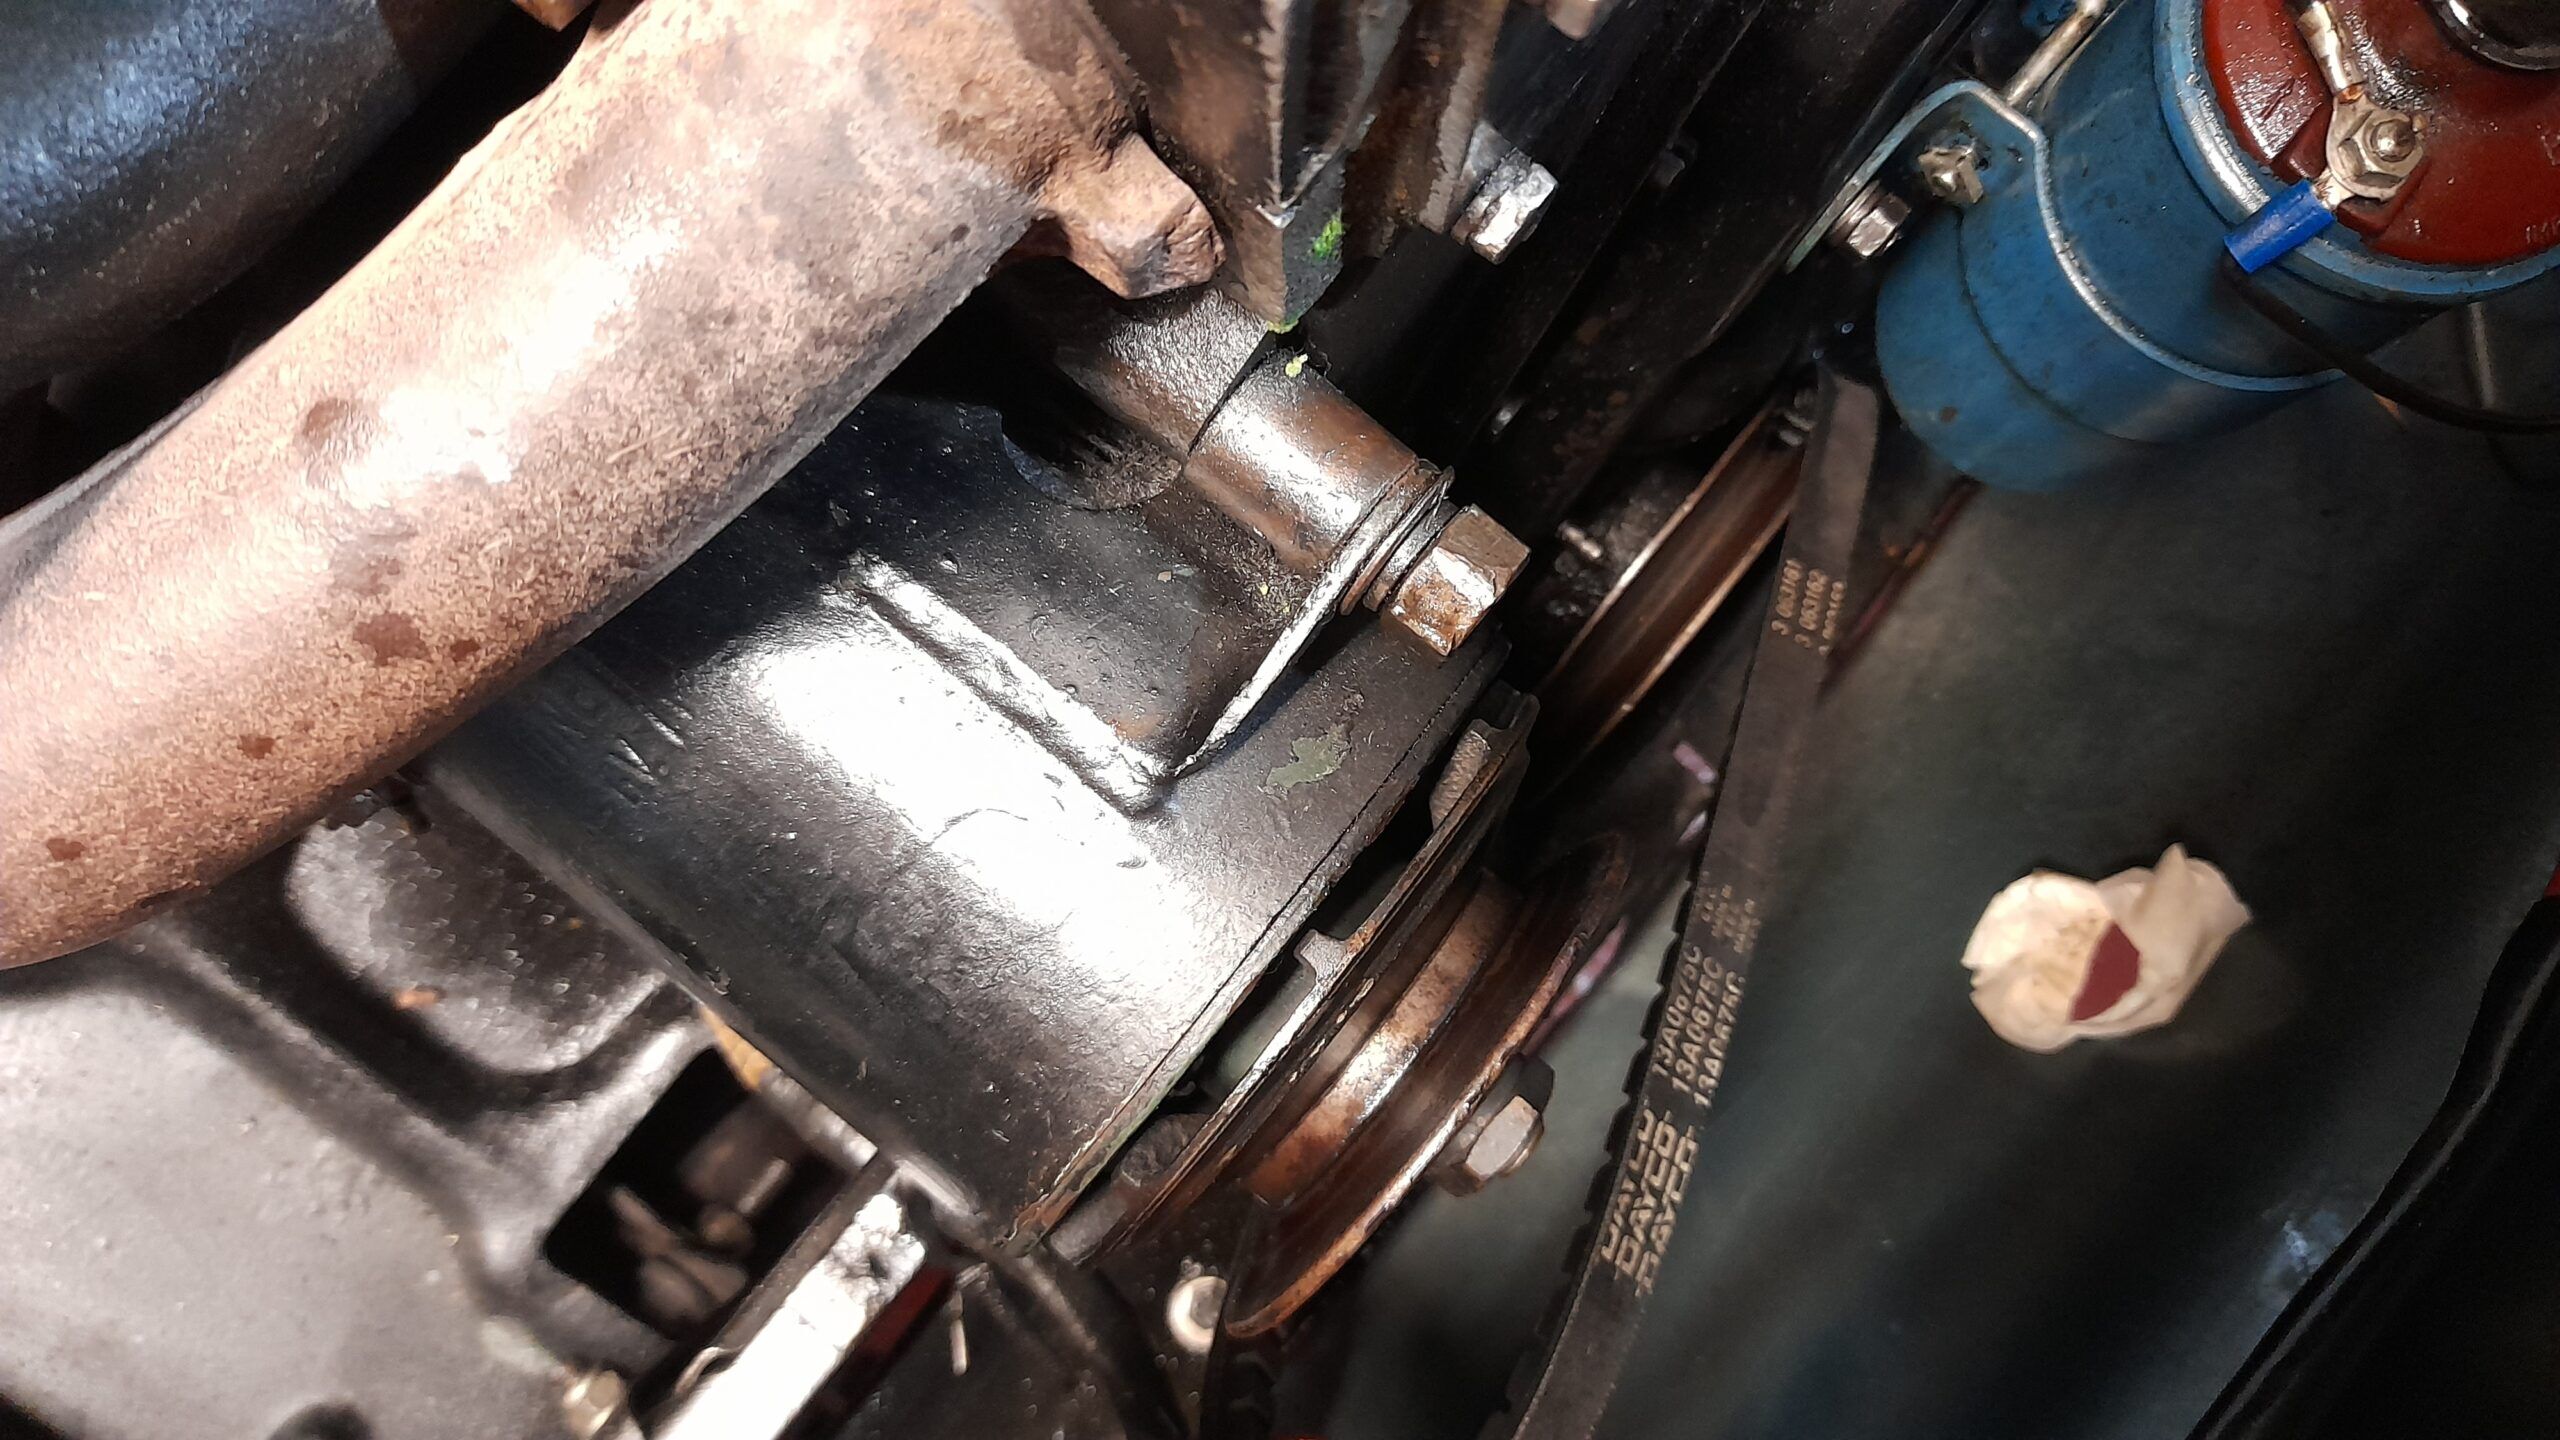
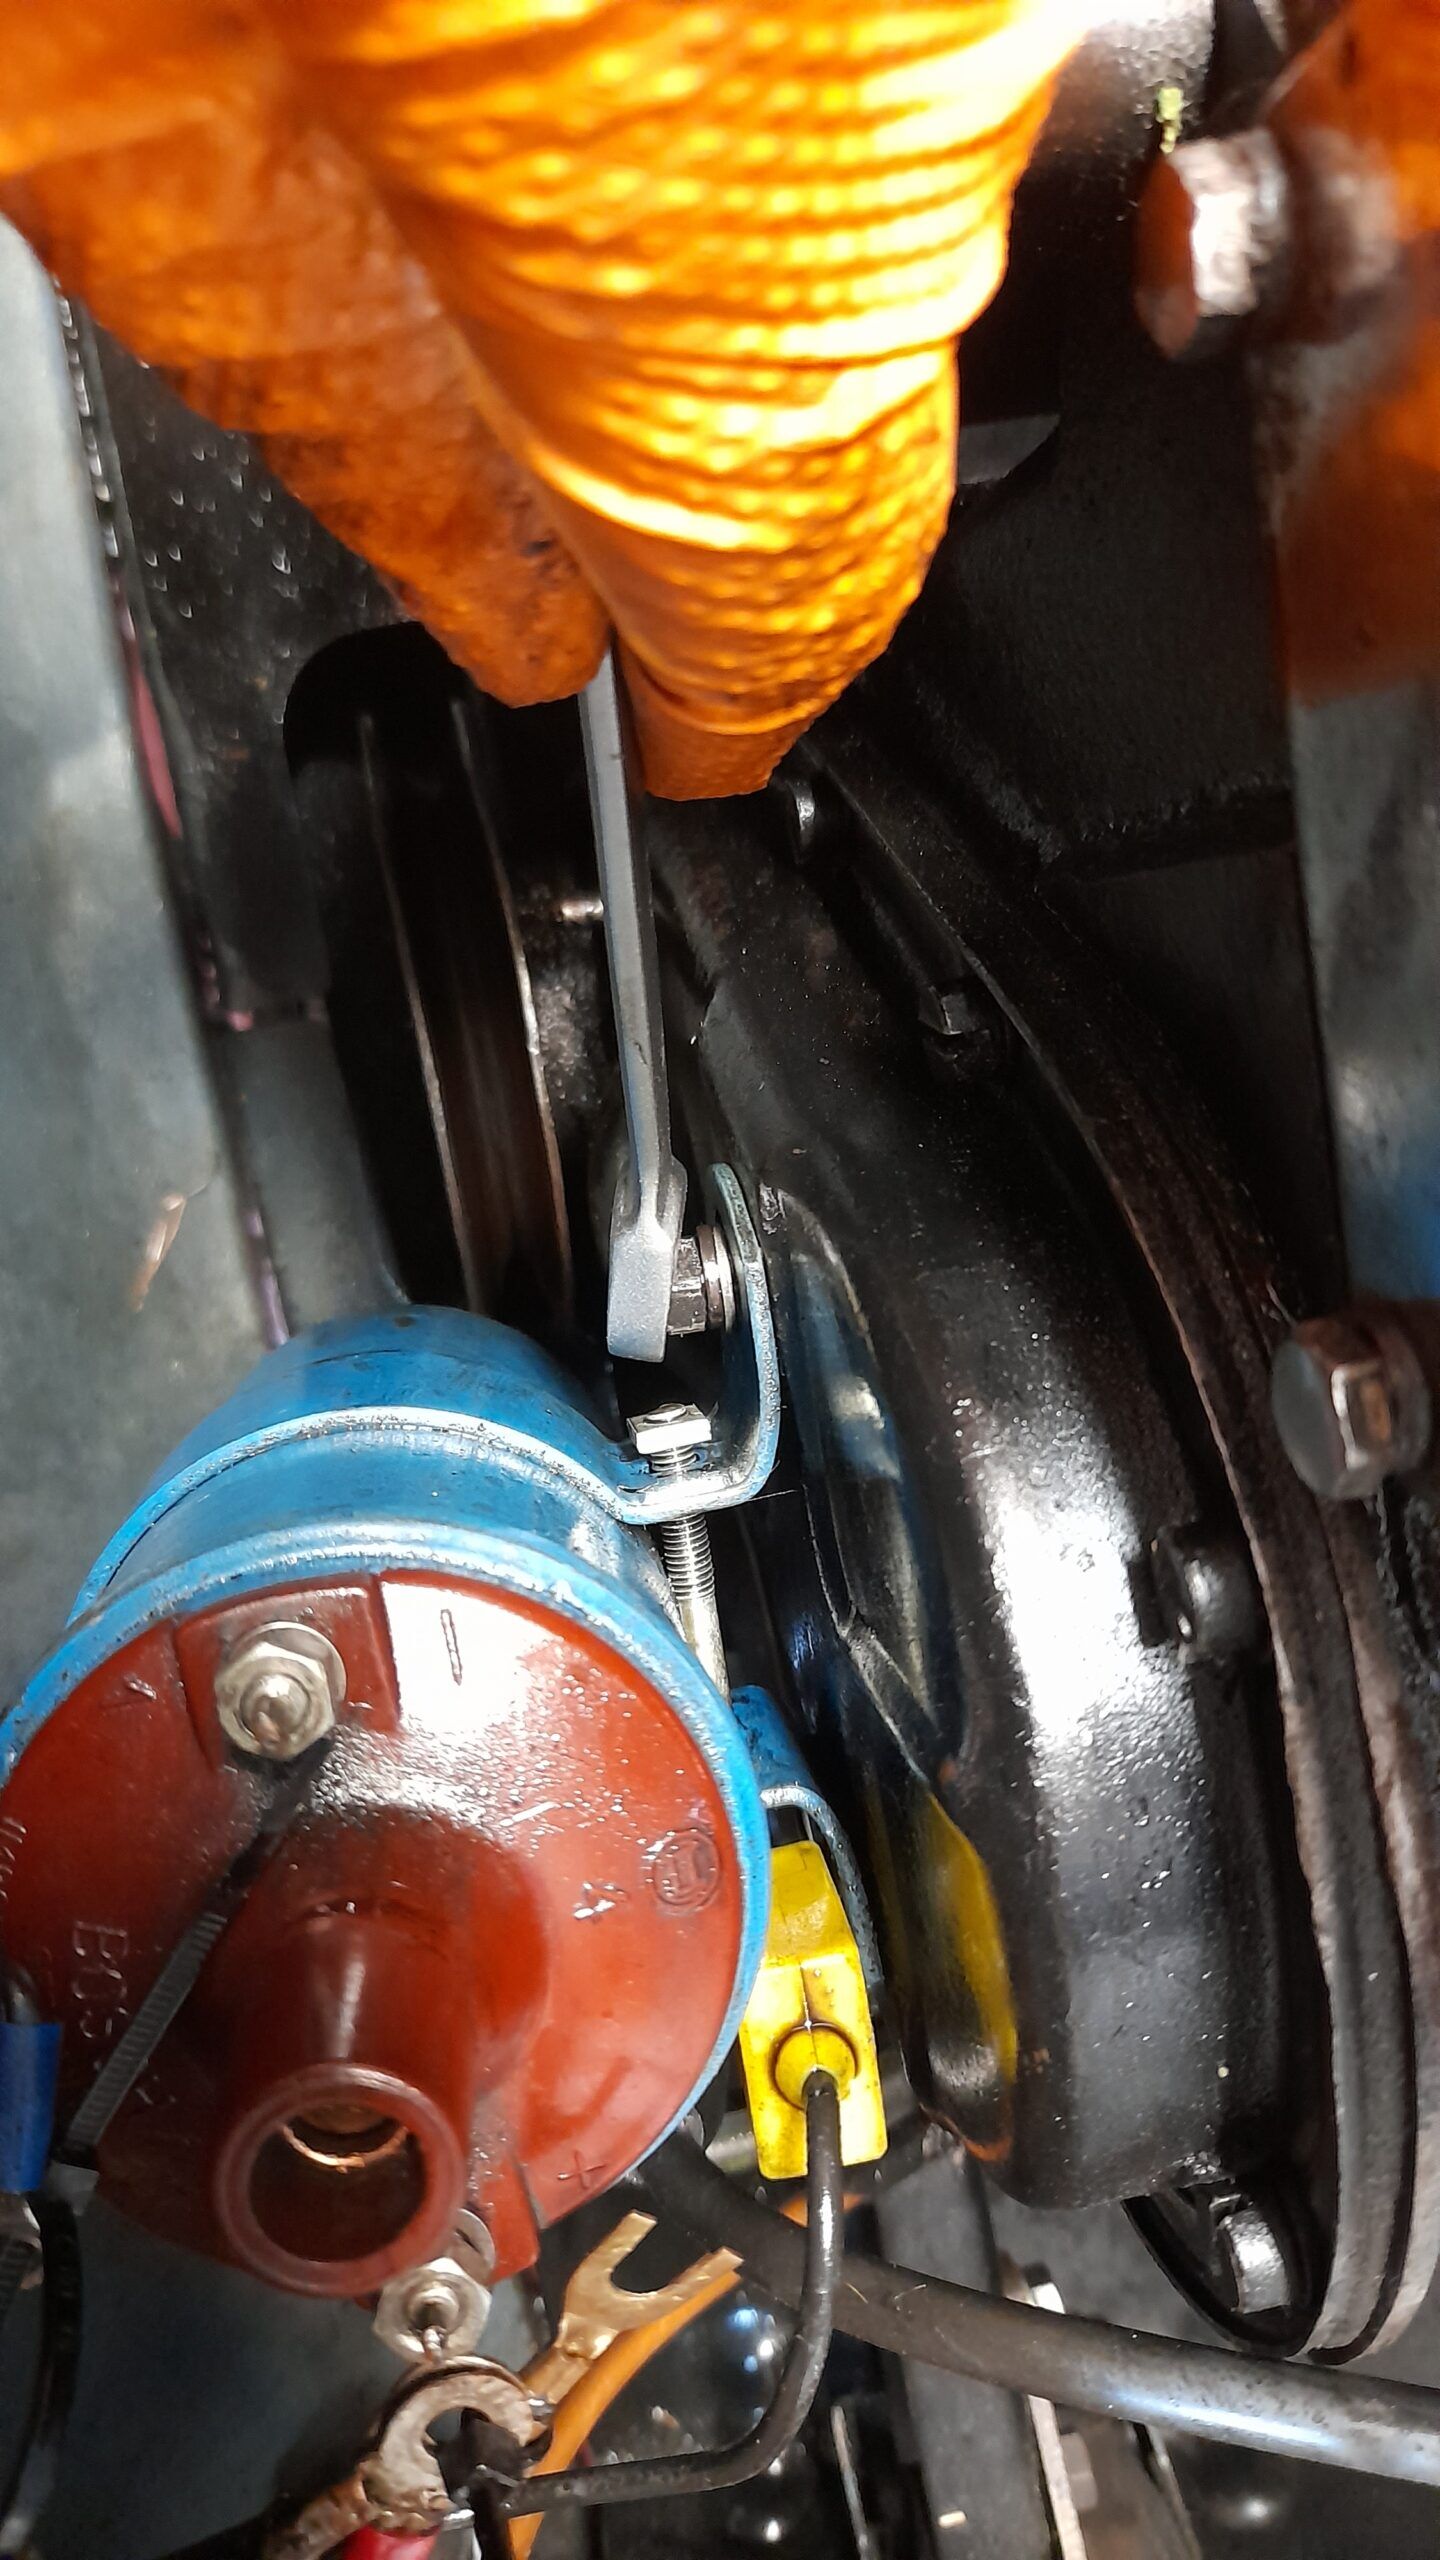
- Loosen the dynamo and remove the belt that connects the dynamo to the crankshaft pulley:
On our Gordini, as it has a parasitic capacitor, a tachometer signal cable and something else, I preferred to tie them together so that I wouldn’t have to think about reconnection later.
NOTE: In my case, I removed the coil after loosening the screw and before removing the pulley. But it is better to remove the coil from the beginning. You will have more visibility/comfort 😊.
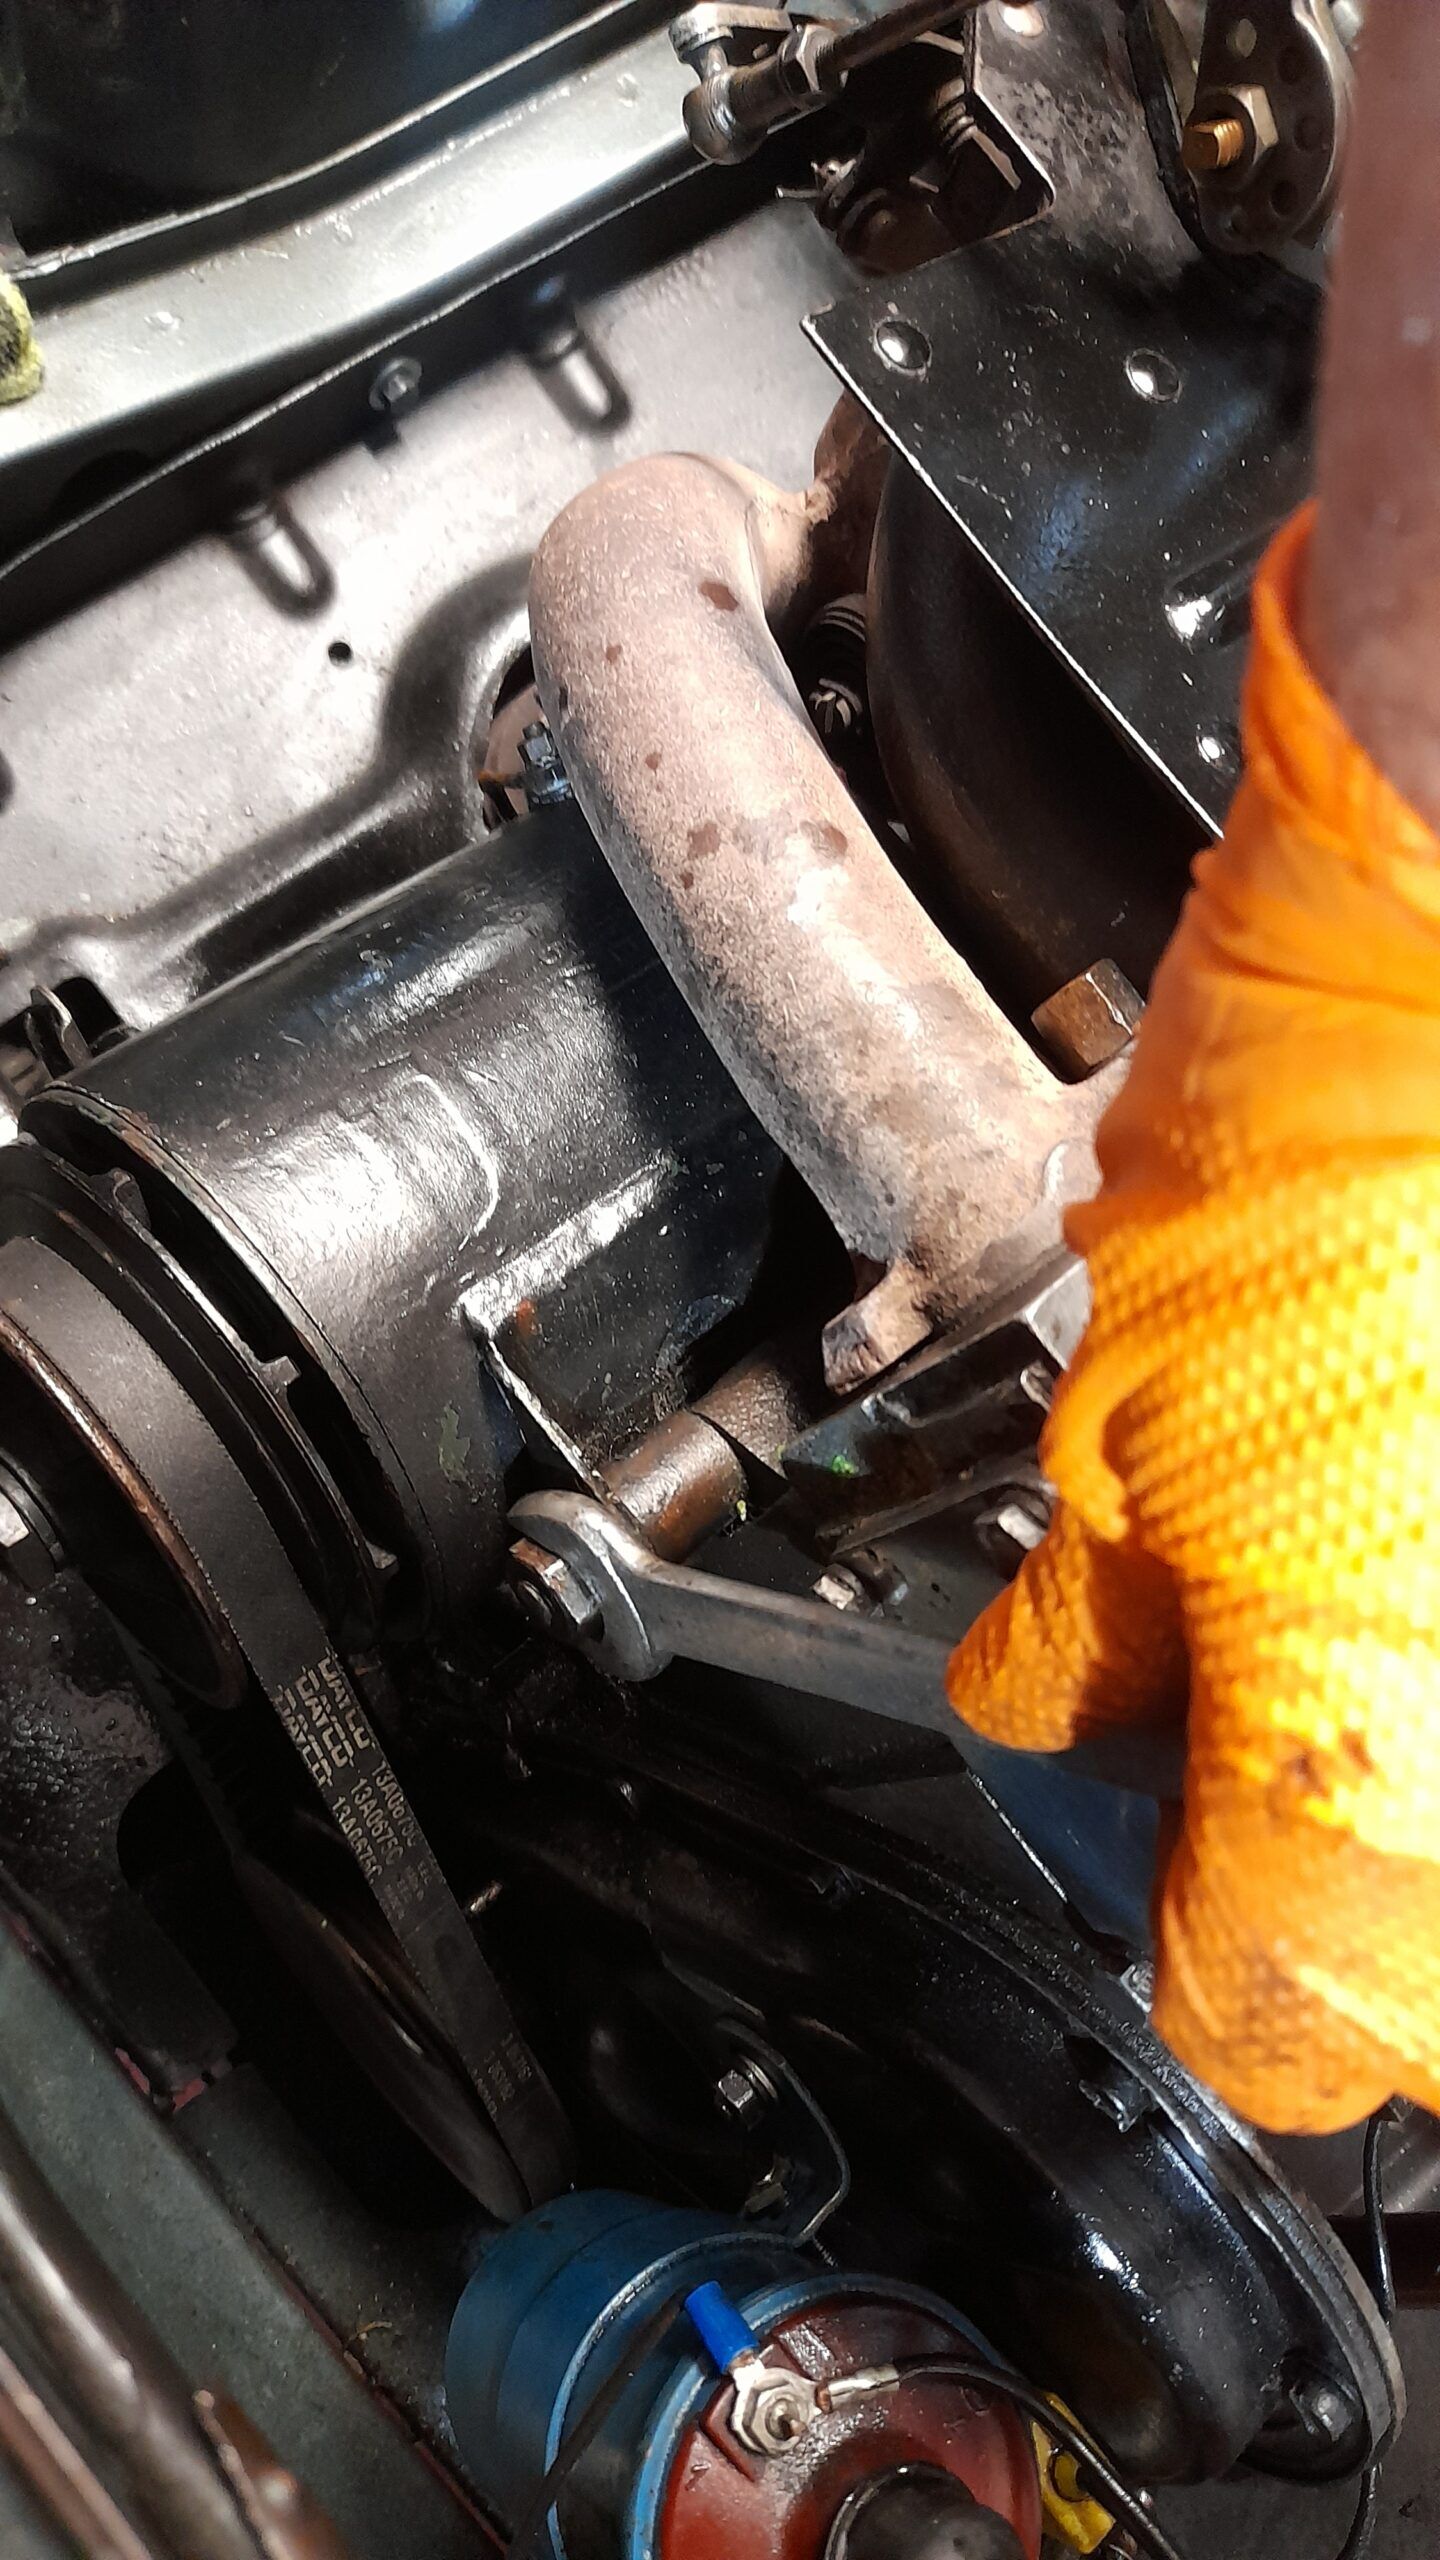
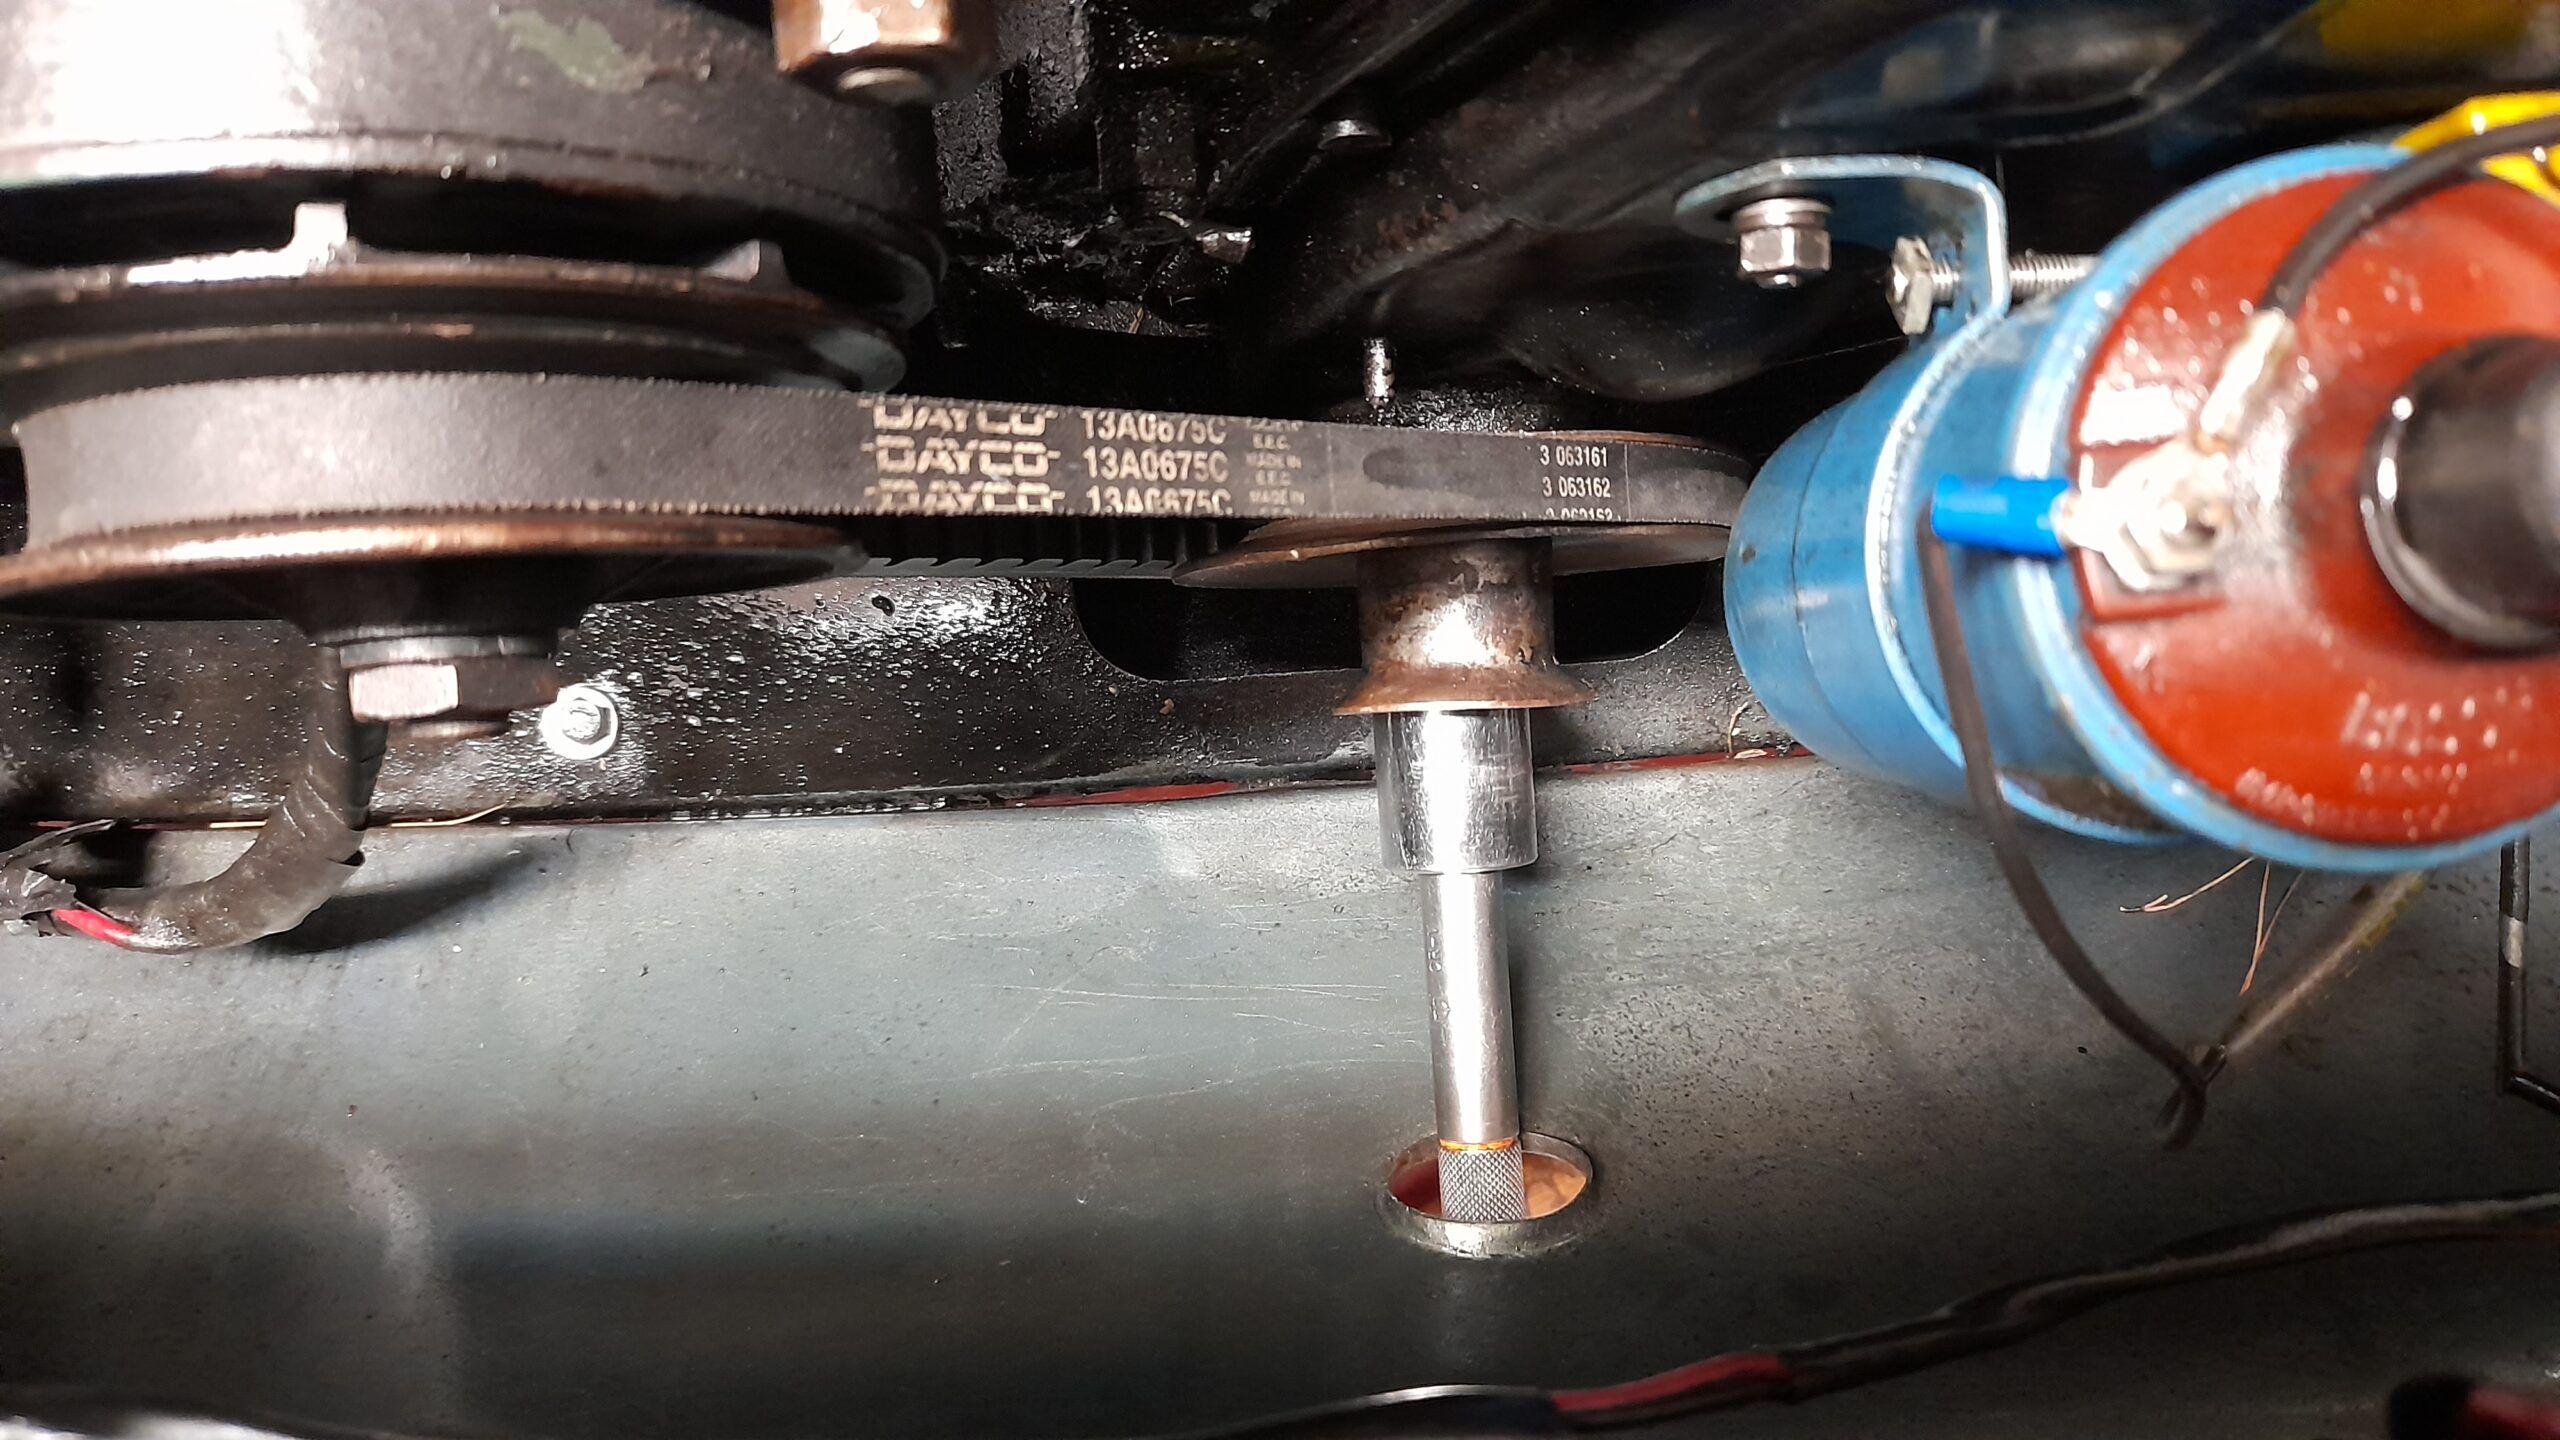
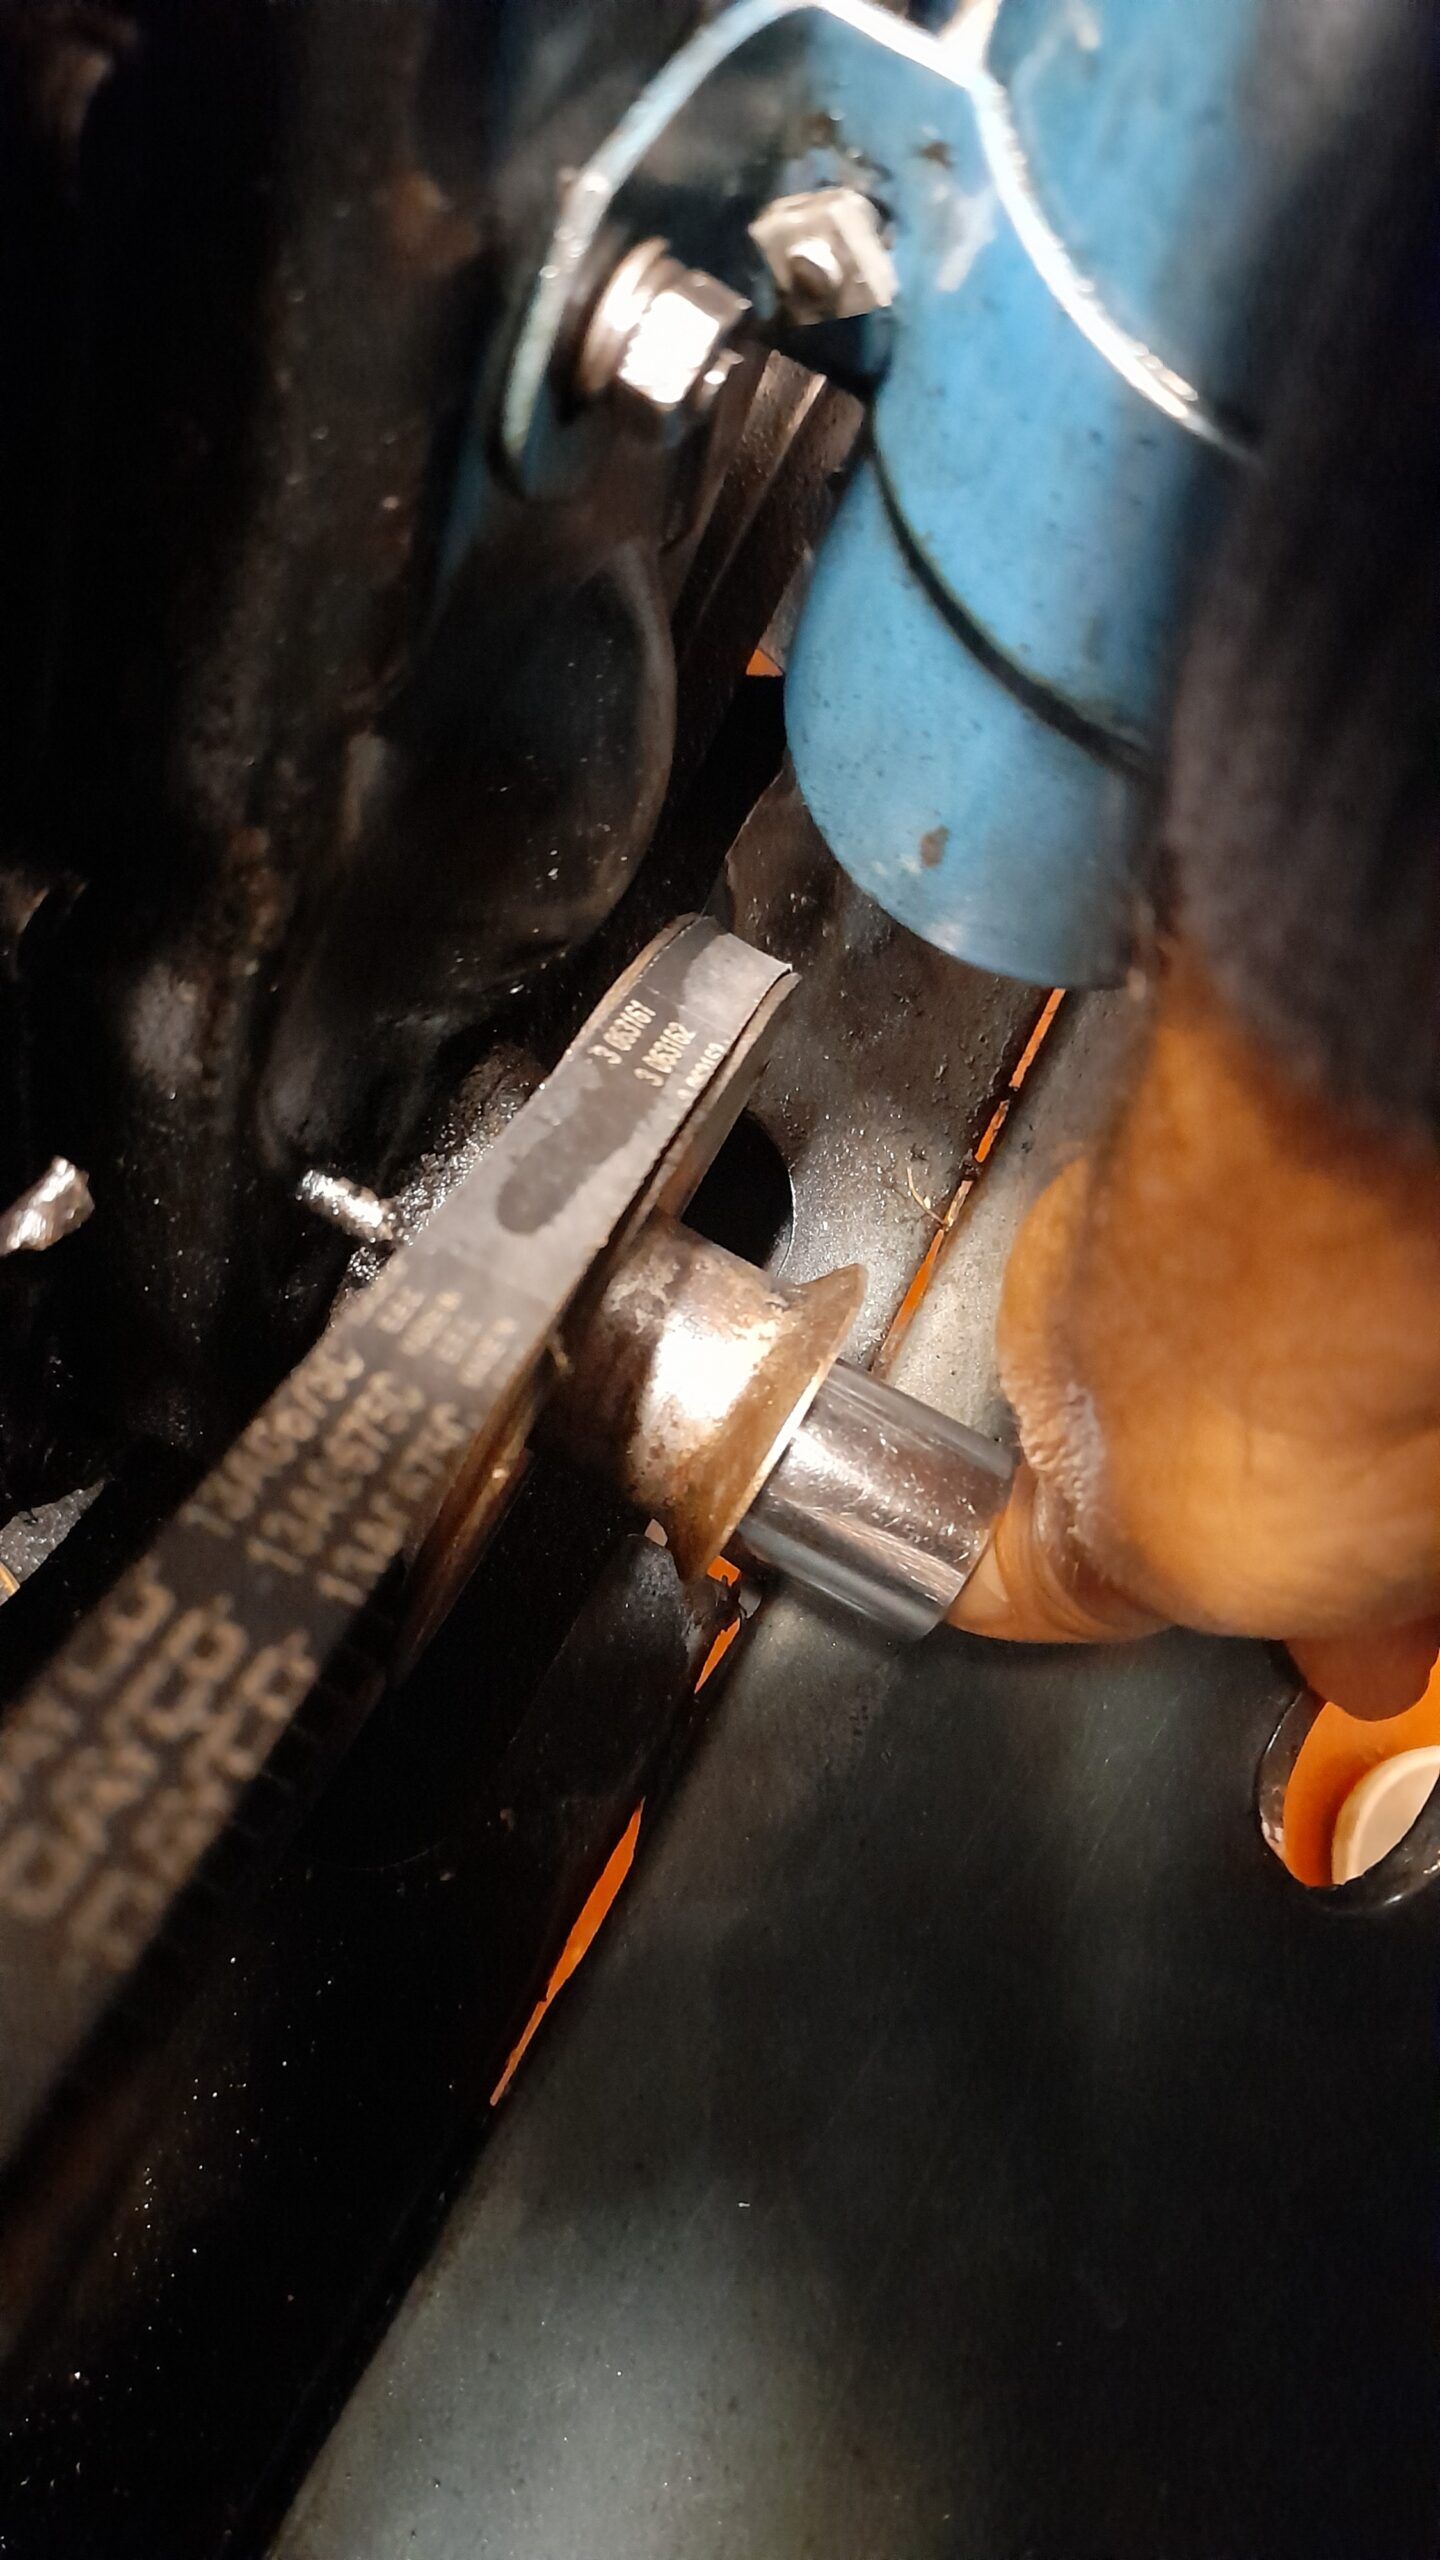
- Pass the key extension through the hole in the crank handle. You have to do it without the 22 socket wrench, because otherwise, it will not pass.
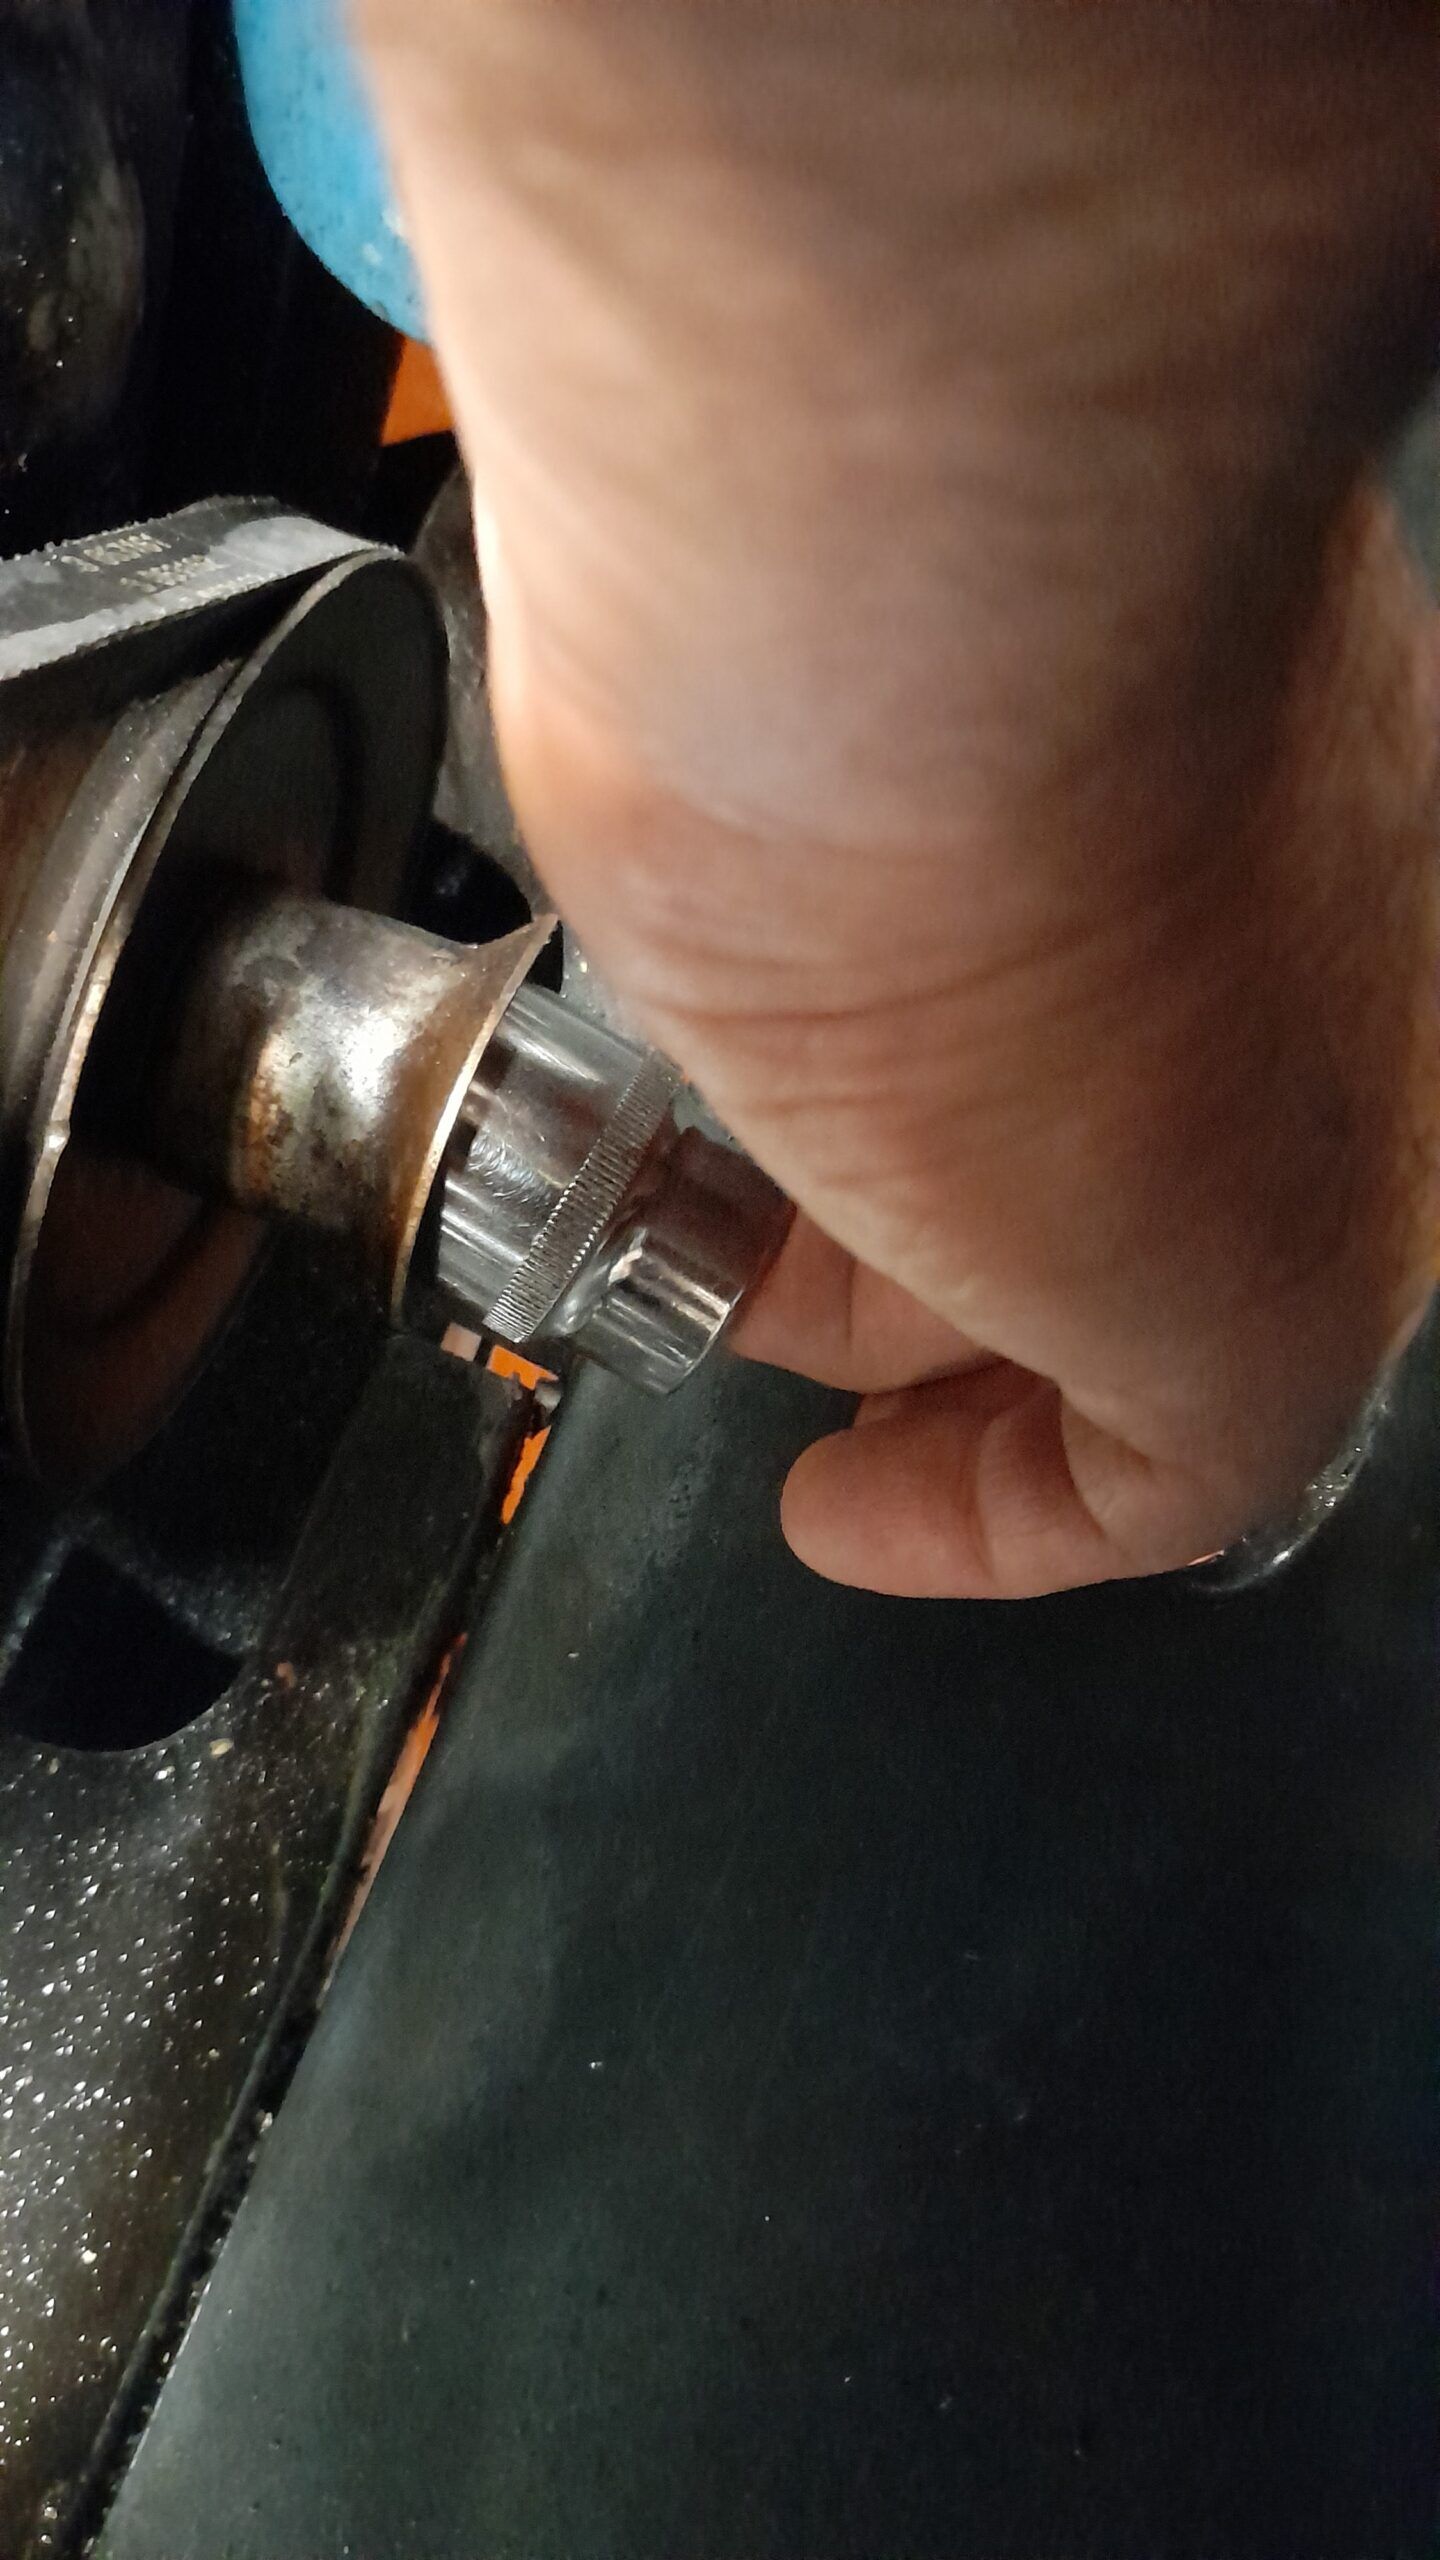
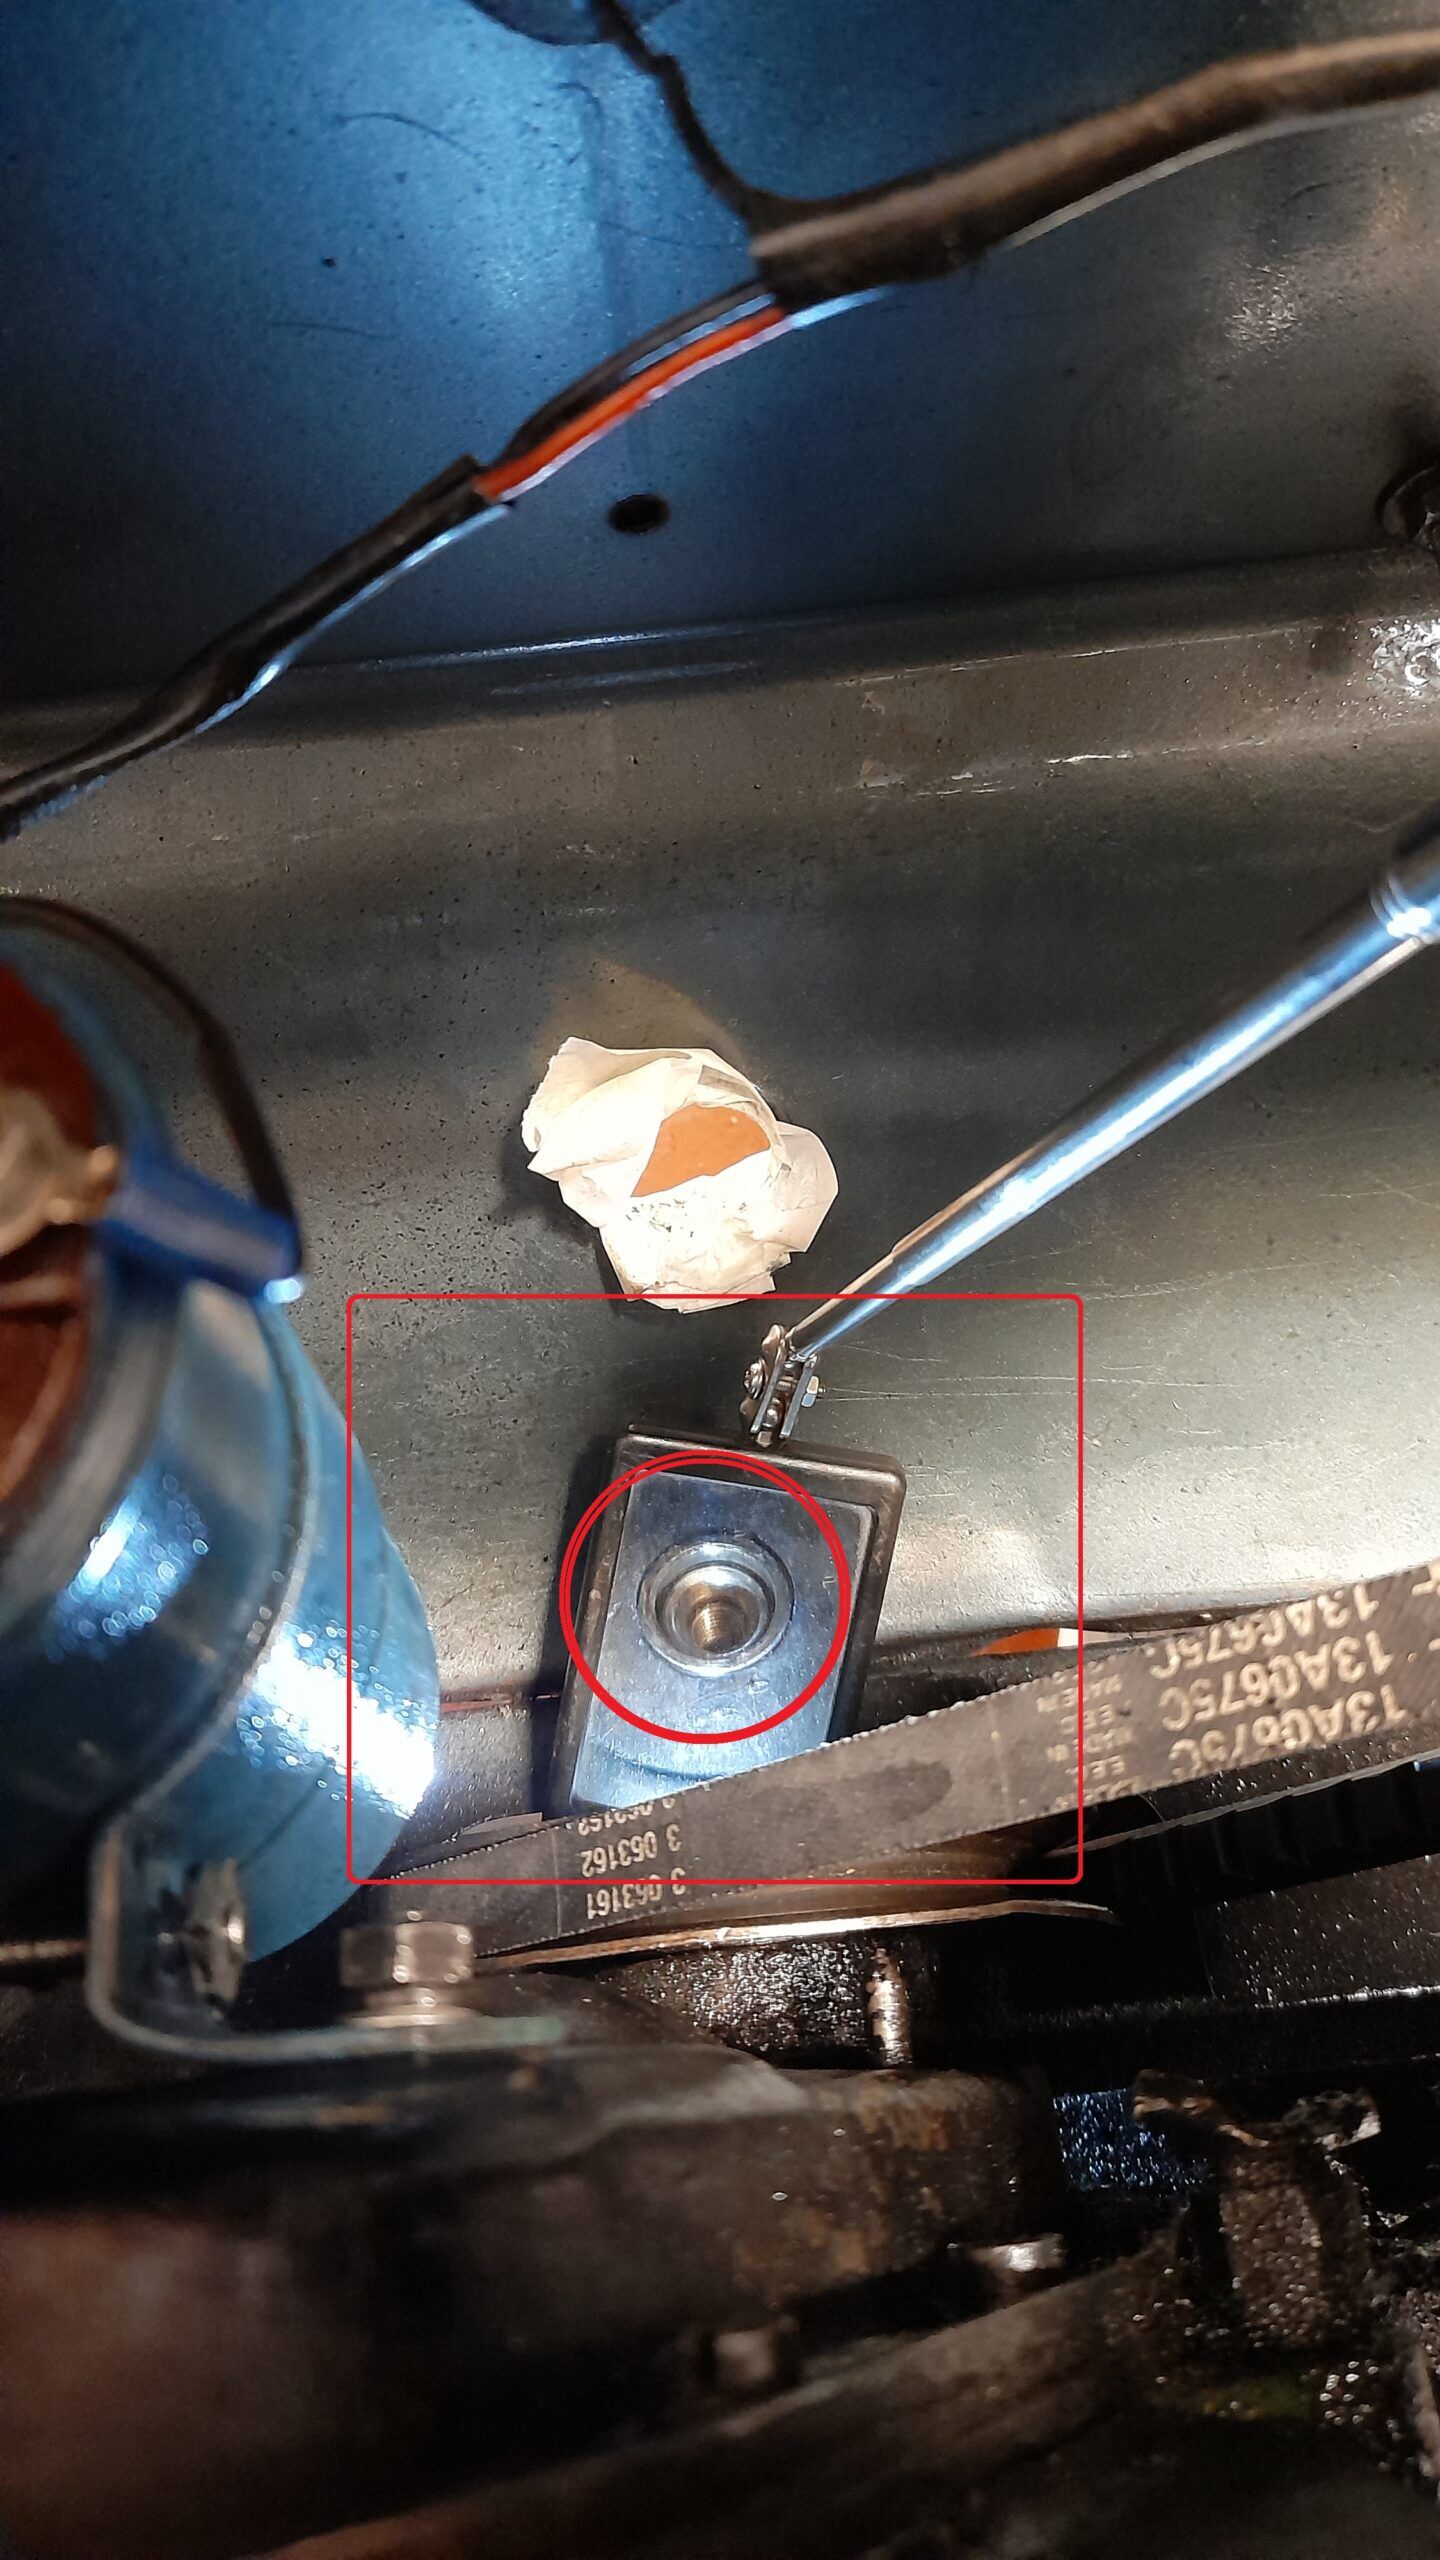
- With the extension in, put the socket wrench on the end of the screw and “present” it, making sure it “grips” the head of the screw. Watch this maneuver very carefully and make sure that you have “grabbed” the screw in the loosening area which is NOT the crank area. If you make a mistake, you can damage the screw head and in that case your labor will have been multiplied by 10 in an instant.
- Attach the impact driver to the other side of the extension.
- Ensure that the screw is well supported: well perpendicular, straight and supported. Give “short” trigger strokes and watch that it does not spin the pulley “crazy” (it shouldn’t, but check this). Make sure, by the way, to have the car in neutral but braked (the gordini weighs very little and as soon as you lean on it, you will move it).
- If all goes well, after two or three short “taps” of the impact screwdriver, the screw will come out by itself.
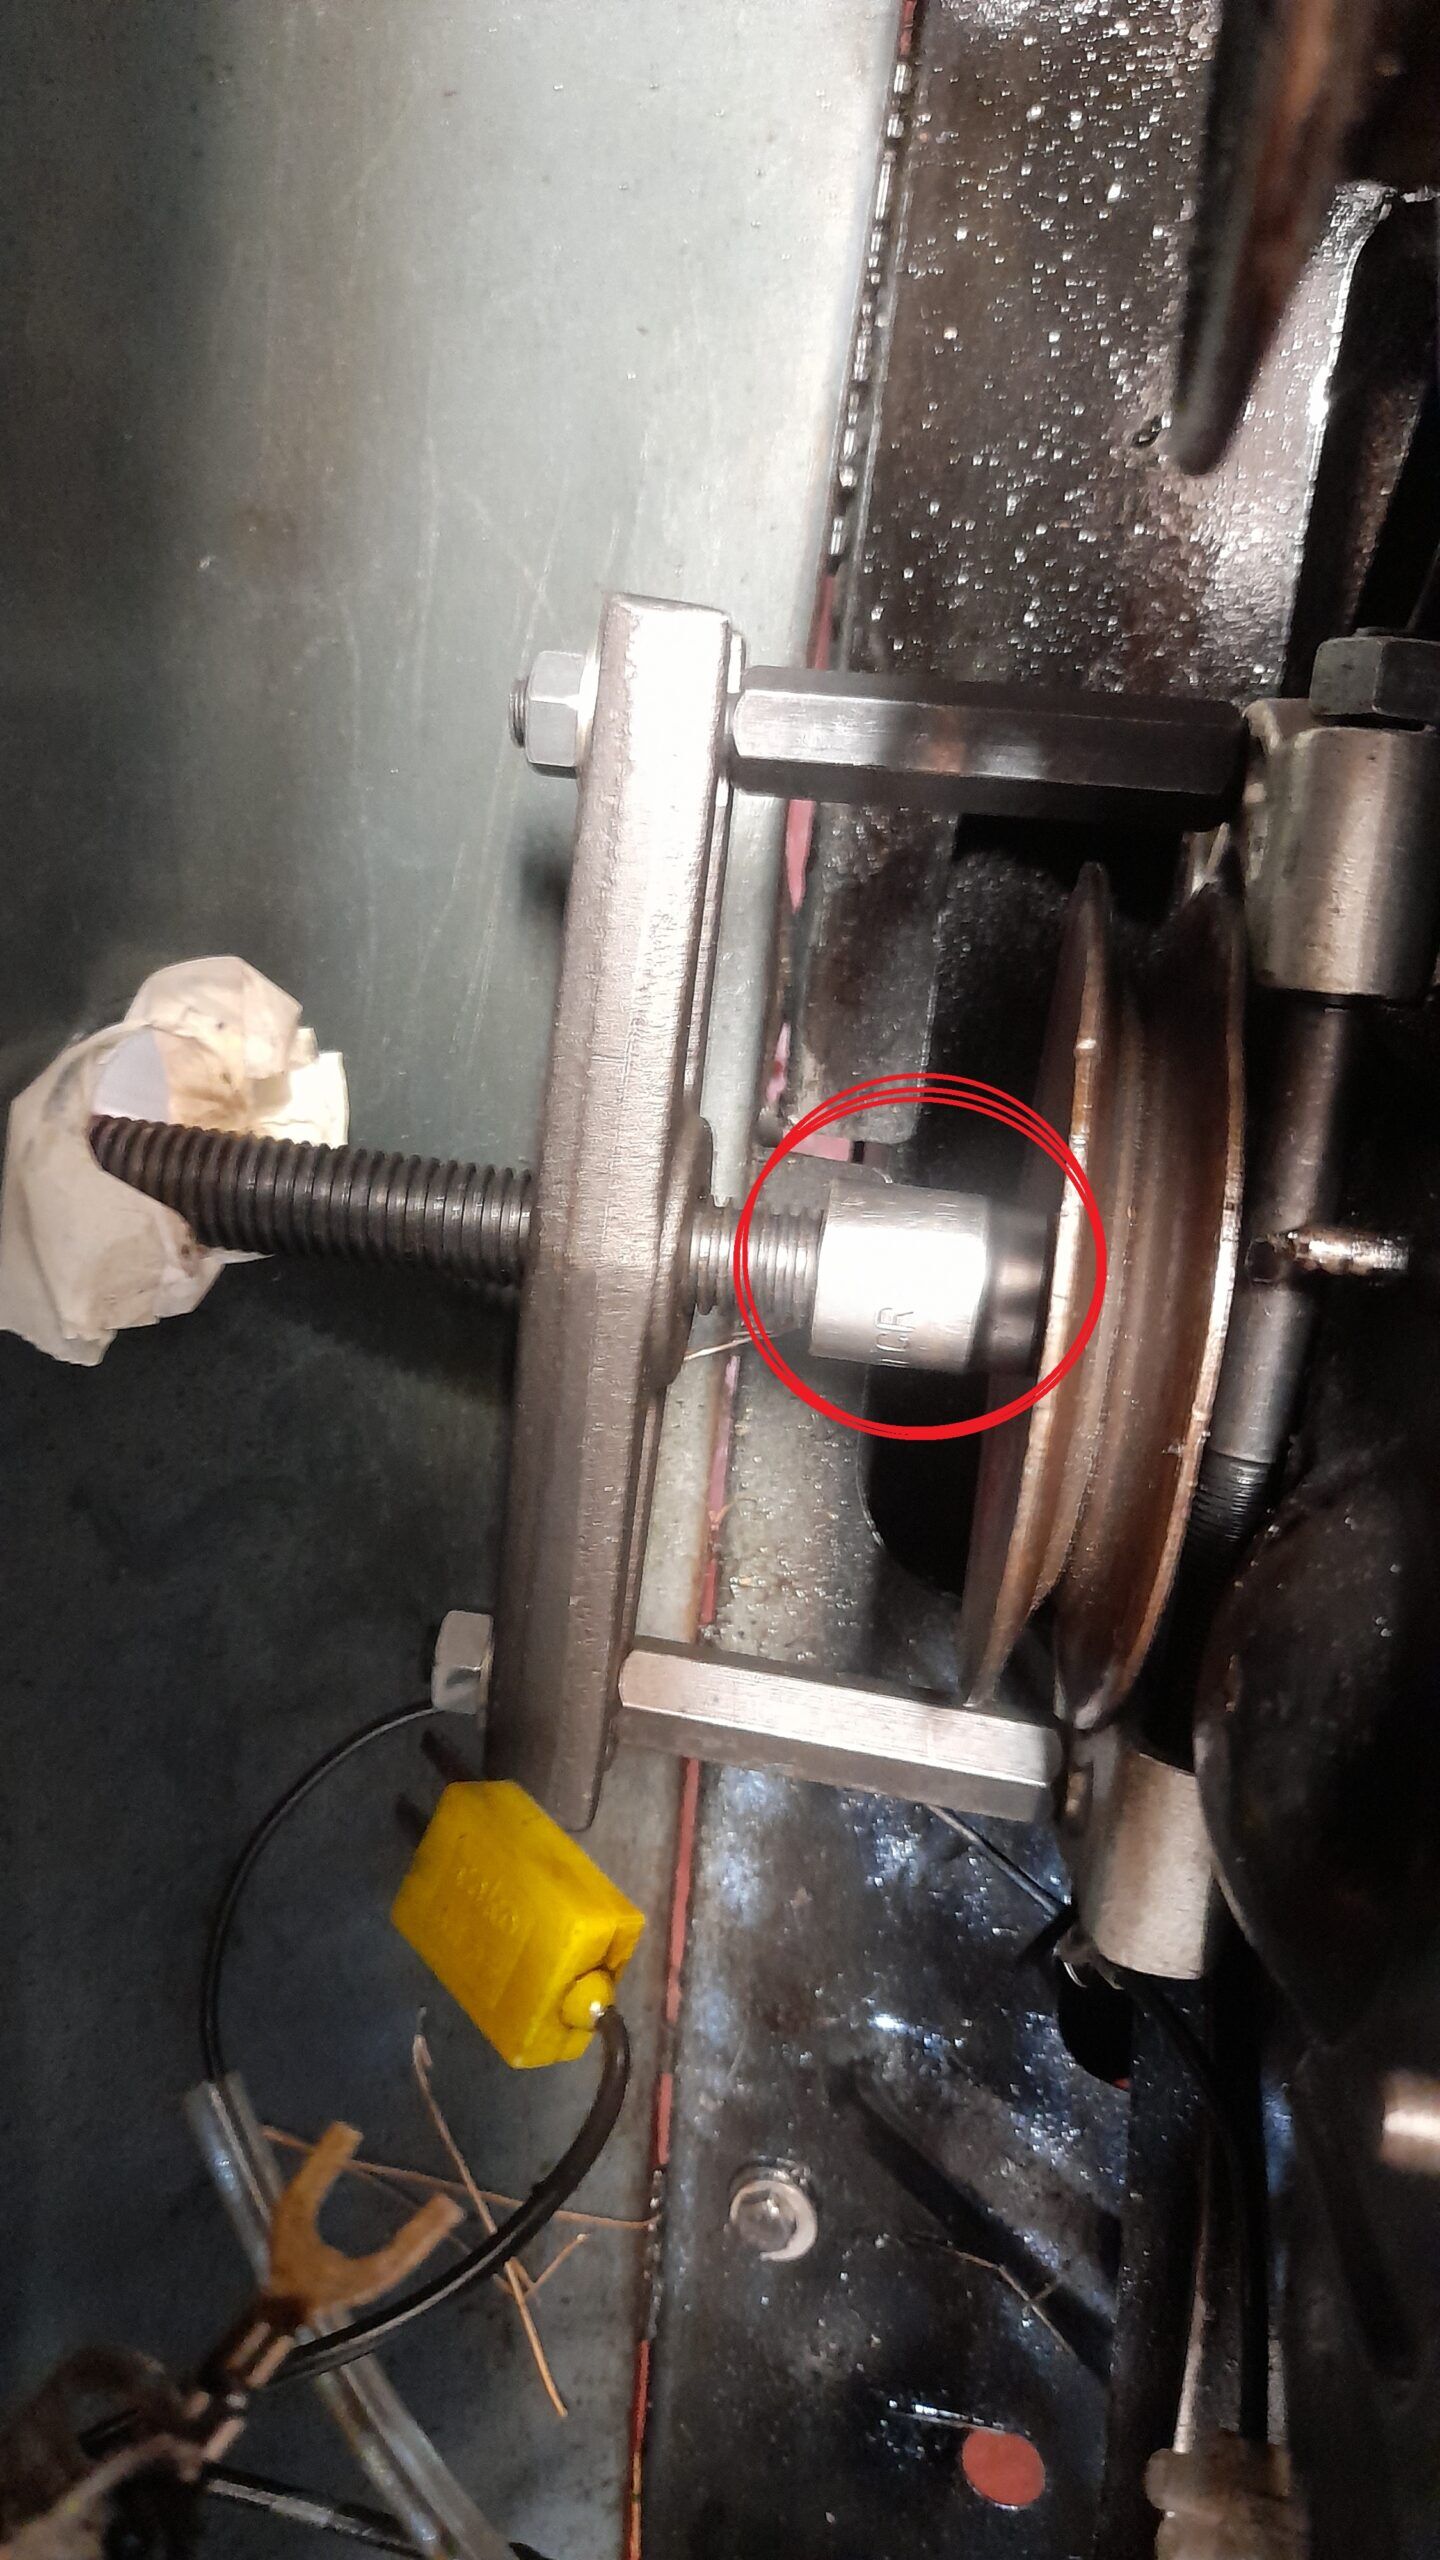
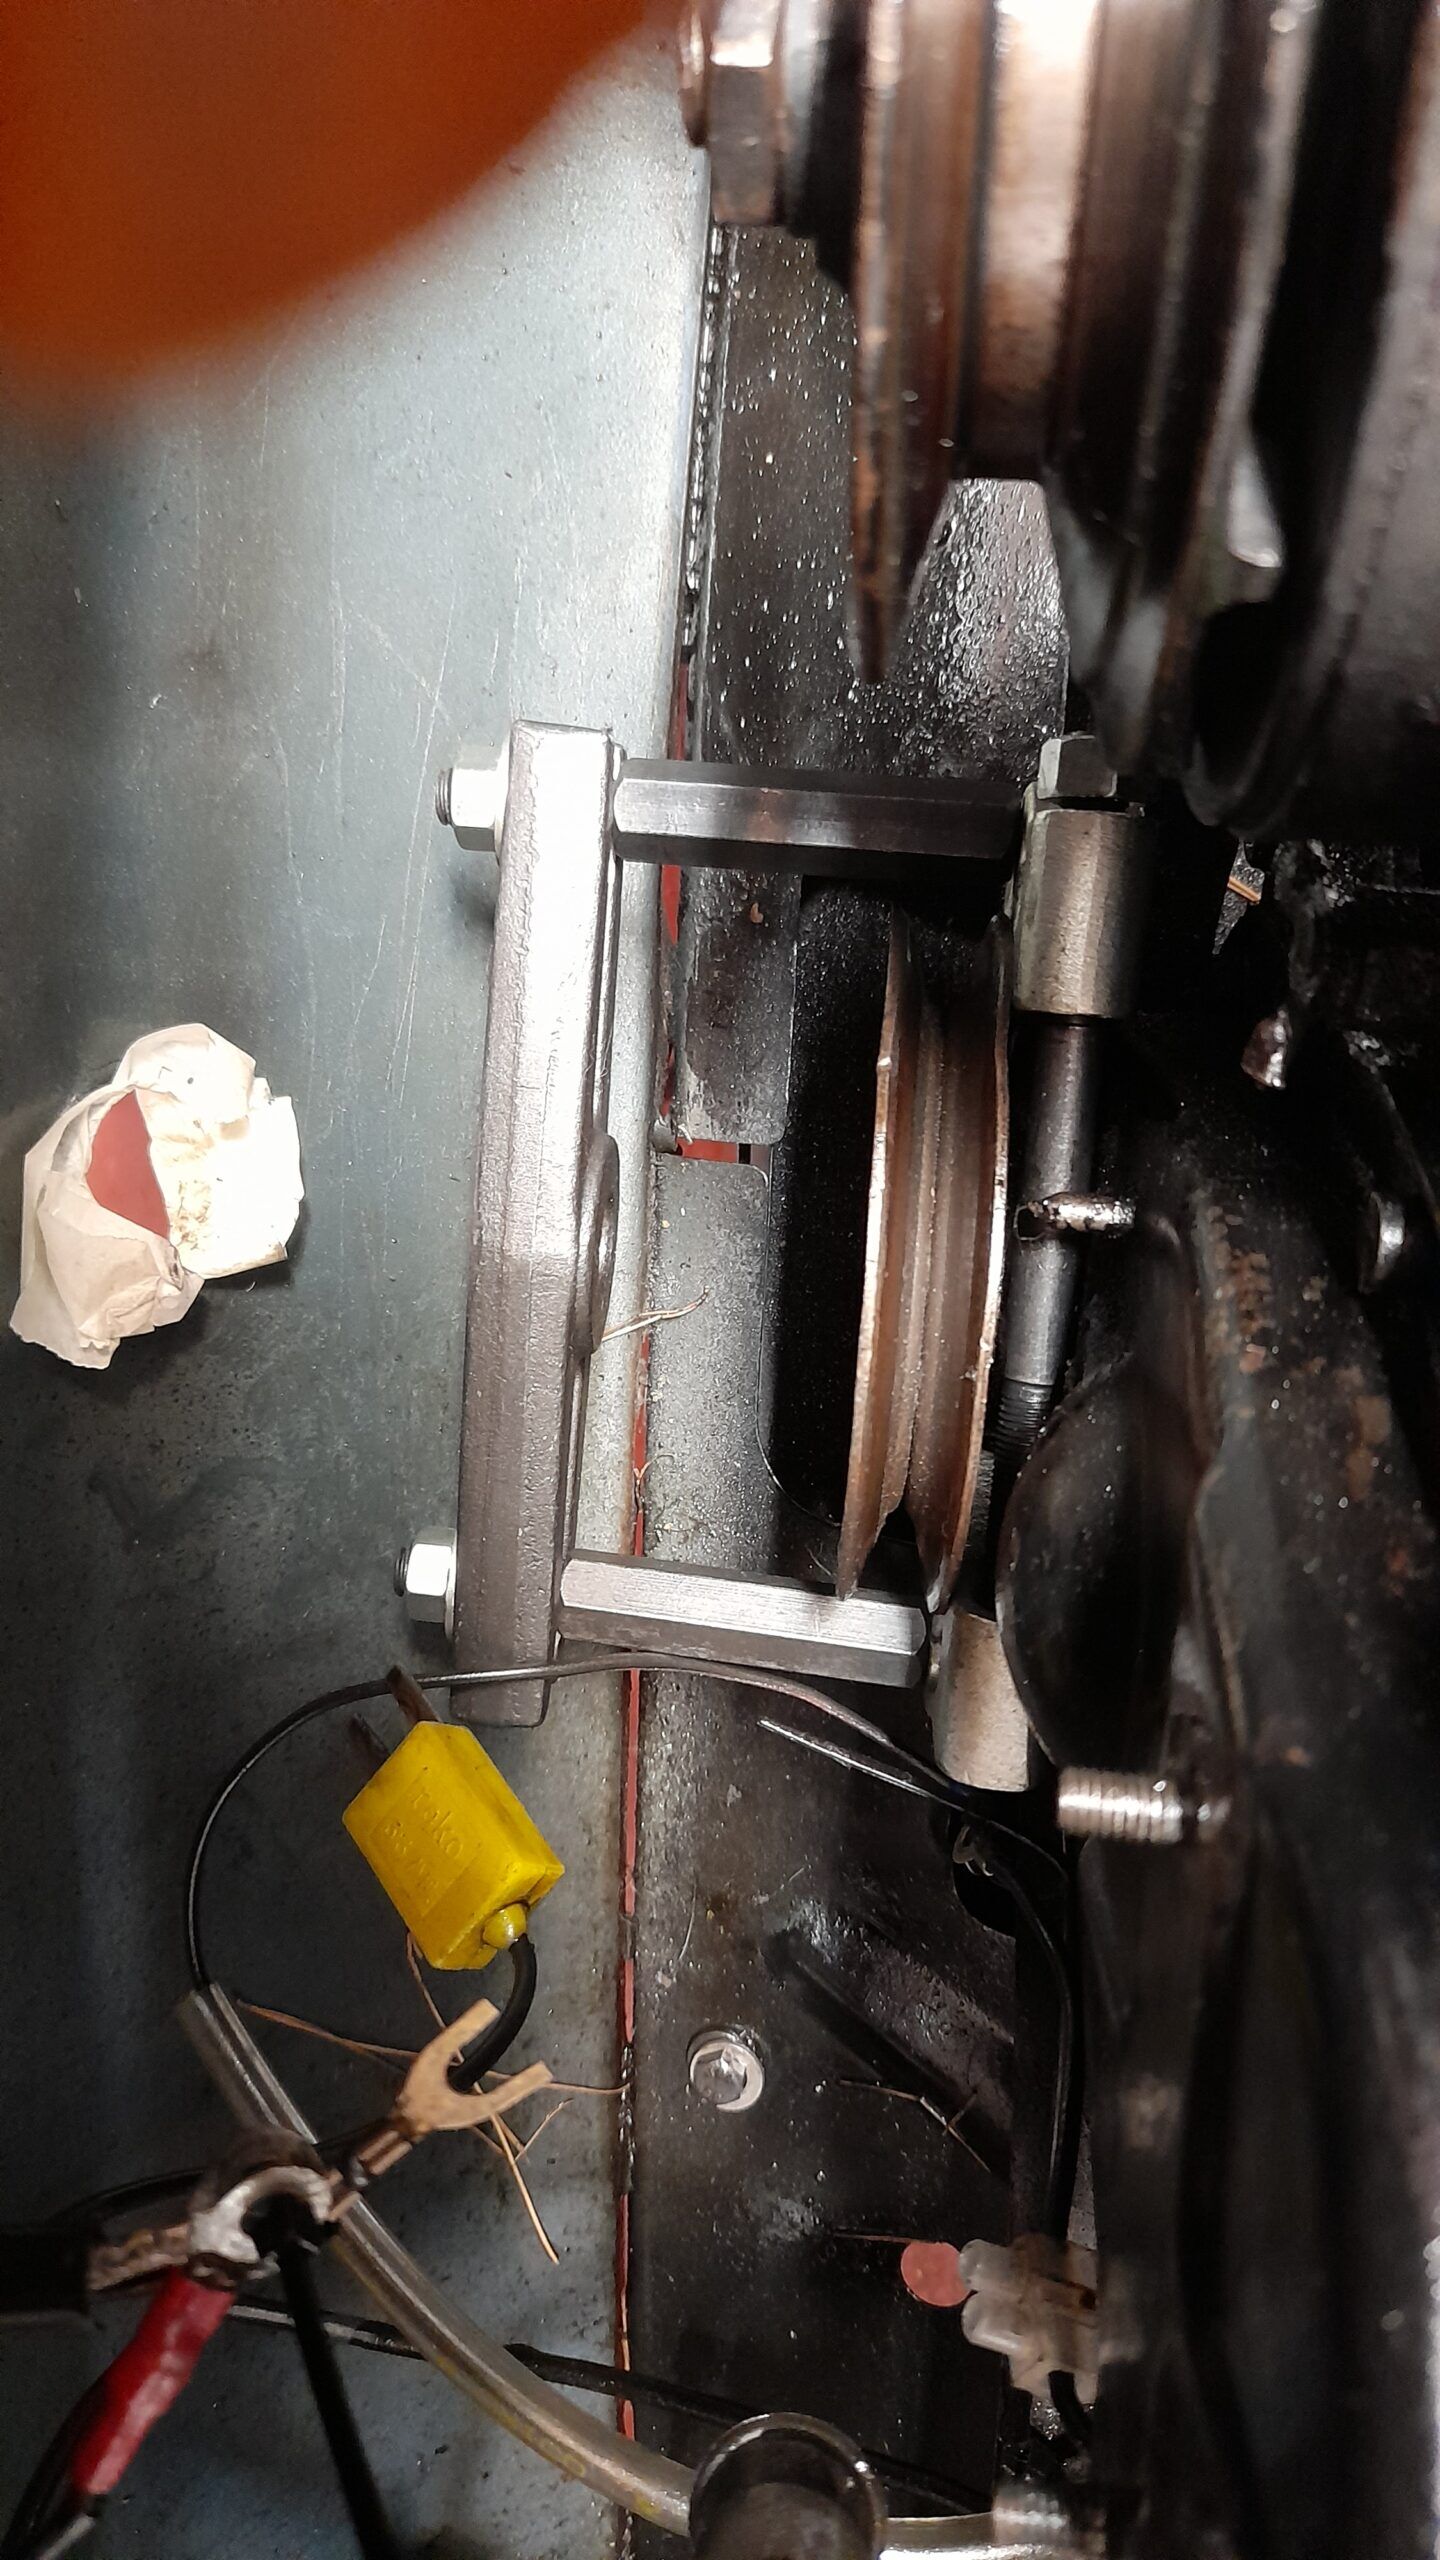
- Once the bolt is loosened, if the crankshaft pulley does not come out because it is “stuck”, you can use any of the pulley pullers on the market. There is plenty of room to fit one. Any claw puller or pulley puller will do. For the central support of the extractor, I recommend that you use the loosened screw itself or a piece that prevents the central support of the extractor from “biting” the inside of the screw thread.
- Once the pulley “gives” a little with the puller, it usually comes out almost by itself.
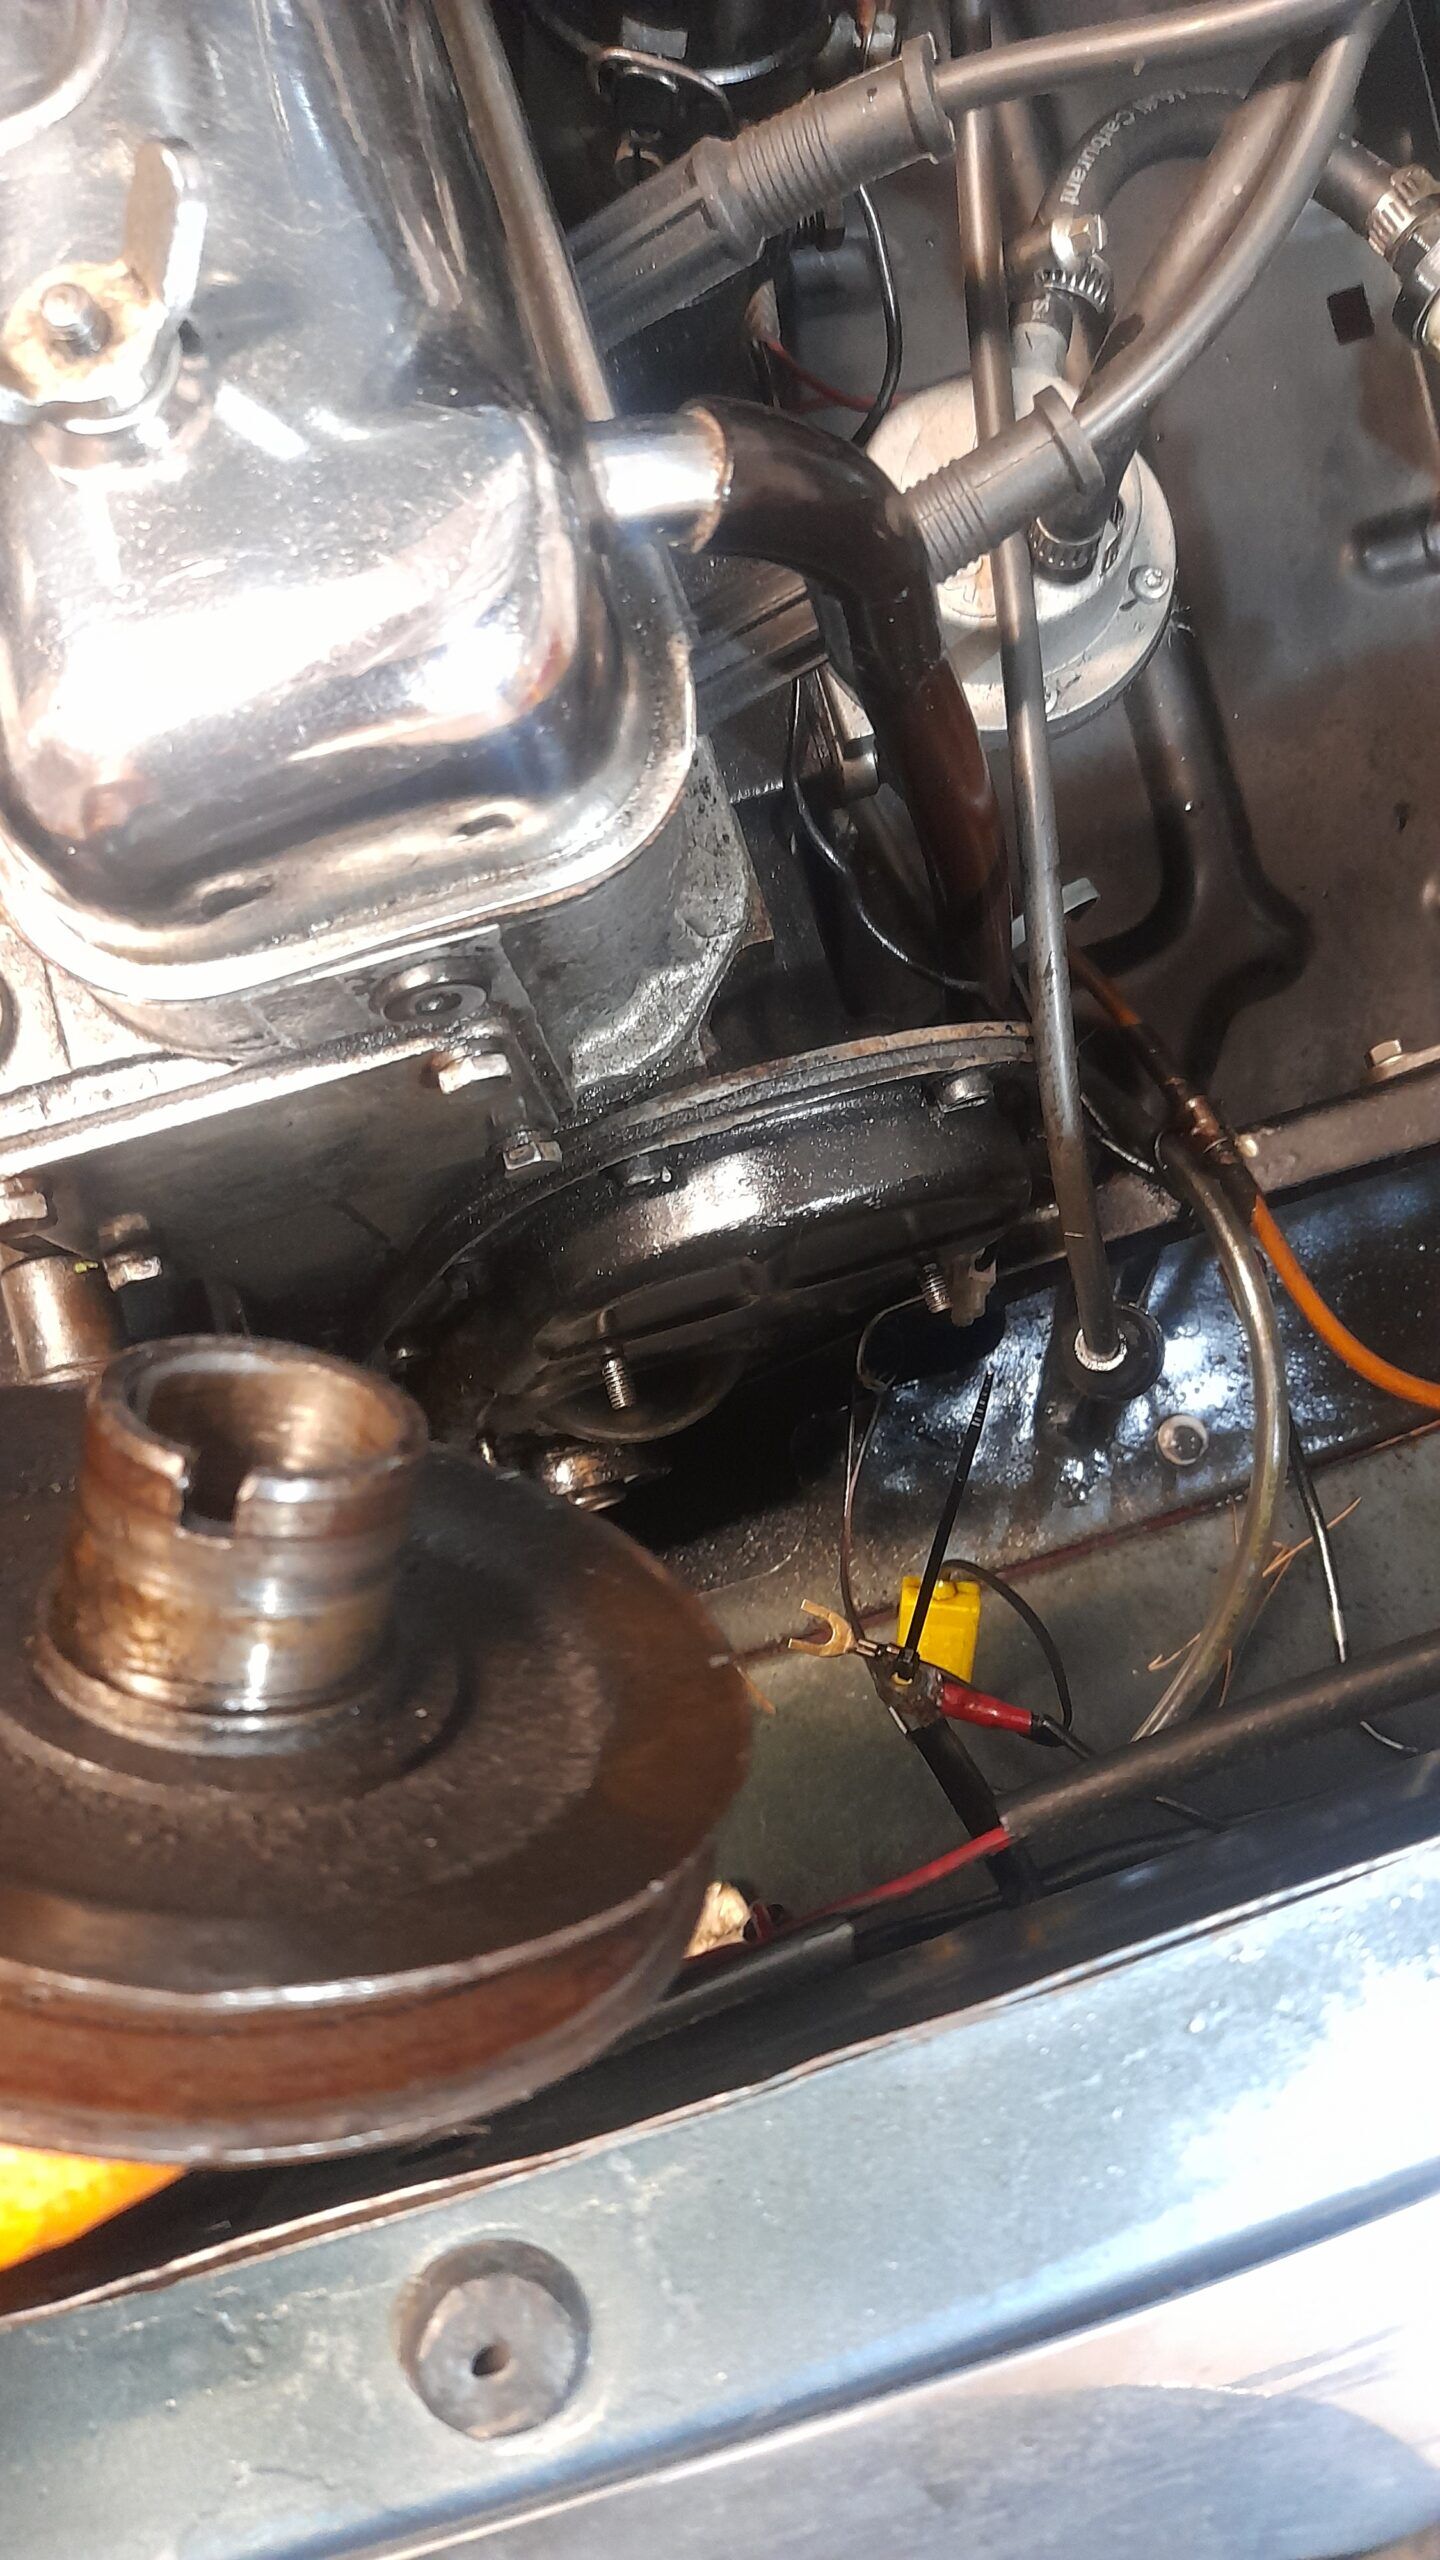
- This is the preliminary to work on the distribution. In the next few days I will prepare another post with details on how to change the timing on this engine. It is very easy and at this point, it is worth replacing the pinion and retainer (if there is a retainer, because there are versions that do not).
- I also recommend: if the “neck” of the pulley shows cracks or grooves, or if the pulley shows any deformity, replace it. It is an easy to find spare part and will not cost you more than 50 Euros.
CONCLUSIONS AND SUMMARY
- The problem with this bolt is not so much the tightness but the shape of the head. It’s not the tightest crankshaft pulleys, but the bolt makes a bad grip.
- This method can be used WITHOUT removing the motor. By simply removing the bumper, you can use the hole in the rear panel (used for the hand crank) to pass a key extension. It is necessary to remove the bumper (or at least the central section) because although it has the same hole aligned to the one over the rear panel, and that reaches the shaft of the crankshaft pulley, the hole in the bumper is narrower and only allows the pass of the manual starter-crank handle for the engine, but not a standard extension of half-inch socket wrenches (which is the usual one). You can see here again the image of what I explain. You can see the crank input hole through the bumper and rear panel to the crankshaft pulley.
- If you don’t have a pneumatic impact screwdriver, there are now electric ones available at very affordable prices. Believe me, if you like to work on mechanical issues, it is a great investment.
- If you do this operation with the engine mounted on the car, a small mirror will be very useful to check the condition of the screw thread, the oil seal, check if you see any oil leaks, etc.
- If you need any information or have any doubts, you can contact me, and I will be happy to answer any questions you may have.